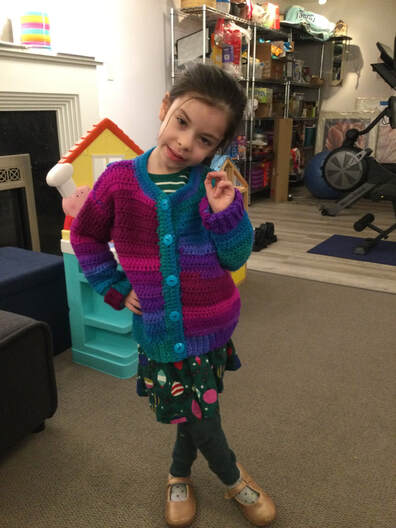
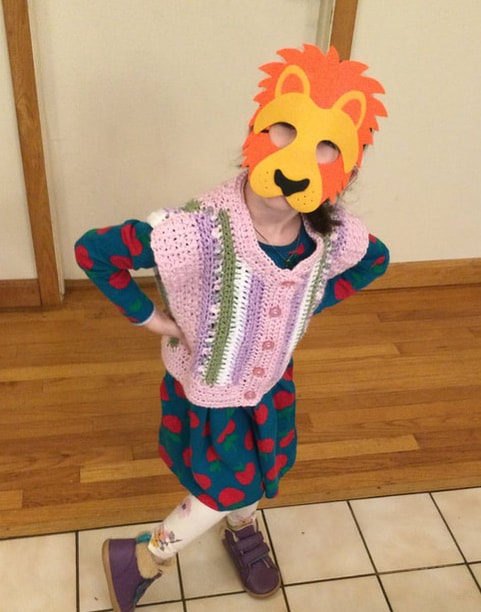
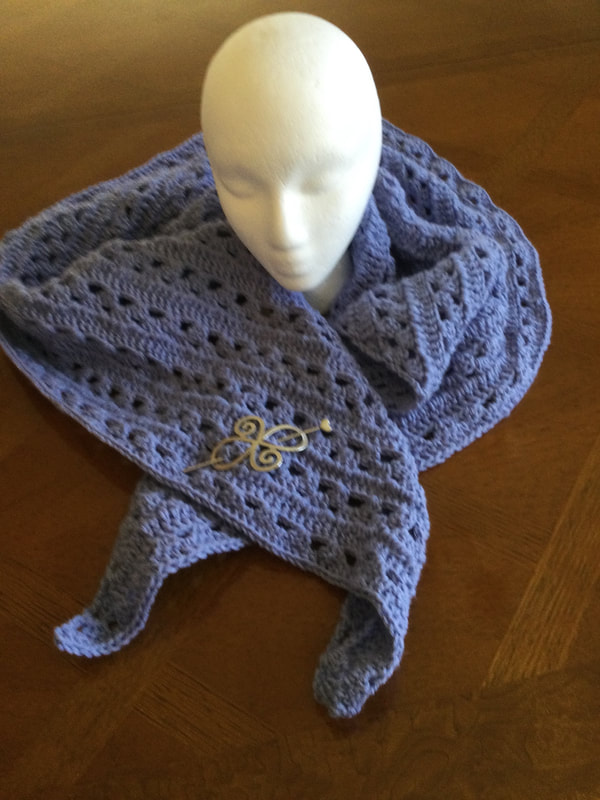
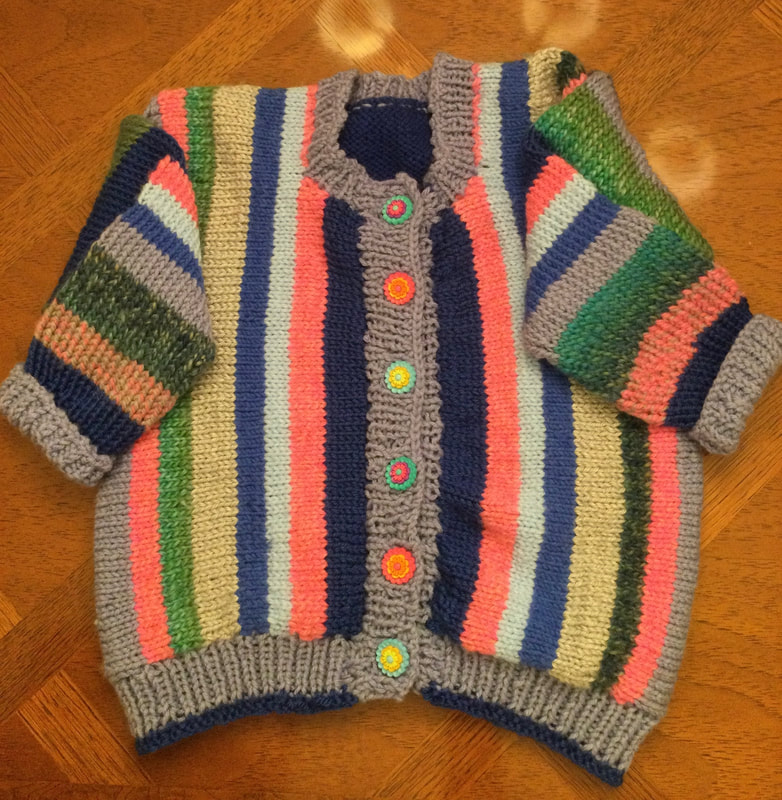
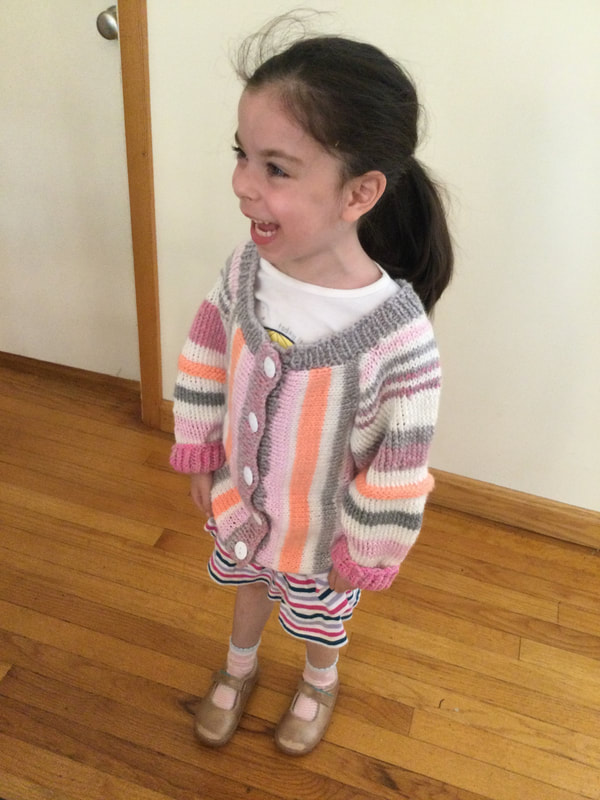
 When my 6 year old granddaughter saw her new bright and bold cardigan, her eyes opened wide, and she exclaimed ,WOW!" " Is that sweater really for me?" We matched bright tourquoise buttons to the button band, and I promised her that she could have the sweater as soon as I had blocked it. "Would you please dress up for fashion parade so that I can photograph you for my article?"I requested. "Yes, she answered with a smile. "I just want to wear it for my parents/" 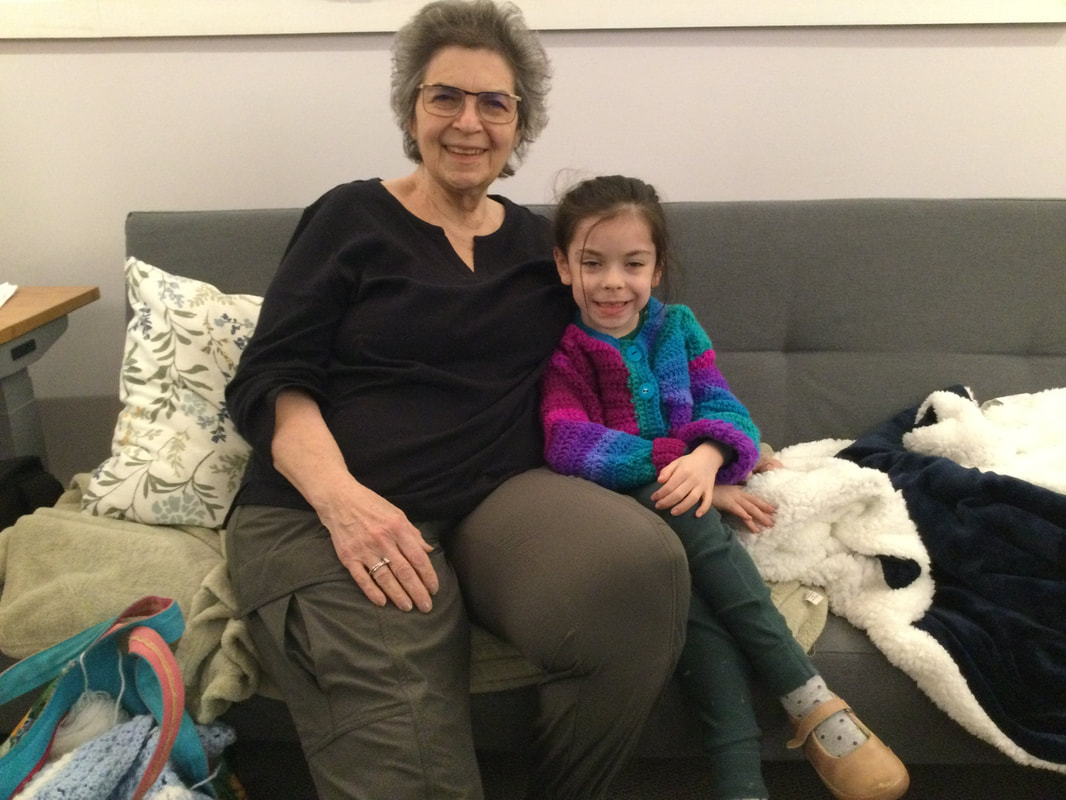 I had bought several skeins of Red Heart Super Saver Stripes in the Polo colorway several months ago. Little did I know that the magenta and turquoise colors would spark such joy.The This Red Heart yarn is worsted weight (#4) and is 100% acrylic. It weighs 5.3 oz. (114 gr) and is 236 yards (215 m) long. It can be machine washed (cold) and dried. However, I prefer to take it out of the dryer when damp and block it to retain its shape for the rest of the drying time. 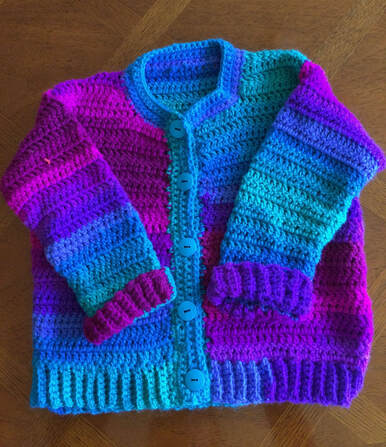 Sometimes I start with a pattern and look for a yarn. In this case, I had several skeins of yarn and searched for an appropriate pattern for a girl aged 6. Size 6 is still roomy for this petite child, but since she has many sweaters, I wanted her to be able to wear the piece into next season. Yarnspirations Fun Time Cardigan (RHC0329-014211M) is a free pattern that appeared to work well with the Red Heart Stripes, yarn. I used about 3 skeins with an H (5.0mm) for the ribbing and an I (5.5 mm) hook for the body. Ribbing was crocheted with alternating Fri=ont and Back Post Double Crochet,FPDC and BPDC) and the body of the sweater was worked in Double Crochet (DC). The back and front panels as well as the sleeves were crocheted separately and then sewed or crocheted together. 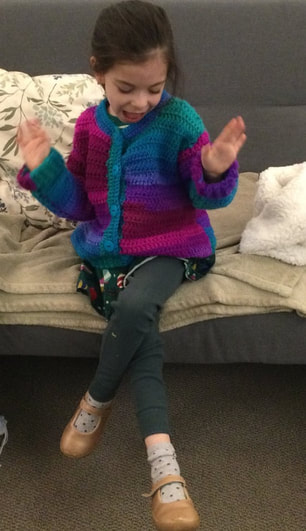 I had previously used this pattern with a Red Heart Super Saver Ombre in size 2. Now was my chance showcase the bright and bold colors of the Polo Stripes. The directions are clear and easy to follow, Sizes are range from 2to8, and so I will be able to use this pattern at least one more time for this granddaughter before she grows out of. A simple pattern is great for presebting interesting yarns. I will try my hand at a cardigan for my youngest granddaughter. I may even have time before our family get-together next month. As always, I appreciate your feedback and reflections. Please join me only stitching journey.. 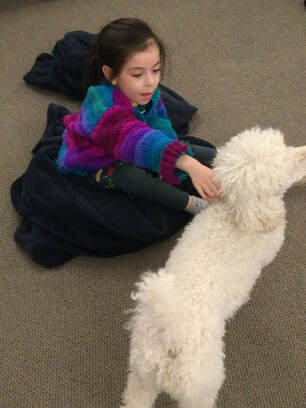  The Hitchhiker Scarf, designed by Martha Behm, was the perfect vacation knitting piece. I needed a project that would keep my hands busy on a plane ride to and from Florida and on several long car rides to many vacation destinations, The Hitchhiker Scarf pattern is accessed through Ravelry. You can easily pay for the pattern through this site. Knitting starts at the narrow end and continues in garter stitch with an 8 row repeat to form increases and a saw tooth edge along one side of the asymetrical. After 42 sawteeth, bind off to complete the scarf. The scarf is warm and squishy, while long enough to wrap several times and tie the ends. Once you master the repeating basic patern it is easy going. 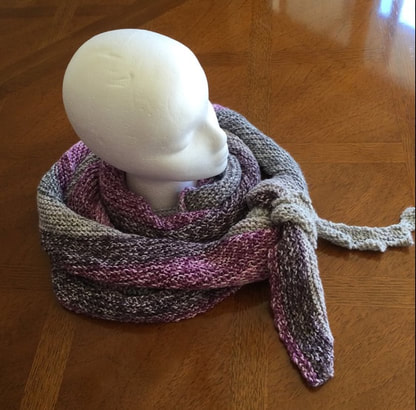 The scarf/shawl is called Hitchhiker because of the 42 saw teeth along the long edge. In the novel, "the Hitchhikers side to the Galaxy," the characters wanted to know the meaning lof life. Tp solve the problem, they created a super computer that came up with the simple answer, "42". "42" was the answer to everything.Since the scarf/shawl has 42 sawtoothed edges, the designer, called her piece, The Hitchhiker Scarf. 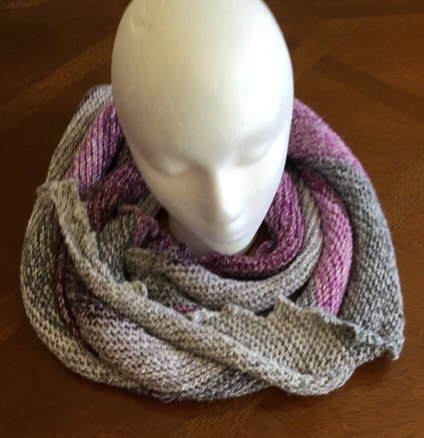 Although the pattern called for fingering weight yarn, I wanted to use 2 skeins of Lion Brand Mandala Ombre from my stash. Mandala Ombre is a worsted, weight, yarn that is 100% acrylic. The colorway, Joy, is washed with white to include light gray, lilac, and deep magenta. the finished piece measured over 8 1/2 feet long and was 2 1/2 feet widest the opposite end.
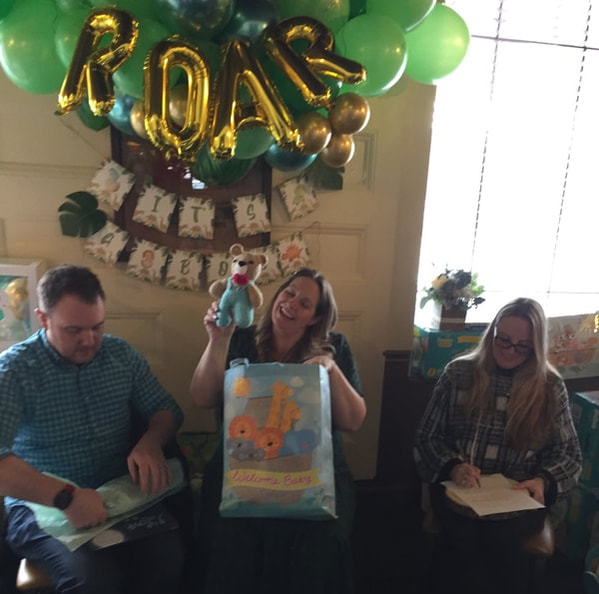
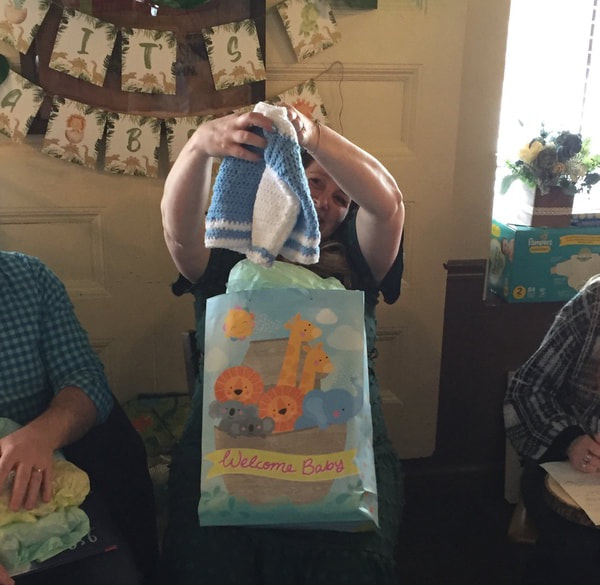
As I frequently wear black,, The Hitchhiker scarf was a perfect accessory to bright up my outfits. The washed effect of the ombre yarn made for subtle transition between colors. The pattern is easy to execute. Directions are clear, and the finished product is a pleasing addition to my accessory collection, As always, I appreciate your feedback and reflections. Please join me on my stitching journey. 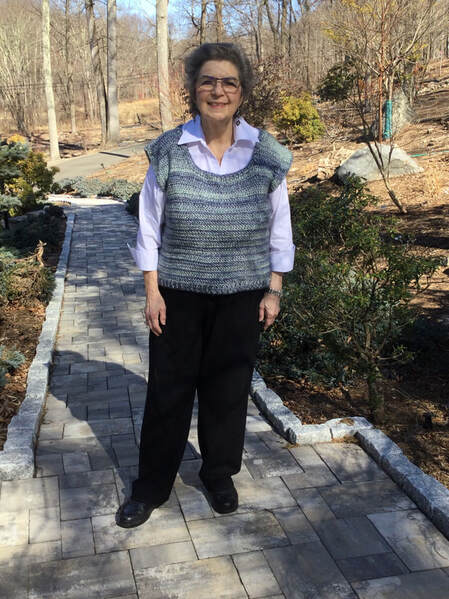 When I purchased the second set of marled yarn in Blue Frost colorway, I knew that I wanted to crochet a pullover vest. The Natural Marl Yarn by Loops and Threads through Michaels is 69% polyester, 22% acrylic, and 9% wool. There are 278 yards in each 5.3 oz skein. With 3 skeins, I had total of 834 yards to produce my vest. I knew that I would be calling it close, but I felt I could manage to complete the vest. Alas, it became challenging to find a free crocheted pattern that provided for a 45 inch bust with a 48 hips for a amply built lady. All of my pattern books for crocheted items were for hats, scarves, shawls, baby items, and mittens. Therefore, I decided to use my measurements to develop my own pattern. 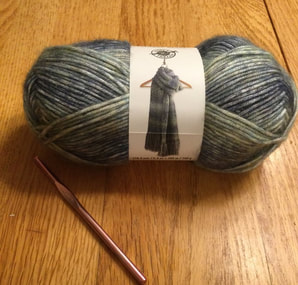 Although I had a general picture in mind, I did not write done a specific pattern before I started to crochet. Rather, I started with a 140 stitch chain that fit my hips and wrote down my process as I went along. The piece I produced is generally in the extra-large range. To make this pattern for smaller sizes, I will have to do some research to get the correct stitch count. The back was easy. After I joined the chain being careful not to twist it, I chained 3 and made a Double Crochet (DC) in the same stitch. There were 140 stitches. Then I continued around with DC and joined the round. I put in a place marker to show the start of the round. Each round began with a chain 3 that did not count as a stitch and DC for 13 inches. Then I would split for the armholes. From the place marker I slipstitched 2 stitches, chained 3 and began DC working in the first stitch for 66 stitches. I continued on the back for 9 inches. Then I finished off.  The front panel was much trickier. I Starting working in the same way I did the back for 7 rows or about 3 inches.Then I had to figure out how many stitches to leave for the neckline and how to accomplish the decreases as each side as I transitioned to the shoulder, I decided to leave 20 stitches for the neckline. Since the front was 66 stitches wide, that would leave 23 stitches on each side as I began the neckline on the left side. I gradually worked in the decreases the neckline edge (DC2tog) as i crocheted up to the shoulder of 16 stitches. I was able to DC evenly for couple of rows when the front side matched the back. I finished off and cut the yarn.Then I turned the piece to the wrong side, and beginning at the armhole, I retraced the same steps I used for the front left side to work on the right. When both front and back were done I joined the shoulders. Now, I had use the remaining yarn to create a ribbing for the neckline, armholes, and bottom of the vest. I started with the neckline as I thought that it was most important to develop a finished edge here. I picked up stitches in a double crochet. When I finished the round, I chained 3 and made alternating front and back post double crochet stitches around the neckline (FPDC and BPDC). I repeated this process for 2 more rows. The next most important area was the armhole. However, I did not think that I had enough yarn to make a full ribbed section to the armhole and to the bottom of the vest. Therefore, I just made single row of double crochet around each armhole. Finally, I was able to take care fo the bottom of the vest. I followed the same steps I used for the neckline and was able to eke out 3 rows of ribbing with a successful ending to my contest of yarn chicken. 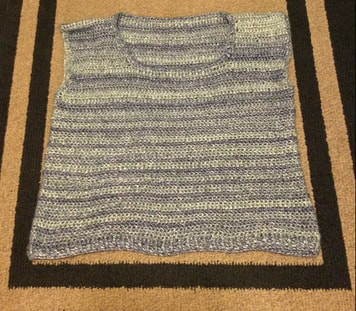 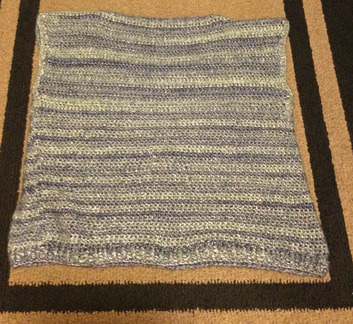 As I managed to lose about 14 pounds from the beginning of crocheting the vest to writing this article, I found that I had about 2 inch of ease at the hip and 1.5 inches of ease at the bust. I was generally pleased with the construction and fit of the pullover vest, but I would make a few changes to improve the appearance and fit. First. I would probably use a narrower scoop neck or a V neckline. As is, I need to keep pulling the shoulders up closer to my neck so that the vest stays perky and does not droop. Also, I would leave more stitches at the bottom of the armhole and then make a few additional decreases as I crocheted up to the shoulder. I might even make the vest a an inch or two longer for a better resting place on the hip. I received compliments when I wore my vest over black pants and a cotton shawl collar long sleeve t-shirt when I came to my knitting and crocheting group. My fellow members did not know thatI had been working on the project, and it was aa fresh look to them. For the picture at the beginning of thisarticleItried on theist with a white buttoned blouse to see a different outfit. I would repeat this project with more carefully written notes and with the corrections noted above. Also, I would make sure that I had enough yarn before I started. I do not like playing yarn chicken. With ample yarn, I could mak e a deeper ribbing on the hip, and I could use ribbing on the armhole, too. As always, I appreciate your reflections and feedback. I welcome you to join me on my stitching journey.  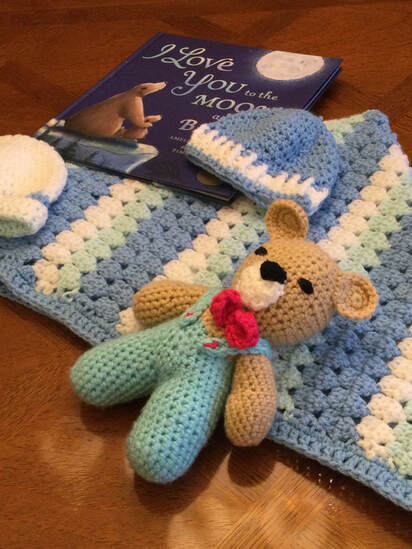 This has been my season for baby layettes. Fortunately for me, I have had the opportunity to explore color combinations and different stitch combinations. For my second layette, the mother-to-be requested shades of blue and green for her baby boy to be born in March. I was thrilled to attend the baby shower to be held in her honor. It was a wonderful chance to celebrate her happy occasion and to meet up with former colleagues from teaching days. 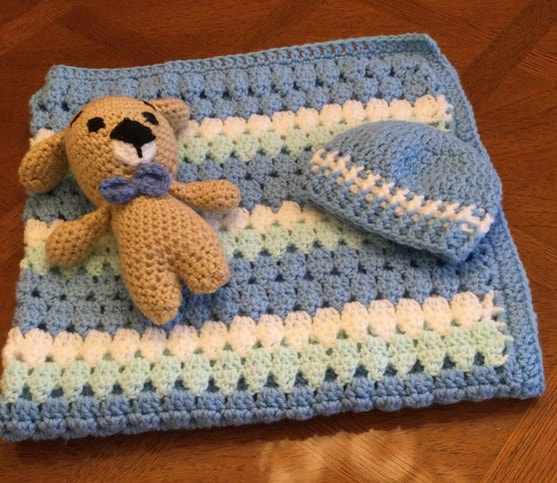 The project began with a baby blanket in sky blue, pastel green, and white. While I had crocheted scores of blankets in extended Granny Stitch or in Diagonal Granny Stitch, I had been unable to master the Daisy Farm Crafts Modern Granny Blanket. However, this time I was determined to create a piece with this stitch. . The Modern Granny Blanket by Daisy Farm Crafts is a free pattern that can be found on Pinterest or through a Google search. For a 34 inch by 34 inch blanket, the piece begins with a 109 chain for a repeat of 3+1. Multiply any number by 3 and add 1. For my blanket, I used Joanne's Big Twist yarn in sky blue and white. For the pastel green, I used Lion Brand Pound of Love in pastel green. I had enough remaining of the green to make girls' sweater, but I wanted to have the exact color. 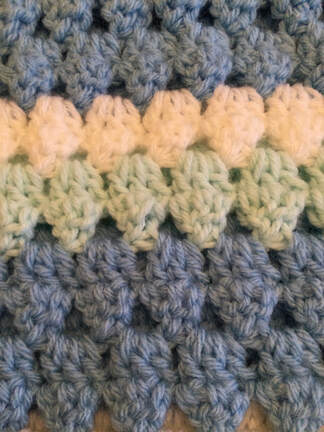 After the initial chain of 109, row 1 begins with 1 Double (DC) in the 4th chain from the hook. The pattern repeat is skip (SK) 2 chains and crochet 3 DC in the next chain. Row 1 ends with 2 DC in the last chain. While the clusters in the first row are wider at the top, clusters in the second row seem to be upside down.-wider at the bottom and narrow at the top. Begin with Chain 3(CH) and DC in the next stitch. The repeat is CH 2 and DC 3 together. This is the tricky part. The row ends with CH 2, DC into next DC, DC into top of turning chain.If you are changing color pull new color through before you complete the last DC. Finished triangles nestle between each other. These 2 repeating rows form the color and stitch pattern. For my blanket, I followed the following sequence. '4 rows blue 2 rows white 2 rows pale green 4 rows blue 2 rows white 2 rows pale green 4 rows blue 2 rows white 2 rows pale green 4 rows blue 2 rows whitw 2 rows pale green 4 rows blue 2 rows white 2 rows pale green 4 rows blue 2 rows white 2 rows pale green 2 rows white 4 rows blue To finish, single crochet (SC) around the blanket with 3 SC in each corner. Then DC around to complete the border. The baby shower host requested a baby book to accompany other gifts. I really liked the message in To The Moon and Back. The colors on the cover went well with the baby layette. 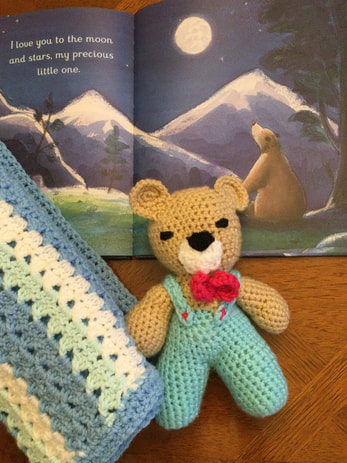 I made changes in "Baby Girl Sweater" designed by Edie Eckman for www/redheart.com/ for a baby boy. The body of the sweater was crocheted in HDC in one piece from the bottom up. I just switched the button hole band to the left for a boy. The body of the seater was done in sky blue in Joanne's Big Twist with a white trim. I added to the length with alternating rows of white and blue.. Then I reached into my stash for delightful owl buttons that had a touch of blue. Coordinating hats were crocheted in colors that coordinated with the blanket nd the sweater. 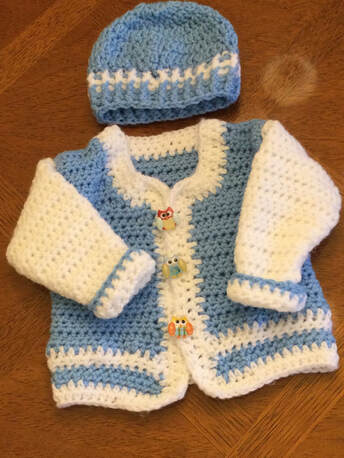 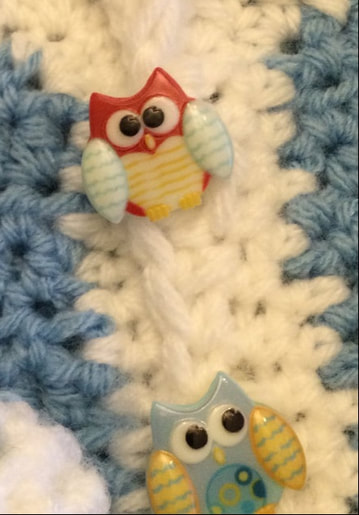 While I had abundance of yarn in my stash, I had also compiled other baby items that were just looking for a home. The baby cocoon and matching hat in shades of light brown andbeigeshould keep baby warming comfortable. it is important to note that while mom can easily snuggle her baby in a cocoon, she should not lettuce baby lie alone in the cocoon for safety reasons. Aknittedsweater in self striping light brown, white, and light blue accents was perfect for anew born baby. I really liked the light blue teddy bear buttons. Finally a crocheted teddy beard a dog that looked similar to the expectant mom's pets completed the package. 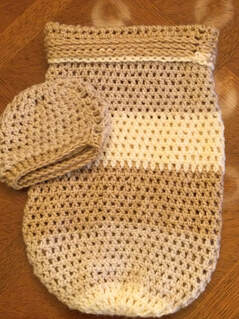
The baby layette was a huge success. The expectant parents really appreciated the crocheted garments. I enjoyed making the pieces for a wonderful young couple. They received many lovely clothing items and useful gifts.
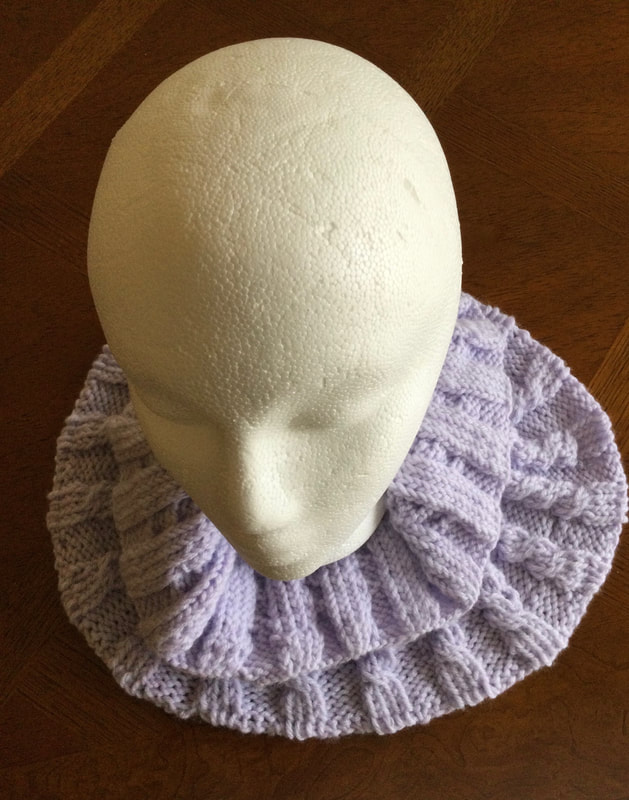
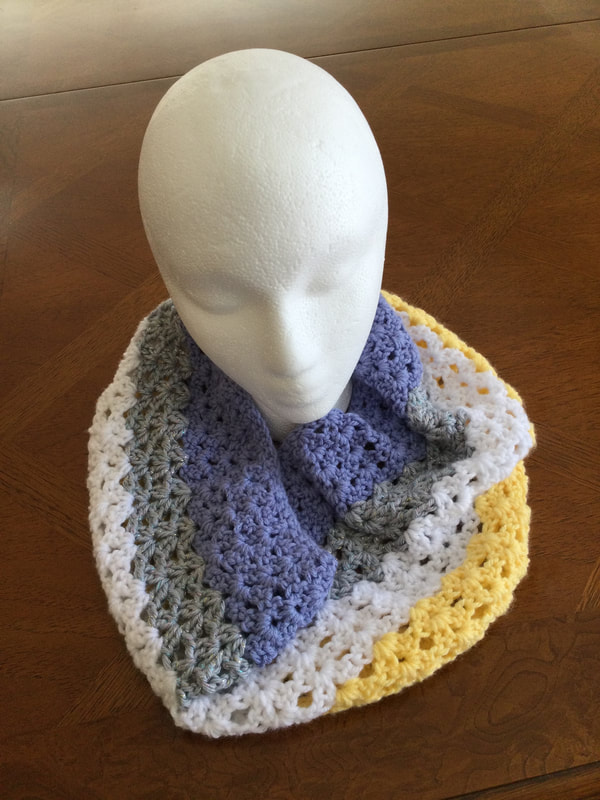
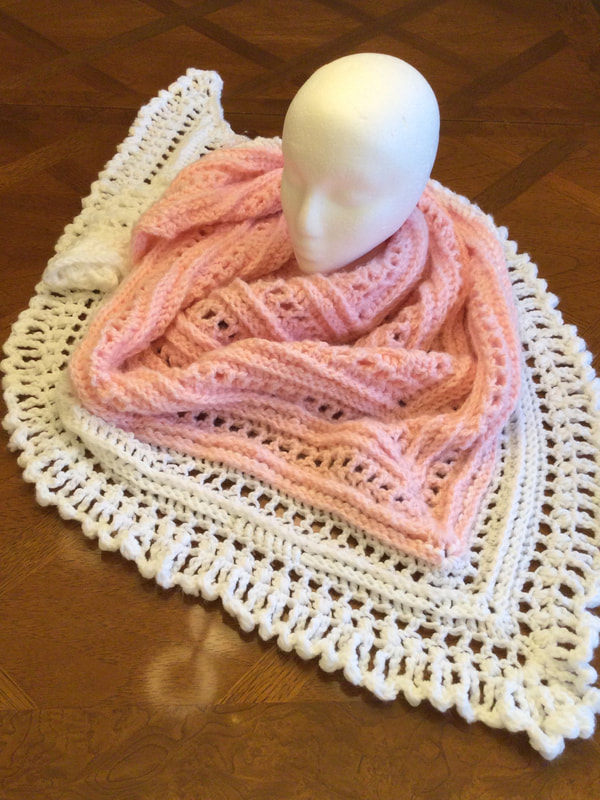
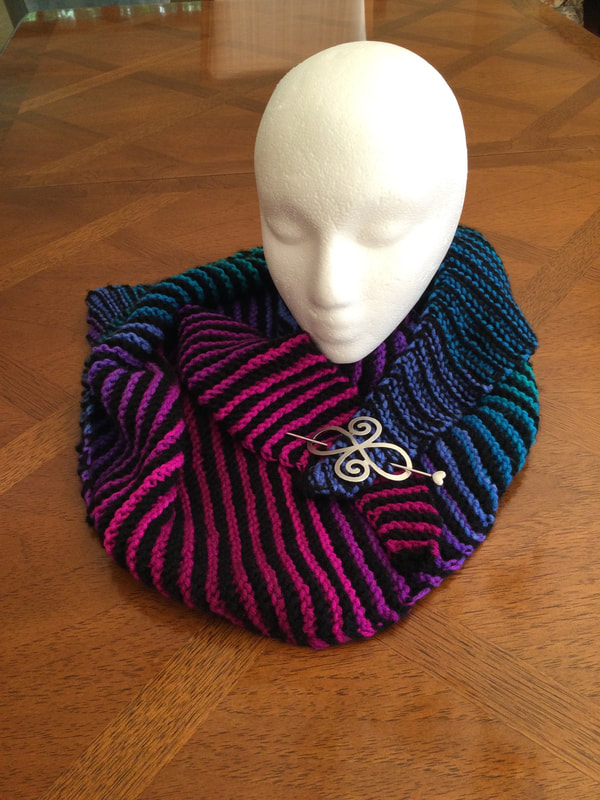
As always, thank you for your reflections and feedback. I welcome you to join me on my stitching journey. 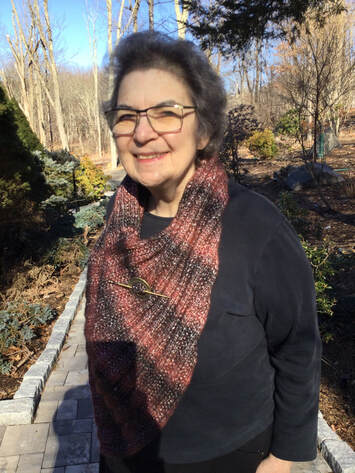 When I first saw this spectacular generous cowl in kaleidoscopic colors, I knew I had to knit the piece. The designer, Rosemary Drysdale, published the directions in the Noro Knitting Magazine #13, Fall/inter in 2018. My local yarn shop was able to access the pattern for me for a $5.00 fee. If I bought the 200 gram skein of Noro yarn, Ita in #03 Rhapsody for$45.00, the pattern would have been complimentary. While that prospect was tempting, I already had 2 skeins of Loops and Threads of Natural Marl yarn in the Spice colorway in my stash. I knew that this yarn would be a perfect alternate. 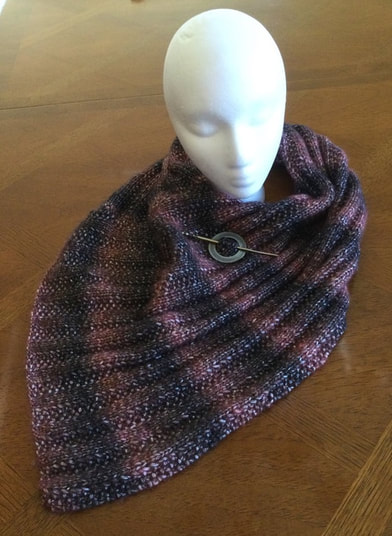 Fabric University defines marled yarn as "novelty yarn produced combining two single roving, slightly twisted colors into a single yarn that has the appearance of two-toned candy cane mottled effect." The subtle shading in my Spice Natural Marled Yarn went from warm brown and white to blackish hues. The result was similar to that of the Noro yarn at $7.99 per skein for 2 skeins for a total of $15.99 for my glamorous accessory. Also at the time of purchase, I was able to acquire a free skein when I bought the 2 I needed for the cowl. I used the remaining skein to knit a pair of mittens. The cowl is worked in a long rectangle in a seed and ribbed pattern. The the cast on edge is seamed along the side to form the cowl. Ravelry notes that the cowl is knit in 437 yards of aran weight yarn on #7 or 4.5 mm needles. The gague is 24 stitches and 24 rows for 4 inches. The specific directions can be purchased right on the Ravelry site. 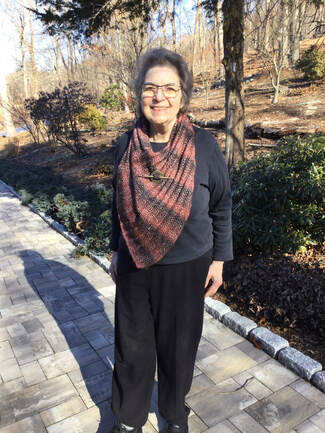 My Natural Marled Yarn was delightful to knit with. The fiber was soft and did not split. It was also easy to make corrections if I made an error when I was knitting the seed pattern of the ribbing. From beginning to completion, I worked on my cowl for about 2 weeks. I ws eager to reveal the finished work to my knitting and crocheting group. I followed the pattern directions to transform the rectangular fabric into a elegant cowl. When I stood before the hall mirror, my immediate reactions was "wow!" This is the perfect accessory to style my winter wardrobe. A fellow knitter in my craft group already had Noro yarn in her stash and was able to access the pattern. As she was kind enough to allow me to photograph her work, I ws ready to share her cowl in this post. The stitch identification stands out with the Noro yarn. However, I prefer the the soft texture of the Natural Marled Yarn for a wearable accessory. 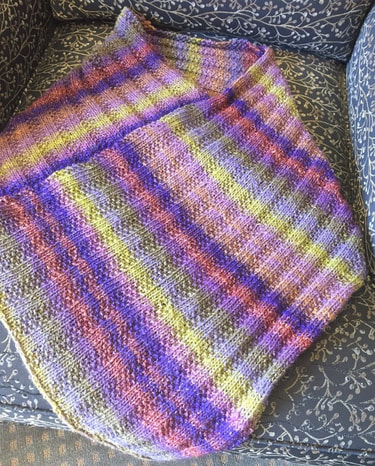 As noted earlier, I had enough yarn to knit a pair of mittens. the ribbed seed stitch pattern made for an interesting and comfortable cuff. As I was knitting in the round, I only had knit the stock and net portion of the rib. The seed stitch remained the same. . As in previous projects, I followed Tin Can Knits , "The World's Simplest Mittens."  As always, I appreciate your reflections and feedback. I invite you to join me on my stitching journey.
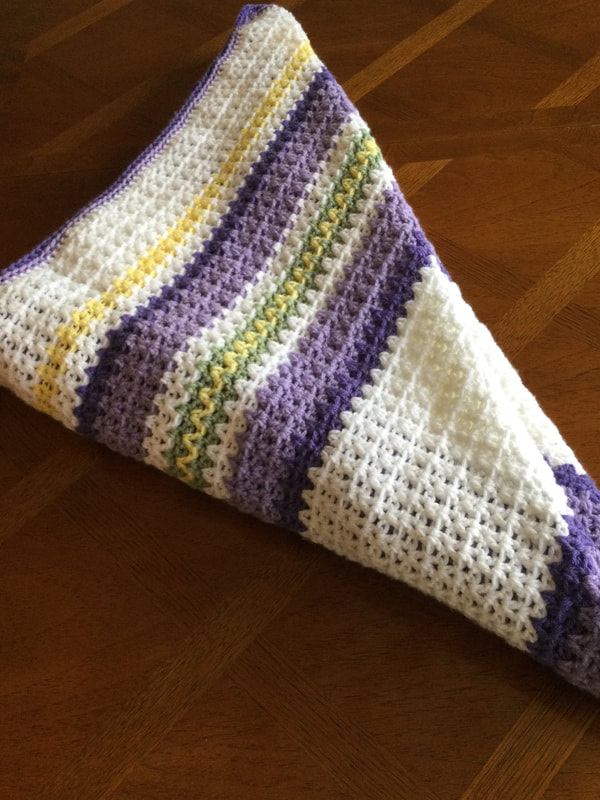
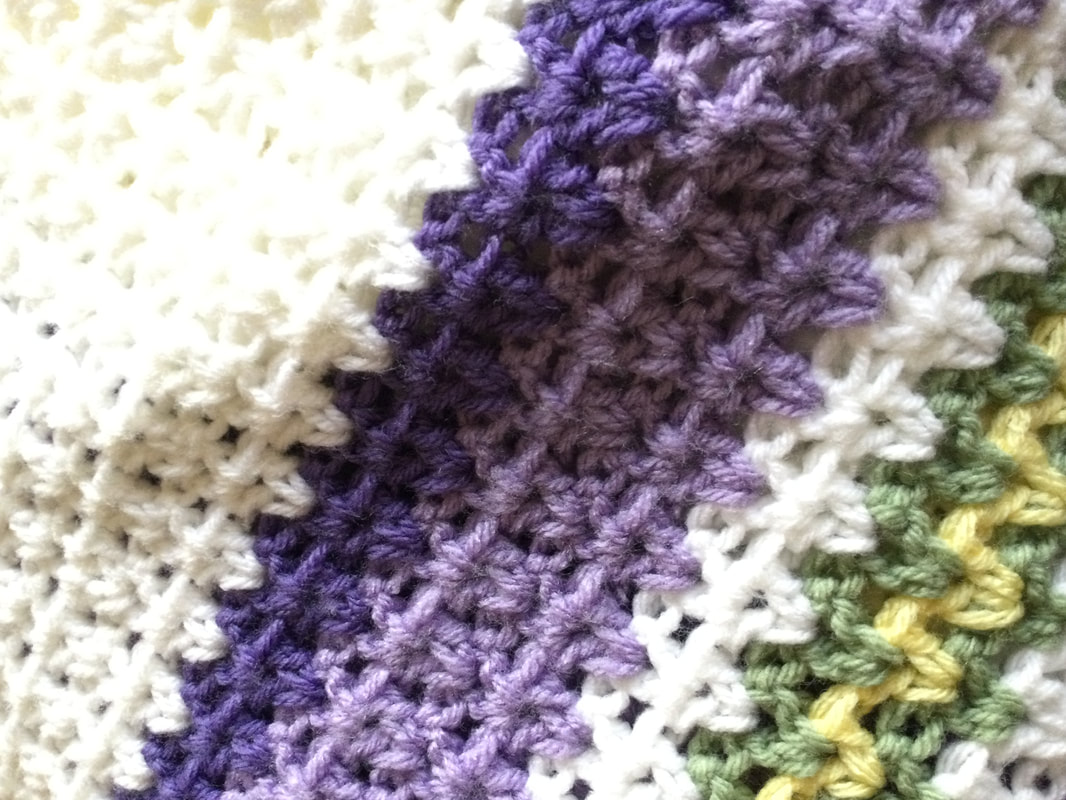
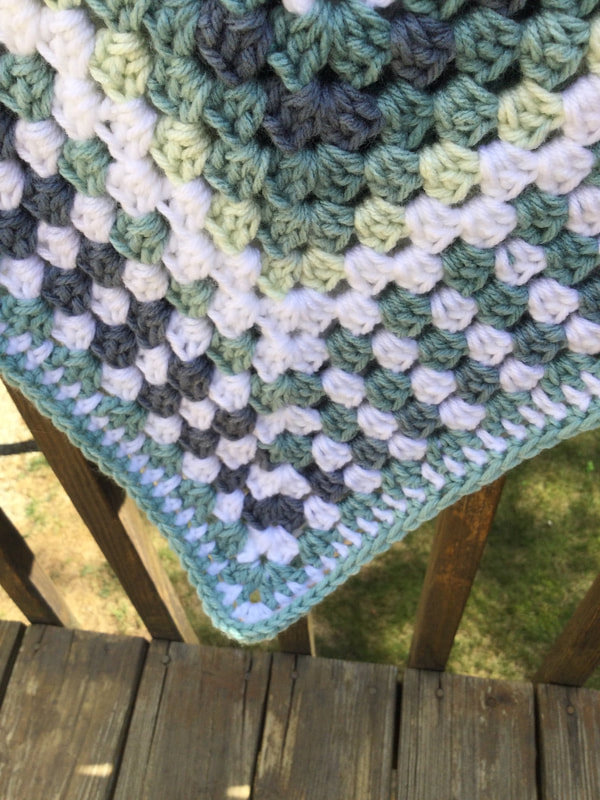
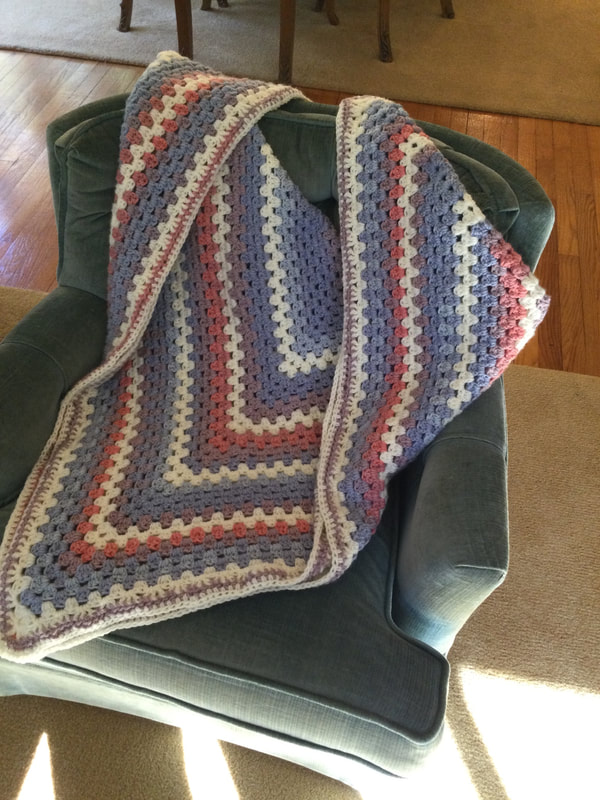
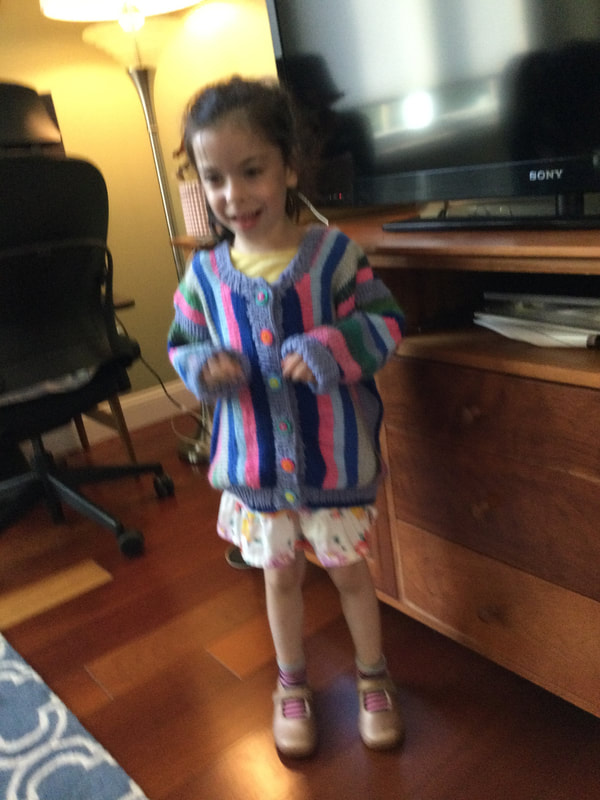
 It has been several years since I have had the opportunity to knit or crochet for infants, and so I was overjoyed to learn that a couple from our extended family were expecting a girl n January. After consultation with the mother to be, we determined that the blanket would be done in purple and white. We decided to use a lighter and darker shade of purple and add bits of yellow and sage green for accent. I had several months to crochet the blanket. Still, I startedrightaway. While many of my blankets have been done in extended Granny stitch or Diagonal Granny stitch, I decided to work with the Stitch for a denser, plushier feel. Many V stitch projects work with a multiple of 3, but I find it easier to work with an even number of stitches. 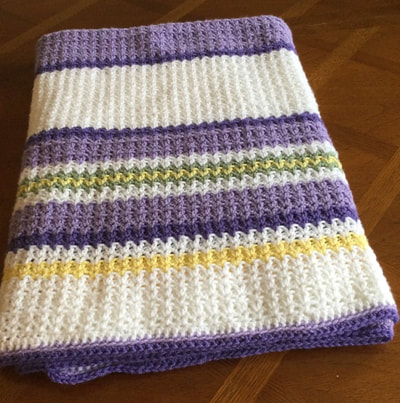 Row 1: After the base chain, make a double crochet into the 4th chain from the hook. This forms the initial DC and skip 1. Chain1 and make another DC in the same space. Skip 1 space. In the next space crochet a DC, ch1, DC and skip the next space. Repeat until the last 2 chains. Skip 1 chain and DC in the 3rd chain of the last stitch. Row 2: Chain 3. Dc in the ch1 space from the previous row. Chain1. DC in he same space. You wil be building a v on top of the v in row 1. Continue to form V's in the chain 1 space as you crochet across the row. DC in the 3rd chain of the last stitch. You will repeat this row until you reach the end of your piece. To change colors, make the first part of your final DC, leaving 2 loops on the hook. Pull loop of new color through 2 loops, leaving a tail of several inches. Knot tail to old color. Snip old color. Chain 3 in new color and continue until you need make a new change.
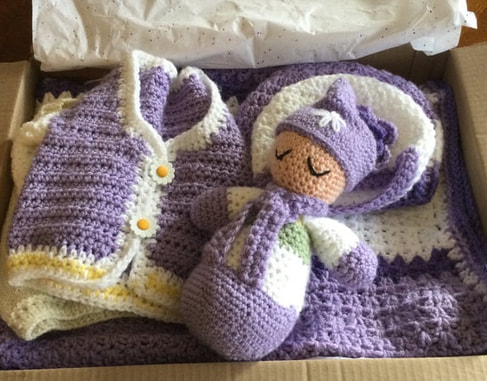
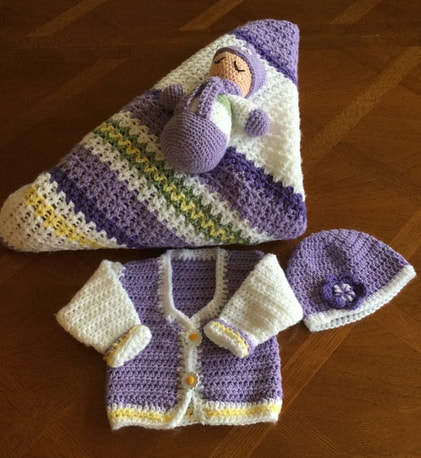
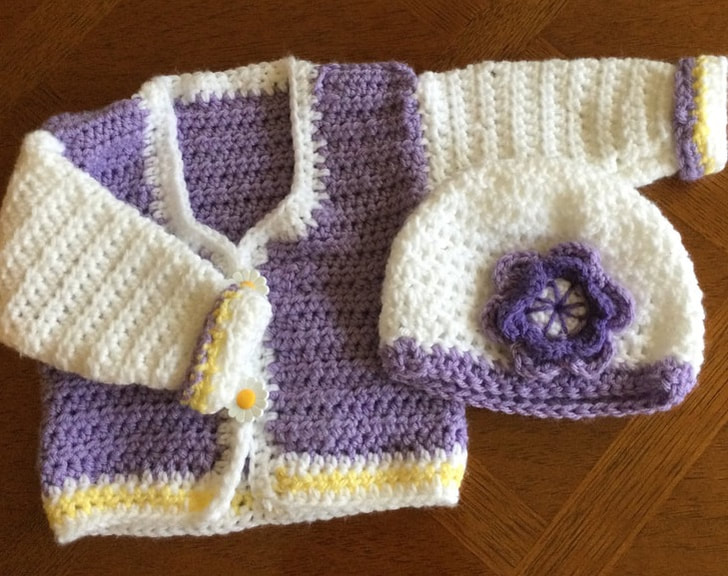
My blanket ended being a crib blanket, rather than a initial blanket for a newborn. My base chain was 150 stitches, and the blanket ended up being 57' by 57'. In the future, I would only chain 120 stitches or130 stitches. This little miss will have this blanket even through toddlerhood. My color sequence went as follows: 6 white, 2 yellow, 2 white, 2 dark purple,4 light purple, 2 white, 2 green, 2 yellow, 2 green, 2 white, 4 light purple, 2 dark purple,16 white, 2 dark purple, 18 light purple, 2 dark purple, 16 white, 2 dark purple, 4 light purple, 2 white, 2 green, 2yellow, 2 green, 2 white, 4 light purple, 2 dark purple, 2 white, 2 yellow, 6 white. for a total of 118 rows. Once completed, I made HDC in white around the entire blanket. Be sure to make 3 HDC stitches in each corner. This was followed by row of light purple and final row of dark purple. 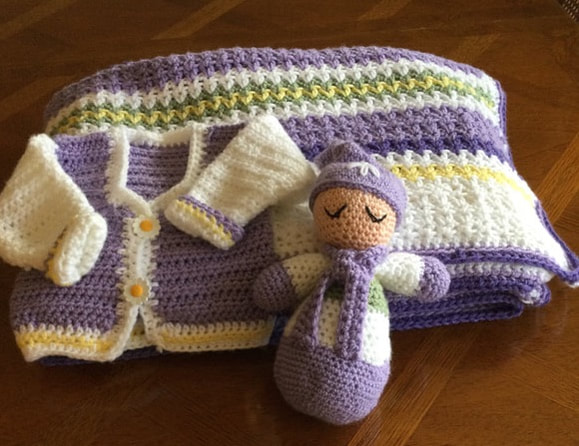 The blanket was followed by a trio of crocheted beanies that followed directions for hats for 6 and 12 months. Flower motifs were added for color and style. I just followed charts to get the correct number inches in the crown and height from crown to below the ear. 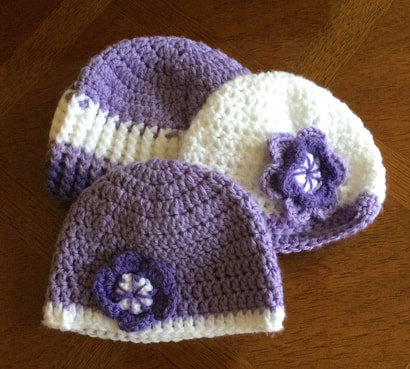 The third piece in the collection was "Baby Girl Sweater" designed by Edie Eckman for www/redheart.com/ The body of the sweater in crocheted in HDC in one piece from the bottom up. After the body is crocheted directions are given to separate for the right front, back, and left front to form the armholes. The sleeves are crocheted separately from the bottom up. Sew up the sleeve to form a tube. Crochet or stitch the sweater at the shoulders and fit the sleeve into the armhole. Stitch or crochet together. I added 2 rows to the bottom of the sweater before I crocheted all around the bottom, front, neck and front for two more rows. The 2 button hole loops were formed in the second row of crocheting. The two daisy buttons picked up the hint of yellow in the sweater.
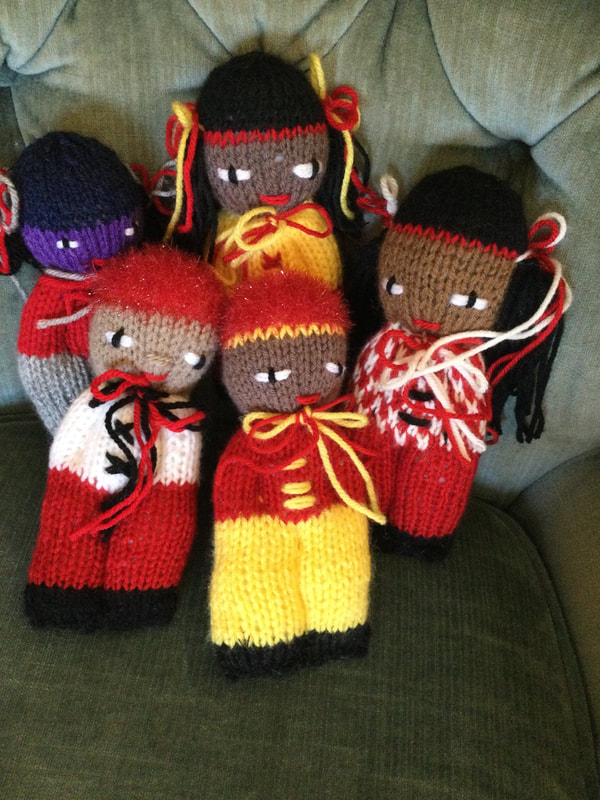
The first stuffy that my 6 year old granddaughter attached to was a sleepydoll. It was crocheted in pink, and she called the doll. "Baby." Even when she received other crocheted creatures, "Baby"was still her favorite. The sleepy doll has a round bottom, two arms, a head, and a sleep hat. The eyes are embroiled closed in black. I just had to crochet a sleepy doll for the new baby. I used the colors in the blanket and followed the directions from Sleepy Doll Amigurumi Free Crochet Pattern from Coolcreativity.com. A free video accompanies the pattern. 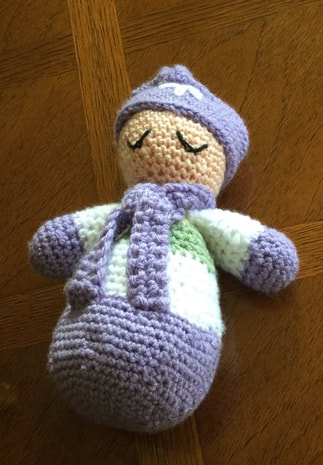 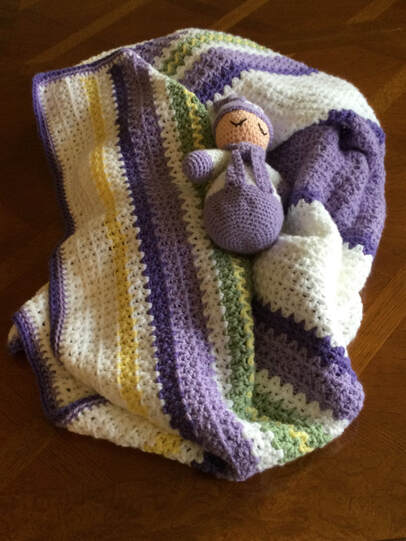 I will be mailing the package off to the parents tomorrow with cleaning directions and many wishes for a bright future for their new daughter. I have one more baby set to crochet for a boy baby expected in March. I am glad that I got a chance to revisit crocheting baby pieces again. Also, now I might go back to crocheting arigurumi. I have not made animals or dolls for a while, but I look forward to exploring the creative possibilities again.
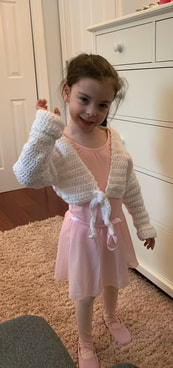
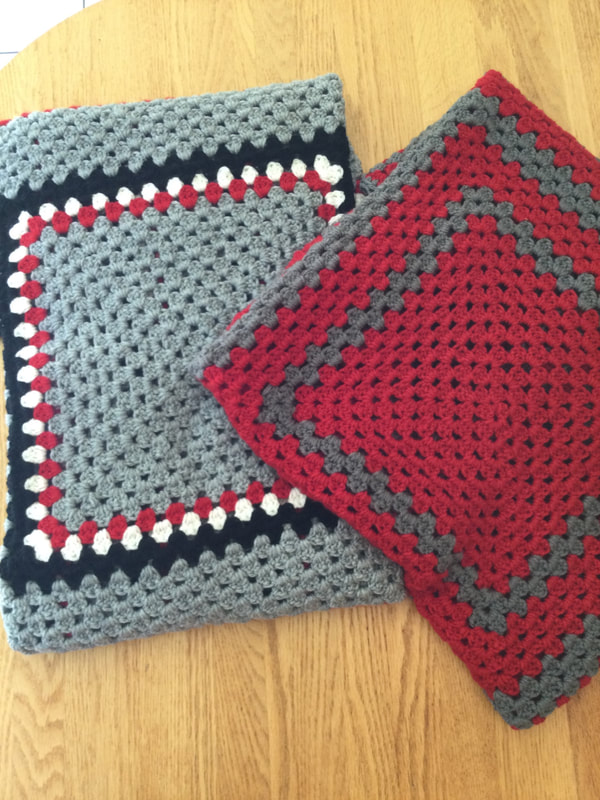
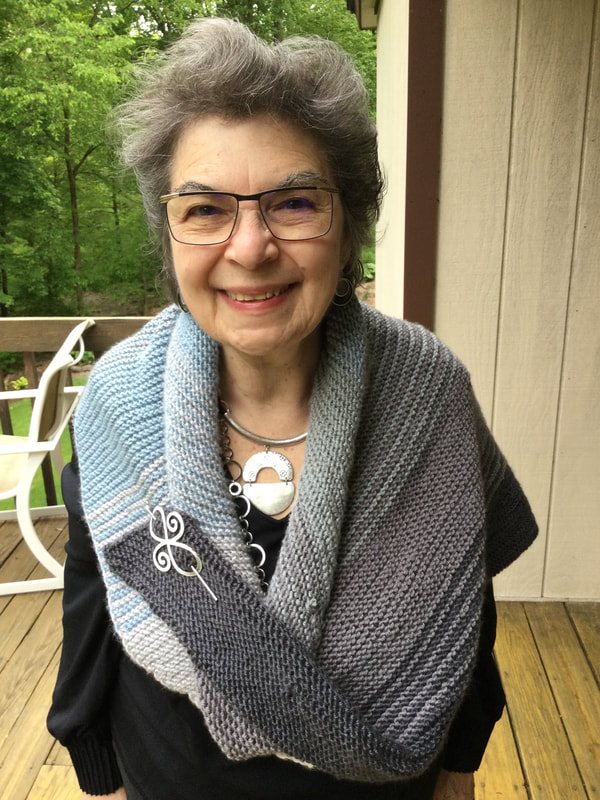
As always, I appreciate your feedback and reflections. I welcome you to join me on my stitching journey. 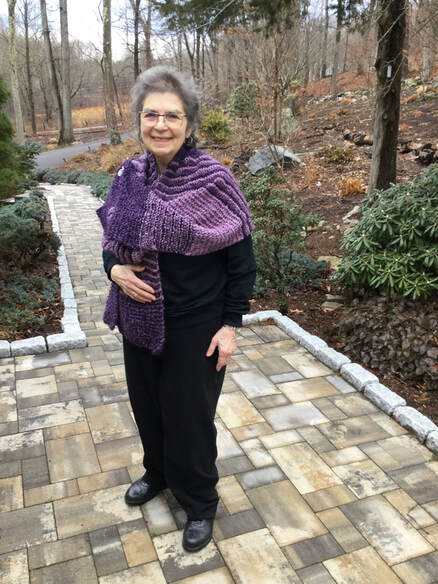 Like many of my fellow fiber crafters, I celebrated the culmination of 2022 with a display of my favorite projects and an analysis of the knitted and crocheted pieces that I worked on during the past year. Now, as I embark on my 2023 stitching journey, I need to set forth some realistic goals for emgagimg with the many skeins in my stash. I also want to expand my skill level and take on new stitches, techniques, and pieces. At one point during 2022 I had crocheted several blankets that made serious inroads into my current stash. Even better, I donated the pieces to several worthwhile groups to empty several bins in my yarn and completed project closets. Unfortunately, I yielded to temptation and purchased many skeins that were quite appealing, and so I am almost back where I started last year. One of my favorite podcasters, Knitty Natty uses a notebook to keep track of her incoming yarn, and outgoing yarn by way of finished projects and gifted yarn. Ending up with just a few skeins in my stash is probably not realistic. However, if I follow the course of another podcaster, I may be able to knit or crochet through 10 thousand yards during the year. I can't promise not to acquire any new yarn in 2023. However, my choices could be purposeful and tied to specific projects. I started the notebook already and have plans for the first few projects. 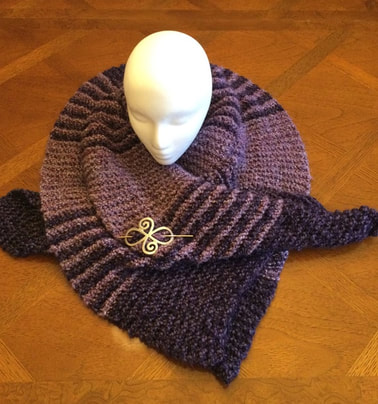 One of my favorite organizations for donating crocheted or knitted shawls and blankets is Threads of Love. Our local New Haven, CT chapter provides for adults and children at Yale-New Haven Hospital. Since supporters off the organization frequently donate funds or bags of yarn, I am happy to donate my time to produce lovely garments for seriously ill patrons who need some cheer and a warm hug. In December I left our meeting with a shopping bag of ho Lionbrand Homespun yarn and 3 jumbo skeins of primary worsted yarn. With the addition a few skeins from my own stash, I was able to crochet 3 colorful larger boys' blankets that went directly to donation.. 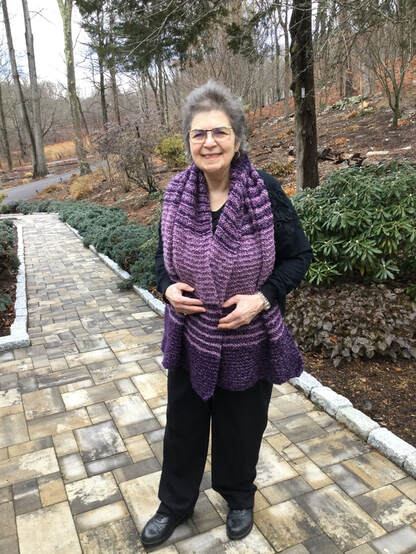 Many people find it difficult to knit or crochet with Homespun yarn, but I enjoy the colors and the textures. I find it easier to knit than to crochet with this yarn. Since I used #13 needles my fabric draped nicely. . I looked back to an article that I published during any early blogging history to get some reminders as to techniques that I had used. (http://wwww/lilcreates.com/lillians-blog/it-all-started-with-a-shawl) My first goal for 2023 was to finish the shawl. My earlier pieces were knitted from single colorways and topped off with a six inch fringe. I was not sure that I had enough yarn for an entire shawl. Therefore, I tried out a design feature that would combine two colors, Since some of the patients would be in wheelchairs or other devices, I decided to leave out the fringe on this piece. The first color band in Gothic colorway was cast on for 55 stitches.. Each band was done in garter stitch for 13 ridges or 26 rows.The second band alternated the darker Gothic with a lighter Baroque. Each color was knitted for two rows and carried along the side. The third band switched entirely to the lighter Baroque. The fourth band was striped, and the middle bands were entirely Gothic. The second half of the shawl continued in the same manner until I ended with the final band of the dark Gothic. Each skein measured 185 yards, and I probably used about 300-350 skeins of each color. It was hard to determine as some of the yarn was in partial skeins. Measurements for the completed shawl were 62 inches long by 20 inches in height. I really liked this shawl and was tempted to keep the work. However, my conscience wouldn't let me as the yarn was donated. Some patient at the hospital on in rehab will get a very attractive piece. Although I cast on in 2022, I did most of the work and blocking in 2023. This was my first finished piece for 2023, and I was thrilled that I could check it off my list. I could start my tally with about 600-700 yards used. Once my Threads of Love group has another collection date, I will be able to move it out of my FO box. I have a couple of skeins left, but I will probably gift them to a friend in any craft group as she knits hats for the homeless using the homespun yarn. 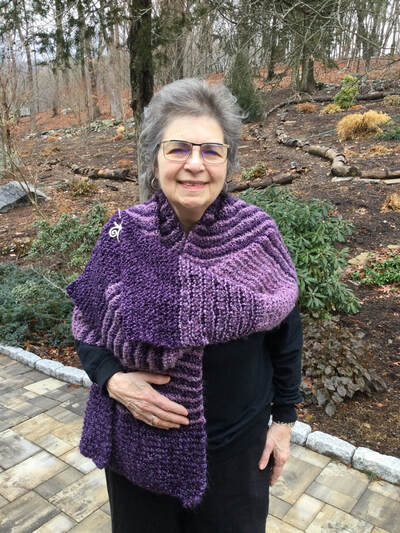 At this point, I can lay out plans for the next few projects, but I may take some time to plan for the entire year. There were two new born babies that I am making layette sets for in 2023. I finished the first set in 2022,but I am working on the second as I write. My granddaughter requested a shrug sweater in strawberry pink. My third bunch will focus on marled yarns. I bought a few sets that were already marled. however, friends gifted me about 700 yards of navy Ice yarn inn navy with thin whips of white. Since the yarn is quite dark, I am combing it with a DK yarn in white to create a marled cowl and a pair of mittens. These projects should take me through the first few months 2022. Then I can reevaluate my progress and make future plans.
As always, I appreciate your reflections and feedback. What are your plans for knitting and crocheting in 2023. I invite you to join me on my stitching journey.
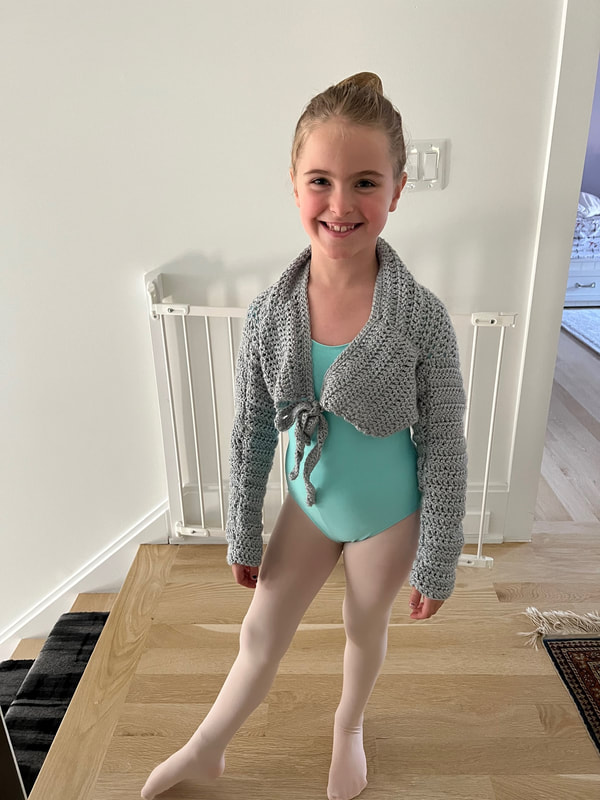
What new designs have I developed? What kinds of new projects have I explored? Which new skills have I learned? What pieces were my favorites? Which color profiles stood out? Did I use free patterns, paid patterns, or self designed patterns? Did I accomplish my goals? What did I learn? The following articles were posted in 2022. As i revisit the pieces that I have created, I am filled with pride. http://www.lilcreates.com/lillians-blog/embroidery-on-a-girl's-knitted sweater http://www.lilcreates.com/lillians-blog/crocheted-ballet-shrugs
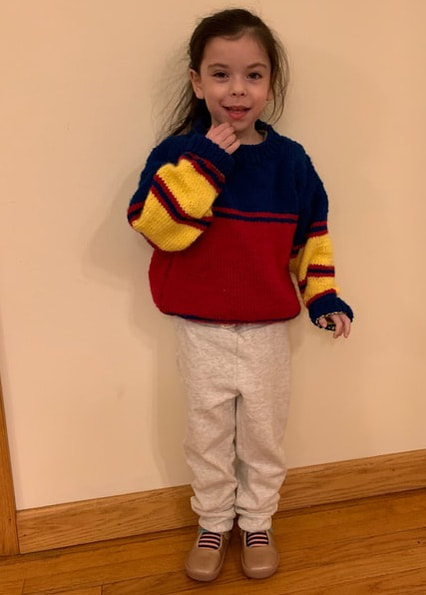
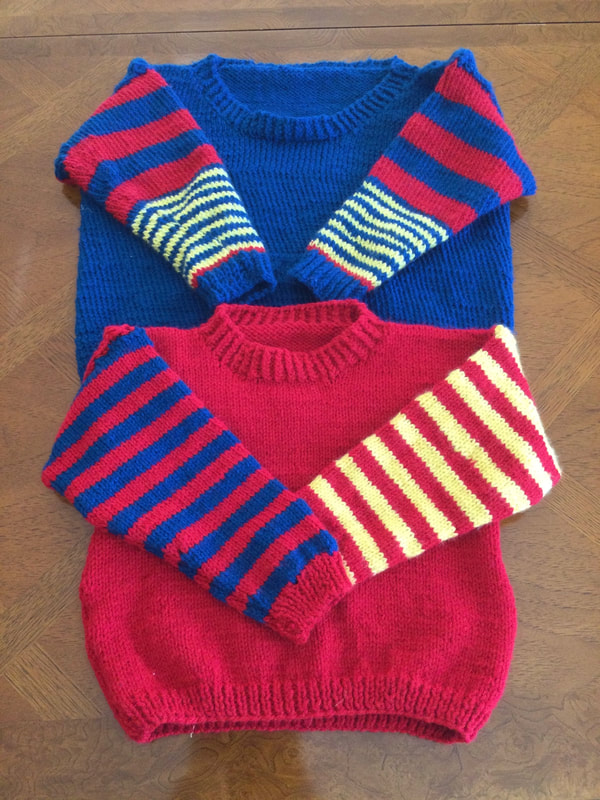
http://www.lilcreates.com/lillians-blog/creating-knitted-sweater0drama-with-striped-sleeves
http://www.lilcreates.com/lillians-blog/accessorize-your outfit-with-a-crocheted-cowl http://www.lilcreates.com/lillians-blog/embroidery-oaccessorize-your-putfit-with-knitted cowl
http://www.lilcreates.com/lillians-blog/crocheted-cardigan-in-spring0colors 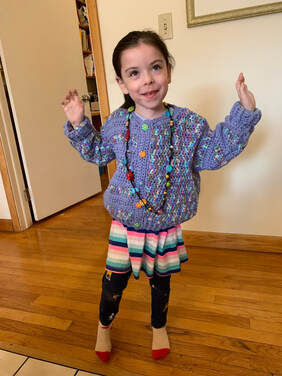 http://www.lilcreates.com/lillians-blog/crocheted-purses-for-spring
http://www.lilcreates.com/lillians-blog/stash-busting-with-strategic-crocheting http://www.lilcreates.com/lillians-blog/improving-crochet-with-stash-busting-yarn
http://www.lilcreates.com/lillians-blog/striped-diagonal-scarf-with-gradually-shaded-hues http://www.lilcreates.com/lillians-blog/boomerang-striped-knitted-wrap
http://www.lilcreates.com/lillians-blog/free-crochet-scallop-wrap 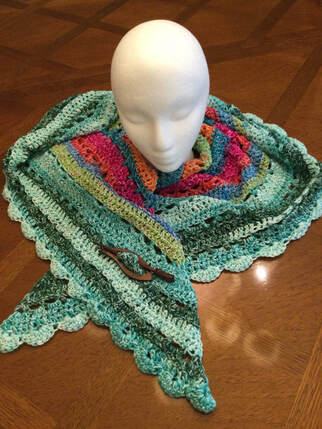 http://www.lilcreates.com/lillians-blog/free-crocheted-ombre-throw-with0artistic-border http://www.lilcreates.com/lillians-blog/crocheting-with-ombre-infinite-possibilities
http://www.lilcreates.com/lillians-blog/crocheted-floral-freeform-scarf
http://www.lilcreates.com/lillians-blog/embracing-colors-and-stripes-to-design-a-girls-knitted-cardigan
http://www.lilcreates.com/lillians-blog/celebrating-girls-freeform-cardigans 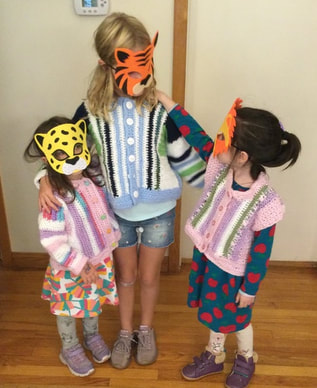 http://www.lilcreates.com/lillians-blog/knitted-comfort-dolls-dressed-up-in-style
http://www.lilcreates.com/lillians-blog/from-drab-to-glam-gray-acessories-for-winterware
.My website, www.lilcreates.com and I Pad photos reflect on how busy I was during 2022. Roughly calculating, I produced about 35 crocheted pieces and 33 knitted pieces. This total does not include the 55 comfort dolls that I knitted for 'RKids and a special project for the New Haven School System. Types of pieces include 12 girls' sweaters, 14 shawls and wraps, 6 cowl, 7 purses, 8 blankets and throws, at least11 hats, and 10 or more pairs of mittens.
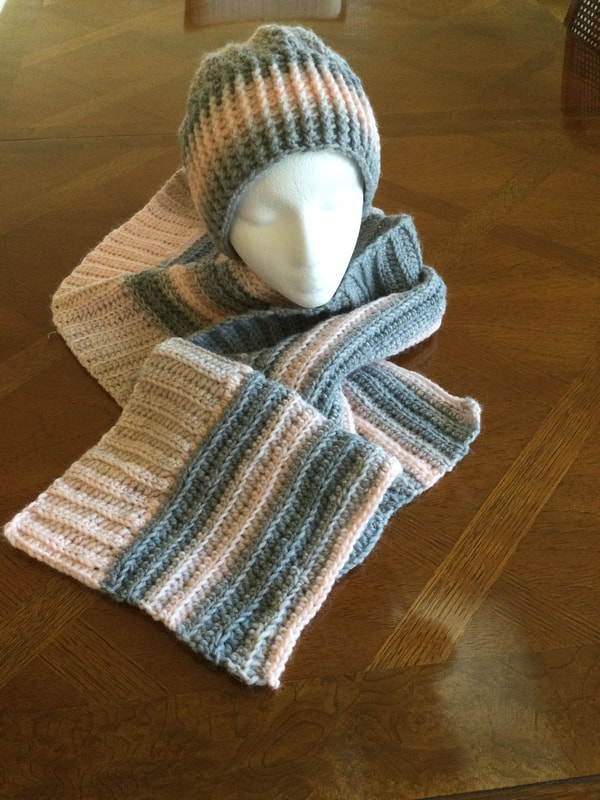
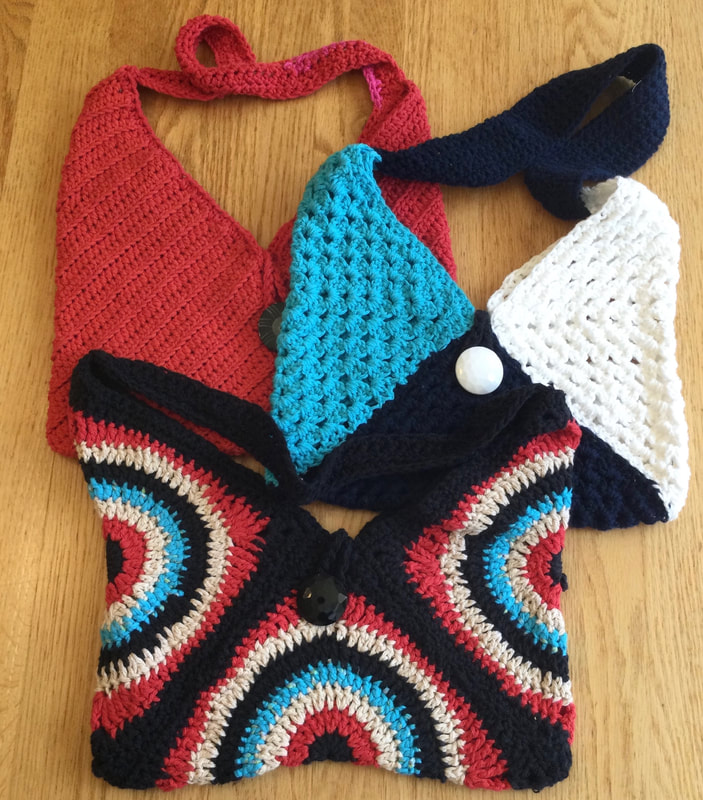
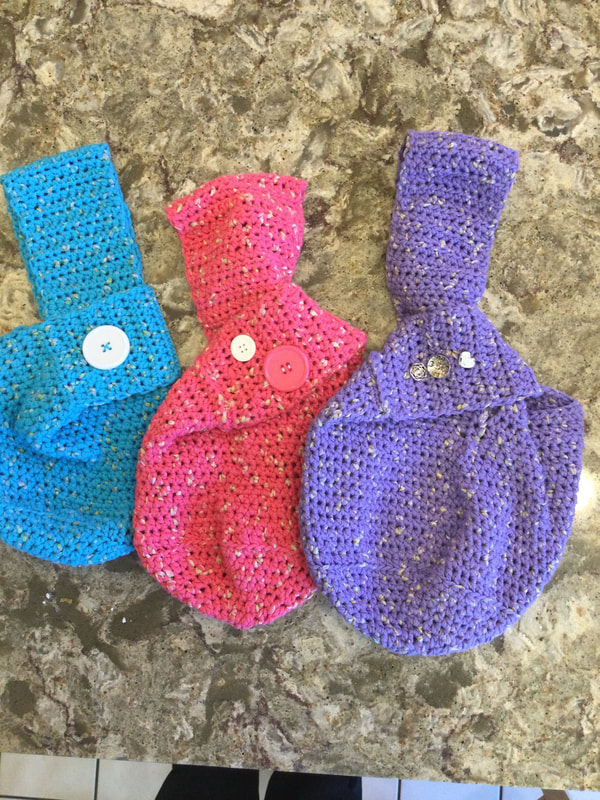
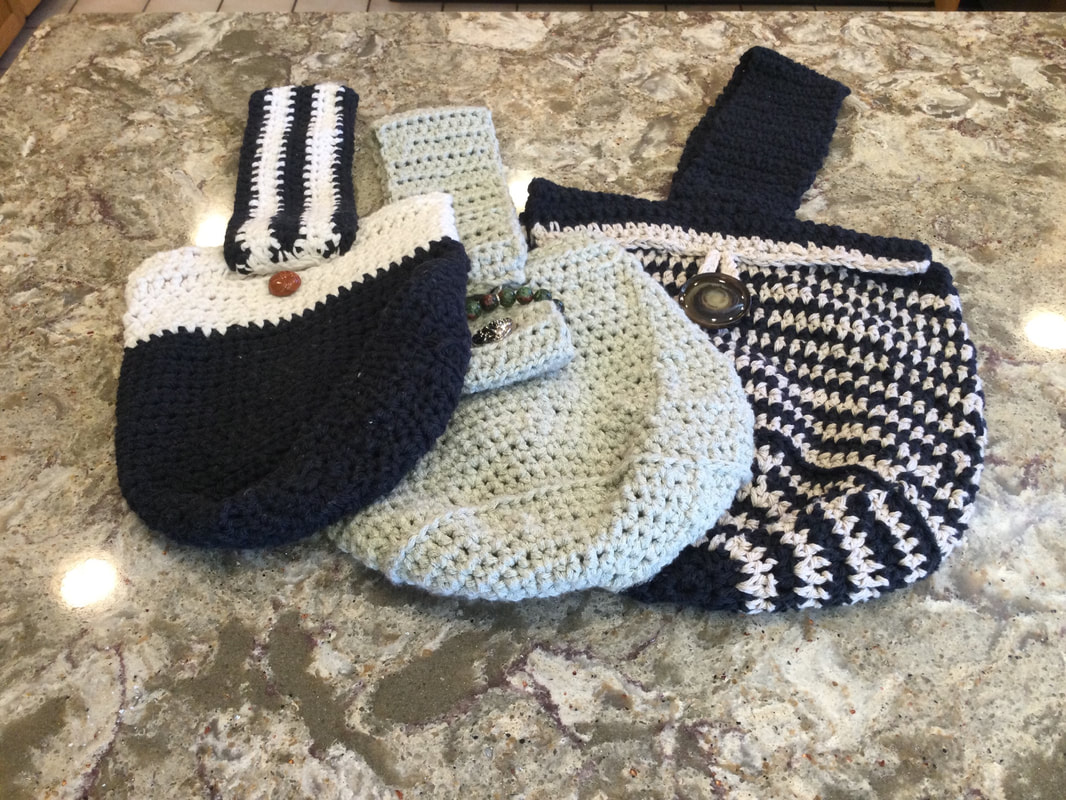
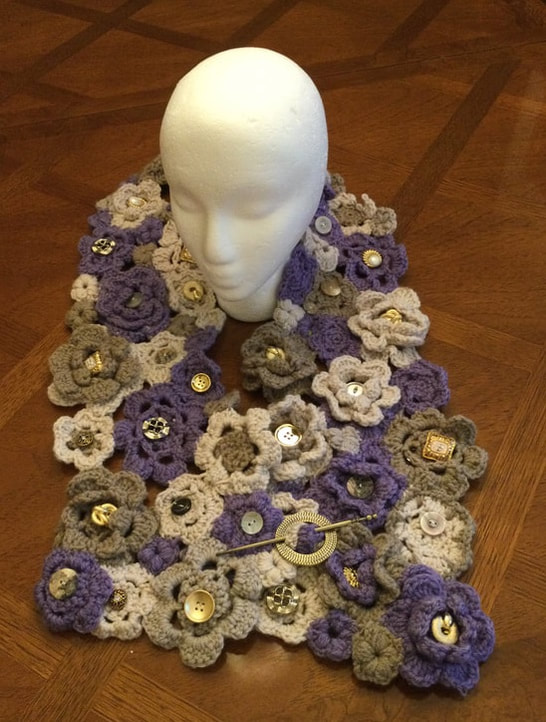
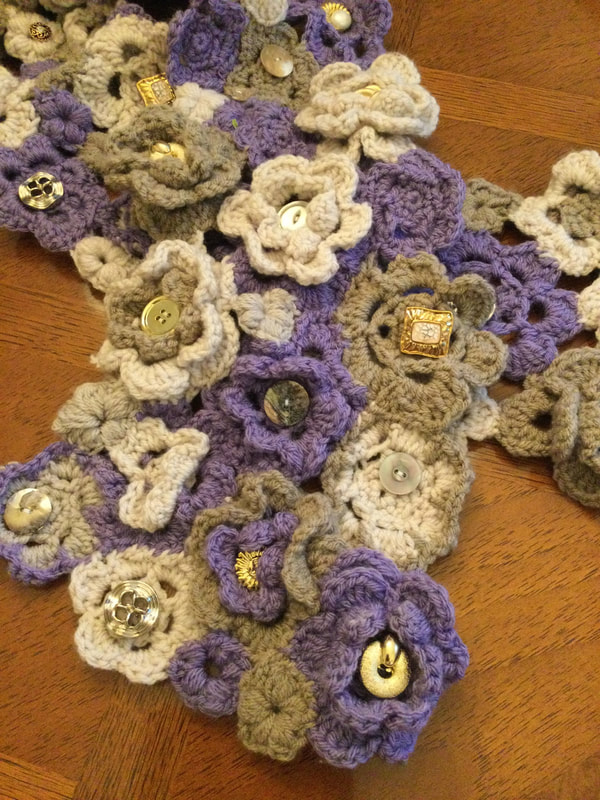
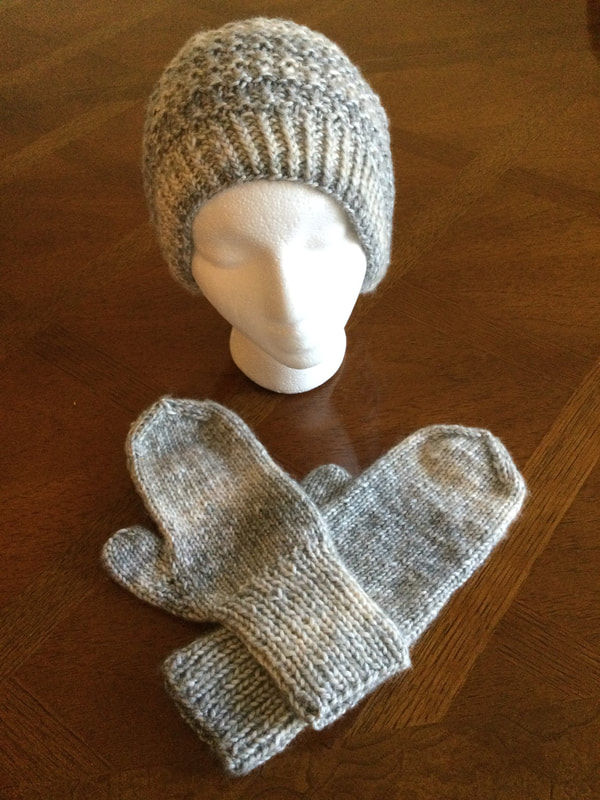
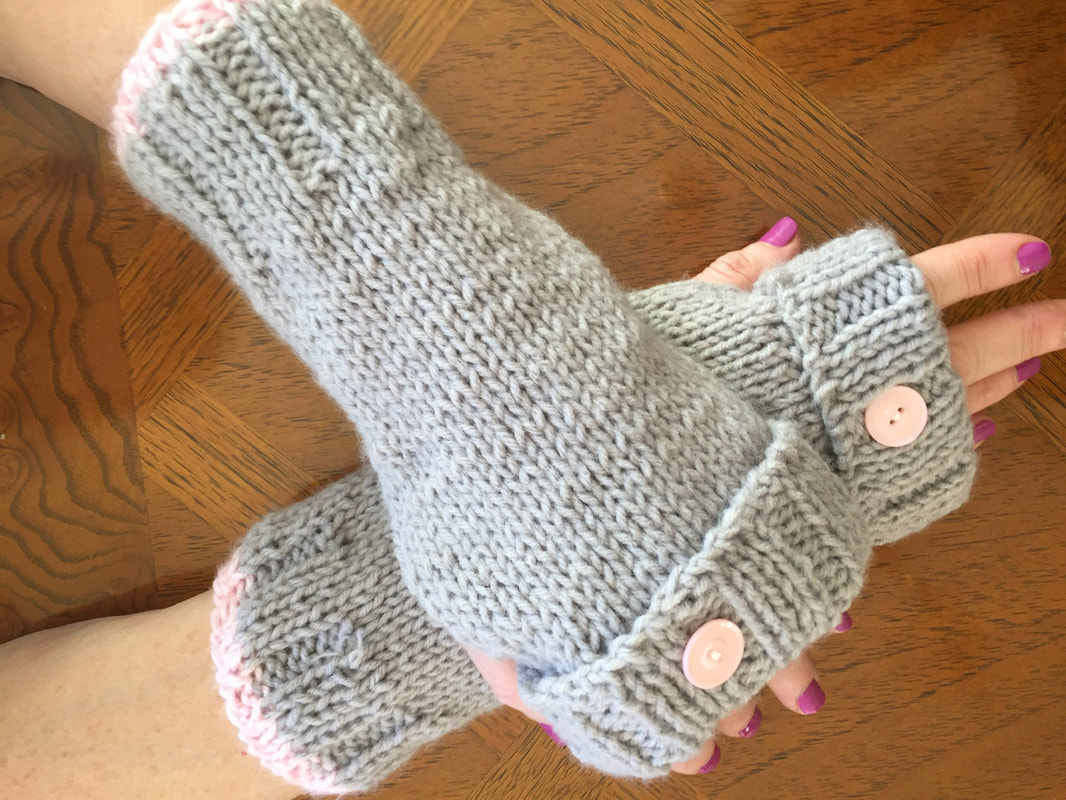
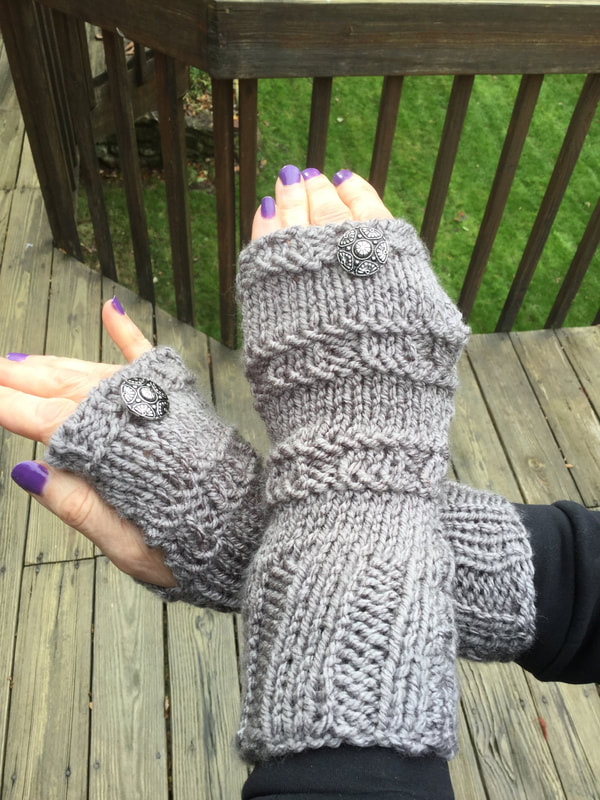
Most of the girls' sweaters have been gifted to my granddaughters. Most of the shawls, blankets, and throws were donated to Threads of Love. The majority of the hats were donated to Hartford Bags of Love and the Human Services department of the town of Woodbridge. I kept a couple of hats and mitten sets for myself as well as some of the special knitted or crocheted wraps. I am pleased to accessorize my wardrobe with my handiwork. What new skills did I learn"|? I transitioned from 2 needle mittens to 4 neele double pointed mittens and was quite pleased with the result. What projects were the most fun? I really enjoyed the freeform knitted and crocheted sweaters that I made without a pattern for my granddaughters. The freeform floral scarf that was constructed from individual crocheted flowers presented an interesting challenge. What did I leave out? I did not produce any pieces for men this year. However,I have a pattern that I want try out for my husband. Although I usually knit and crochet with acrylic yarns, I will invest in wood or cashmere as he needs to keep warm when he performs outdoor tasks in winter. I did not make any socks, and do not think that I will tackle them in 2023/. I do not enjoy working with fingering weight yarns, and have not learned the short row techniques needed for the heels and toes. I still have not learned how to do Tunisian knitting. This still remains a goal for the future. A friend gave me a pattern for a linen stitch scarf that I will try in 2023. Maybe this year I till knit or crochet a sweater for myself. I have the skills, but I worry about the fitting. The scarf/ wraplet that I attempted to knit with expensive fingering weight yarn remains in my WIP project bag. I do a few rows when I do not have a new project to start, but the piece does not bring me joy. Still, I refuse to give up as the yarn was pricey. I will push forward to finish it in 2023. It would not pay to frog it and start over, It is not the pattern. I just find working with fingering weight yarn tedious, Reviewing this article and the pieces that I have included,I am proud of the skills that I have learned and the pieces thatI have created. It was fun to experiment and to follow new patterns. Was this article for my readers or for me? I am not sure. However, the analysis helped regain a perspective on my body of work so that I can set forward-thinkiong and realistic goals for 2023. Readers, what were the highlights of your crocheting or knitting experiences during 2022? Did you gain any new insights when you looked over this year's work? Did the analysis help you plan for 2023? As always, I appreciate your feedback and reflections. I welcome you to join on my stitching journey. 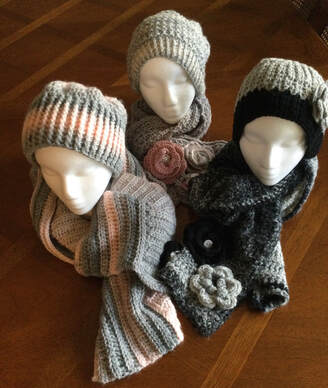 Gray has come a long way from earlier associations as a dull and dreary color to a chic and serene hue that is a mainstay of home decor and fashion. This autumn I have enjoyed creating a variety of accessories that coordinate well with outdoor garments and provide cozy additions to cold weather indoor fashion. I also found pieces that I created during the past few seasons that go so well with the theme of this article. Where possible, I will share the patterns and yarns used. As you view the pieces and descriptions, I hope that you come to share my enthusiasm for grey fiber projects. Perhaps you will attempt one of your own  Although I donate or gift most of my knitted and crocheted pieces, I decided to keep my favorite gray set for myself. The pieces were knit with Natural Marl from Loops and Thread with the color way Pearl. Information about the mittens was previously published in the Facebook Group "Just Mittens," The mittens were constructed from "The World's Somplest Mittens" from Tin Can Knits.This pattern introduced me to knitting mittens with 4 double pointed needles. Once I overcame my initial hesitation of working with the 4 dp's, I found the directions straightforward, I was thrilled with the cozy mitten that fitted my hand beautifully. The pattern includes directions from toddler through adult large in yarns from DK, Worsted, and Chunky. For the hat I adapted a chunky yarn pattern to my worsted weight yarn. I casted on 90 stitches as the pattern for the body required a multiple of 6. I worked in the round and used a 1x1 ribbing for 8 rows before beginning the main part of the hat. The stitch pattern was: Row 1: Knit. Row 2: Purl Row 3: Knit 1, Purl 1 Row 4: Knit 1, Purl 1 (You want to achieve 2 rows of ribbing.) Repat the pattern stitch until the hat measures 7 inches to begin decrease rows. Row 1: Knit 2 together, knit 4 until end of round (75 stitches) Row 2: Purl 2 together, knit 3 until end of round (60 stitches) Row 3: Knit1, Purl1 ribbing ( no decreases) Row 4: Knit 1, Purl 1, ribbing (nodecreases) Row 5: Knit 2 together, Knit 2 until end of round (45 stretches) Row 6: Knit 2 together,Knit 1 until end of round (30 stitches) Row 7: Knit 1 Purl 1 Row 8: Knit 1, Purl1 Row 9: Knit 2 together until end of round (15 stitches). Row 10: Purl 2 together , Pul1 Use a tapestry needle to draw yarn through all stitches and go again to secure. 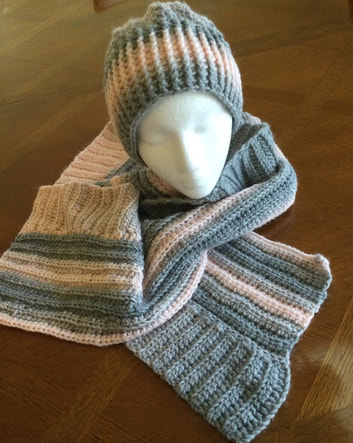 Another set was created a few seasons ago from Scarify yarn by Lion brand. The hat was crocheted from my favorite Lakeside pattern. To this day, it remains my best fitting hat. The scarf was crocheted in two directions. This scarf was adapted from a knitted version that came from a purchased pattern. I chained for about 65 inches for a foundation row. The pattern stitch for the first section is a repeat of one row. Make a HDC into the back loop of the third stitch from the hook Continue across the row. Chain 2 and turn. . HDC in fhe back loop of first stitch and continue across. My scarf had 14 rows for about 5 inches. but you can easily adapt for a narrower scarf by decreasing the number rows along the length of the scarf. For the second part of the scarf, I wanted to create a horizontal ribbing that was at right angles to the vertical piece. The second part is crocheted separately and then attached to the main part of the scarf. Chain 16 stitches. HDC into the third stitch from the hook. HDC to the end of row for 14 stitches.. Chain 2 and turn. HDC into the back loop only and continue across. You will be crocheting a strip that is as long as the first part of the scarf. Pin pieces to space out sections and so that the ends meet and crochet with a slip stitch along the length. Weave in the ends. Soak in cool water and squeeze out water gently. Dono wring. Shape interlace and lay along fluffy towel. Rowll towel nd let dry for a couple of hours. Unroll and continue to dry. This blocking process makes the stitches pop. 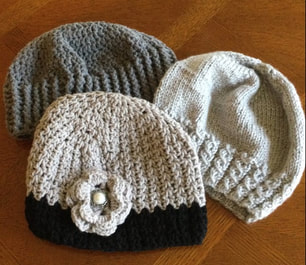 The three hats in the above photo can accessorize many winter coats. The pale gray hat on the right features a bamboo pattern instead of the typical ribbing. The hat was knit flatl and then seamed up the side. My adaptation is done in multiples of 5. Row 1: purl 2, knit 3 across to end. Row 2: knit 2, purl 3 across Row 3: purl 2, Place first knit stitch over the next 2 stitches. Repeat to end. Row 4: knit 2. purl 1, purl over for an extra stitch, purl 1. This increase enables you to replace the stitch that you lost when you placed the stitch over the next 2 stitches in Row 3. I repeated the sequence 4 times to create a 2 inch border. End in row 4. Knit body of hat in stock and knit until the piece measures 6 1/2 inches. To make decreases, knit 2 together, knit 8. On purl side, there are no decreases. Continue in decreases on alternate rows. Each time there will be one less stitch between the knit 2 together.. When between 8-10 stitches remain on the needle, use a tapestry needle to gather the stitches and secure. Leave a long tail to sew up the side of the beanie. The grey and black hat was crocheted from the crown down .Begin with magic circler a ring made from asmallchain. Row 1. Crochet 8 DC into the ring. Row2: Crochet 2 DC into each stitch. Row 3: Crochet 2 DC into the first stitch, followed by one stitch into the next and continue around. Row 4: Crochet 2 DC into the first stitch and one stitch into the next 2 stiitches. and continue around. Row 5: Crochet 2DC into first stitch followed by one stitch in next 3 stitches and continue around. Continue pattern until there are 7 stitches between each 2 DC in same stitch. Crown will be about 7 inches in diameter. Now you will set up the V stitch for the body of the hat. Crochet 2DC in the same stitch, skip one stitch. Continue around. For the rest of the hat crochet a V stitch between the two stitches that you made together in the previous row. Skip a stitch. As you continue down body of the hat, create v's For contrast, I changed to black and continued for the last 4 rows. I finished the hat with a crocheted flower. 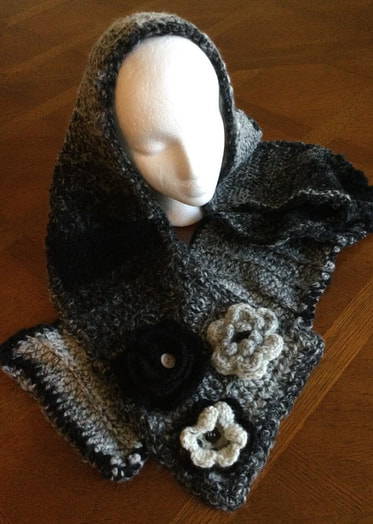 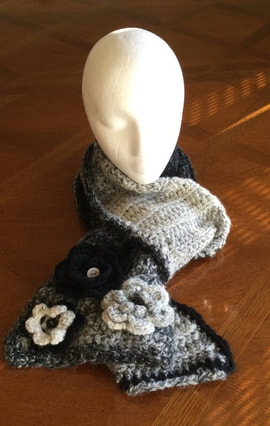 The grey and black scarf was crocheted from Scarfy yarn . It is 7 inches wide by 68 inches long. The piece was crocheted in double crochet. A row of single crochet was made along the edges to even out the stitches. Flowers in grey and black finished off the look. The scarf is long enough to be doubled to pull the ends through. This enables the wearer to keep the flowers on top. 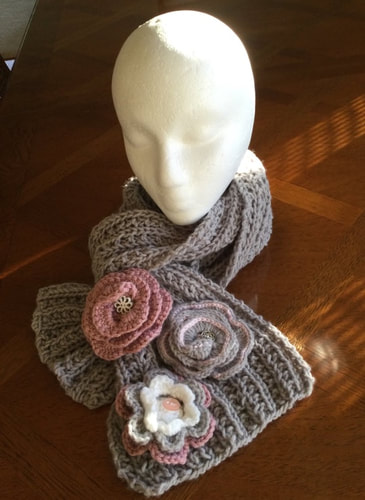 A second long knitted scarf was made with a broken rib stitch. The stitch also measured about 7 stitches wide and 68 stitches long. Pink and gray crocheted flowers gave it a flair. 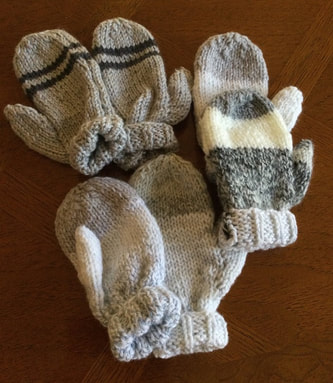 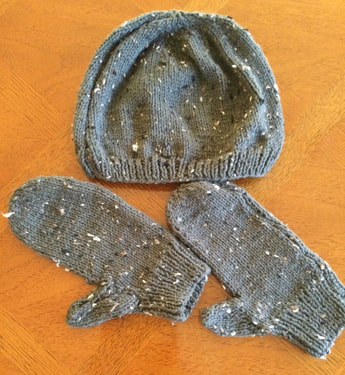 Several mittens knitted with the two needle flat method were donated to variety of charities. See patterns from Knitting4Piece for easy-to follow instructions. 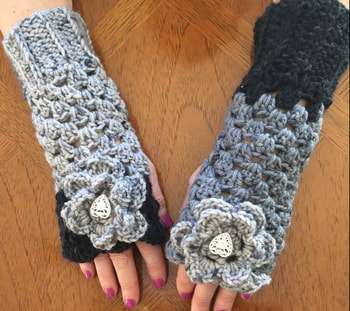 In years past I created variety of fingerless mittens. The grey ones were especially popular at winter fairs and made great gifts. This mismatched version was created from self-striping yarn.  Bamboo stitch mittens can be created from a flat panel. Begin with a 2 purl , 3knit rib for the cuff and change to the bamboo pattern noted earlier in the article. Fold the glove in half , right sides together. Sew or crochet the ribbing portion. leave about 2- 21/2 half stitches . Sew or crochet the remainder to the bottom. Weave in ends. Turn right side out. Silver hearts lighten up the pieced.
There are countless versions of knitted and crocheted gloves that can be created 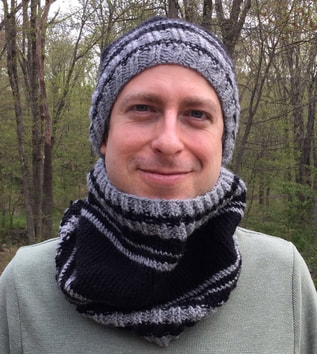 Let's not leave out the men. My son=in-law has enjoyed his hat and cowl set as weather comes in. They are especially welcome when he shovels snow from the drive. I really like the patterns and would be tempted to make one for myself in the future.
I could really continue for a very long time as I showcase my grey winter pieces. I welcome your feedback and reflections. I welcome you to join me on my stitching journey. |
Archives
November 2022
Categories
|


 RSS Feed