 As a very fortunate grandmother of three delightful girls (plus 2 wonderful teenage boys) I have wonderful models who are my muses for so many creations; Now that all three girls have started dance programs, the front tied At the Barre Shrug designed by Diane Moyer for Yarnspirations is the perfect accessory for these "budding ballerinas." The free pattern is also shown on Ravelry and Pinterest. Although the directions called for Red Heart Sparkle Soft, this yarn is no longer available. Therefore, I substituted Caron Simply Soft which was a good fit for sparkle and weight. I started with a sparkly silver for the oldest girl. Then I made the next shrug from a sparkly white. The youngest child requested a blushing pink. The Simply Soft yarns come at the lighter end of the worsted (#4) spectrum of yarns, but they worked well for these delicate sweaters since I wanted to allow for freer movement. While they would probably not wear the sweaters as they danced, these accessories could easily be slipped on so that they did not get chilled after their lessons. 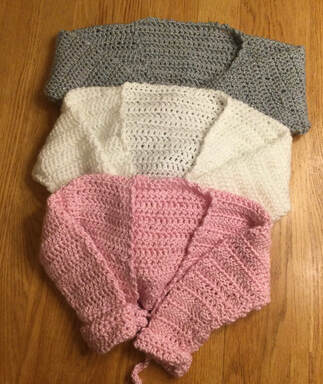 The size range for the pattern is child 4 through child 10. The sweaters are crocheted with size I (5.5 mm) hooks. The body of the shrug is worked in one piece beginning with the lower back edge. The sleeves are worked directly onto the body. Most of the sweater is crocheted in double crochet. Special stitches include dc2tog (double crochet 2 stitches together), FDC (foundation double crochet), FSC (foundation single crochet), and a Picot edging. Instructions are provided to make special stitches. I found it necessary to go on You Tube to see a video on how to make the foundation stitches, but I got the hang of it with practice. Since the foundation stitch combines the initial chain and the first row, you can just separate the steps if you find it too difficult to execute the foundation stitches.  Since the pattern is reversible, just select the side you prefer before starting the sleeves. By crocheting the sleeves right into the body, the sleeve placement is smooth. With right side facing place markers on both side edges of front and back from 2 to 5 inches depending on size. This will leave from 5 1/2 to 7 inches between the markers. A handy diagram with measurements helps you to visualize sleeve placement and construction. When the sleeves are done crochet a Picot edging to create a finished look. 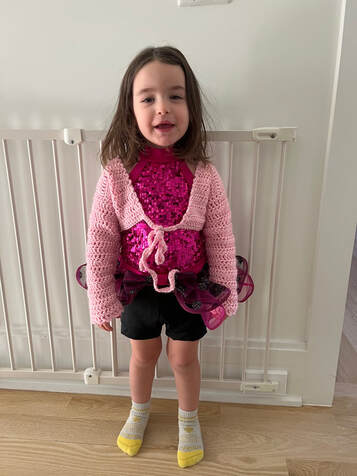 To construct the garment, fold the piece in half to match the front to the back of the sweater. Pin along the short side seams and along the sleeve. I used a neat blanket stitch to make my seams. With the double crochet stitching I found that crocheting the seams or using the mattress stitch did not provide necessary structure. I prefer blanket stitch to whipped stitch as the seam has a more finished look. 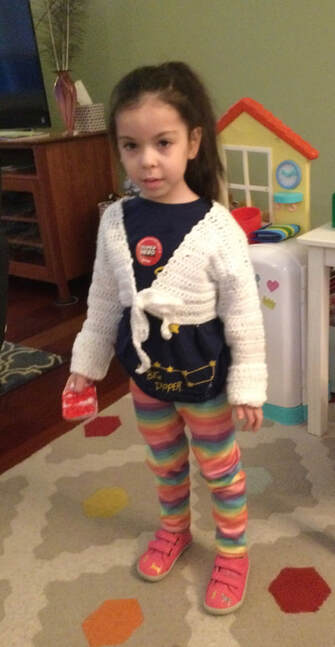 Place the sweater right side facing you to start with a single crochet in the lower right corner to begin the Picot edging. You will be working in the ends of the rows as you go up the right front edge, across the neck and down the left side. Ties are crocheted to each side of the front sections. The pattern calls for FSC (foundation single crochet) followed by 2 additional rows of single crochet. 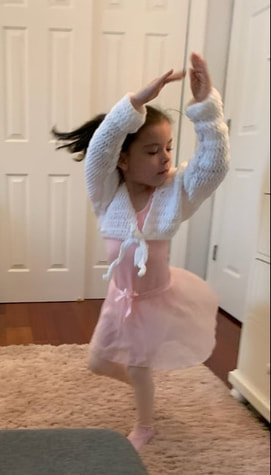 The free Yarnspiration patterns are wonderful to work with. The patterns are concise and are easily printed over 2-3 pages. Yarn weights, yarn yardages, gauge, and finished measurements are listed. Directions are clear and special stitches are explained. Photos and diagrams help to visualize the finished piece. 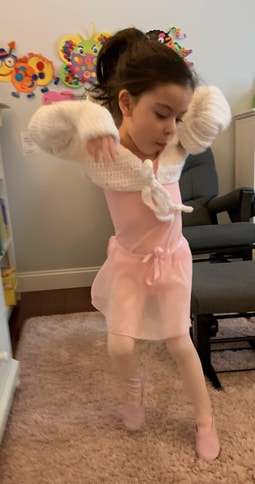 My girls were delighted with their new ballet shrugs. If there is a young dancer in your family or friend group, I encourage you to try this project. The sweaters do not take long to finish and are relatively easy to make. As always, I appreciate your feedback and reflections. I invite you to join me on my stitching journey.
1 Comment
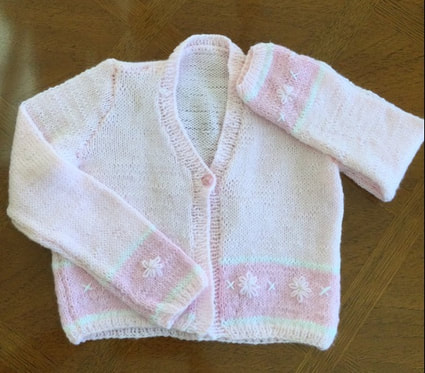 As knitters, we sometimes start with a pattern and search for yarn. At othermtimes we begin with the yarn and search for the pattern. When I was gifted two large skeins of DK weight yarn in two different shades of pink, I knew I wanted to make a piece that would suit one or more of my granddaughters. With the exception of my earlier infant sweaters, I don't usually knit with DK (#3) yarn as the projects take longer to complete, and I like the feel of worsted (#4) or sometimes chunky (#5). However the soft pink tones challenged me to try something different. On a visit to my local independent yarn start (Yarn Barn in New Haven, Connecticut, I found the pattern that called my name. Sirdar Calyso Double Kbniuitting Pattern #4297 is a cropped tri-color cardigan with a single button closing. I added some DK white to the yarn I had on hand, and I was on my way. Needle sizes are US 3 (3 1/4mm) for the ribbing and border and US 6 (4mm) for the body of the sweater. The back and front, and sleeve pieces are knitted separately from the bottom up. Then they are joined at the shoulders. The pattern calls for the ribbed border to be knitted before the sweater is completely put together. I prefer to sew all parts together first. The last step is the embroidery. I used the photo guide on the pattern cover to show me the placement. 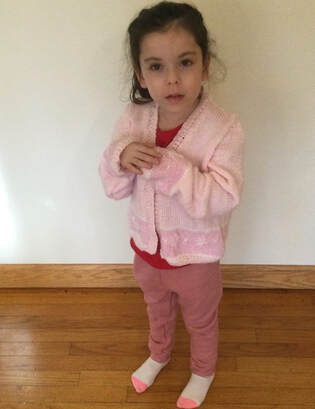 The picture on the cover portrayed a girl in a lime green sweater that was decorated with narrow bands of yellow and a wide band of sky blue. Lime green and yellow flowers were embroidered onto the blue band. Yellow and blue flowers were embroidered onto the body and back on the green sweater. The designers even paced a blue square bordered with yellow on the back of the sweater. A green and blue sweater was embroidered onto the center of the square. For my color placement, I used the palest pink for the body of the sweater, white for the narrow band, and a slightly darker pink for the broad band. Following the scheme of the pictured sweater, I embroidered, light pink and white flowers onto the broad band. I made a few changes in the sweater, because I was not able to create the intarsia square on the back. I knitted with light pink up the entire back. Also, I added colored bands to the sleeves. I chose not to embroider flowers on the body of the sweater for a simpler look. A simple pink rose button closed the sweater at the v- neckline. The delicate embroidered flowers add an extra dimension to the sweater. Please note, that the narrow bands are actually white, although they may not appear that way in the detail photo. 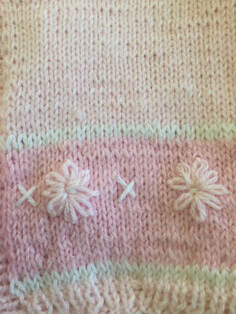 I made this sweater in a size 5-6 for my petite 5 year old granddaughter. The sweater fits, and is roomy enough take her through the spring. Since it is lightweight, she can wear in on top of a long sleeved t-shirt for a bit of extra warmth indoors during the cooler moths. Since it is lightweight, she can wear it under her winter jacket, without feeling too bunched up. 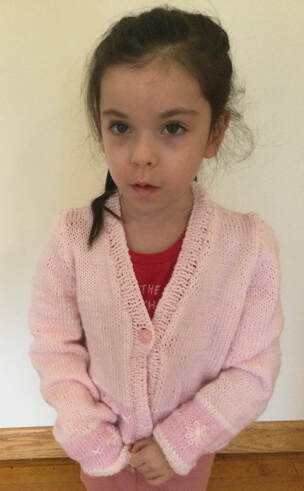 Her three year old cousin frequently requests sweaters in her favorite color pink. Luckily, I have enough yarn left to make her sweater as well. this time I will switch to use the darker pink for the body of the sweater, and the lighter pink for the bank. Instead of white, I will pick up a delicate blue or green for the narrow bands and parts of the flower. I haveyeat to decide whether to tackle the intarsia square or the additional flowers on the body of the sweater. Friend of mine employs the intarsia technique all of the time, and I know that she would be able to help me. Since it takes me a long time to knit in DK I am unable to show off my ideas for the sweater with the new color placement this time. I am currently working on another 3 sweater project progress) at a time, but I wandered to showy readers the possibilities of the color swap. When I finish to new sweater, I will add the pictures to this article I have adde floral embroidery and facial details to the mittens pictured below. I look forward to combining the two fiber arts for projects in the future. 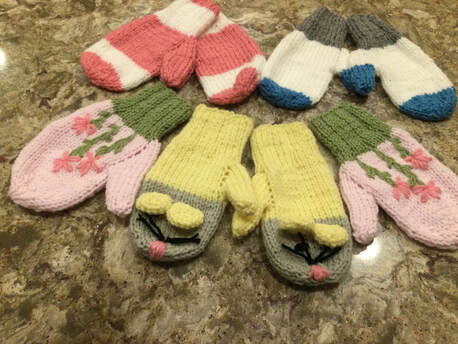 Readers, have you combined embroider with knitting to embellish your projects? I would like to see your photos. I welcome you to join me on my stitching journey. As always, I welome your feedback and reflections.
|
Archives
November 2022
Categories
|

 RSS Feed