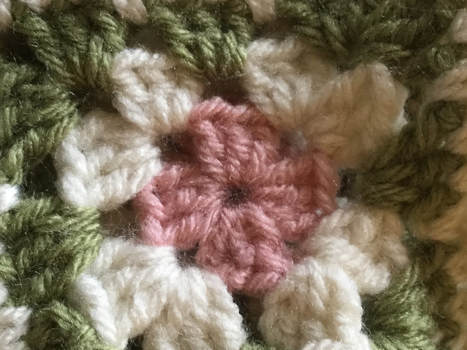
 According to Wikipedia, a crocheted granny square is produced in rounds from the center out to produce a lace-like square of fabric. It typically starts with a center ring from which you crochet 4 sets of 3 double crochets. Each succeeding round adds shells and larger rings to the piece. There are many variations, creation of granny squares is an art in and of itself. In my pre-blogging days, I associated the granny square with afghans composed of hundreds of these delightful colorful pieces. I really admire the artistry and persistence of the crocheters who who design and complete these intricate blankets. After actually designing and constructing a baby blanket I realized that I did not have the even hand or attention span to create another. One solution was to crochet extended squares. While I would still have to cut and weave in many ends from each ring, this task was nothing compared to the process of combining many squares to complete one blanket. I still find the artistry of the Granny square intriguing. I am in the process of researching and trying to replicate some of the more interesting designs and color combinations. I decided to use the granny square to create smaller pieces or to make it an accent in a larger project. Frequently Granny squares are thought of as "country", "square," or "old fashioned." I wanted to take the best of the art to create pieces that were fun to wear or use and fashionable. As I scrolled through Pinterest's visual data base I found many options. My criteria would remain as always:
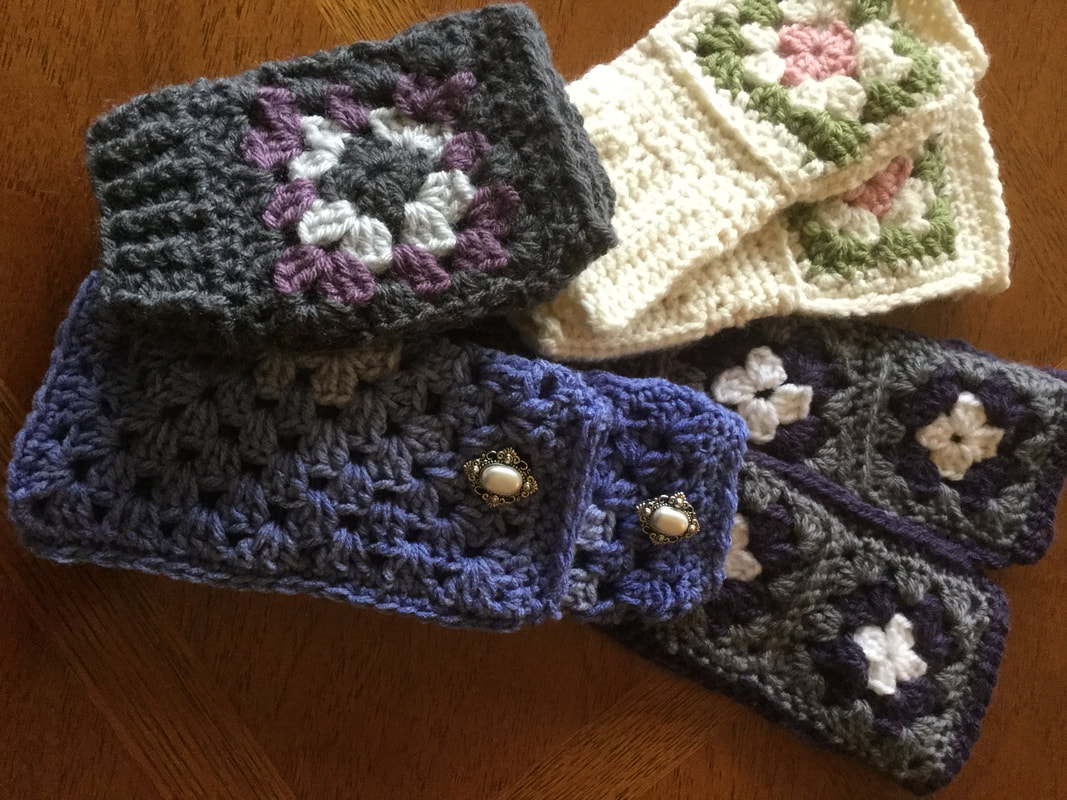
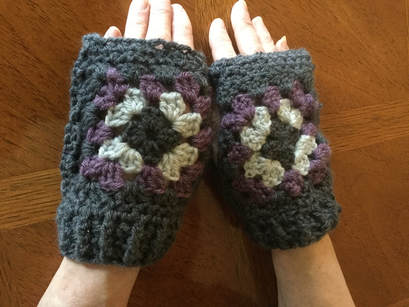
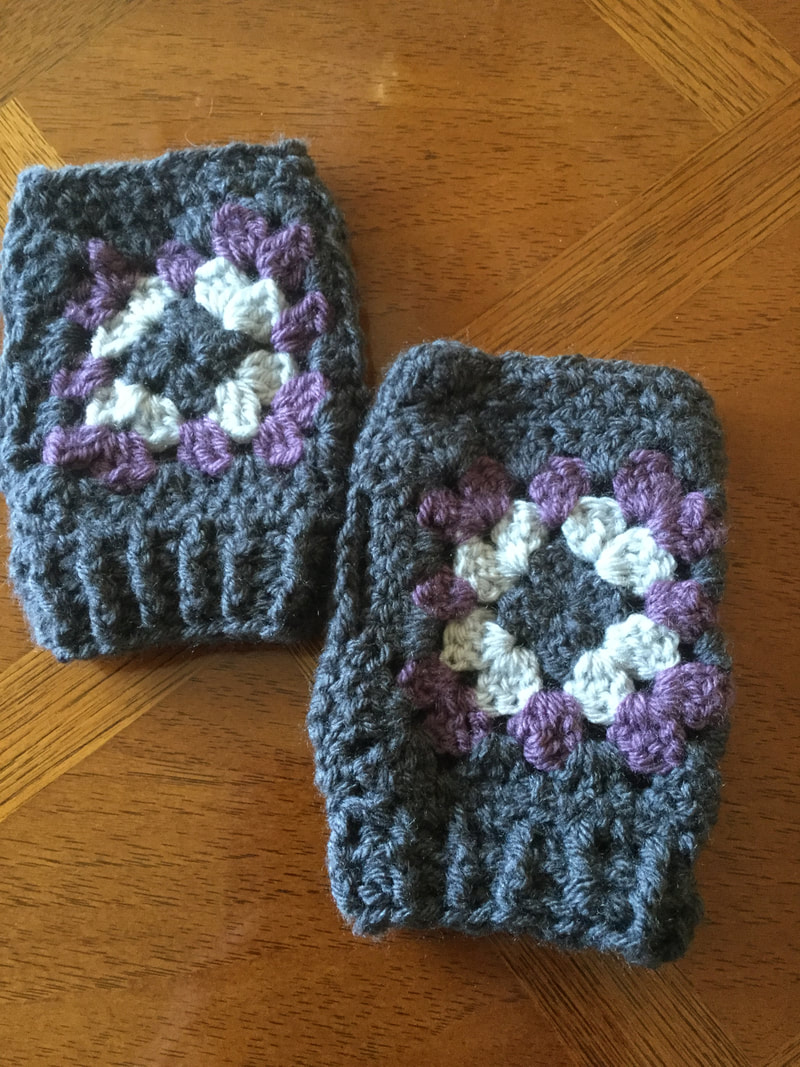
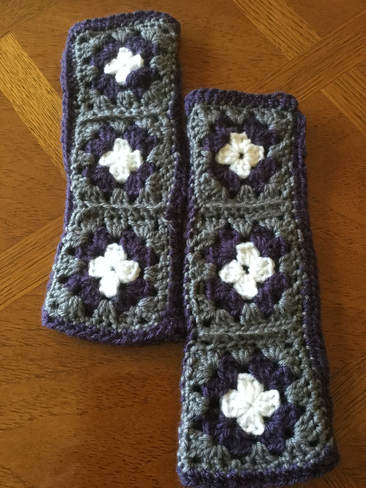
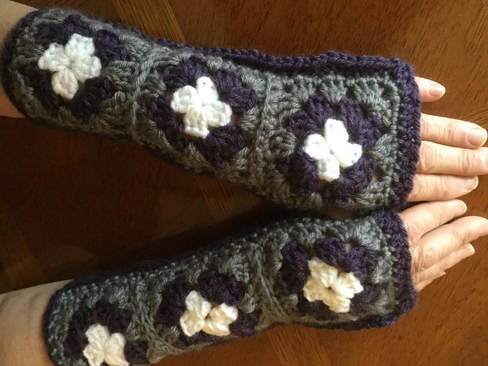
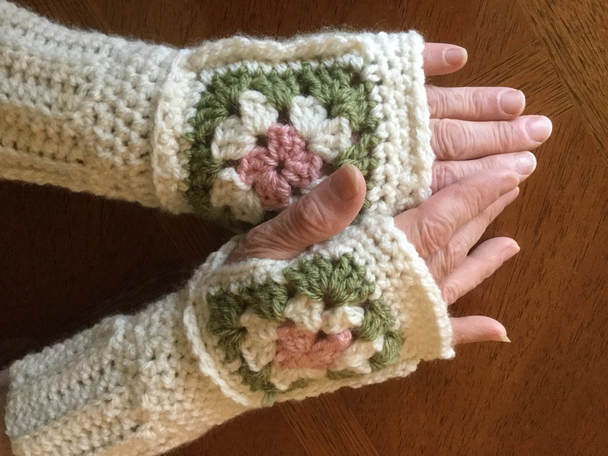
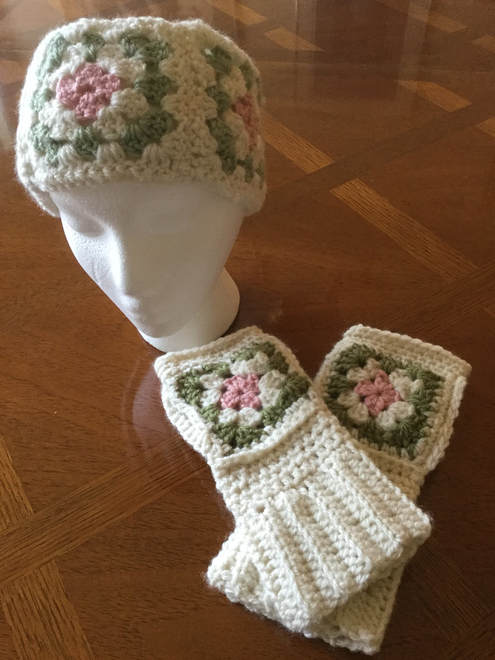
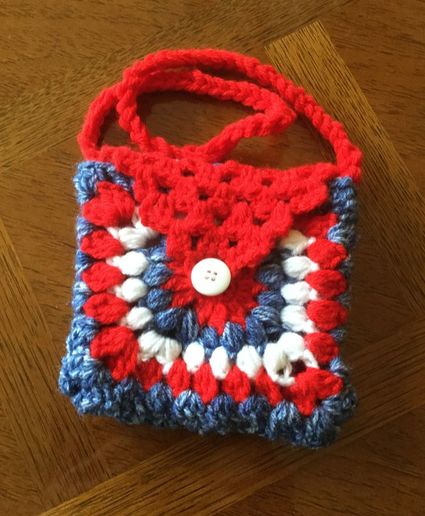
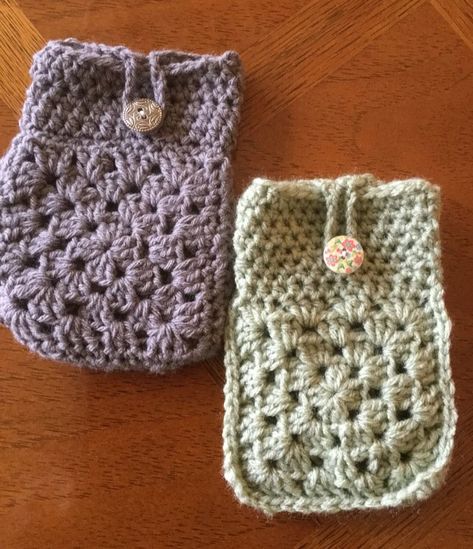
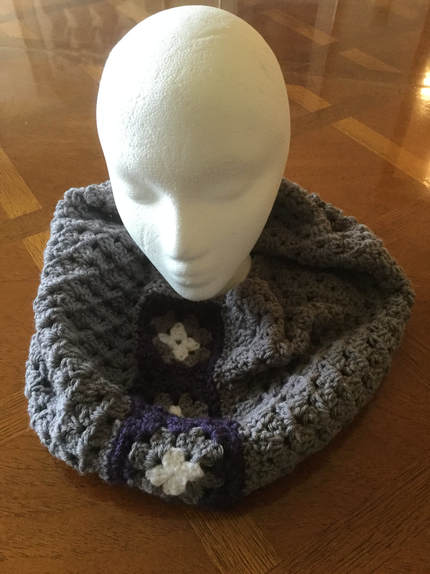
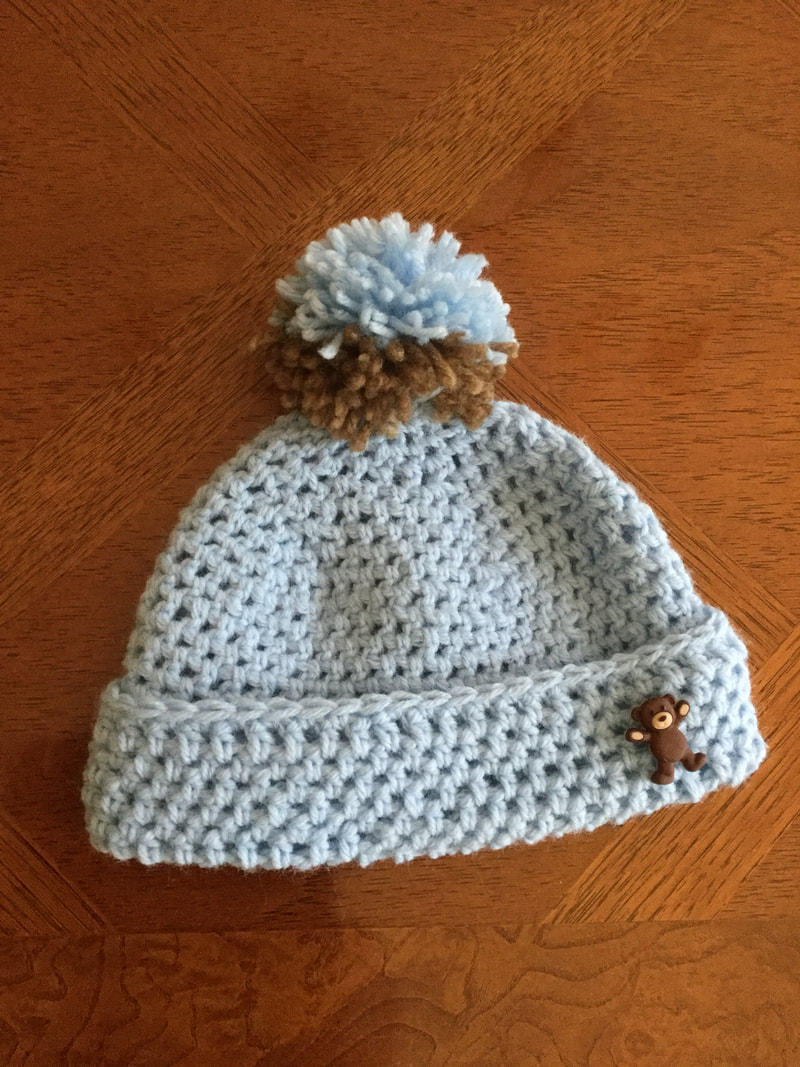
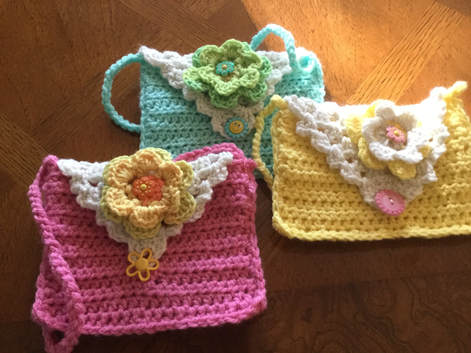
From my search I discovered a variety of purses, bikini tops, shorts, slippers, gloves.vests, tunics, hats, coats.sweaters, hoodies, scoodies, retro shrugs, pockets, mug cozies, haltertops, headbands, ponchos,and cardigans. The bikini, halter tops, and shorts were definitely out. Large projects like the coats, cardigans, and shrugs involved too many Granny squares. Since I enjoy and sell quite a few gloves, hats, purses, headbands they seemed like a good place to start. My first square was to use 2 single squares to make a pair of gloves. Directions can be found in "Last-Minute Granny Square Gifts: 6 Charming Porjects Made from 1 or 2 Granny Squares" from sarakayhartmann.wordpress.com. The pattern calls for 8 rounds, but I prefer a slimmer glove with 7 rounds. The square is folded in half and seamed, leaving a space for the thumb. At the bottom of the glove, single or half double crochet for several rounds to make a cuff. I made my glove from Red Heart Super Saver in Denim Ombre. With the color variation, I did not have to cut, join, and weave in ends. A shorter pair can be found at "Granny Square Crochet Wrist Warmers" from sewhappycreativeuk.wordpress.com. My piece resembles the gloves in the pattern picture. However, I decided that I did not want to go to the trouble of making 4 squares with different colored rounds. I crocheted two multicolored squares for the packs of the hands and 2 solid squares for the palms. Construction became confusing when I wanted to have the seam on the inside. I kept on getting the thumbs for both gloves on the same side. When I left the seam on the outside I did not have this problem. Next time I will crochet the 4 multicolored pieces so that I do not have this problem. This project is great for using up all of those small pieces in your scrap pile. The arm warmers pictured below are based on the pattern in "Starburst Granny Square Arm Warmers" from whistleandivy.com. The design in my pair is the more traditional granny pattern. Actually the row of squares started out as an accent piece for a cowl I will show later on this article. However, I ran out of the rich purple Vanna's Choice and could not find any of the same color. Therefore I frogged the purple and repurposed the granny squares. The grey arm warmers make an interesting winter-fall accessory. These gloves are are on the narrow side, to my daughter's delight. If they do not go at my next fairs, I think that they will have a new home. The winter white with rose and green were crocheted on a whim. I started with the four matching granny squares and then worked on how to attach them and create a cuff. I chose an outside seam for interest. At each step along the way I fitted the pieces on my hand and made changes as necessary. The cuff was crocheted with alternating Front and Back Post Double Crochet. Once complete, I designed the headband Three squares made the front of the headband. Then I attached the off white to one side and crocheted with Half Double Crochet to make sufficient rows to encircle my head. Finally I joined this back piece to the connected squares to finish the headband. createI have been working on a variety of young girls purses that are popular with the preschool and elementary school crowd. The granny square provided the perfect vehicle for a new design. While my other purses had a solid body, contrasting flap, and a flower decoration, the decoration of these purses was the granny square. I tried out the flower motif that used cluster and puff stitches for the first few rounds before transitioning to the traditional squared off clusters to make clean cut edges. I like these flowers and will continue to experiment as I pieces for spring and summer fairs. The phone cover pouches made effective use of the solid granny square. I crocheted two squares with 4 rounds and then single crocheted around each piece. Next, I held both squares together and single crocheted through both layers to make an outside seam. When I reached the top of the second side I turned the work and began to single crochet around the opening. The number of rows depends on the size of your phone. A 20 stitch chain was attached to the center of one side to form a loop. A button was affixed to the other side so that the pouch could be closed. There are many images of scarves and cowls made entirely of granny squares. I found a way to include the design in a solid piece. I attached 3 squares to form a column Then starting on one long ledge, I crocheted the 3 dc clusters that made up the granny square in rows until the piece measured about 40 inches. I crocheted the last row to the other side of the column and blocked the cowl. I really like the way the column of granny squares breaks up the solid gray of the cowl. I enjoyed working with the granny square, but these projects are only the beginning. There are so many floral and animal motifs that make granny squares interesting and colorful. I made a hat for this article, but I want to try it on a real person before I show it to the world. I saw a very exciting scoodie (scarf and hood) that I would like to try alternative to a hat. Also, I want to design a sweater for my granddaughter. I would like to place a larger granny square on the back. I haven't figure out yet whether I would use granny pockets or other sections on the front or arms.
Please share your experiences, projects , and ideas for using Granny Squares. Do you have any hints or strategies for streamlining the process?
2 Comments
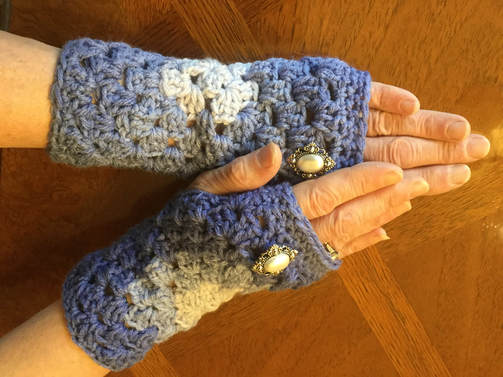
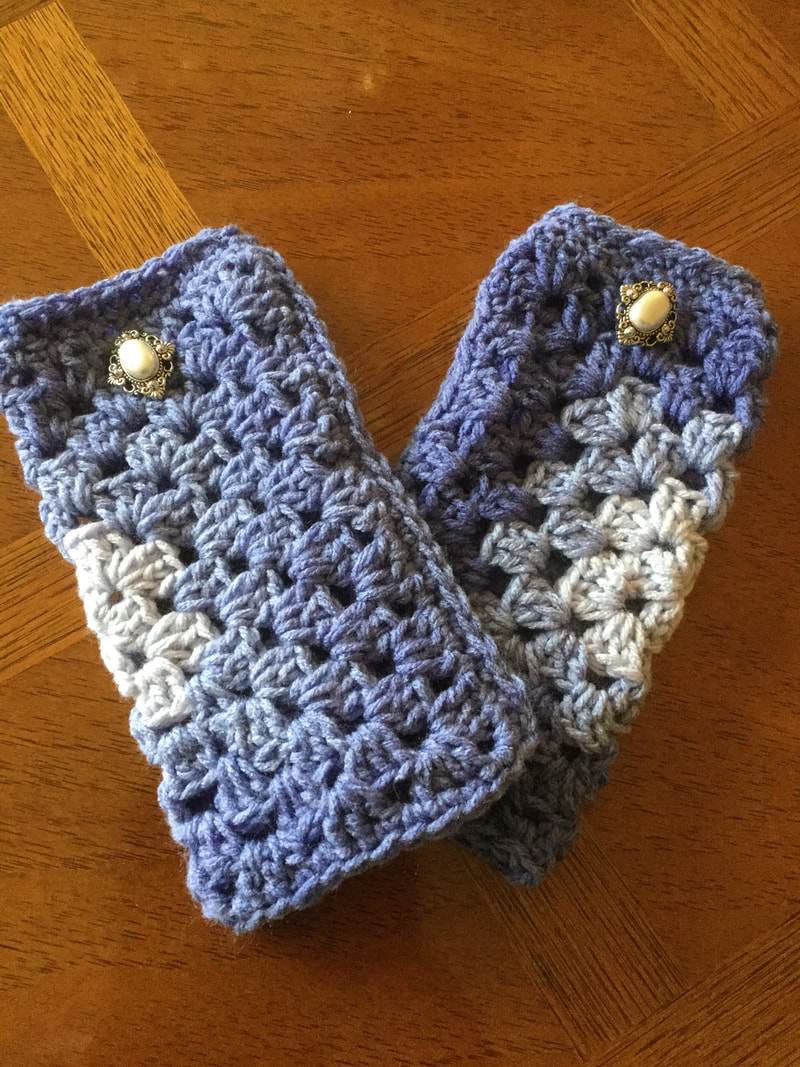
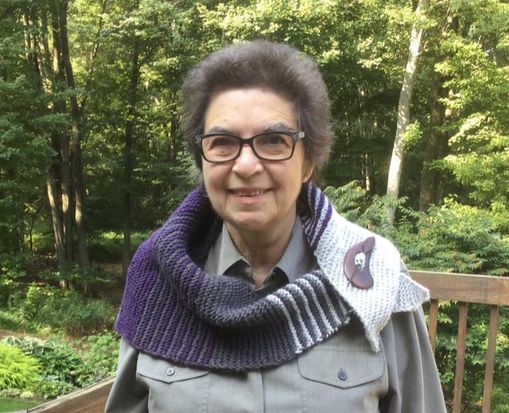
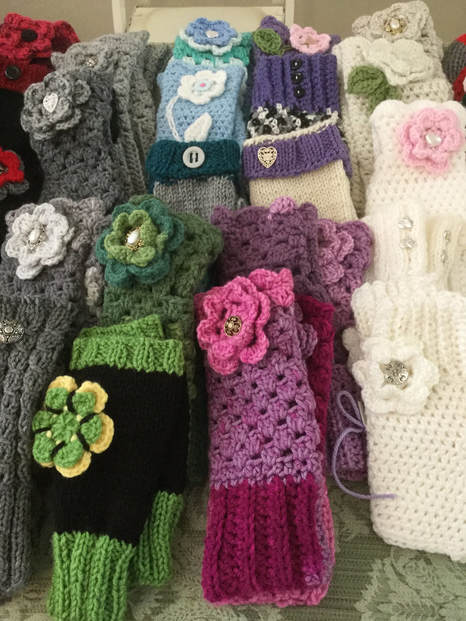
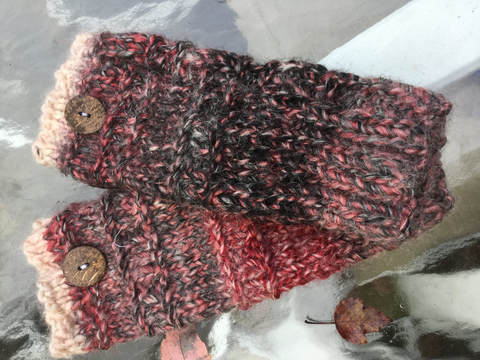
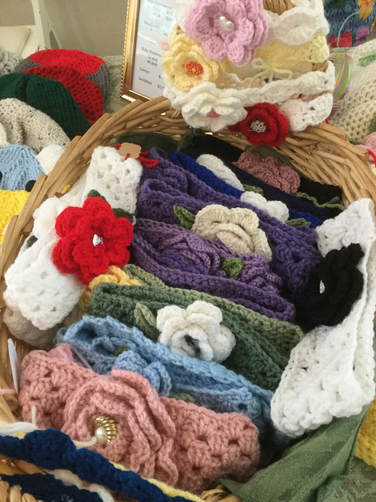
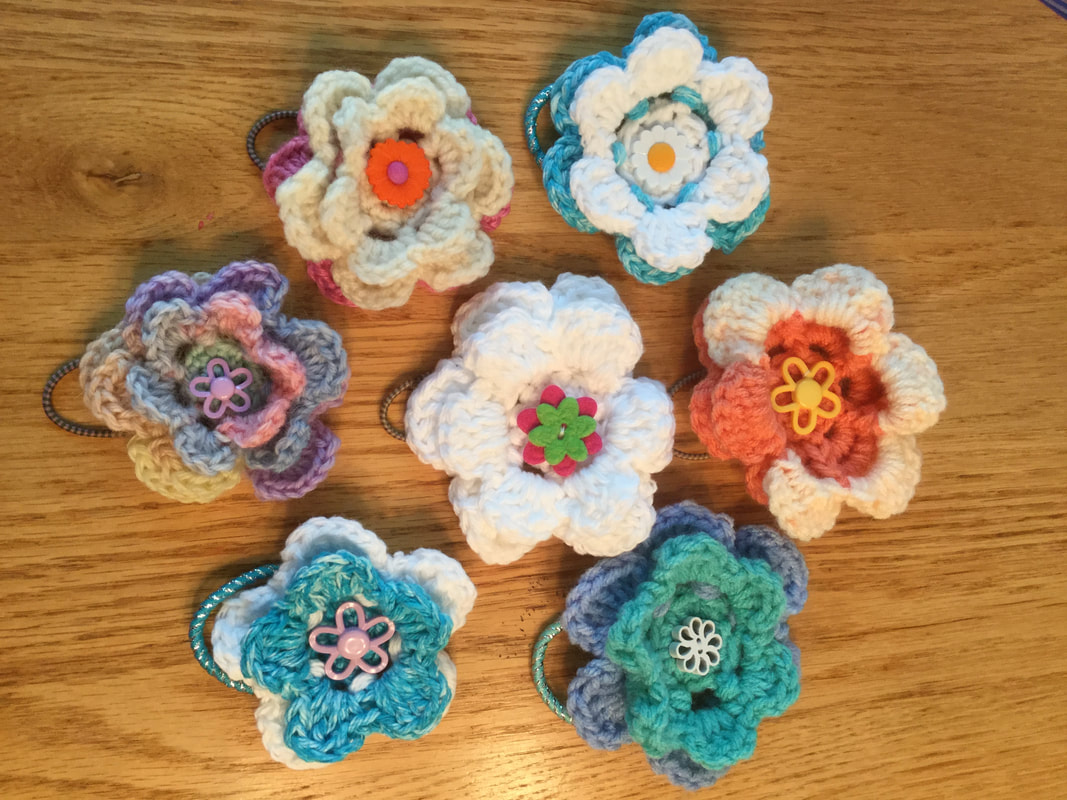
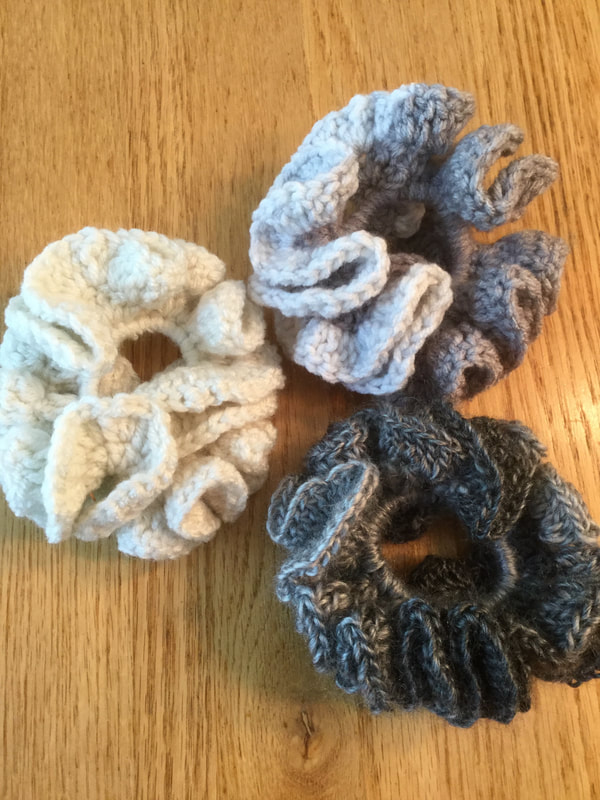
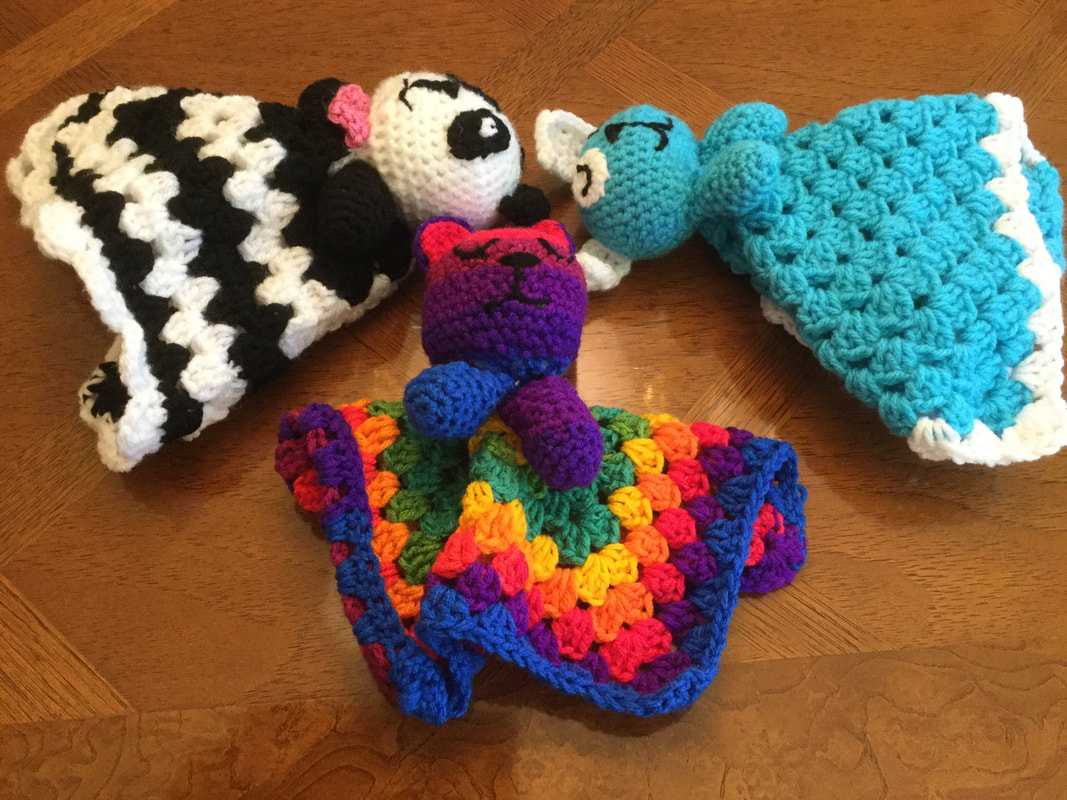
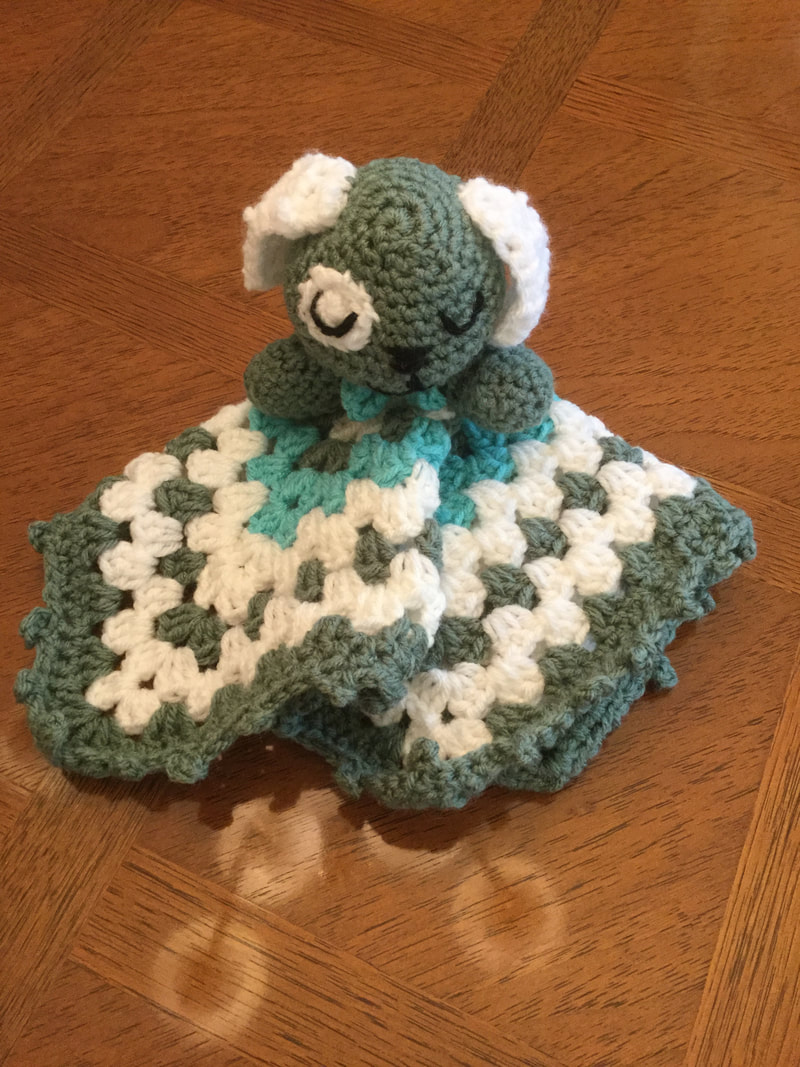
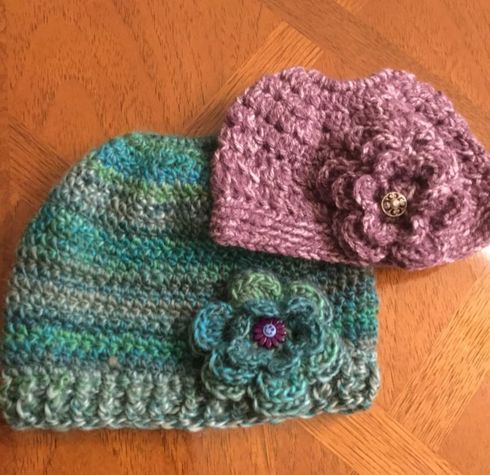
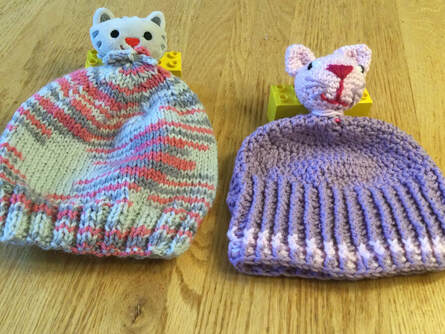
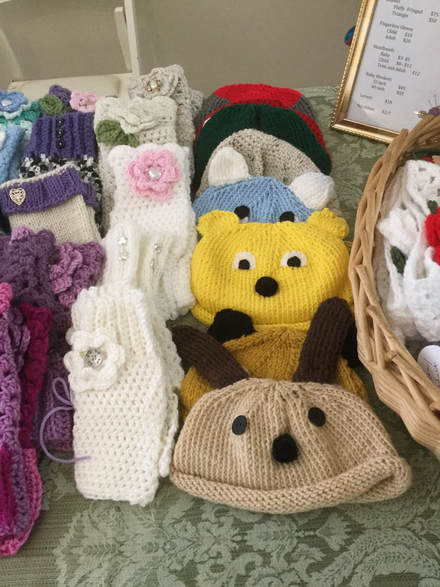 How does one prepare for a holdiay craft fair? With my kitchen remodel almost over, I hit my first holiday craft fair of the 2017 season at St. James School, Stratford, Ct. on Saturday. As the installers, electricians and finishers were completing their final touches on Friday evening, I secreted myself in the the spare bedroom that housed my yarn and finished pieces. Most of the goods for the fair would fit into two large rolling suitcases and one large bin. I needed to pack strategically and make educated guesses as to what would sell at this particular venue. The big questions were: What items should I pack? Which items should I leave out? How much of each style and size should I include? Which small items would entice young children and their parents? How should I display my pieces? This was my second season at the St. James Fair, and so with last year's experience as a reference, I decided to leave out the baby afghans and larger luxurious shawls. Last year, I noticed that there were many vendors who sold the blankets at half of my asking price. Customers would touch the luxurious shawls and say how nice before moving on. Needless to say, the precious surface area of the table could be put to a more profitable use. Instead, I decided to take some newer shawlette designs that I could mark for a more affordable price for my customer base. As it turned out, a couple of these pieces were snapped up. One particular sale really made me smile. An attractive, slender young women in a camel hair coat had tried on a couple of pieces when she came to my new assymetrical, multiculored, striped shawl complete with shawl pin. I had modeled this piece for an earlier article for this blog. However when she saw her reflection in the mirror I brought, she beamed. I priced these pieces slightly less than I wanted, but I needed to move merchandise as my yarn room storage bins were bulging with finished pieces. I was thrilled to see my knitted work look the way it was supposed to. She paid me in cash and continued to wear her new accessory as she walked though the fair. The picture below is one of me, not the lovely young lady who bought my shawlette. .My fingerless gloves were a strong seller last year, and so I packed a variety of colors and styles of crocheted and knitted pieces. My mismatched coordinated gloves that are crocheted with self striping yarn are an original design. I noticed that I was running low of this particular style, and packed most of my inventory. These gloves make me smile as I love the way the colors play themselves out in executing the gloves. The flower with the pearl and silver embellished button are the perfect accent. My decision was right again. One mother even wanted a pair of gloves for herself with a matching fingerless set for her daughter. I threw in a flower hair clip and that cinched the deal. These child gloves have not been a big seller. I might follow this merchandising idea of mommy and me gloves in the future. From one skein of Sweet Roll, I have enough left over to make a pair of child's gloves. There is always one item that should have been cloned and recloned. As an experiment for my rustic knitted blog, I used one skein of Appalacha self-striping yarn with an original pattern. The fiber was 80% acrylic and 20% alpaca. Also many different colored strands were interwoven to create a unique and interesting and soft set of gloves. I had to do some cutting and adding of the different bands to create a more integrated use of the colors. The customer who eventually purchased the pair was interested because her dogs' hair would not show on the glove. Other customers who wanted to think about the purchase returned to find the gloves were gone. Unfortunately, I could not convert their interest to another pair. There are 10 days before my next fair. With Thanksgiving on Thursday, I do not know if I will have time to purchase the yarn and make the gloves in time. Crocheted and knitted hats have always been craft fair favorites. This year I was particularly excited about my Pom Pom designs. I had invested in a Pom Pom maker to make colorful and playful beanies. Also this was my first season with faux fur Pom Poms. At this fair, there were several vendors who included hats in their displays. I thought I had a good spot for my table, but customers had stopped at tables before mine on both sides to purchase their hats. Also, these vendors had furnishings that could display their hats individually and at a height above the table. I guess it does not matter how lovely your workmanship if you can not catch the customers' eye. I have to decide if I want to invest in these set ups if I only do a few fairs a year. I will keep on the lookout to see how I can get height for my display at a reasonable cost. Since this fair was held at a school, I wanted to have several items that were just a few dollars each that would appeal to the elementary age child. My girls' crocheted purchases were a big hit on the internet, but did did not garner much attention at the fair. I have completed a variety of crocheted hair accessories that I had expected to be popular with this age group. First, there were my flower accented ear warmers that I had featured for several years. There were also scrunchies, hair ties, flowers on elastic bands, chair clips and bobby pins with cluster flowers. I missed the boat on this one. I had to smile when a little girl held her dollar tight in one hand as she move through the box of clips with the other. I was selling the clips at 1 for $2 and 2 for $3, but I told this sweet miss that there was a special for young girls who were spending their own money. Her friend got the same deal, and they, too, walked away, proud of their purchases. Other vendors were doing well with their stuffed animals, and so I thought my lovies would hit the spot. A lovey consists of an animal head and arms attached to a 12" square blanket. Mine were colorful and beautifully decorated, but did not attract as much attention as some larger, but plainer pieces from a neighbors booth. My question is do I expand my line to include some of these colorful stuffies? I just tried a crocheted sleepy head doll which is cute, but takes up more time than I am willing to give toward it. Despite a slow start, by the end of the fair, I had taken in several hundred dollars, about my average for a holiday fair. The fair organizers had done a wonderful job in advertising and organizing the space. I was pleased to have an upstairs table in a well lighted room. At only $50 for an 8 foot table, I did not have to sell as much to pay for my table. The school provided a complementary breakfast for vendors and had student runners who took and delivered orders for lunch. Vendors were made to feel welcomed and valued. The customers who bought from me appeared to be delighted with their purchases.
What are my takeaway thoughts and insights?
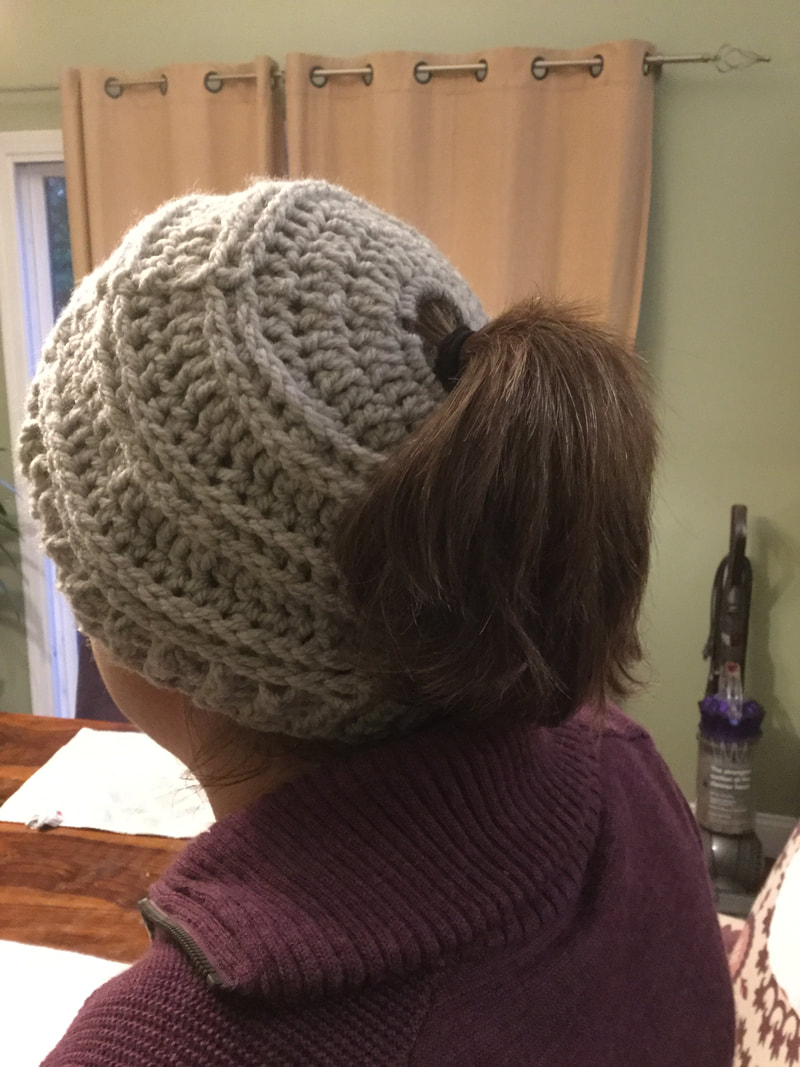
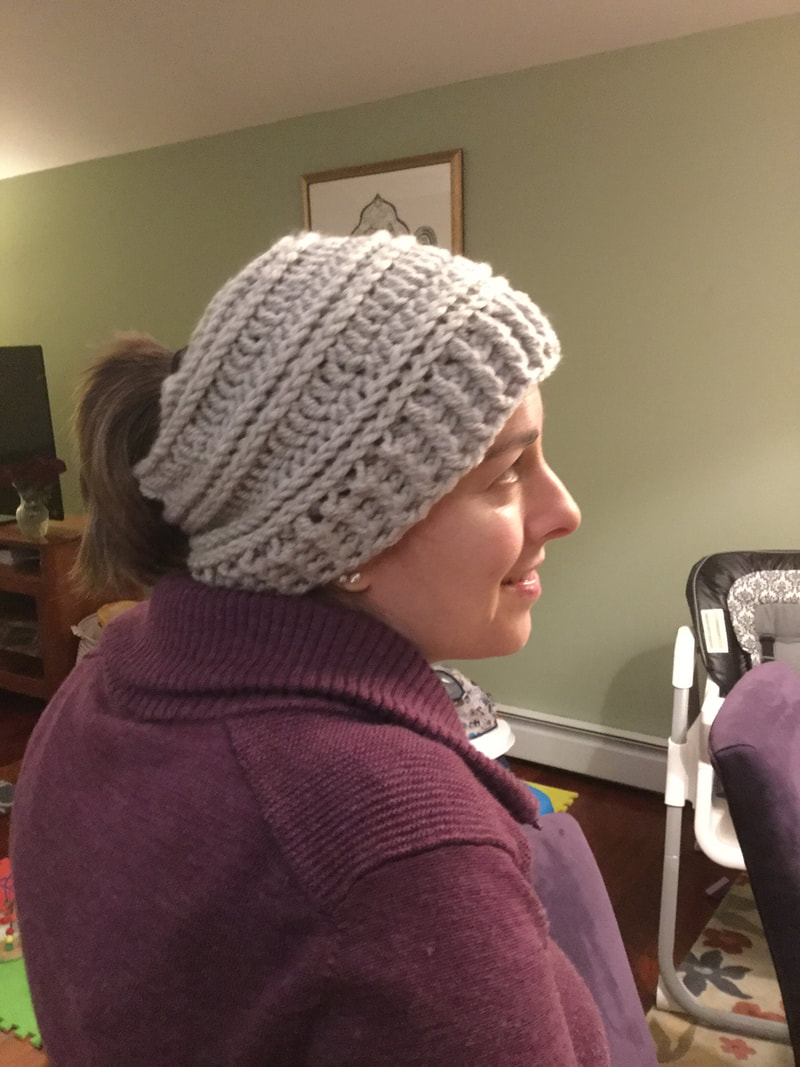
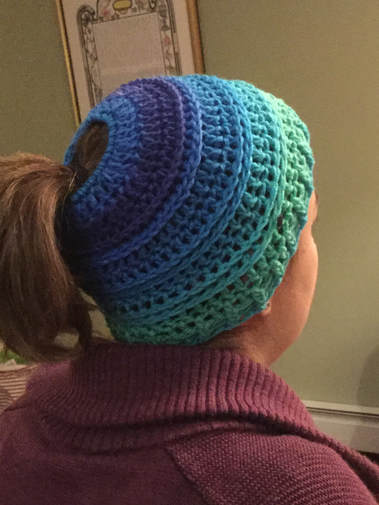
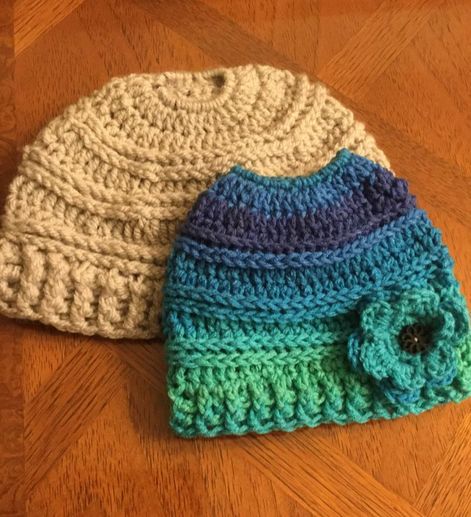
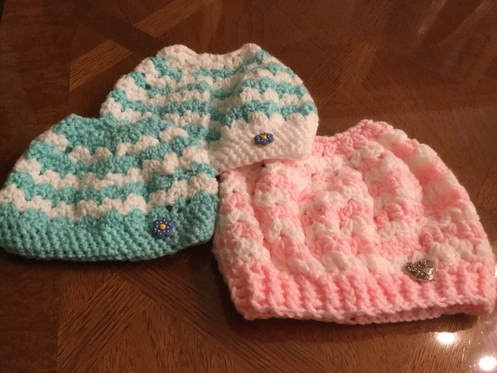
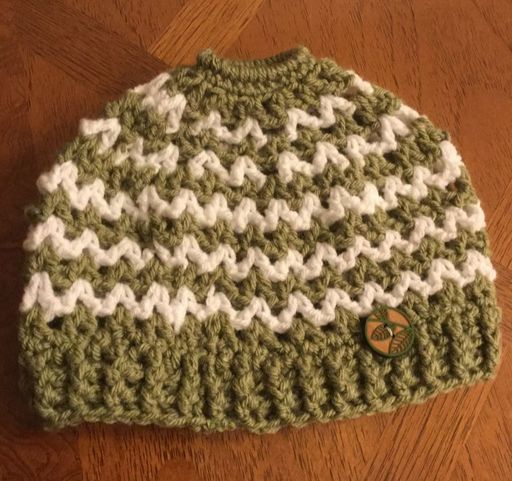
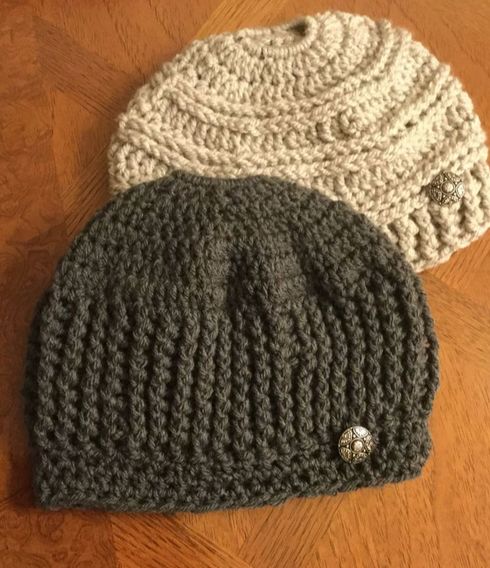
My next fairs are on December 1 and December 3. Wish me luck. 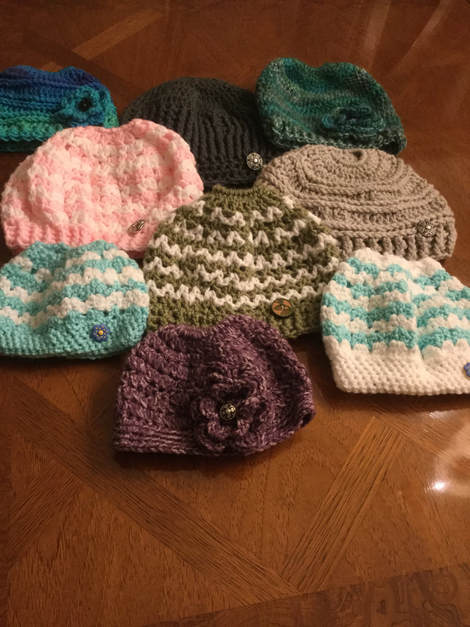 The messy bun hat was devised to solve a problem. How could a women, girl, and even some guys with long hair keep their heads warm in winter without squashing their hair under a tight beanie? The messy bun beanie or ponytail hat resembles other crocheted hats. However, it comes with a hole at the top so that the wearer can pull the bun or pony tail outside the hat for greater comfort. With holiday fairs in the next few weeks, I decided to explore and search out interesting patterns that were best suited for the messy bun design. In pursuing this project I not only learned to follow messy bun patterns, I converted several designs from complete hats to messy bun hats. I also discovered how to use the crocheted ribbing as a design feature in the body of the hat. The v stitch and the cluster V stitch were also new stitch patterns for me. The messy bun hat was quite popular last year, and I am hoping that potential customers will appreciate my efforts. I think the style will have staying power. Time will tell. The Messy Bun Hat Free Crochet Pattern Size Adult from Mango Tree Crafts is crocheted with worsted weight yarn. An H hook is used for the hat, and a G hook is used for the brim and accent flower. Start by crocheting a Single Crochet stitches around a covered elastic band (H hook). Increasing bands of cluster stitches make up the body of the hat . Once the crown is at the desired diameter, use the same number of clusters to crochet the sides. When the hat is at the desired length, crochet the border with a G hook. A flower accent decorates the hat. Type the following link into your search bar: http://www.mangotreecrafts.net/2016/12/messy-bun-hat-free-crochet-pattern-size_29.html A similar hat was crocheted with Unforgettable Yarn. This time I started with 24 single crochet stitches over the elastic band. I joined with a slip stitch and chained 1. The second row had the same number, but used half double crochet stitches. I joined with a slip stitch and chained 2. I followed the procedure outlined below to finish the hat. r. 3 chain 2, hdc in same stitch , *, 1 hdc in next 2 stitches, 2hdc in next stitch*, continue around * and join with ss. 32 r. 4 Chain 2, hdc in same stitch, * 1 hdc in next 3 stitches, 2 hdc in next stitch* continue around. Ss to join 40 r 5. Chain 2, hdc in same stitch, 1 stitch in next 4 stitches, 2 hdc in next stitch. Continue around and join Continue increase rows until the crown diameter has the required measurement for size and age. To make the required height,ch 2, hdc around the circumference. Ss to join. Continue same rows until required chart height is reached, ch 3. To make ribbed border, dc around, ss to join Ch 3 and make a Front Post Double Crochet stitch (FPDC)alternated with Back Post Double Crochet (BPDC) for 3 rows or until desired size of brim is reached. I also attached a flower accent and button to decorate this hat. The Katniss Hat named after the heroine from Hunger Games offers design and structure. One of my pieces was executed in an oatmeal worsted weight yarn (4) with a J hook for the body and an H hook for the brim. The other was done with a grey bulky weight (5) with a K hook for the hat and a I hook for the brim.The design by Haken and Zoo was published by Yarn Ballin'. This hat was also started from the top down with a covered elastic band. I enjoyed playing with the Front Post Double Crochet and Crocheting off the third back loop to make the interesting texture. The band was created by alternating Front Post Double Crochet and Back Post Double Crochet Stitches. See: http://yarnballin.com/katniss-messy-bun-hat-pattern/ for the Katniss Messy Bun hat Pattern. Sometimes mothers and daughters can use the same styles while coordinating by not replicating the same colors in a hat. The Mommy and Me Messy Bun hats by Sarah at Repeat Craft Me offers this type of design.The free pattern comes in child and adult sizes. This time the crocheter starts with a crocheted chain that is then covered with single crocheted.The design with an H hook is achieved by crocheting V cluster stitches around the hat. Increases are made by making extra V clusters in between existing spaces. When the desired height is reached, use alternating FPDC and BPDC stitches to crochet the ribbed border. Like the photo in the pattern I used tourqoise and white. The teen hat was predominantly tourquoise, while the youth hat was predominantly white. I made a looser adult hat with a J hook with pink and white. http://www.repeatcrafterme.com/2016/12/crochet-mommy-and-me-messy-bun-hats.html I converted a v stitch messy bun beanie from a bottom up with a crocheted band to a top down to work with a single v stitch pattern. As with the other hats I used the alternating stitches of FPDC and BPDC to form a band. I do not have a specific pattern as of this time as I worked out the hat as I went along. I know I will get requests for a pattern for this two tone piece, and so I will have to put it on my "2 it" list. My last messy bun hat was also converted from another pattern. The Crochet Ribbed Beanie Pattern by Renewed Claimed Path was quite intriguing. As I searched among my messy bun hat patterns on my Pinterest Board Crocheted and Knitted Hats for Adults, I could not resist the different way the rows of stitches were arranged. The pattern called for a regular beanie, but i was able to convert it by covering an elastic band with single crochet and proceeding to Row 3 of the directions. The pattern called for an I hook, but I used a J hook. At this point I had a circle of 30 Double Crochet stitches. I continued with increasing rows until I had approximately 70 stitches.The next row called for alternating FPDC with BPDC to create a ribbed effect. Although the pattern called for 7 rows, I went onto crochet 2 more since I like a deeper hat. The band was crocheted with HDC stitches with an H hook. Instead of a flower, I used an interesting button for an accent. The messy bun hats are interesting and trendy. I am confident that there will be some interest at my fairs this season. My nieces and grand niece have long hair, I would love to give them this new accessory as a holiday gift. One benefit of making all of these new and exciting accessories is that I always have a gift on hand when the occasion calls for it. Are there any messy bun hats in your life? Is this a classic style or a fleeting fad? Please share your opinions and interpretations of these patterns and styles.
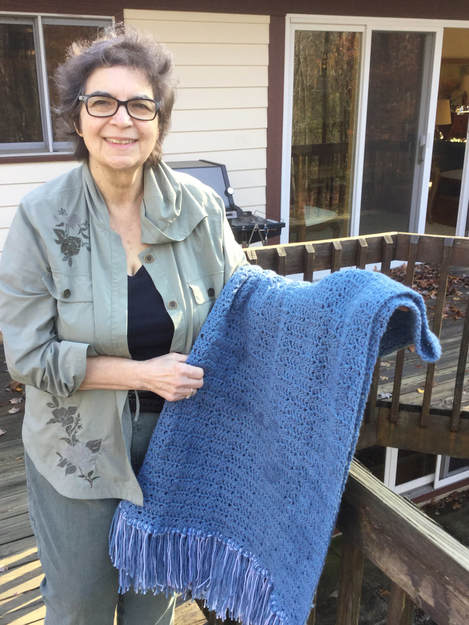
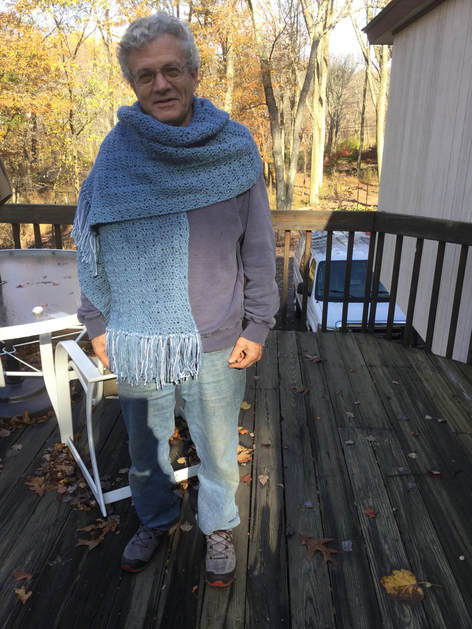
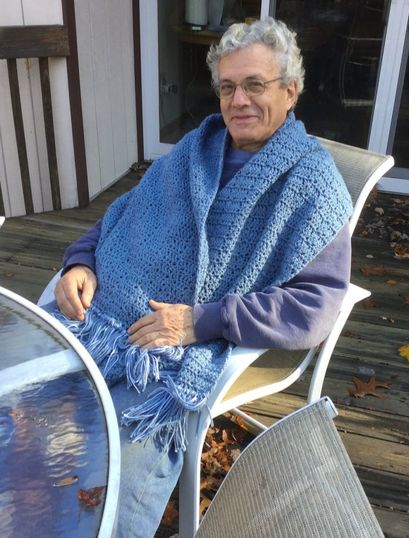 There are many advantages as well as challenges to making a men's shawl or blanket scarf. They are a stylish vehicle as as well as a fashion statement for keeping the cold out on a frosty winter day. They can be wrapped around the shoulders while watching tv in the basement mancave. Men's fashion magazines showcase interesting patterns pieces and how to wear this up and coming fashion accessory. For those those who are temporarily under the weather or suffering from a more serious condition they are like a warm hug without the feeling of being buried under a blanket. My incentive for crocheting this men's shawl or Blanket Scarf came from my Threads of Love Group that gifts knitted and crocheted shawls for hospital patients and for the chronically or terminally ill. Ladies' shawls and child blankets were easy. There are so many patterns, and I have been making them for years. However, I wanted I wanted a shawl that would look manly and fashionable while conveying the feeling of warmth style, and love. Men's shawls are much larger than the counterparts for women. If I invested the yarn resources and time in producing a piece I wanted a pattern that was interesting, but not too complex. I also wanted a piece that a man would wear. My husband, Bert, promised me he would model the Blanket Scarf for my pictures, and so the piece would have to pass his test. My research landed me in More Crocheted Prayer Shawls: 10 Patterns to Make and Share by Janet Severi Bristow and Victoria A. Cole-Galo. The shawl selected for this post was "Easy As 1,2,3 Shawl" by Pat Ross. The pattern of 3 double crochets alternating with a cluster stitch resulted in a series of subtle stripes. The pattern is gender neutral. I had been gifted 2 skeins of Studio Classic yarns by Nicole in Cottage Blue from A. C. Moore (worsted weight #4) for the project, but I needed to hunt down one more to make a piece that was 20 inches wide by 62 inches long. As I experimented with the yarn and pattern, I found that using a J hook (6.00 mm) gave me a better stitch definition and a softer feel. I extended the length to 66 inches so that it would look just right on my husband who is 5" 9" tall. Although I do not usually see men's shawls with a fringe, the photo in the pattern book showed a fringe that was the same as the color of the shawl as well as some strands of a somewhat lighter blue. What a wonderful idea! This shawl has taken me several months to complete as I have been engaged in making items for this blog and for the fall fair season. Now in the midst of a kitchen renovation, I need to be home and out of the way of the series of workmen who are tearing my kitchen apart before they put it together again. My Blanket Scarf is been gently hand washed and blocked. The photographs are ready for publication in this blog. I look forward to meeting with my group again and sharing my masterpiece before we wrap it for our group of donated pieces. For a future project I found a reversible striped shawl pattern, for a 16 inch x 86 inch piece. ( I would adjust the length to about 66-68 inches and make adjustments in the initial chain. It is published by spiffyniftyriffic.wordpress,com and is distributed by AllFreeCrochet.Com with the following link: http://www.allcrochet.com/Prayer-Shawls/Mens-Reversible-Prayer-Shawl.
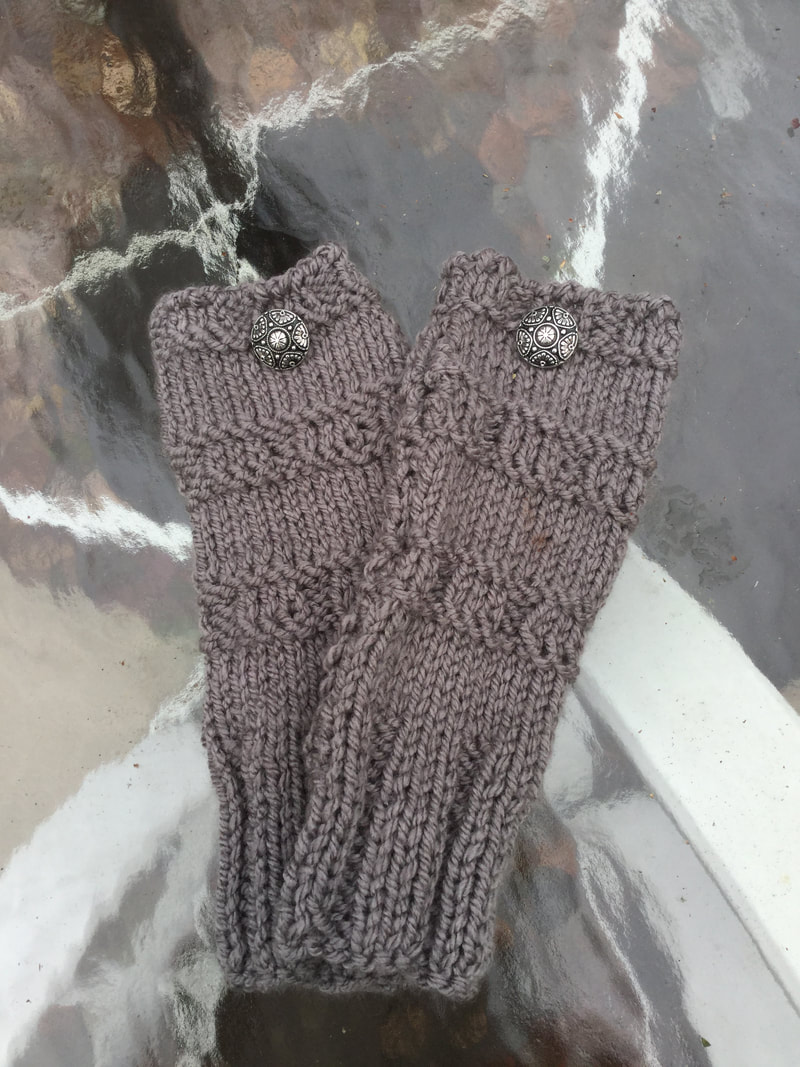
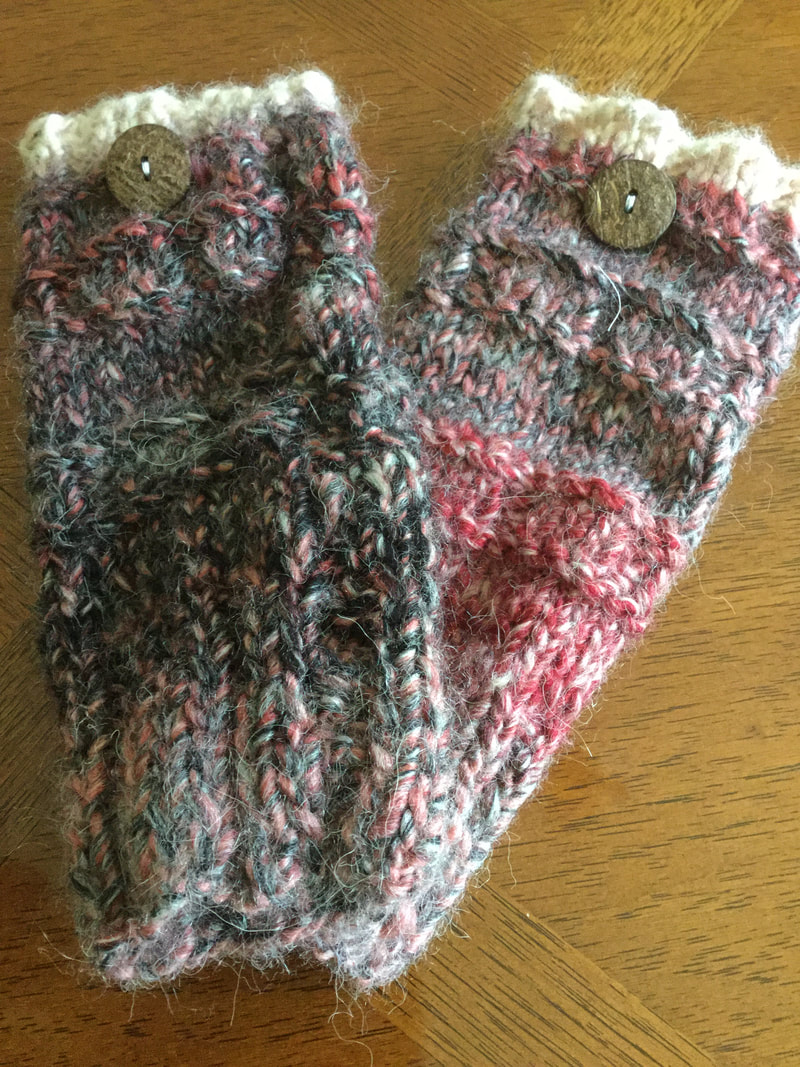
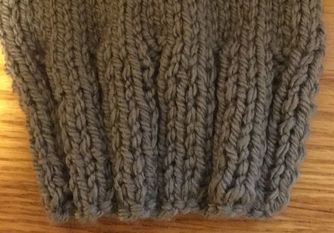
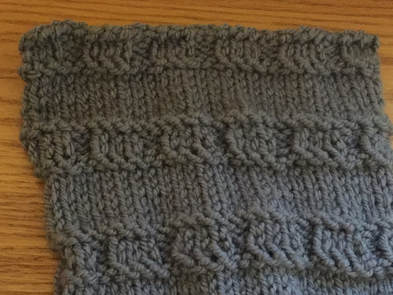
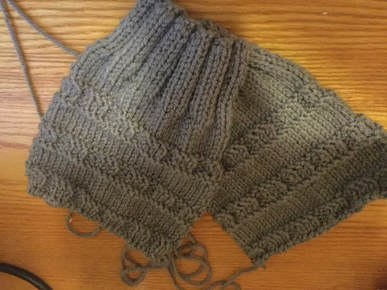
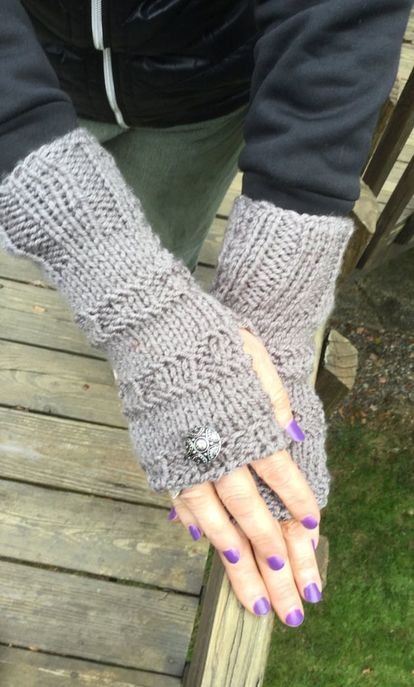
These Men's Shawls or Blanket Scarves make an interesting gift for the gentleman who is willing to make a fashion statement, keep war on a chilly night, or just in need of warmth and caring. Any takers?  Writing patterns is a learning process. Designing original pieces and translating the process to written form is part of my journey as a fiber artist for lilcreates. Frequently I start with an idea or image or drawing and work out the details as I go along. There is usually quite a bit of frogging until I get the piece just right. If I make a hat or scarf there is only one piece to work out. However, if I make a pair of gloves, the challenge is to make both gloves the same. The purpose of writing down the pattern is to enable me as a knitter or crocheter to replicate the work consistently. Since I started lilcreates in February, I have presented several free designs. Eventually I hope to take my knitting and crocheting designs to the next level so that my readers and potential customers can follow a set of directions in a perfect pdf with photos and diagrams. However, while I am experimenting and exploring, I decided to make them available for free. Hopefully, I will get useful feedback as I learn to produce a pattern that I would pay for if I chose to purchase a design. In my last knitting post I offered a pattern with a cabled panel at the topic of my rustic fingerless glove. My goal for the next couple of weeks is to create a pdf and register that pattern with Ravelry. In the same article I also introduced a glove knitted in bulky, self striping yarn from Appalachia by Premier Yarns. I did not have time to work on the pattern before my publishing date, but I thought it would be better to take more time to work out some of the kinks in the directions. The first glove was lovely, and I hope to repeat the project for sale, for gifts, or for my own personal wardrobe. As I wrote out the pattern, I wanted to show off the specific elements so that my readers could see what I was talking about. These gloves used a solid color in Chunky Dove by Big Twist Yarns. The fiber is soft and smooth and lends itself to revealing the stitch pattern and design. Another change I made in this project was to reduce the number of cast on stitches from 30 to 28 to make a slightly narrower glove. Bulky Fingerless Gloves (Make 2 flat pieces that will be stitched to form the gloves.) Dimensions: 9" long 7" circumference Materials: 1 skein of bulky yarn (#5) I used Chunky Dove by Premier Yarns 1 pair #10 knitting needles 1 pair #9 knitting needles optional: 1pair#8 knitting needles 1 tapestry needle 1 scissors Directions: Cuff: Cast on 28 stitches . Use #9 needle. Knit 20 rows in pattern. Row 1: Knit 3, Purl 2 to end of row, ending in Knit 3. Row 2: Purl 3, Knit 2 to end of row, ending in Purl 3. Hand: Change to # 10 needle Rows 1-7: Knit Stockinnette for 7 rows, ending with knit row. Row 8: With Purl side facing you, Knit 1 row. Row 9: Knit 3, Purl 2 to end of row, ending in Knit 3. Row 10: Purl 3, Knit 2 to end of row, ending in Purl 3. Row 11: Knit 3, Purl 2 to end of row, ending in Knit 3. Row 12: With Purl side facing, Knit 1 row. Row 13-19 Knit stockinette for 7 rows, ending with a knit row. Rows 20-31: Repeat Rows 8-19. Rows 32 - 38: Knit stockinette for 7 rows. Row 39: With purl side facing you , knit 1 row. Upper Cuff Change to # 9 needle. (for those who like a tighter upper cuff, use a # 8 knitting needle for these 3 rows and bind off.) Row 40: Knit 3, Purl 2 to end of row, ending in Knit 3. Row 41: Purl 3, Knit 2 to end of row, ending in Purl 3. Row 42: Knit 3, Purl 2 to end of row, ending in Knit 3. Bind off in pattern. Leave a tail long enough to sew down or crochet finishing seam. Construction:
Fold glove in half lengthwise so that the wrong side faces out. From the top of glove, use a whip stitch or mattress stitch for 3/4 inch to begin finishing seam. Make sure to match stitching rows of pattern. Stop at this point and whip stitch only one side of glove for thumb hole for 1 1/2 inches. Match pattern sides and resume stitching both sides to bottom. Weave in ends from the cast on yarn and stitching yarn. When the glove is folded in half for the stitching the piece appears to be very narrow. However, the pattern and yarn are very stretchy. The glove easily fits an average to slightly above average hand. Turn glove right side out. Place gloves on flat surface so that the thumb holes face one another. Select a coordinating button and sew in place on middle pattern rows. Moisten and block gloves. Lay on towel to dry. Please note that if you prefer the wider glove, add 2 stitches to the cast on.. Your lower and upper cuffs will then end with Purl 2 in Row 1 and Knit 2 in Row 2 of the pattern as you knit through the rows of the glove. Last night I thought about my large stash of worsted weight wool. How could I use this bulky (#5)weight yarn pattern to work with worsted (#4)? Knitters who prefer to work with worsted yarn can use the basic design by casting on 37 stitches. The the pattern design starts with k2, p3 and continues to end with k2. Row 2 starts with p2, k3 and continues to end with p2. I hope you enjoy this pattern. Please give me constructive feedback so that I can make any adjustments. Was there any part that you did not understand? When you followed the pattern did your work look like the photos? Do you have any suggestions for improvements in the design or in the instructions. |
Archives
November 2022
Categories
|

 RSS Feed