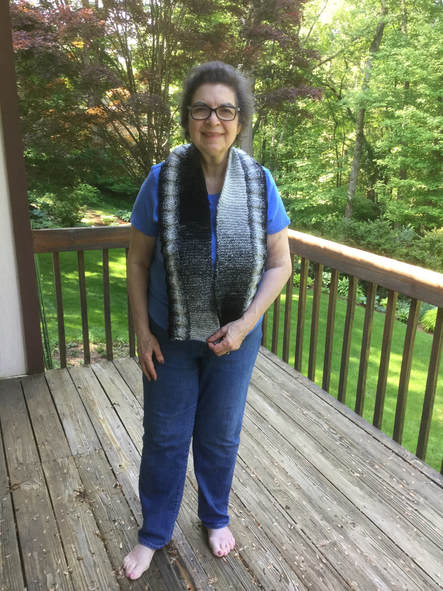
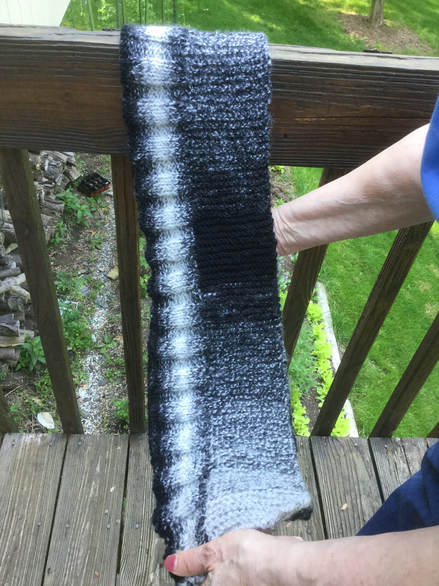
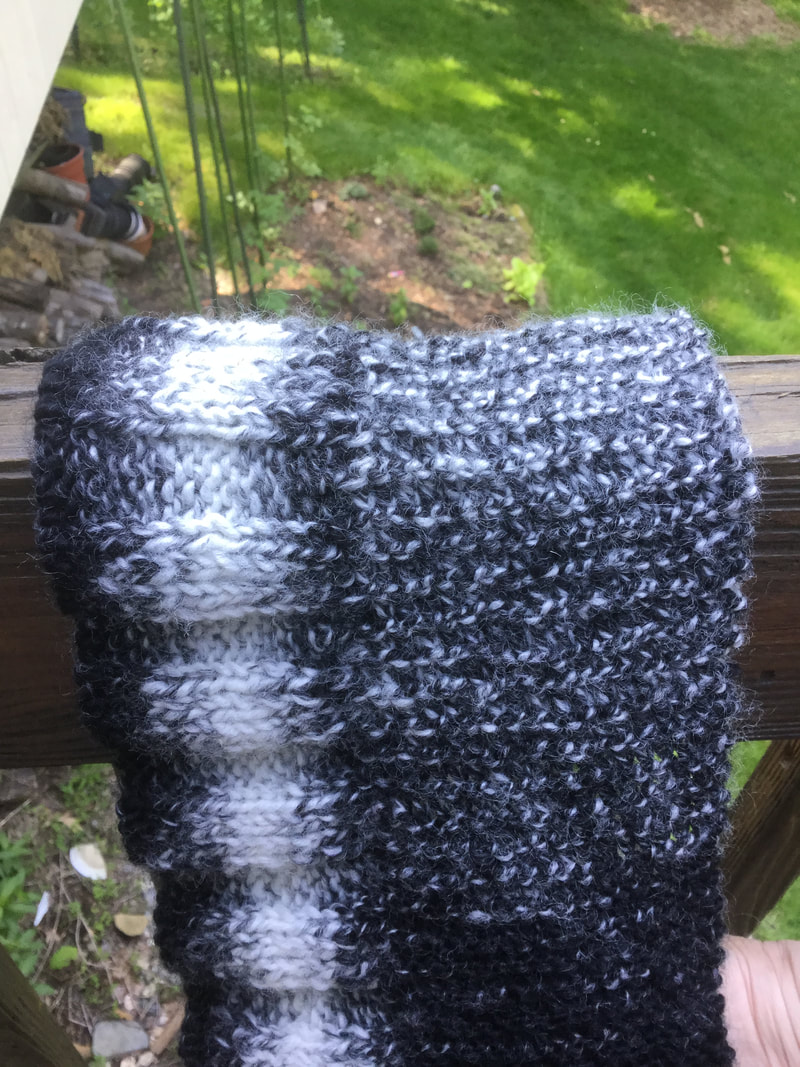
 Did you ever complete a piece of handiwork that makes you shout out loud "This one is for me." When I completed my last knitted scarf, I knew that it at the top of my fashion accessory list. My Two Direction Scarf was based on a pattern from Classic Elite Yarns, Accent 3. As I continue on my blogging journey, I am forever looking for new ideas and materials. When I leafed through the booklet, I found several designs that fit my fashion profile. There were several scarves and sweater patterns that called to me, but the Two Direction Scarf had the most appeal. The pattern calls for 4 balls (488 yards of #4 worsted) of Liberty Wool to create a scarf 8 inches wide by 72 inches long. However, at approximately $11.00 a ball, I decided to substitute yarn from my stash while I tried out the pattern. If the scarf was to my liking, I would invest in the more expensive version in other colors. For my experiment, I selected a skein of black to white Scarfie yarn by Lion Bran from my bins. I knew that my scarf would be shorter because there was less yardage (312 yards), but I felt that it was worth the gamble. This yarn is a Chunky #5 yarn. that is 80% acrylic and 20% wool. The label stated that there was enough yardage to make a complete scarf out of this soft, tonal yarn. I have knitted and crocheted other scarves from Scarfie, and have been pleased with the results. As with many yarn collectors, I have acquired yarn that looked interesting even when I have not had a particular pattern in mind when I bought the skein on sale. Black is one of the staple colors in my wardrobe. This scarf would look great with my winter coat or as an accent to a black sweater. To create my scarf I knitted a 4 inch panel of garter stitch with a #9 needle) that would run the length of the scarf. As I was using a different yarn than the one called for in the pattern, I had to estimate when I was halfway though the skein. I was only able to knit about 56 inches before I would start the ribbed section that would run perpendicular to the garter stitch portion. Since my scarf was shorter, I was able to fit all of the picked up stitches on my 14 inch needle. If I had made the 72 inch scarf, I would need a cable needle that I would use to knit back and forth. I liked the 4x4 rib. As i knitted the rib, I was once again playing "yarn chicken" to see how wide I could make the ribbing before I had to bind off. I probably could have made a scarf one or two inches longer since I had some yarn left when I finished my scarf. For more specific directions, you will need to buy the pattern as it is copyrighted by Classic Elite Yarns.
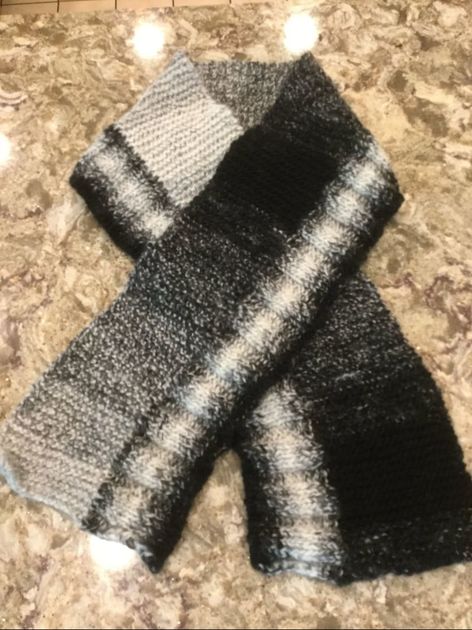 Now that my first piece is complete, I am tempted to have another go at the same pattern. I can buy the Liberty Wool called for in the pattern. While my scarf lies flat along my chest and torso, the longer scarf can be doubled around my neck as I fit the long ends through the loop. I am also considering making a wider garter stitch panel to partner with the ribbing. This would have a shawl effect that would be great for covering my shoulders on a cool spring evening. The pointed scarf with diagonal lines has possibilities. I guess we will have to wait and see, which piece I make.
3 Comments
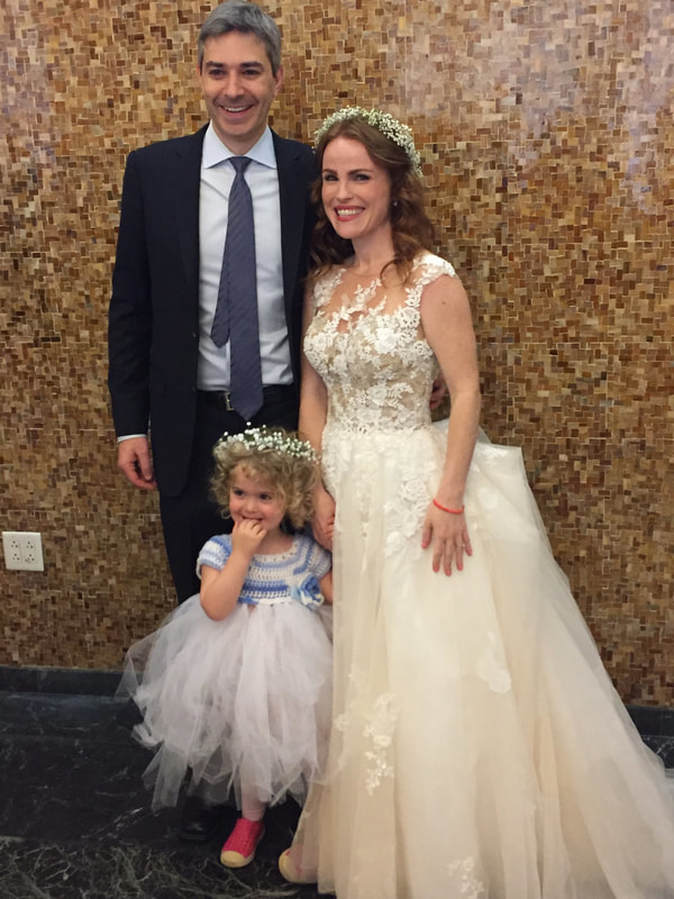 My son, Jeff, and his beautiful bride, KC, were wed on Friday, but I still can not get the smile off my face. Family and close friends witnessed their celebration and wishes of love and happiness filled the air. In two weeks we will get to extend the celebration from our home to include even more family and friends. Now his wonderful family will include his handsome, smart, warm, and generous boys as well as an adorable, blond sprite. At 2 1/2 she looks and talks as a preschooler and she knows and can explain what she wants. When I was scrolling through the various dresses for young girls, I was captivated by the tulle skirt dresses. I knew that I could make them, but I wanted to make sure that I used the colors that my new step-granddaughter would want. In a three-way conversation, she informed KC and me that she would like a blue dress. We took measurements for her chest and from the bodice to the skirt hem, and I was good to go. 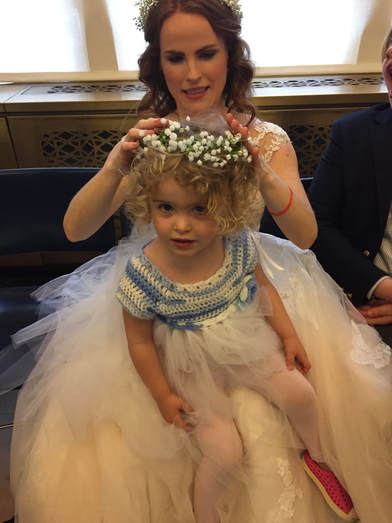 Tulle skirt dresses are quite popular right now, and there were many patterns to choose from online. I preferred the cap-sleeve design to the strapped ballerina models. An empire style dress by Kassia fit the bill. (http://www.theviewfrommyhook.net/2014/07/free-pattern-friday-kassia-empire-waist.html) The pattern was made for sizes 2T to 4T. A blue and white tone skein of Candy from the Toybox Collection by Plymouth was just the smooth and light worsted yarn (4) was the perfect color palette and texture. However, when I matched the blue tulle with the bodice yarn, I felt that the colors became muted. Instead, I selected 3 spools (or 75 yards) of 6 inch white tulle for the skirt. The bodice was crocheted with double crocheted stiches using an H (5mm) hook. It was done in one piece with increases to form the sleeves and body. Diagrams show how to lay our the long piece so that the ends meet in the middle before crocheting the extra rows that set off the sleeves and the foundation for the row to attach the skirt. The edging was a repeat pattern of hdc, dc, tr, skip two stitches. I liked the edging so much that I even used it on the neckline. The tulle skirt makes every girl feel special. As my model is 40 inches tall, we needed 16 inch x 2 to make 32 inch strips. Two of each strip would be cut and folded in half before making a slipknot into the back of the row just above the trim. I decided to place my bunches every other hole to make a full skirt. My spools were 20 yarns instead of 25 yarns, and unfortunately, I had to go back to the store to get more tulle as I was 4 strips short. Luckily, I was able to get the same brand to finish the dress. I hung it on a hanger, and trimmed the ends neatly. 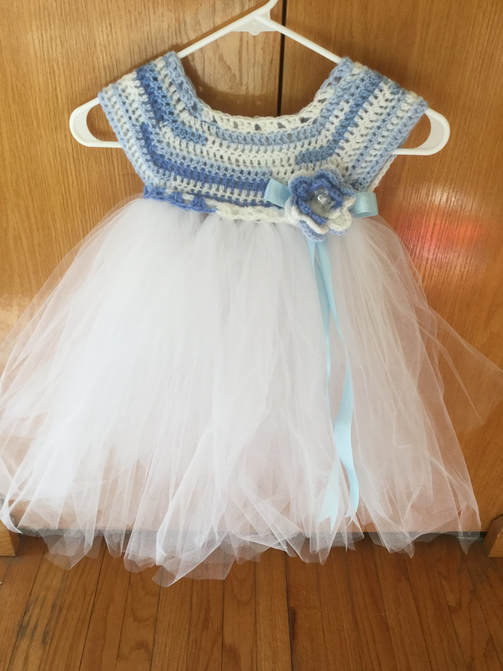 The beautiful treasure was encased in tissue paper and placed in a large mailing box to be mailed to my little princess's new home. The evening of arrival day, I could not wait any longer, and I called my son to find out if the package had arrived and if his daughter to be approved. With a laugh, he informed me that she was already prancing around in the dress. Later that even his fiance called to share a conversation with her daughter. When she told her that Lillian had made her a "Frozen" dress. She sighed and replied. "I'm Elsa." Still between mom and daughter, I did know if they would use it for the wedding or just for dress-up. Either way, I was happy. I had made the dress for this darling girl to enjoy. On the morning of the wedding, she brought out her dress and informed her parents that she was wearing it to the wedding. Always the individual, she also selected her rubber-like shoes for the day. Later at the wedding dinner, she told my son that this was her "wedding dress." When he asked her if she knew who made it, she answered happily, "yes, your mommy, Lillian." She felt special all day. Many of the guests admired her garment and did not realize that it had been made for her. 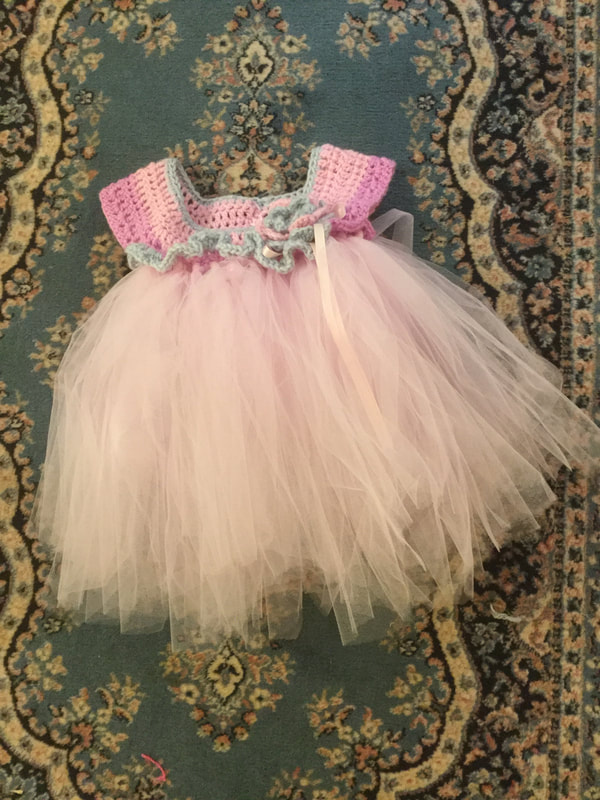 The crocheted bodice and tulle skirt took only 4 hours to complete even with the crocheted flower blossom. Now I was on a roll, and decided to try a smaller version for my granddaughter who usually wears 18 month sizes. This time the bodice was a Babycakes by Caron Yarns, and the tulle skirt was pink. Now I needed 24.5 inch lengths for the 12 inch skirt plus knot.The Empire Waist Crochet Tutu Dress by Daisy Girl Crochet could fit babies from 12 months to 24 months by changing the needle size. I made the larger size as I wanted her to be able to wear the dress more than one time. When complete, the dress appeared slightly too big for my petite girl. I still love the dress, but it will wait until she grows. I bought the yarn and tulle to remake it in a smaller size. This dress will be aqua and while. If I finish this dress before the reception in our Connecticut home, she can wear it for that party. 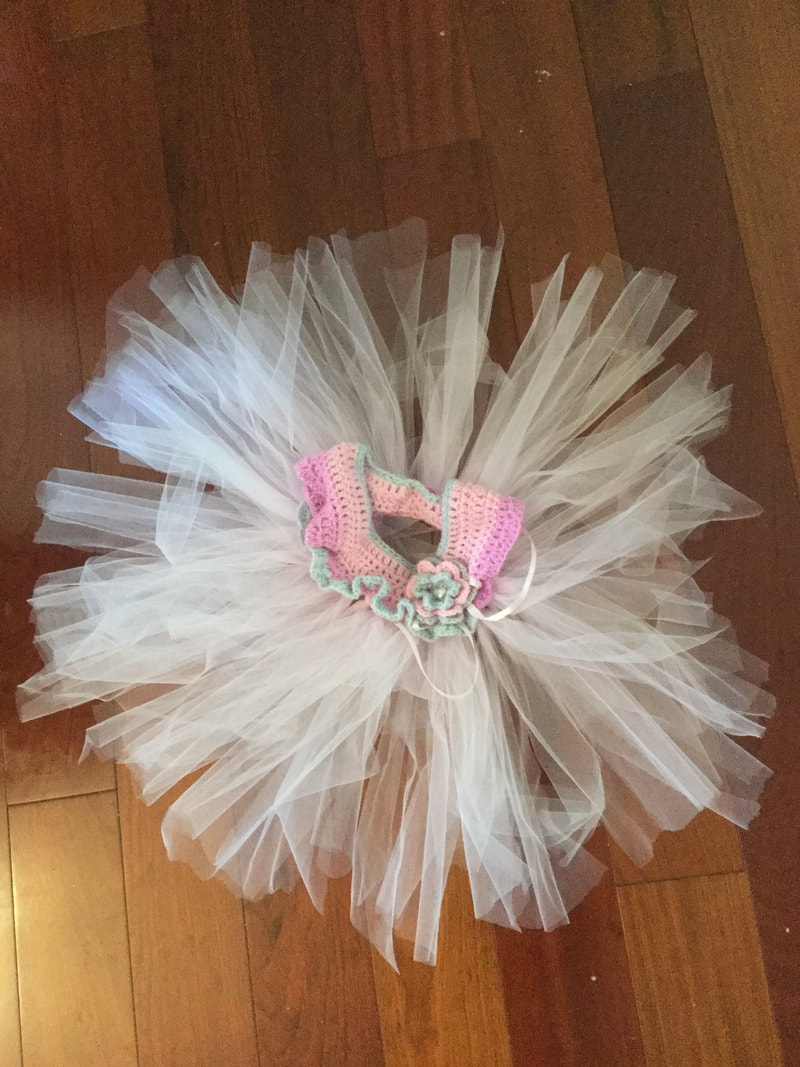 For crocheters who want to make a tulle skirt dress for an older girl, Busting Stitches shares a free pattern "Feeling Free Dress" in sizes 2.4.6.8.
These dresses can be individuallized in many ways. I chose to use a multicolor yarn for the top and a solid bodice. They would also look lovely with a solid bodice and two or three colors of tulle in the skirt. You can accent the dress with a wide ribbon bow or sash or use lengths of tulle to make the bow. The flower crocheted for the dress would also make an attractive headband. These dresses make affordable dresses little girls in a wedding party. It is easy to pick up the colors of the wedding party. Using material like the ones I used for my dresses, the garments cost about $16.00 to make. After the special party they can always be used for dress-up days. With these easy-to-make tulle skirt dresses, every girl can be a princess. 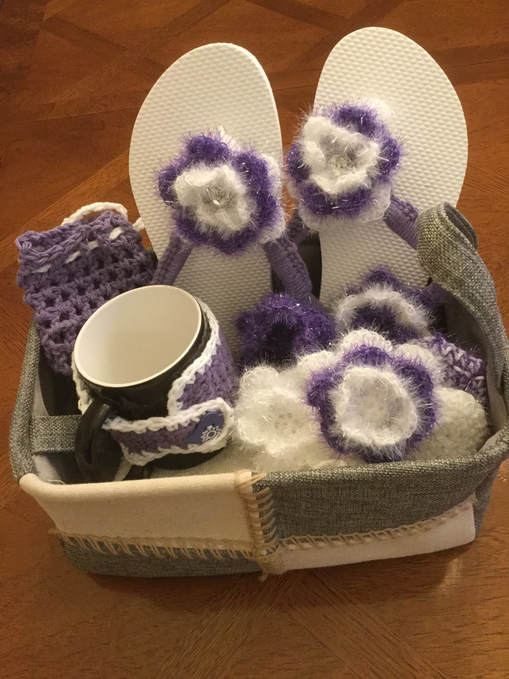 With Mother's Day just around the corner, I thought it would be fun to gift the women in my life with with cheerful spa tokens to recognize them on this special day. I am lucky to have a daughter, several special friends, 2 sisters-in-law, and a daughter in law to be in my life. Since this year's collection has taken me considerably more time than I anticipated, my mailing date will be probably be tomorrow, and they will arrive sometime next week. However, I am still smiling because each of these wonderful women will get a surprise special treat. Last year I prepared an assortment of spa gifts with cotton and scrubby yarn from Red Heart. I provided links and directions for facial scrub pads, fabulous flip flops, a head band to keep the hair out one's face, more abrasive scrubbers for callouses on the feet, and a small bag for soap. One set was crocheted in aqua and white. Another was prepared in peach and white. For pictures and ideas please refer back to "Mother's Day Crochet" from April, 2017 in the archives. Directions for scrubby pads "Scrubby Art," can also be found in the April, 2017 archives. 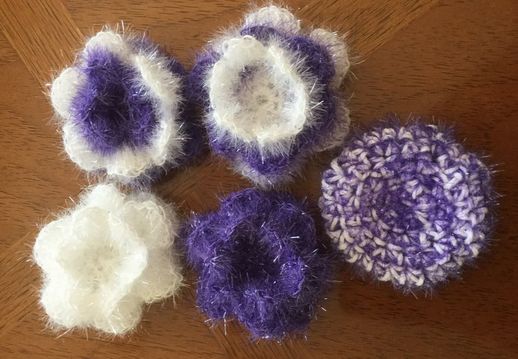 This year I am focusing on crocheted scrubby flower as well as spa gifts in purple and white. Past collections have used cotton yarn and Red Heart Scrubby Yarn individually or together. These yarns are ideal for spa gifts, but crocheting can be hard on the fingers. My cotton yarns of choice tend to be Sugar n' Cream by Lily or Premier Home by Premier Yarns.For me,my new addition is the Red Heart Scrubby Sparkle Yarn. This yarn has a unique texture and yields a sparkle effect. It is 100% polyester and comes in 3 oz. 174 yard skeins that are idea for scrubbies and other craft items. Items made with the yarn may be machine washed on delicate, Do not bleach or iron. The yarn feels like eyelashes held together on a cord. Red Heart calls for a #8 knitting needle or an 5.5 or I hook. Most of my pieces were done with a 4.5 (large G) or 5.0 (H) hook. 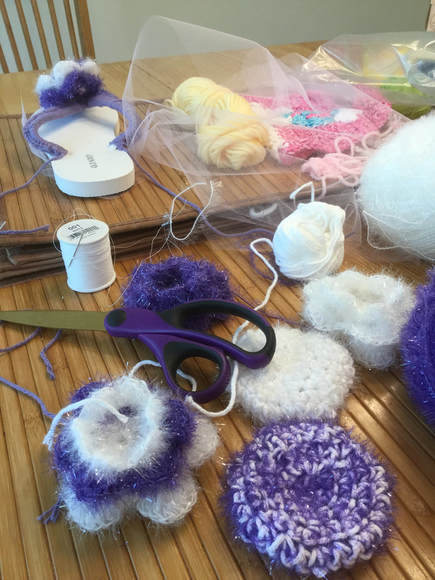 The Scrubby Sparkle Yarn is gentler to the touch than the original Scrubby Yarn and it is ideal for making flower scrubbies. I follow the general pattern that I use for making my 2 and 3 layer blooms. Layer 1: Row 1: Make a magic circle and crochet 6 stitches into the center. Pull the yarn to close and join. Row 2: Make 2 single crochet (SC) into each stitch (12) Row 3: Chain 3 and skip one stitch. Single crochet into next stitch. Continue around until you have 6 loops that will form the base for your first layer of petals. Chain 1 Row4: to form petal crochet the following stitches in the first loop. SC, CH, 3 DC,CH, SC,CH. Move to next petal and continue as in first petal. When all 6 petals are complete join with slip stitch to bottom of first petal. If you are continuing with the same color pull yarn to the back of the flower SC around the post formed by the first petal. If you are changing colors secure thread, cut and weave in end. Layer 2: Row 1: With same color chain 4 from the yarn you pulled through from first layer. If you are using a new color, SC around one of the flower posts and chain 4. For either method. Single crochet around next flower post. Continue around as you did in layer one.Join to last loop, SC in that loop, and turn work Row 2: For first petal, make the following stitches in the first loop: SC, CH, HDC, 4 DC, CH, SC, CH to go into next loop.When all 6 petals are complete join with slip stitch to bottom of first petal. If you are continuing with the same color pull yarn to the back of the flower SC around the post formed by the first petal. If you are changing colors secure thread for row 2 , cut and weave in end. Layer 3 Row 1: With same color chain 5 from the yarn you pulled through from first layer. If you are using a new color, SC around one of the flower posts and chain 5. For either method. Single crochet around next flower post. Continue around as you did in layer two. Join to last loop, SC in that loop, and turn work. Row 2: For first petal, make the following stitches in the first loop: SC, CH, HDC, 5 DC, CH, SC, CH to go into next loop.When all 6 petals are complete join with slip stitch to bottom of first petal. Cut and weave in ends. 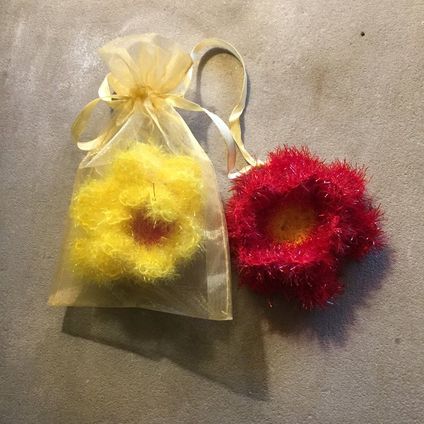 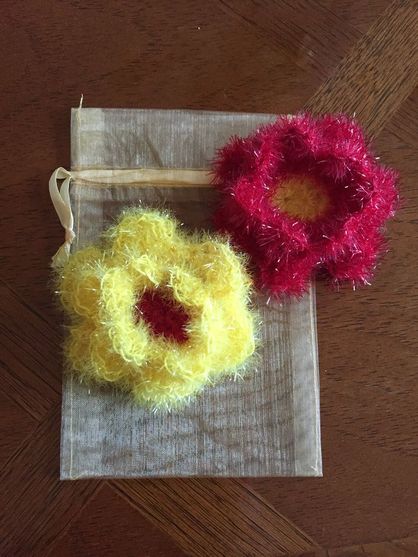 For this collection I made an open mesh bag for holding soap.  I also made a cup cozy for holding a steaming hot cup of coffee or tea. 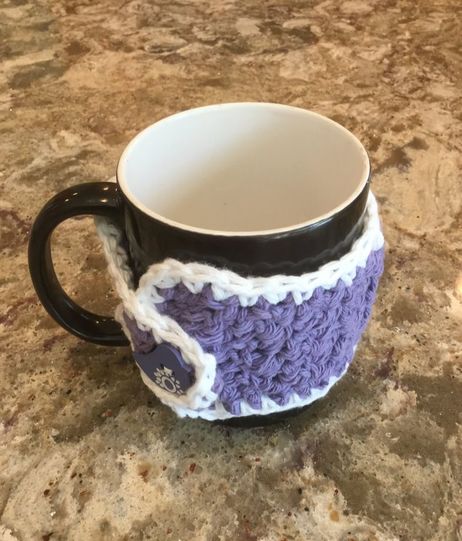 The last items for this purple collection were decorated flip flops. I followed the Posy Ruffle Flip Flop Pattern by Lion Brand for covering the straps. I made another set of Scrubby Sparkle flowers to accent the spot just below the toes. 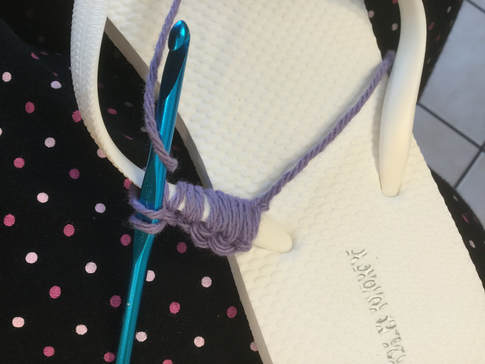 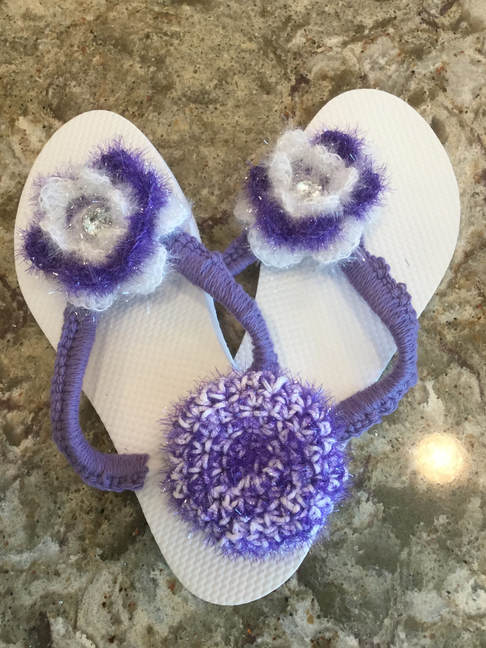 Happy Mother's Day to all of my readers. I hope that these pieces help you to make every day a spa day. What items would you add to a crocheted spa collection? I am open to new ideas.
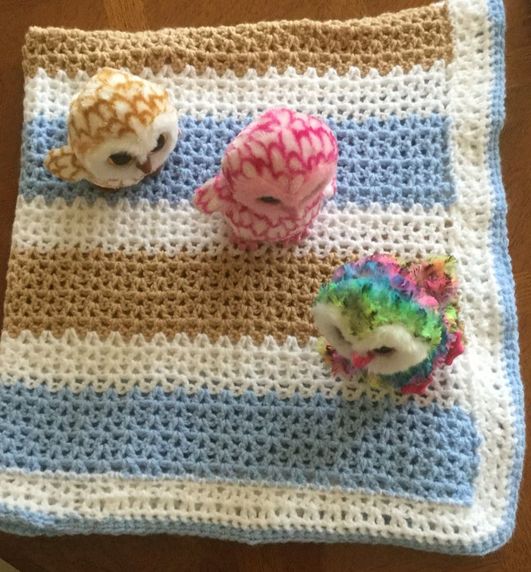
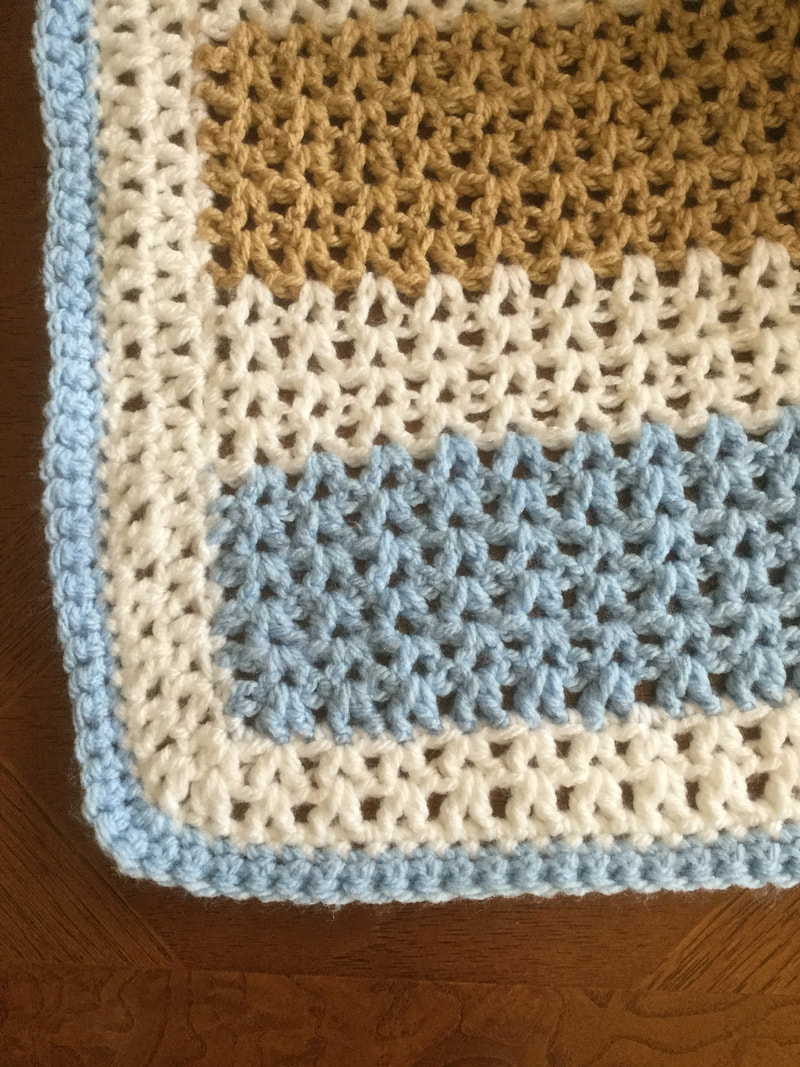
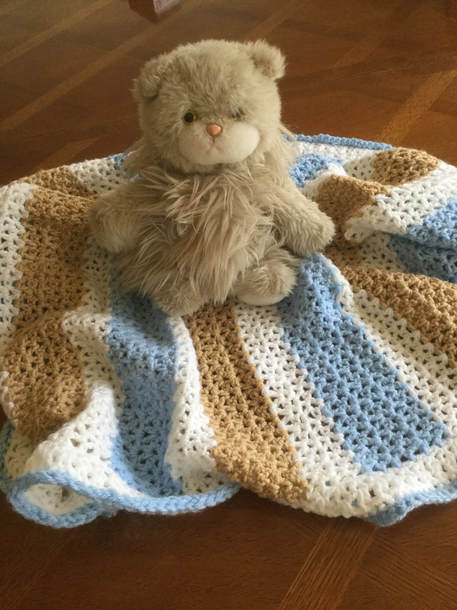 Crocheted baby blankets have always been among my favorite projects for gifts or custom orders. Now with the warmer weather ahead, I was looking for a lighter version for my "blankets with holes" to provide a cuddler to keep the chill off while not overheating the baby or toddler. The inspiration for this article came from "V-stitched Crochet Baby Blanket by Maria through her website "Dinki Dots." By crocheting with a V-stitch instead of the 3 stitch cluster, I was able to achieve an open weave without the added thickness found in most Granny Stitch patterns. I had thought that I was finished with the baby shower gifts for children of dear friends when my BFF, Phyllis, from Florida called to tell me that her daughter, Melissa was expecting a little one in the fall. I had watched Melissa grow up from infancy, and so any of her children would also be dear to my heart. Even though she is a grown woman she still calls me "Aunt Lillian," a relic from our early years in Miami. She will not be able to use the blanket for her new baby until the winter, and even then she will need a lighter weight cover. Since I do not know the baby's gender, I guess I will make two blankets, and give her the right one when the little one arrives. I already selected pink, white, and a multi-shade for the female version. 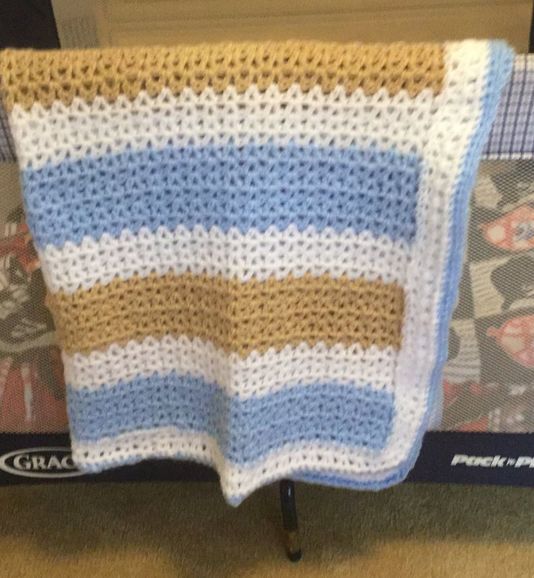 The original V-stitch inspiration was done in rainbow colors, but I wanted to use up some worsted from my stash and decided to stitch with white, baby blue, and camel. Lately, I have been crocheting many of my bigger projects with a worsted weight (#4) yarn called "Studio Classic by Nicole." This is an affordable house brand from the mega-craft store AC Moore. The yarn is at the thicker end of the worsted range, It is soft to touch and works up beautifully. The yarn is machine washable and dryable under low heat. I generally just dry until some of the moisture is removed and block flat on a towel. Since there are 372 yards in each skein, I only needed 1 of each color to complete my blanket with an accent trim.  While still following the basic style of the pattern, I made several changes to make a larger blanket. Instead of a 133 foundation chain, I widened the chain to 122 as the V-stitch repeat is 3 plus 3. The original started with 2 rows of white alternated with 4 rows of different rainbow colors. I started with 6 rows of color and alternated with 4 rows of white. Since I wanted to start and end with the same blue, I ended up crocheting 70 rows before applying the trim (instead of 58) My model was 26.9 inches wide by 37 inches long. My finished piece was 36 inches wide by 40 inches long. The larger blanket would still work well for a toddler. The number of rows in each segment does not matter. Just choose a pattern that pleases you. Next time I will probaby choose a combinati9on that works out with a smaller number of rows to yield a square.The blanket was crocheted with a 6.00mm J hook. 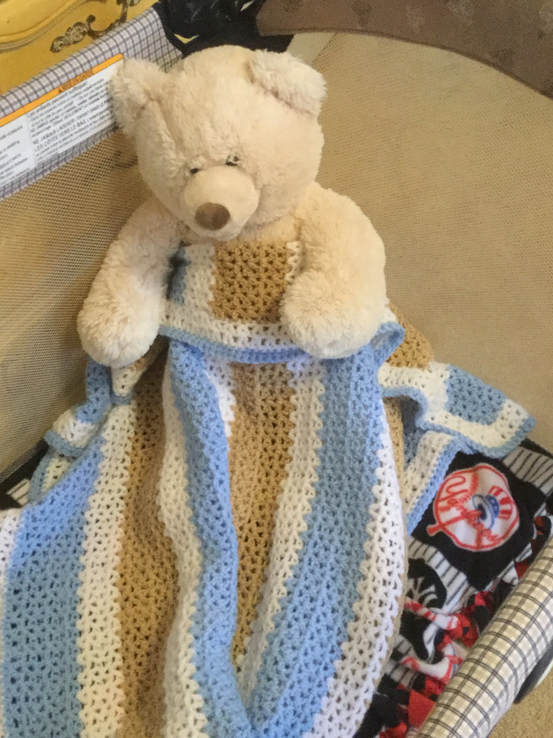 With the exception of the trim the entire blanket is done in V stitch. (DC-CH-DC in the same stitch. After several tries I was still unable to execute the chainless foundation. Therefore, I just chained my 122 stitches and added 1 for the turn and crocheted back along the chain. I am determined to master that technique, but I will have to devote a lot of time and many reruns of You-Tube shorts dedicated to the demonstration. At the end of the row, I chained 3 and turned my work.and made my first V-stitch into top of the first stitch in row. After each V-stitch I skipped 2 stitches until I reached the last stitch. Next, I double crocheted (DC) and turned my work. In each following row, I made my v-stitches in the ch space left in the previous row. At the end of the row, DC in the top of the CH3. Then CH 3 and turn.
Please note to change color, work into the two open loops before making the chain 3. When I finished the sequence, I single crocheted in white around the circumference of the blanket. I made sure to make 3 single crochet stitches into each corner so that the blanket would lie flat. The next step was to follow the V-stitch pattern as I had done for the main portion. I was able to work in 3 DC in the first row and2 sets of 2 DC in the second row of trim. The last step was to change to blue changing back to single crochet. The final row was done with Crab Stitch. This stitch is also called a reverse Single Crochet. This stitch provides a thicker more interesting edge to the blanket. You can find a simple photo-tutorial, "How to Crow A Reverse Single Crochet Stitch" through dummies that is related to Crocheting for Dummies. or through "Reverse Single Crochet Stitch (Crab Stitch) from AllFreeCrochet.com. 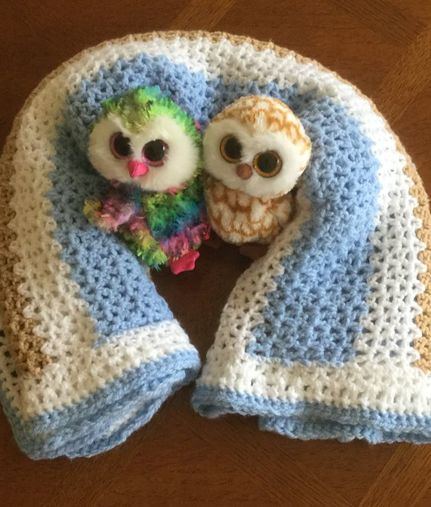 I am proud of my new blanket and look forward to presenting it to a new mama. As with all of my pieces, I give it a critical eye so that I can continue to improve in future blankets. The V-stitch was easy to execute and worked well into a lighterweight baby blanket. Next time, I will change the color count so that I can end up with a blanket about 10% shorter. I also might consider adding a fourth color or work the stripes from light to dark for an ombre effect in the same color family. I need to be careful when crocheting along the long sides so that my edges lay flat without extra stitches. Now that this blanket is finished I am eager to start the female version. Whenever the parents reveal, I will be ready to send off the blanket. The baby's older brother received an earlier version of my "blanket with holes," and it well worn with love crocheted into every stitch.
|
Archives
November 2022
Categories
|

 RSS Feed