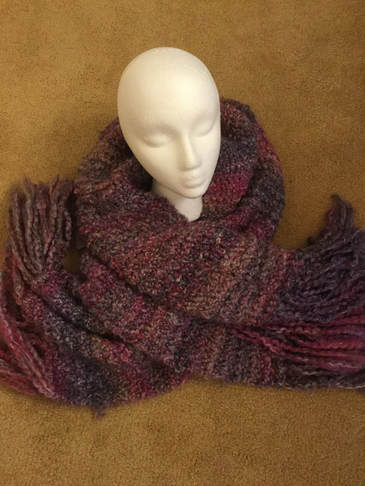
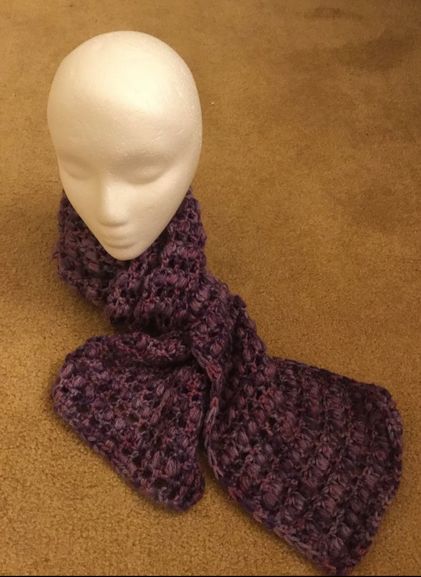
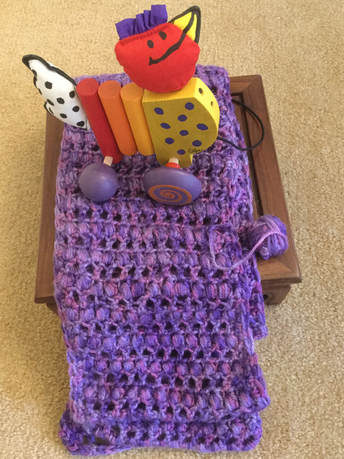
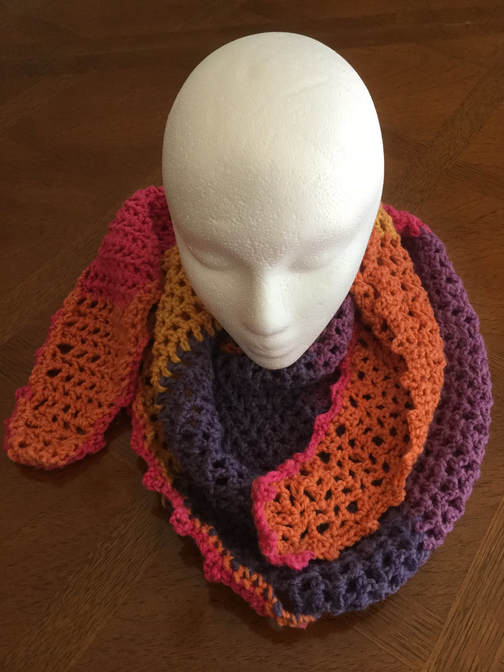
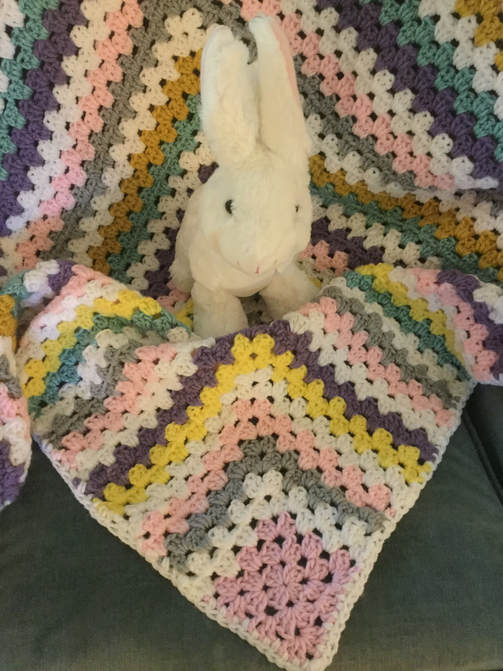
 YARN CHICKEN is a high risk game for crocheters and knitters where the winner takes all. Let's face it. At one point, most experienced crocheters or knitters, voluntarily or unwillingly, get involved in this gamble in the fiber arts. For me, the challenge is simple. Will I run out of yarn before completing a chosen project. As I stitch down to the end, the tension and anxiety mount. I ask myself, Will I complete the piece, or will I be forced to engage in some strategic frogging or substitution. The closest I ever got to losing was completing the final edging with a mere 6 inches of yarn left. (I will tell you about that adventure later.) On another occasion, I was left with 3 inches of border, but luckily, I had left a 18 inch tail at the beginning of the work, and I was able to snip the yarn, attatch it, and complete the final border. Whew! Why would any sane crocheter or knitter engage in such a high risk behavior when the consequences could mean hours of wasted labor and the potential waste of several skeins of yarn? This is especially chancy when the lot has a dye lot. Even if the crafter could find additional yarn, it might not match the body of the work. Most recently, I tackled a scarf which alternated rows of puff stitch with open work double drochet. The pattern was simple, but I had adapted the design from fiberflux.com. The design called for a ball of Lion Brand Scarfie. This yarn was a bulky weight (#5) and was to be worked with a K hook. If I followed those directions exactly my finished product would be a cozy 8.5"x70" acrylic-wool blend that was ideal for wrapping in many style variations. To access this pattern, search for Tea Leaves Scarf by Jennifer Dickerson. The scarf is also a free download from Ravelry. The yarn I wanted to use was Red heart Soft (Plummy) which was a light worsted (#4). I planned to crochet with a J Hook. My finished piece would be 7 " wide and would and would stretch as long as my 2 skeins of yarn allowed. What complicated my plan was the half double crochet edging that I wanted to crochet around the circumference of the scarf. The HDC stitch would give the scarf a finished edge to look neater and more professional. I really like the texture of the puff stitch and the row of open work that goes into this piece. It was just right to show pink, lilac, and purple strands that came together in a shimmery fiber. I crocheted until I estimated that I had made the scarf as long as I could, allowing for the border yardage. I was pretty confident when I started, and stitched along happily until I made the extra stitches in the last corner and started making my way up along the last side. Even though the consequence would not be too bad for this piece, I began to worry. If I ran short, I would have to rip out the entire border and the last few rows of the scarf before I began to redo the edging. I did finish with a couple of yards remaining. Again, I heaved a sigh of relief and began blocking my new fashion accessory. Please this is the same scarf in both pictures, but the purple comes differently, depending on the background and the light. Another project that led me to play YARN CHICKEN was my Desert Winds Scarf I crocheted out of Caron Cakes. I followed the pattern and had ample yardage to complete the scarf. Again I decided to finish the the scarf with an edging. This time I chose a picot stitch (3sc, 4 ch and sc in same stitch .... repeat) (http://www.lilcreates.com/lillians-blog/my-love-affair-withself-striping-yarn) Happily I crocheted along. As I neared the end, I held my breath and crossed my fingers. When I crossed the "finish line" I had 6 " of yarn. That was too close for comfort, but I had won the high stakes game of YARN CHICKEN. 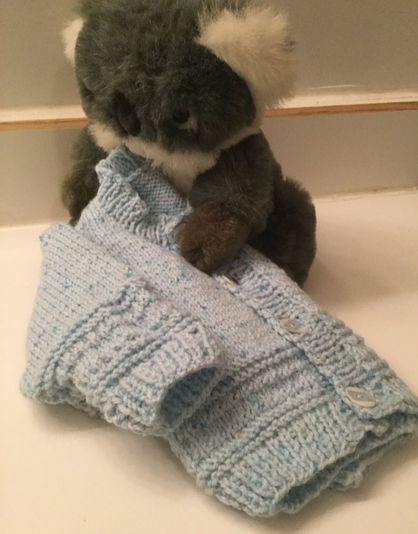 A baby sweater that I wanted to knit for a friend's grandson came from 2 skeins of of sweet light blue with aqua specks in a light worsted yarn from my stash. I had purchased it from my neighborhood specialty shop, Yarn Barn in Woodbridge, Connecticut. Unfortunately, the baby had grown before I got around to making the sweater. To make a 6-12 month size, I had to go up a size,. The directions, called for 3 skeins of yarn instead of 2. Still I was willing to take the risk since I stubbornly refused to go back to the store to pay for an extra skein. I figured I would only need an extra ounce at most. The sweater knit up beautifully, but if I wanted to use the yarn to knit the ribbing on the button bands for the cardigan, I would have to secure the yarn for the seams from another source. Since the seams would not show, I decided to assemble the sweater with a scrap of light blue from my stash of odds and ends. The mother-to-be was happy with her gift. The picture she sent me of her son in the sweater showed no signs that I had experienced difficulty -- another successful end to a course of YARN CHICKEN. I don't usually get into trouble when I am following a pattern's directions exactly. The difficulty comes when I decide to be creative. My textured band scarf was the result of just such a challenge.I was crocheting a long scarf with a partial skein of grey worsted yarn when I realized that the finished piece would be too skinny if I did not get additional yardage. The plan I came up with was to use another remnant of Homespun by Lion Brand for a coordinated textured band and corresponding fringe. Again I had to estimate how wide I could make the the band and still have enough for the fringe. My idea was to make the fringe for the grey worsted with worsted fringe and the fringe for the textured band from the Homespun. In this way The colors would extend from one end of the scarf to the other. Since I had no idea how much yarn I had in the Home Spun piece or in the worsted yarn, I had to guess for both. The resulting scarf was quite attractive, and my daughter received many compliments on her fashion accessory. I had won another game of YARN CHICKEN, actually 2 games in one. (http://www.lilcreates.com/lillians-blog/working-with-textures) One of my most interesting games of YARN CHICKEN involved a baby blanket, constructed entirely out of yarn scraps. I am always looking for a way to empty my scrap pile. This time instead of making my go-to extended Granny Square from the center, I decided to start in the corner. As I executed the design I would go back and forth with cluster stitches on two sides of the growing corner square. I wove in the colors to provide some repetition of a basic color as I introduced new shades. The plan was to create a cheerful, unique, and kind of funky wrap for an infant. The beginning rows were not a problem, but as each set of two Granny Stripes grew larger and larger, it was harder to estimate how much yarn was needed. Occasionally I had to rip and substitute, but the final project has enough color repeat to be pleasing to the eye. I won the game of YARN CHICKEN again. (I don't have a pattern for my crochet around a corner baby blanket at this point, but the pattern-to-be will join my list of projects.) I think this series of victories and problem solving qualifies for a blue ribbon. What are your experiences with the game of YARN CHICKEN? Have you been able to tough it out, or have you searched near and far for that last remaining matching skein? Please share your photos and reflections with our communities of readers.
0 Comments
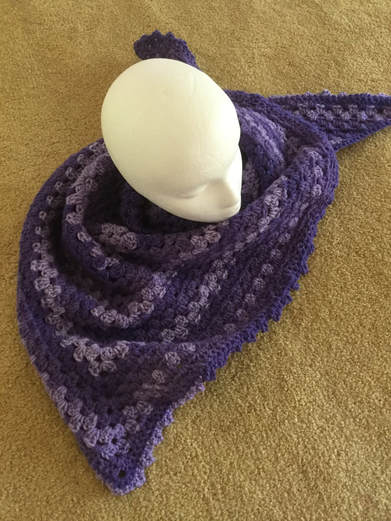
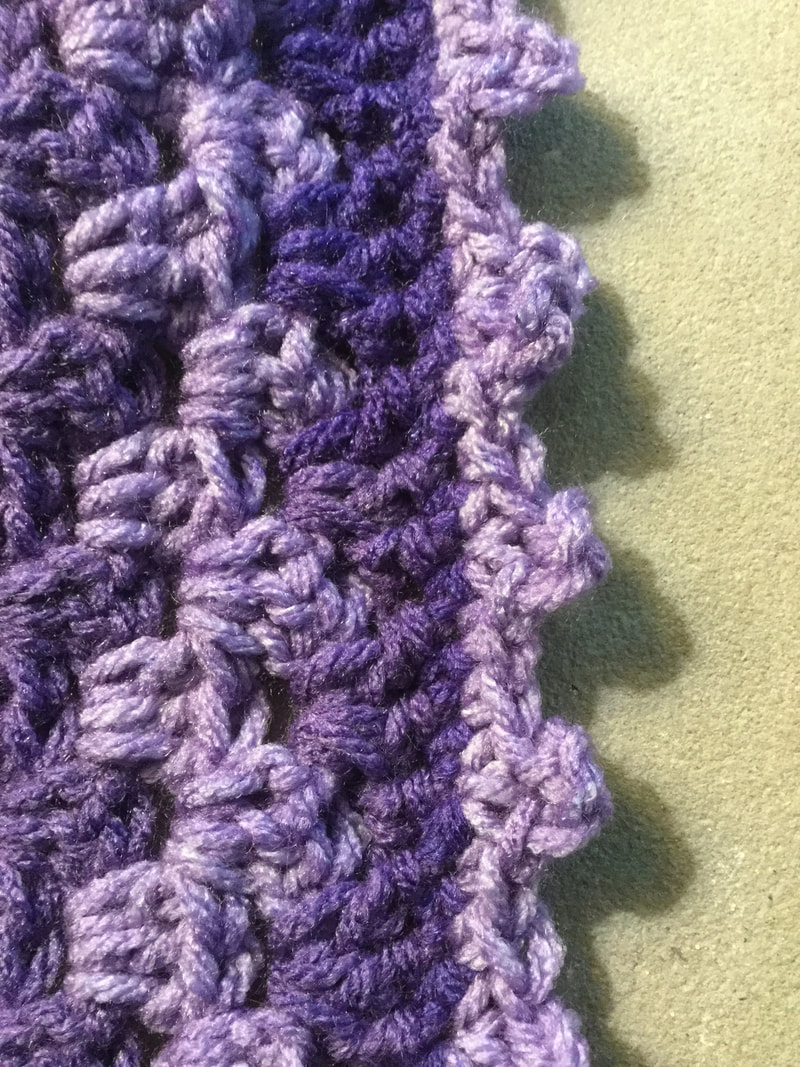
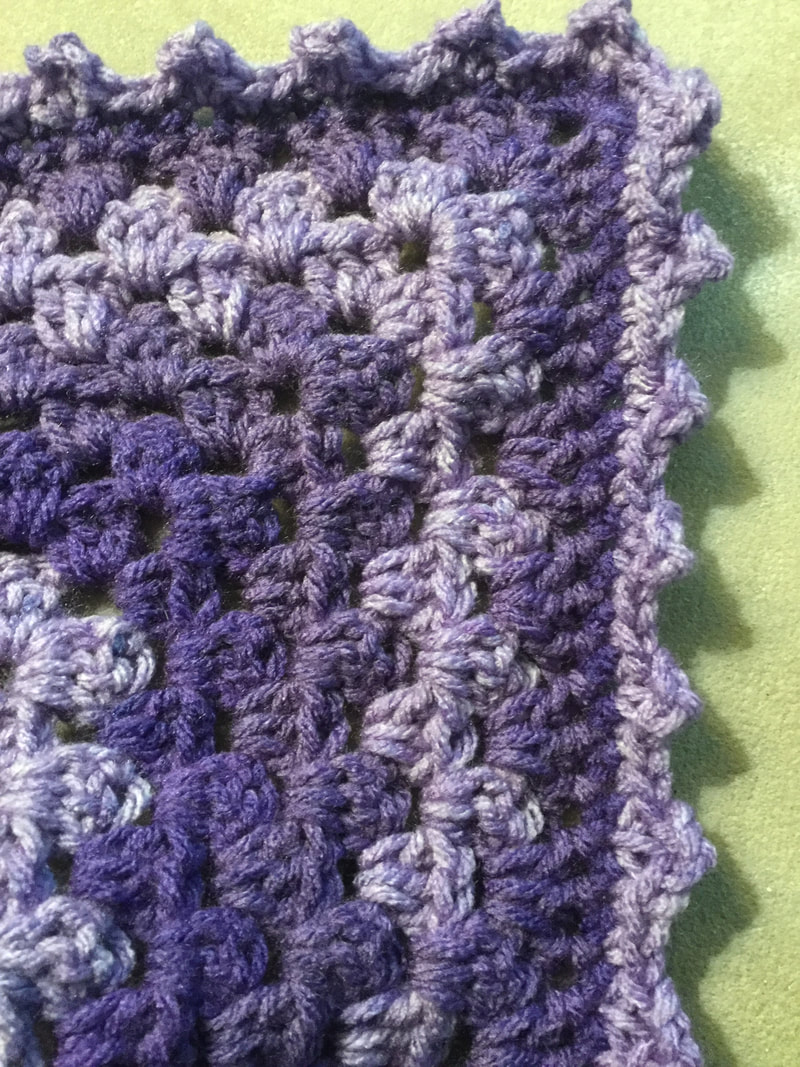
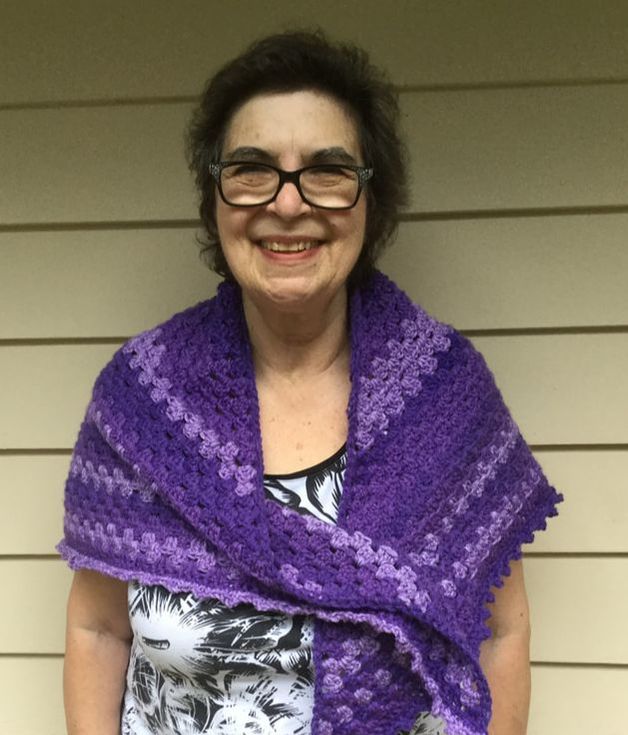
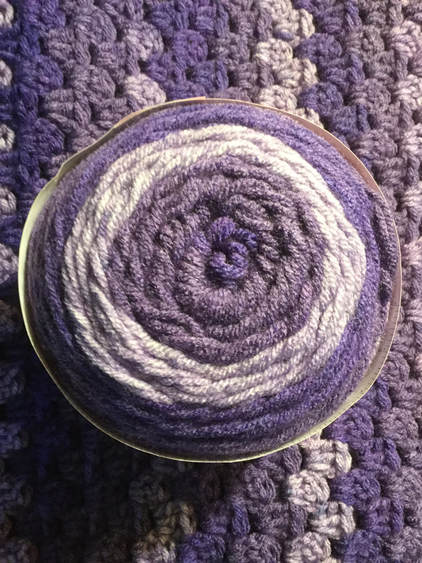 Have you ever purchased a few skeins of yarn just because you were drawn to the color , color combos and the feel of the fibers? You did not have a particular pattern in mind, but you assured yourself that eventually select the right one and a lovely crocheted piece would emerge. You were drawn to THE CHARM OF THE YARN. Such is the case with my Premier Yarn Sweet Roll GRAPE SWIRL. (Yes, I am still enamored with self-striping yarn.) When I did get started, I decided the piece would be part of a display on a future article focused on the color purple. Faced with another 4 hour car trip (this time to a baby shower near Boston), I packed up my car trip equipment bag (that included my hooks, measuring tape, scissors,etc), yarn, directions, and the first crocheted rows of my new scarf. I even taught myself to do the bobble stitch to add texture to the scarf. Happily I crocheted along as the scenery swept by. I was confident that this new venture would be another success story. However, when I looked down to examine the work as a whole, I was dismayed. I had to admit that the beginnings of my scarf-to-be looked like a warty, lop-sided banana. My increases were not coming out evenly or all on the same side. The piece could not be salvaged. Still in love with my yarn, I tenderly ripped out the work and began an alternative pattern. I knew I was not supposed to start a new unfamiliar project, on the road, but with 2 hours to go, my fingers still demanded action. Needless to say, this pattern required more attention than I could give in the car, and into the frog pond, I jumped again. At this point, it was obvious to me that if I was going to have any success at all I needed to return to a tried-and-true design that would be enhanced by my beloved GRAPE SWIRL fiber. Yes, I could forgive myself as once again, I launched a triangle shawl with granny cluster stitches. As I added row upon row, I stroked the granny shawl lovingly and admired the colors and the way the shawl lay on my lap. A few days later on a Thursday morning, I stood in front of the mirror and smiled that I had crocheted just the right number of rows. I was ready for an edging, and decided on a more subtle Picot instead of a Scallop or Shell border. Picot edgings vary, depending on the yarn, and the nature of the garment. For my shawl I would use a 3SC, ch4, SC in same stitch repeat. Quite by accident, I discovered a strategy that made the Picot edging lay more naturally. Before I crocheted any border, I made a single crochet all around to provide a clean edge as the foundation row. Since I just wanted a plain edging along the neck edge, I would only crochet a picot border on 2 sides. Usually, I just continued around with the picot after this base row. However, I did not like the way the edging looked on most pieces. Therefore, I decided that after the base row, I would finish off and cut the yarn. Then I would reattatch it at the beginning of the first corner and crochet in the opposite direction. In this way, both the SC row and the picot edge would be crocheted with the same side facing me. I really love my GRAPE SWIRL shawl, as simple as it is. I have enjoyed the CHARM OF THE YARN. I even have enough yarn to execute the directions I wrote out for my mismatched fingerless glove pattern that I am trying to prepare for publication. The shawl will still be part of my purple focused article to be posted in the near future.
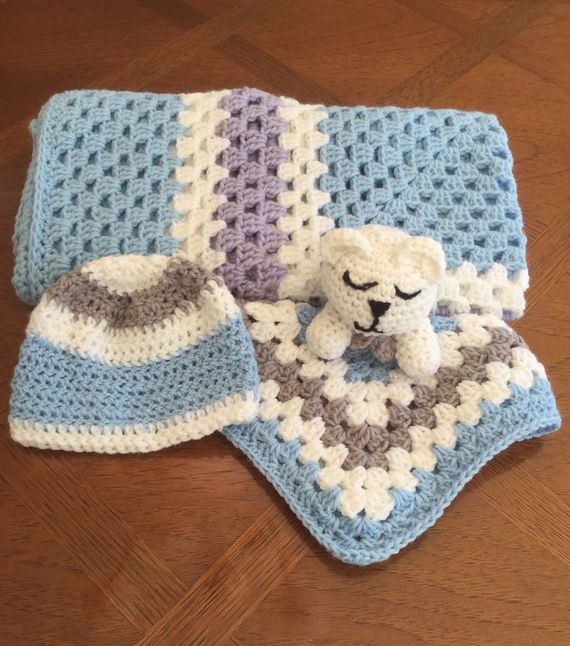
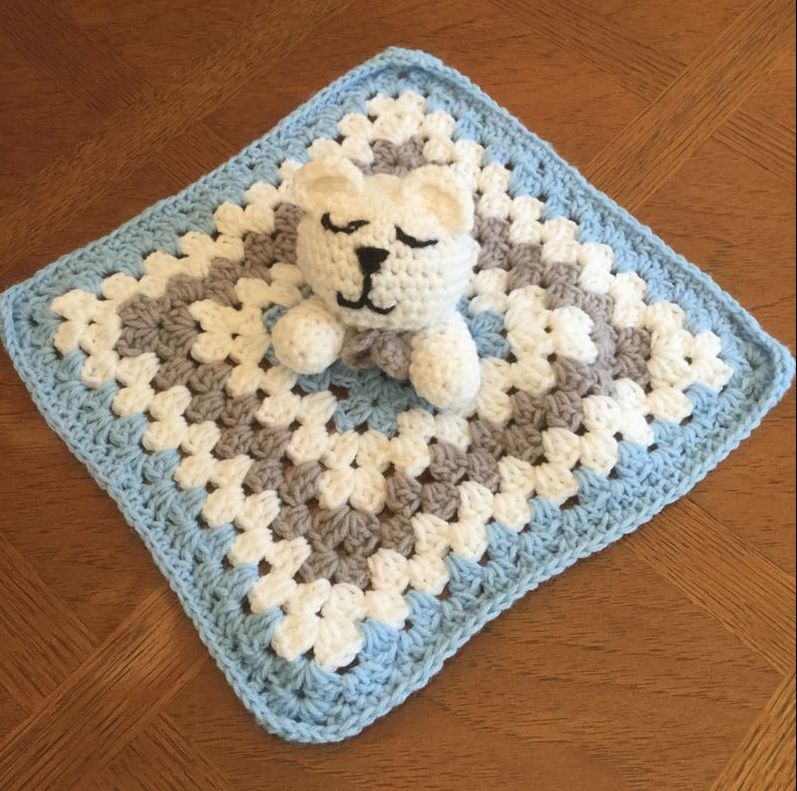
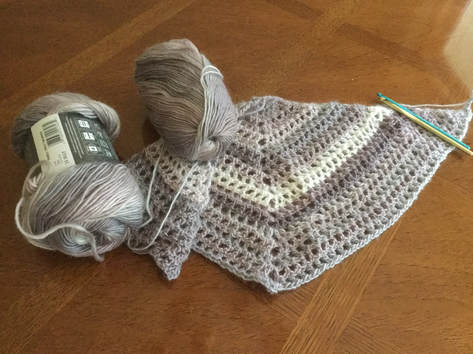
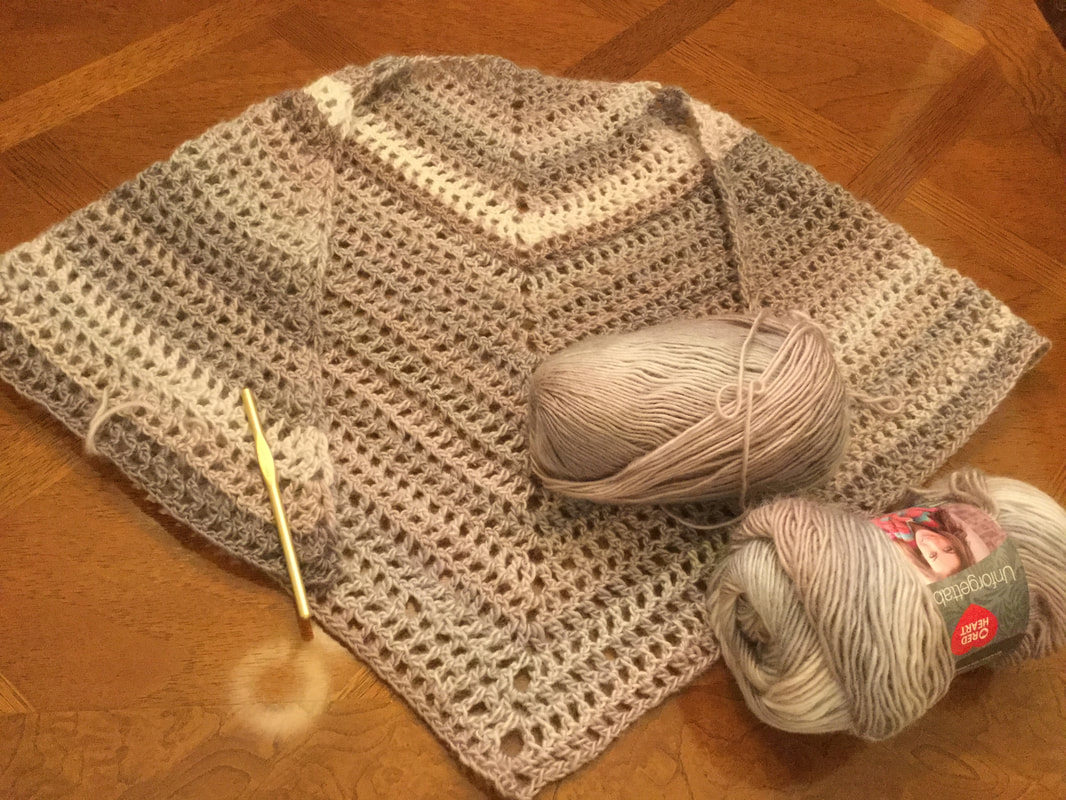
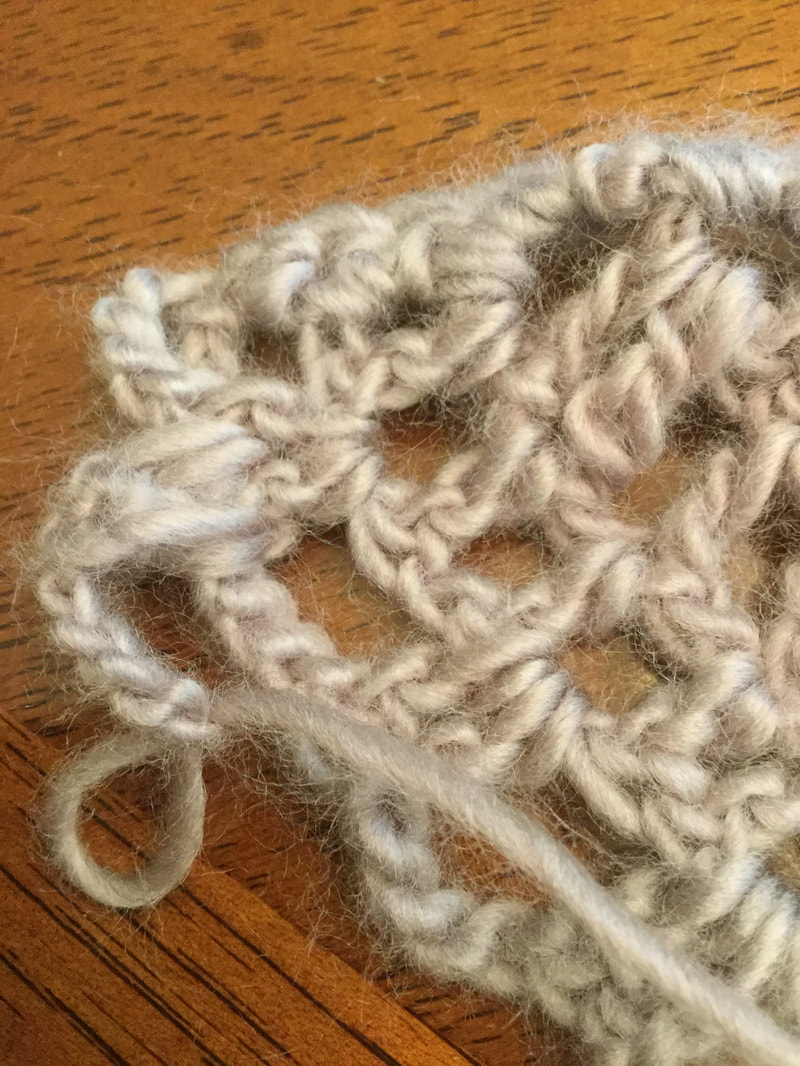
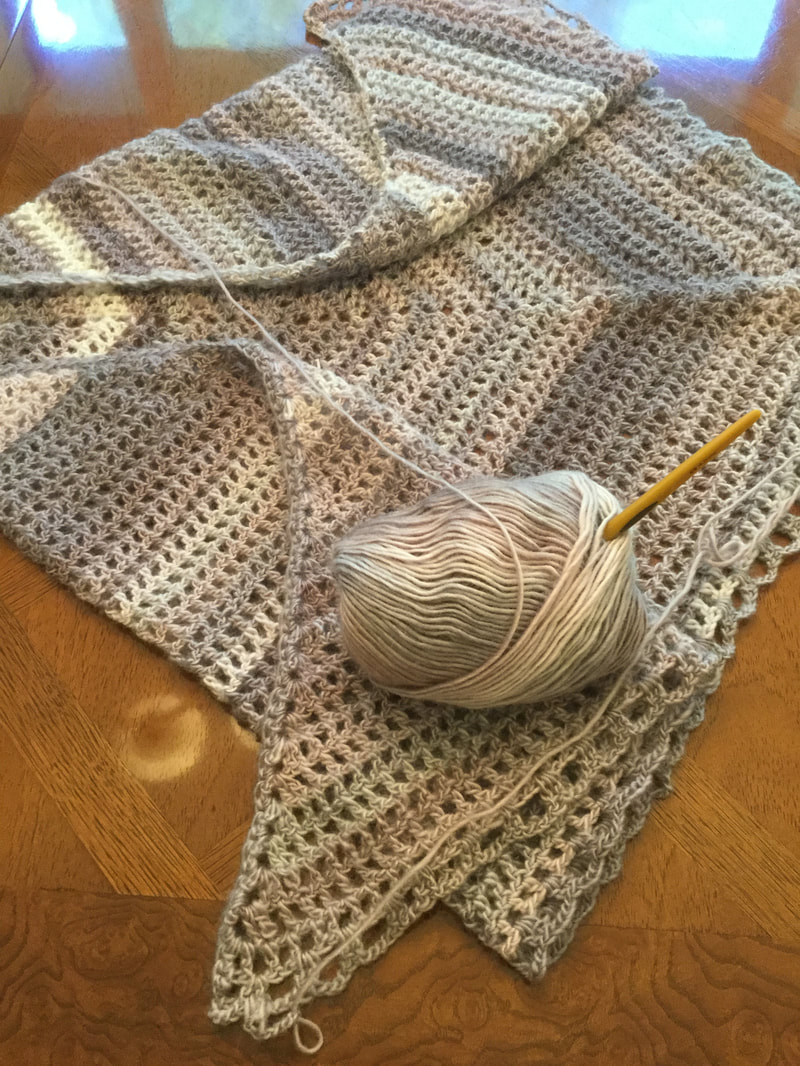
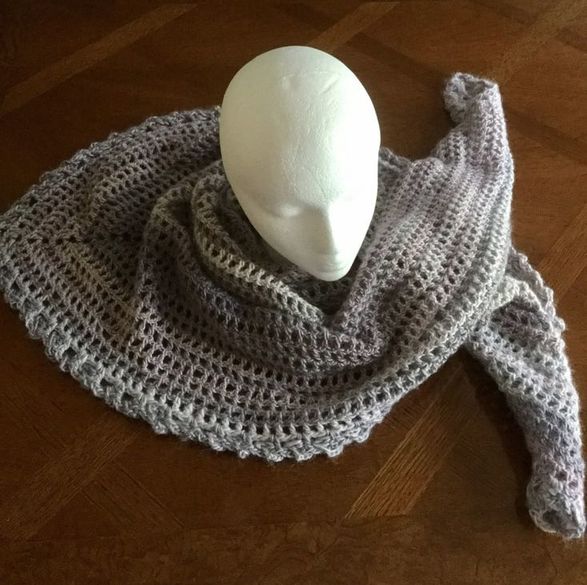
What yarn have you enjoyed working with. What was the CHARM OF YOUR YARN? Please share your finished pieces or your WIP's as well as your comments at the end of this article or on Facebook. I look forward to your feedback.  Just imagine yourself crocheting as quickly as your fingers would go with a huge clock ticking away the minutes until your deadline. You are crocheting to beat the clock, not for a prize or to win a race, but to finish a gift, a sale, or a contest entry before the due date. You want to focus on your love of crochet and the beauty of the WIP, but the end-time looms and you are trying to catch up with your production timeline. We have all been there. Sometimes there is the special gift. At others it is a sudden custom order or a bunch or orders. Frequently, we get bogged down with the holiday gifts we want to produce for everyone on our gift list. When will we learn to simplify, plan more accurately, or even say "no" to others or more importantly to ourselves? My guess is that this will not happen anytime soon. The challenge is too great. Besides we have all that yarn stored in our stash for just this moment. Last week, I was preparing my gift for a cousin''s baby shower that would take place in a few days. I really felt on top of the time element. I wanted to give the mother-to-be a crocheted baby "blanket with holes." (http://www.lilcreates.com/lillians-blog/blankets-with-holes). I was delighted when I learned that I already had crocheted a blanket with her chosen colors of white, blue, and gray for her baby boy that was expected at the end of the summer. Since I had completed the blanket several months ago, I needed to freshen it up by hand-washing it in organic baby detergent and by reblocking and air drying on a towel. Everything was good. The blanket was in fine shape and drying on schedule. However, while the blanket was attractive and well-done, it somehow felt a bit lonely as the only piece in the package. When the young mother opened the package I imagined a polite smile and "thank you" when I wanted a "wow!" With only a couple of days to work, I needed a couple of coordinating pieces to round out the present. As I keep everything, I had the remnants from the blanket and decided to make a lovey. I am on a lovey roll, anyway. I have made several since my lovey posting. (http://www.lilcreates.com/lillians-blog/what-makes-a-lovey-loveable). This one would be special because it was for this terrific young woman and her child. I dashed off the 12 inch mini granny blanket that matched the larger baby blanket in about an hour. The teddy head and arms with its embroidered features took about another 2 hours. I even squeezed in a hat. If the mom took her son out in the stroller, he would be coordinated and matching. My efforts were rewarded at the shower when all three pieces, but especially the lovey brought a wide smile to the guest of honor's face. Mission accomplished. I had beat that clock. However, when I had started the lovey and the hat for the baby gifts, I had only just started a crocheted shawl that I wanted to present to my BFF at an important decade birthday party in less than 2 weeks. My husband, Bert, and I would be flying down to Georgia to her lake house to celebrate with her family and friends. As friend for 48 years, we knew each other's hearts and tried to make it to all major celebrations. I wanted to make her something special and had picked out an attractive "road trip" pattern that I had previously made in a heavier worsted. This rendition would a lighter version that she could throw over her shoulders at the movies or in an air- conditioned restaurant. The Unforgettable yarn that I had selected ranged in color from a pearly white to shades of grey and subyle variations of light greyish purple. (They tend to look lie taupe in my photos.) It was a 20 hour project at the very least, and as you my readers know, few projects get completed in the projected time. I had set too many goals with too short a time horizon, and I was overwhelmed. I felt that I could really finish the piece on time, but that meant focusing only on crochet for the next 10 days. I had started the shawl before I began the lovey and hat projects, but I switched over because I could easily accomplish the short term goal first and cross them off my list. Now as the second deadline loomed, and I needed to deal with other aspects of my life in addition to crochet, I felt the first signs of tension that had not moved on to the panic stage (at least not yet.) The 3 skeins of Unforgettable Yarn were lovely to look at, but represented several challenges. It did not split or shred as did many yarns with this label, but it was very difficult to frog and redo. If I stopped myself with an error, I had to undo stitch by stitch. Frequently the tiny fibers were so caught up with one another that I had to separate stitches with a tapestry needle point and exert a lot of pressure as I pulled them apart. This proved to be especially problematic when I was crocheting the complex border edging in the final stages. Once I was involved in crocheting the shawl, I did not want to abandon the piece and was determined to see the project to the end. Day by day, I took pictures to create a photo-diary of my progress. I took the shawl, yarn and hook wherever I went, crocheting in the car, at meetings, when visiting, and while watching tv. Not a minute was wasted. Talk about multi-tasking. When I finished off the last stitch, well ahead of my travel day, I shouted "Yes!" and proceeded to hand wash and block the piece in preparation for gift giving. The last picture from the timeline is the one where my friend, Phyllis, modeled her gift. She declared that she loved her elegant shawl and would be sure to wear it for an upcoming dressy occasion on Cape Cod where the nights could be cool even in the summer. I am so glad that she enjoyed her shawl and that we were able to be with her for her own special celebration. What situations cause you to crochet under time pressure? How do you handle the the challenges? What projects do you select when you are rushed. Please share your thoughts and photos in this blog's comments or on Facebook.
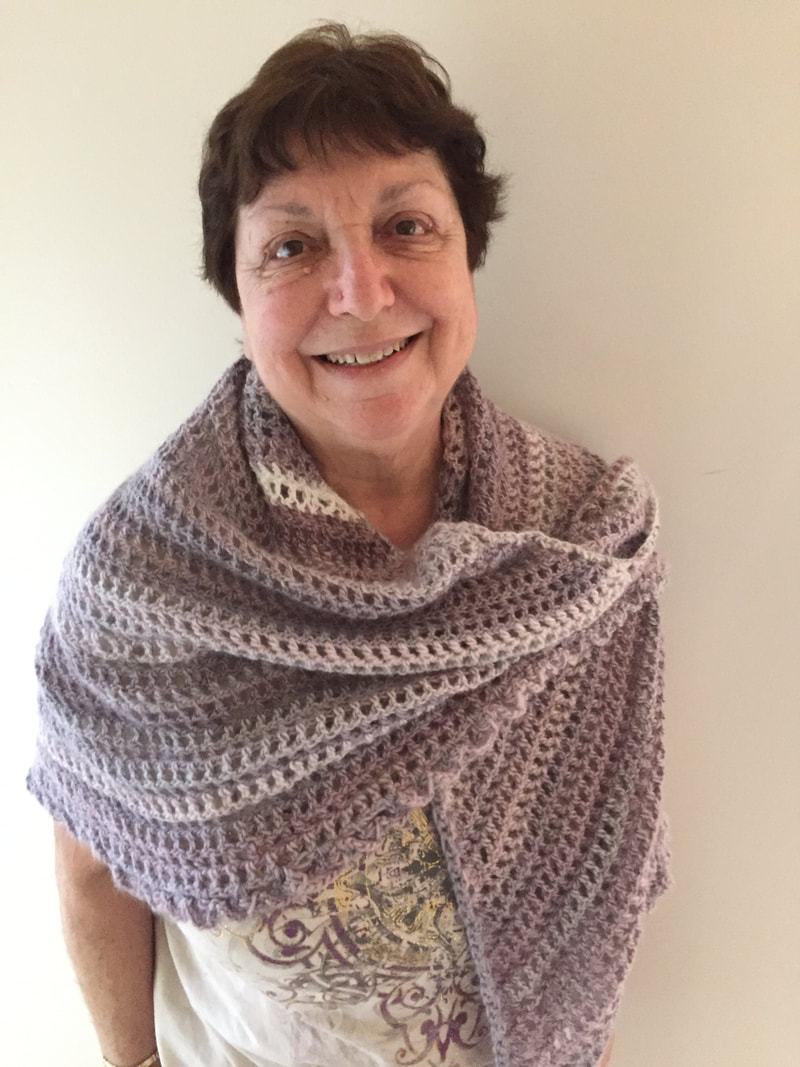
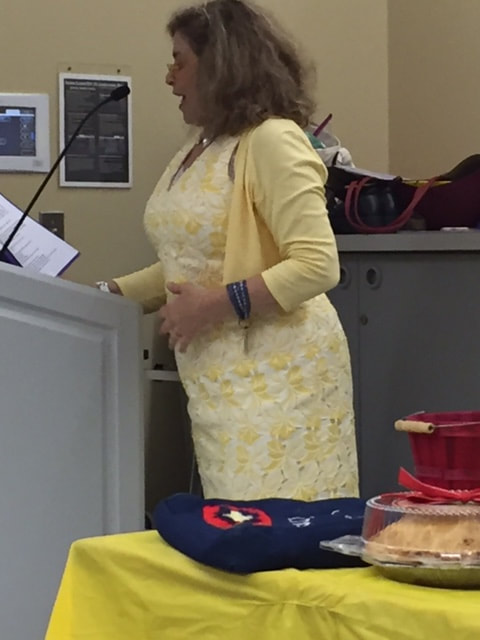
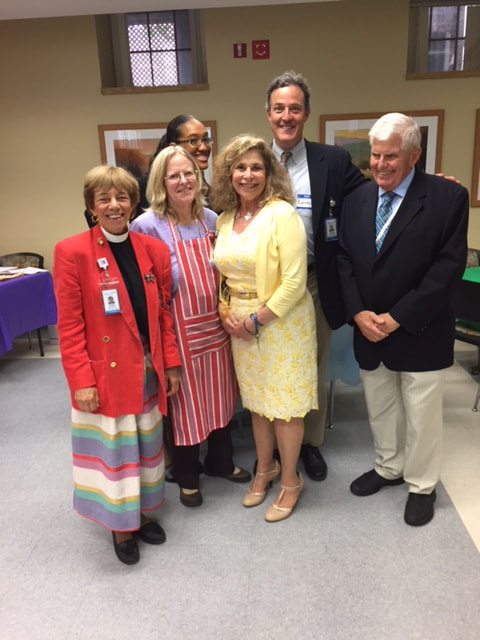
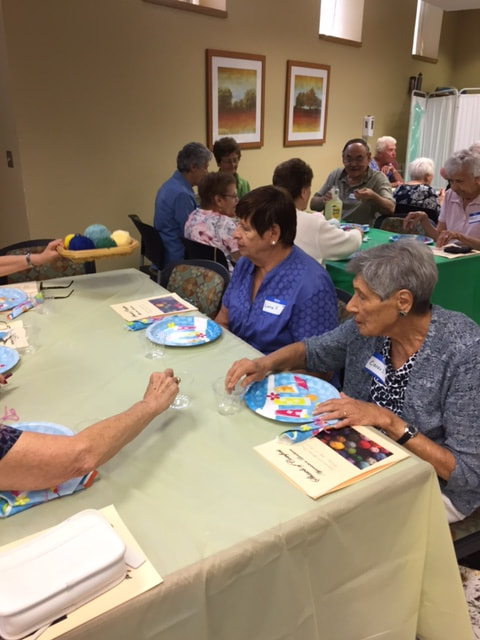
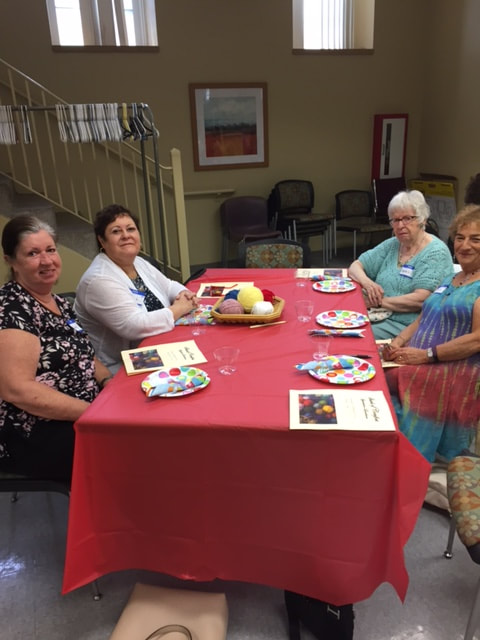
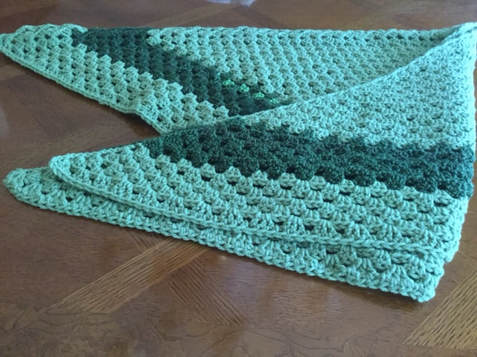
 The Shawls of Comfort Appreciation Luncheon brought knitters and crocheters from the greater New Haven Area to celebrate the gifts from our hearts and hands. The Department of Spiritual Care of Yale New Haven Hospital hosted the July 17 event at the St. Rapheal Campus of Yale-New Haven Hospital to recognize the many groups and individuals who had contributed their shawls and hard work over a number of years. Chaplain Sarah Blum, the Shawl Coordinator and event m.c. talked to us of how the shawls provided comfort, care, and hope to the many patients who to come to Yale-New Haven Hospital. Just like we connect the yarns to create beautiful comforting knitted and crocheted shawls, the shawls themselves, connect the patient to an unknown individual who cared enough to create the piece. Sarah also spoke of how"the shawls wrapped the recipient in light" and provided "tranquility to those in transition." At an event, filled with positive energy and good fellowship, we blessed the hands that knitted and crocheted as well as those individuals who transported, packaged, and distributed the pieces to those in need. Three nurses spoke about their experiences and the impact that the shawls had on their patients. Their stories took our mission from helping sick patients in general to providing a valuable strategy in improving the emotional well-being of individuals. The message card that is included with all shawls conveys the beauty of the work and the spirit of giving. Shawl of Comfort "This shawl of comfort was created with love, especially for you, weaving wishes of hope through the gentle touch of our loving hands. May you feel shelter and warmth wrapped within the shawl, knowing you are graciously held in peace and prayer with this shawl of comfort." Many thanks to the Spiritual Care Department, Office Coordinators, Kimberly Jowers and Barbara Longobardi, Manager Dr. Kenneth Palladino, and Chaplains, Rev. Wiliam West, Rev. Sarah Blum, Rev. Sandra Belcher. Dedicated groups of volunteers coordinate the collection, packaging, and distribution of the shawls. Representatives from many community groups came together for the event. Some of these included: Our Lady of Pompeii, Threads of Love (Jewish Prayer Shawl Circle of Great New Haven), The Catholic Charity League, Abraham's Tent from St. George in Guilford, Saint Frances Cabrini Parish, Saint Margaret's of Madison, and Saint Rita's Church. Our group Threads of Love, was well represented by our knitters and crocheters, led by our coordinator , Elaine Klein. This celebratory post is a follow-up to an article I wrote in May about Knitting and Crocheting for Charity and my relationship to Threads of Love. (http://www.lilcreates.com/lillians-blog/knitting-and-crocheting-for-charity) Whether you knit or crochet, your beautiful work is appreciated. To date our own group as created and distributed almost 600 pieces in about 6 years. My most recent donation to our cause is shown below. although our collection date is not until August, Elaine put out an all call for for a few women's shawls. Our group has extended its giving-caring circle to embrace those in the larger community circle, even to those who live out of state who have personal connections with our members. Needless to say, Elaine was not disappointed as several members heeded her call. I enjoyed adding a stylish darker green band to a sage crocheted triangle shawl. At present I am knitting a navy and purple hued fringed shawl from Homespun (Lion Brand). I am looking forward to presenting it at the next collection meeting in August.
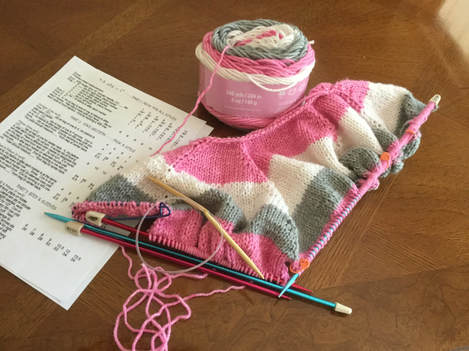
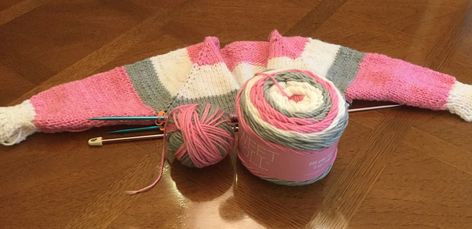
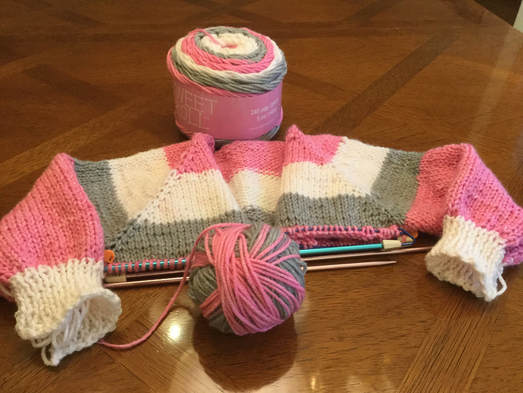
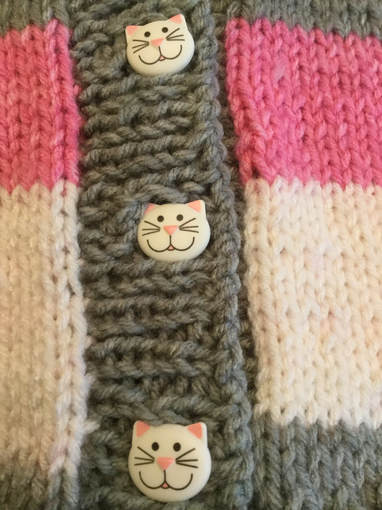
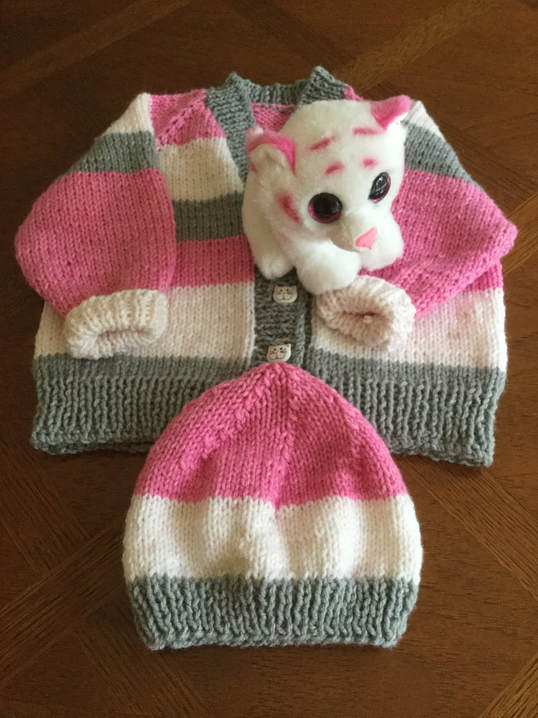
Seeing knitters and crocheters from the greater New Haven community face-to-face is so inspiring. Thousands of Shawls of Comfort have already gone to some sick or needy person. Knowing and actually seeing that your mission of creating these shawls transfer love, beauty, and solace is shared by so many other people has created a bond among fellow providers. What a lovely way to spend a day. Thank you again to Yale- New Haven Department of Spiritual Care. 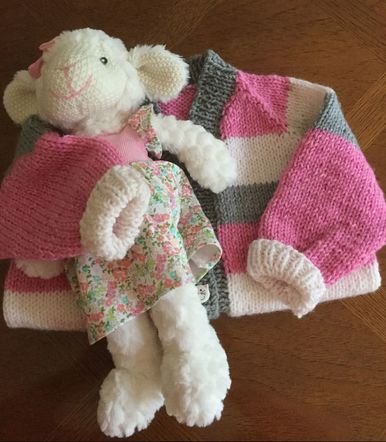 Knitting a sweater from the top or collar down unfolds like a puzzle. The work is done in one piece with only one seam on each sleeve. The raglan sleeves come out neatly aligned. The sleeves are knit from the yolk and fit in naturally at the shoulder . The length of the sleeves is easily adjusted just above the cuff. Lo and behold! The sweater comes together when the front pieces and the back are joined together and knit as one. In a final step a border is added by picking up stitches from the bottom of one side up and across the neck and down the the opposite edge.This sweater presented a challenge, and I am so pleased that I met my goal. After a couple of months of crochet, I decided to take on knitting again. My mission was two-fold. I wanted to tackle the top down sweater from Ann Norland's pattern in my personal yarn pattern library. (Kid's Basic Top Down Raglan). Secondly I wanted to incorporate two skeins of self-striping white, pink, and gray Sweet Roll into my project. The sweater will be for my granddaughter, but she will not be able to wear it for several months. Ann Norling patterns are usually purchased in specialty yarn shops. I bought mine at the Yarn Barn in Woodbridge, Connecticut. A special feature of this pattern and many others by the designer is that she offers several designs and several sizes while showing the knitting how to adjust stitches and rows for different yarn weights. With my pattern I could construct, both a v neck and round neck cardigan as well as a v neck and round neck sweater. The same pattern also showed me how to knit from Dk to bulky yarn. The yarn for my project was worsted that required size 7 and size 9 needles. The stitch gauge called for 4..5 stitches to the inch. While many of Ann Norland's patterns are listed on Ravelry, there does nor seem to be an easy way to access the actual pattern. The project will work with any top down sweater pattern for worsted weight yarn. This was the pattern that I had on hand. I started my sweater at the collar and yoke by pulling out the pink strand from the center of my Sweet Roll cake. The pink came to an end, and to complete the yoke I knit one large stripe of white, followed by a band of gray. Then the directions called for me to put most of the sweater on spare needles or yarn holders. As I began knitting the first sleeve, the color change to that luscious pink came right the point where the upper part the sleeve starts.. Remember, since this is a top down project, the knitter knits the sleeve at its widest at the under arm point. I was able to knit in pink all the way down to the cuff where I naturally made the change to white. I shortened the sleeve length by 3/4 inch because I find that knitted sleeves are much to long for the children in my family. With this change, I was able to start the white right where I began the ribbing for the cuff. When I began the second sleeve, I had a decision to make. If I used the yarns as they came off the cake, the second sleeve would not match the first. The colors were revealing themselves. but where they would stop and start on the sweater remained a potential mystery. I did not even know where the colors would appear on the body. My other option was to cut into the yarn so that the second sleeve would have the same length of pink as the first. Then I could adjust the yarn at the cuff. I had already knitted a traditional cardigan with self-striping yarn in shades of white to light and dark gray. I let the colors fall naturally, and I ended up with an interesting, but quirky piece. Therefore, I chose the symmetrical path this time. I would lose the feature of the yarn that did not require joining, but I would gain control over the color placement. The controlled approach yielded a sweater in which the stripes matched at key points. I adore the kitty cat buttons in pink and gray on a white background. With some more cutting and joining I had enough yarn for a hat. I could still make a matching headband/ ear warmer with a flower for days when it might be too warm for the hat. Anyway, you be the judge. Self-striping yarn is for knitters, too. I look forward to the time that my granddaughter is big enough to wear my creation. I know that I will try my hand at other knitted pieces in self-striping yarn. As a knitter, how do you treat self-striping yarns? What are your strategies. Please share your comments and photos.
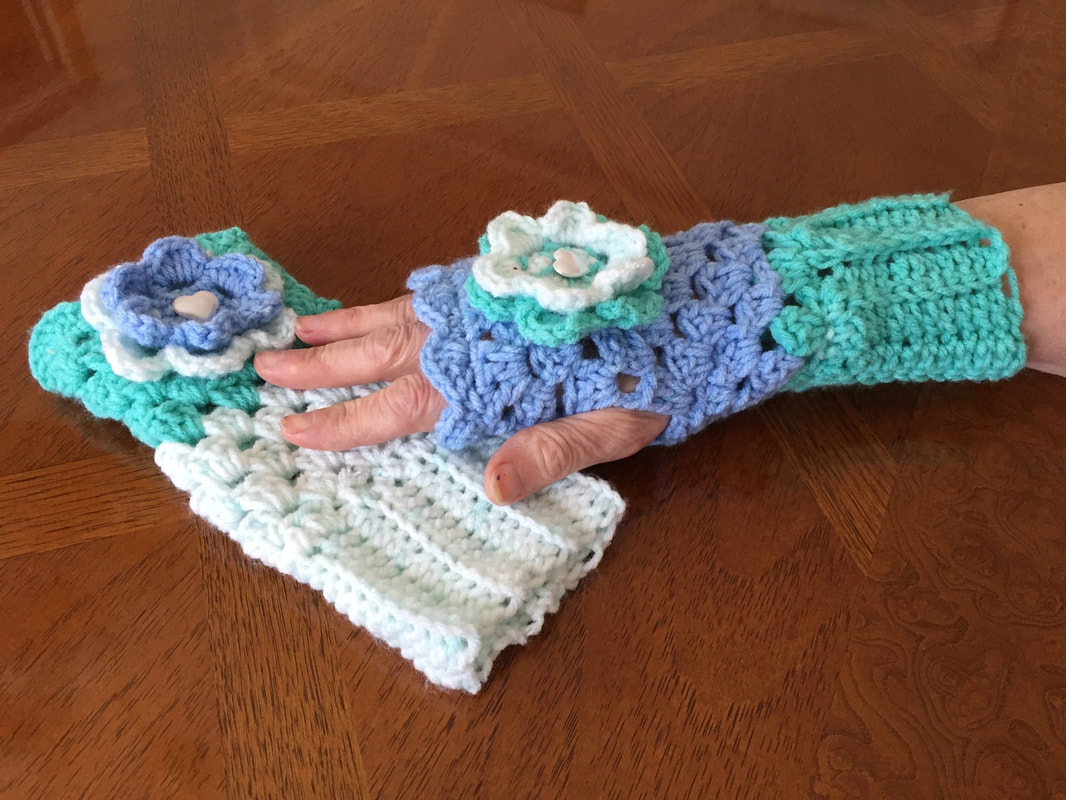
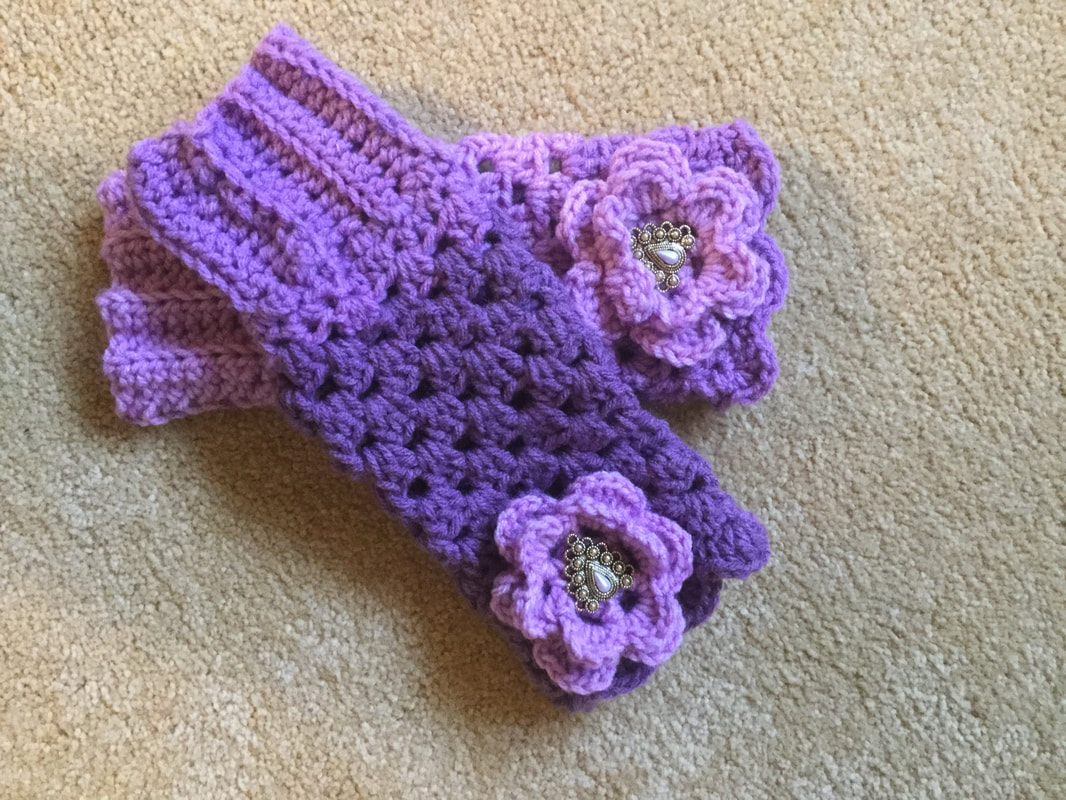
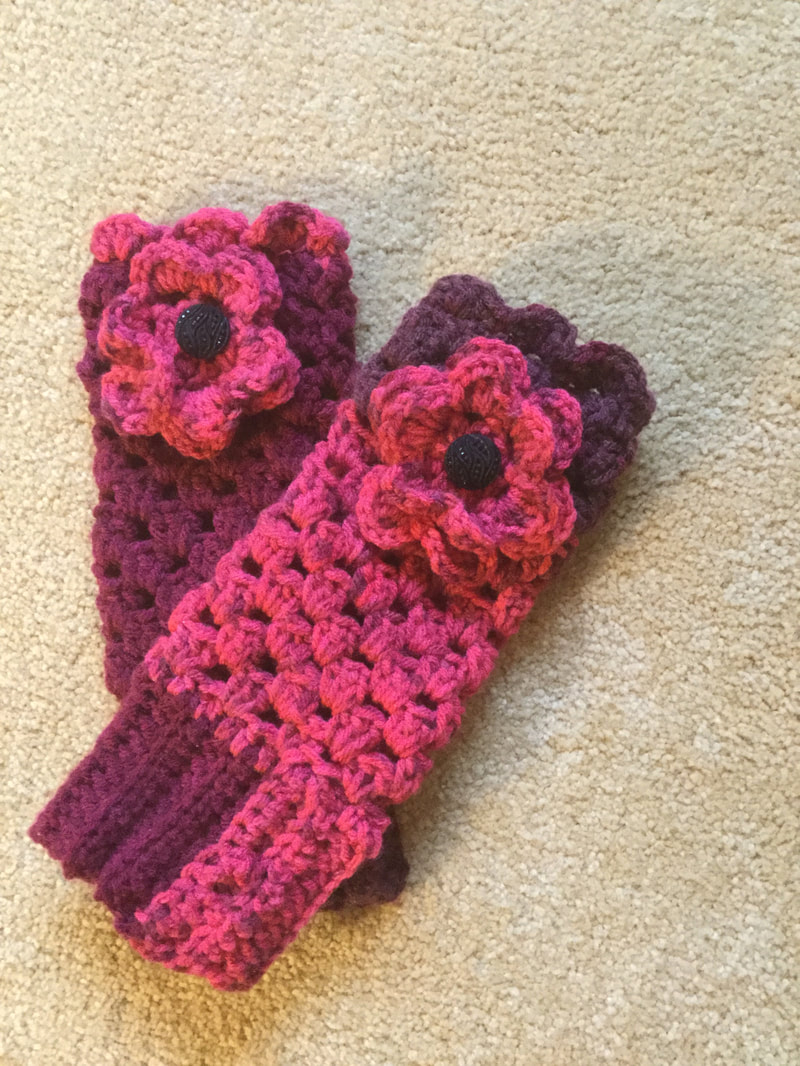
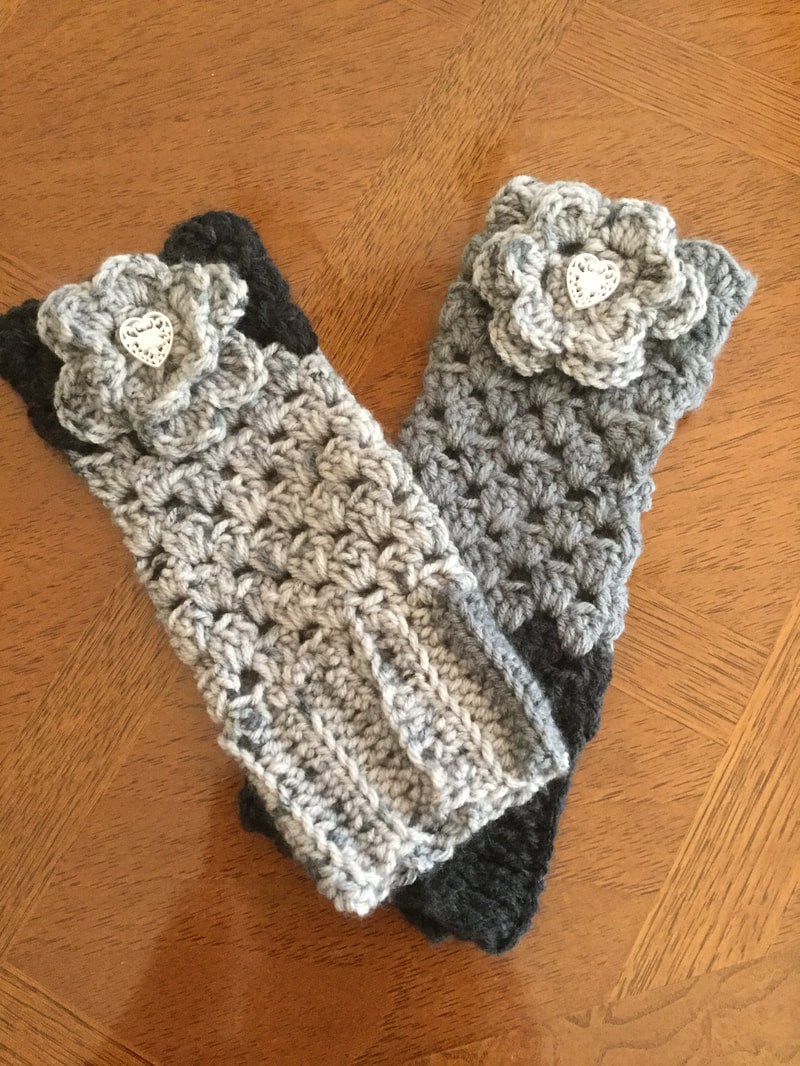
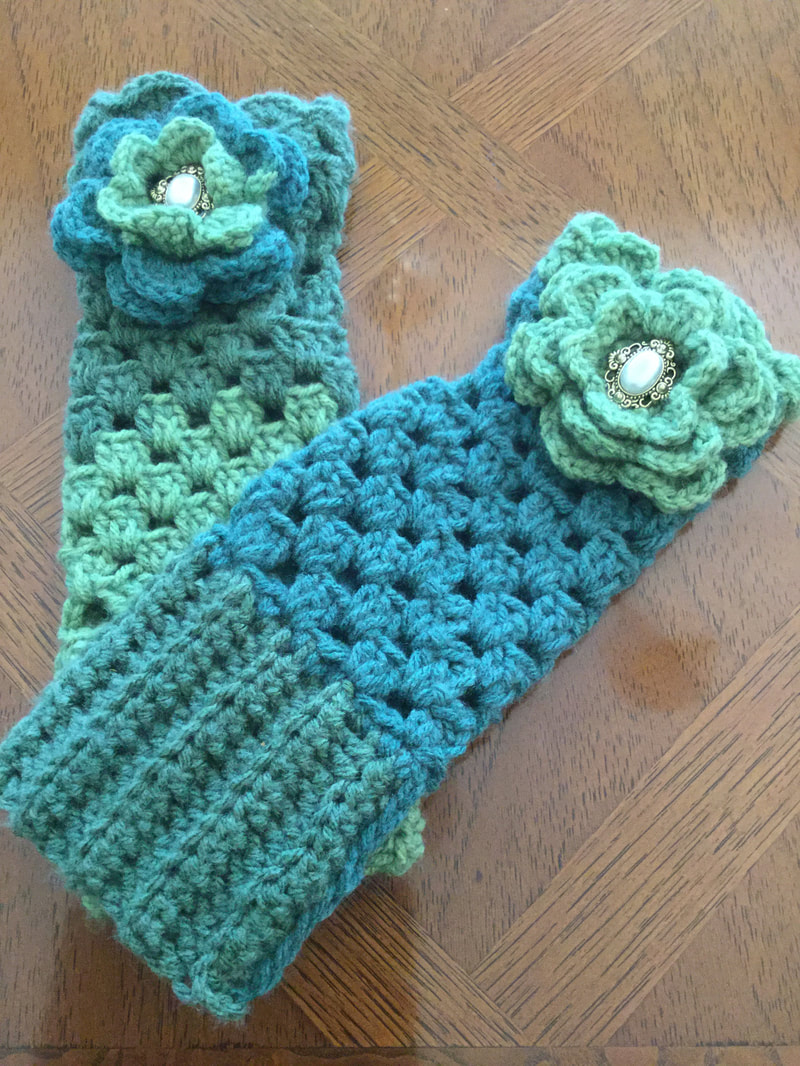
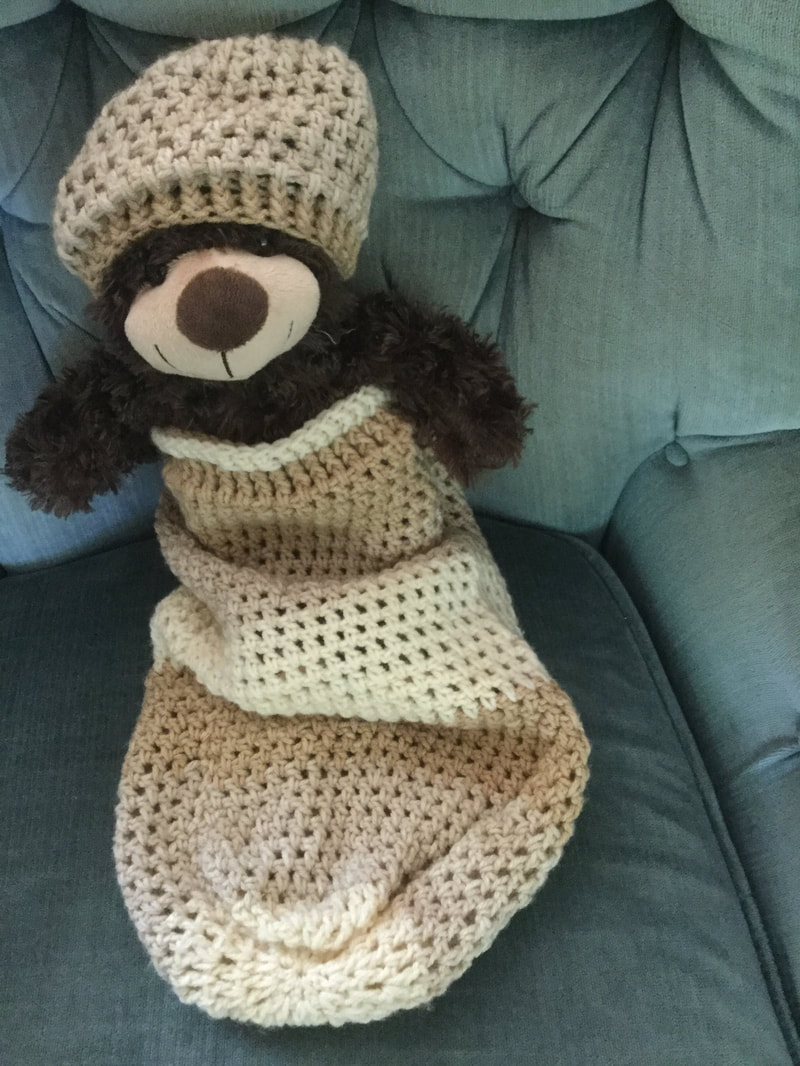
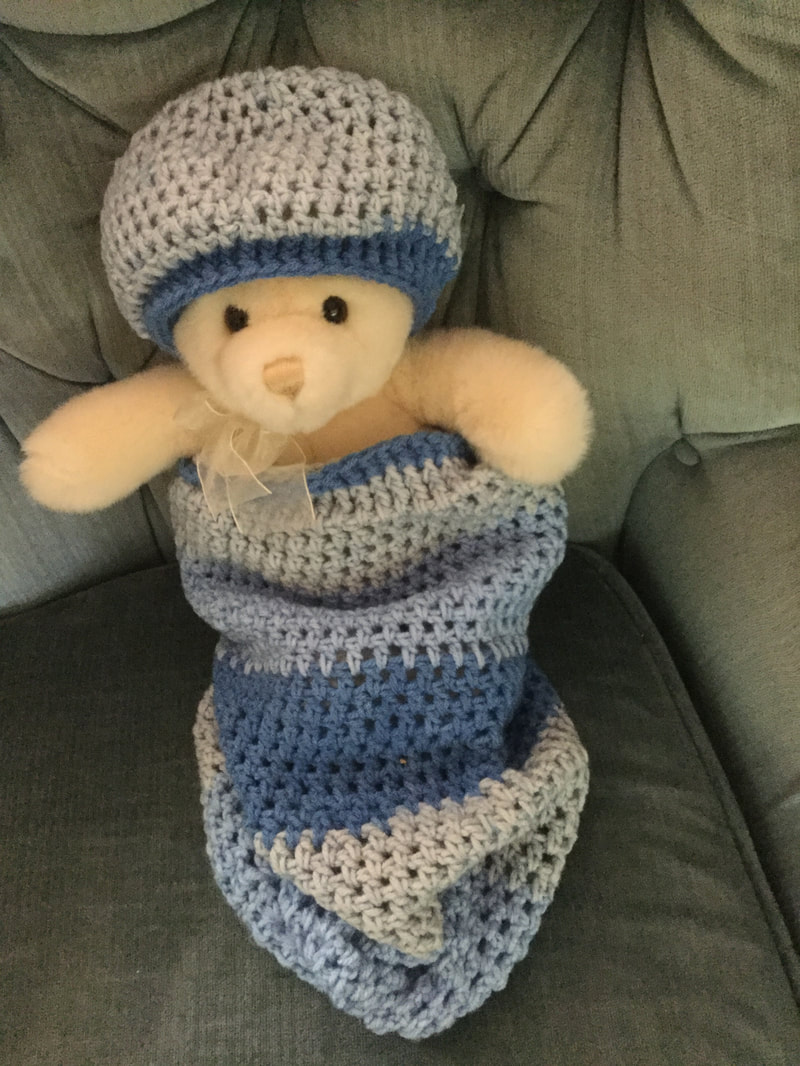
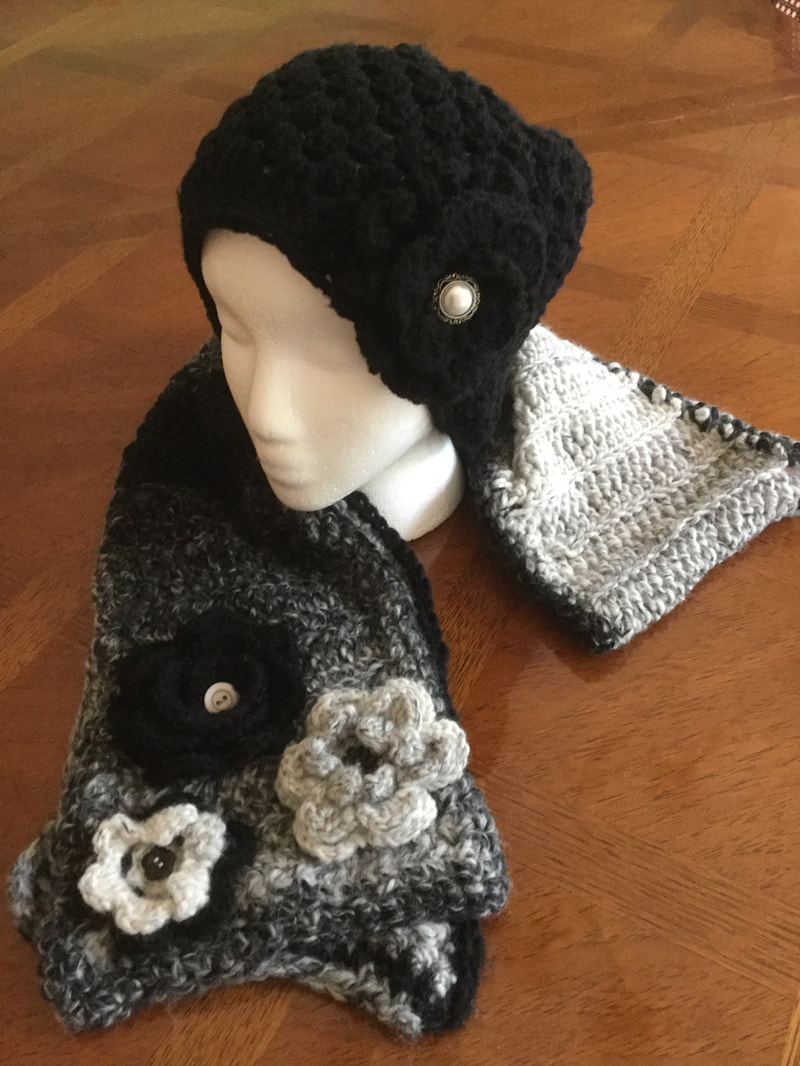
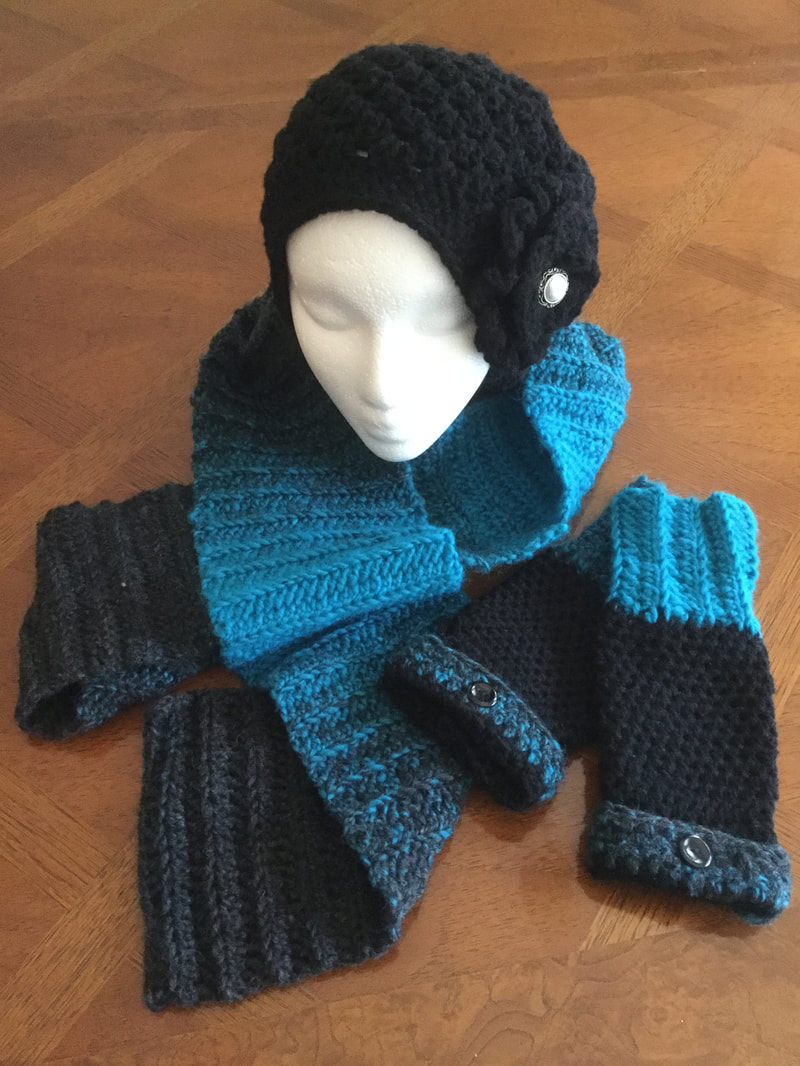
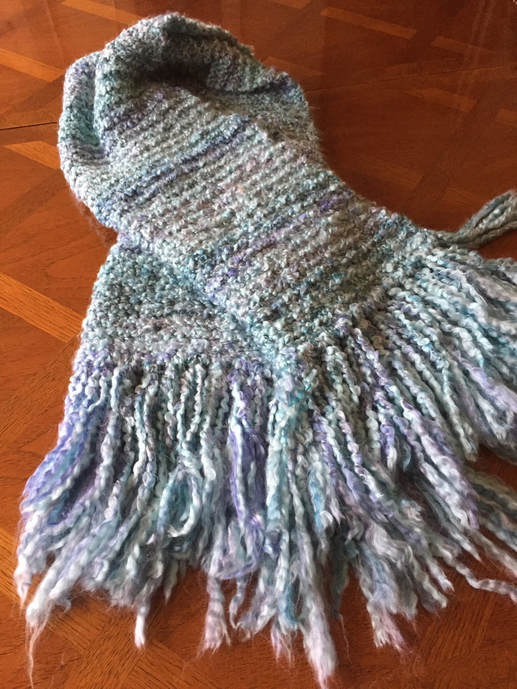
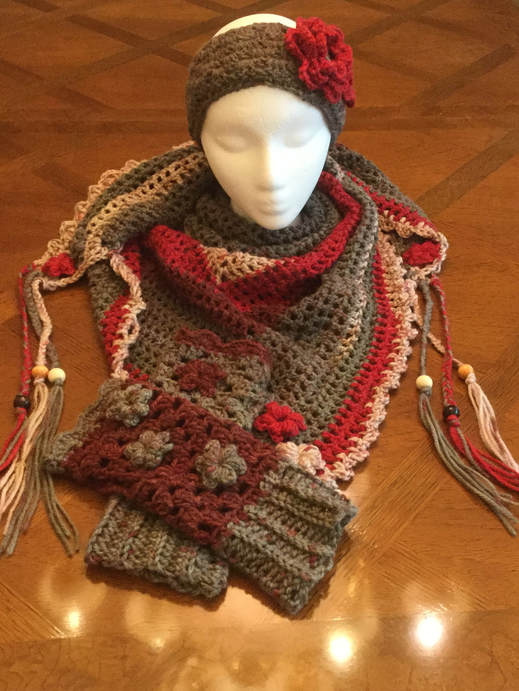
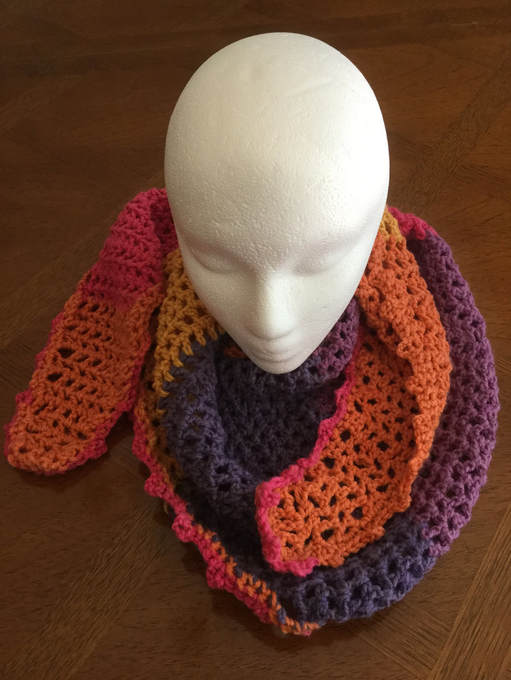
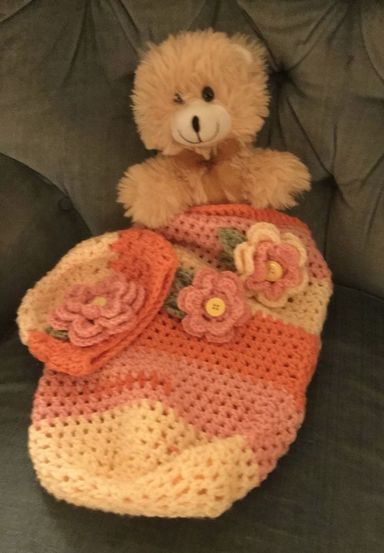 It was love at first sight. I spied the displays of concentric circles from down the aisle at Joanne's, my favorite mega-craft store. Pink, purple, and cream -- light to dark shades of purple -- baby blue, lilac, and off-white -- shades of gray and white to gray to black -- They called my name. When I held out my hand to squeeze their lusciousness, I knew that I had to have some, and someday I would have to acquire them all!. Let the crocheting and knitting begin. This moment of rapture summarizes my first encounter with Sweet Roll by Premier Yarns. I was attracted by the colors and enticed by the possibilities of the these self-striping yarns. The color combinations were delightful and creative. Left to my own devices, I would not have selected and brought together some of the diverse, harmonious, and complementary shades. Best yet, I would not have to join yarns, and the extent of each color was long enough to made a significant swath in my crocheted or knitted work. This was much sophisticated than my experiences with varigated yarns. Unfortunately, the crafter does not have a lot of control over where the color changes occur. Sometimes they will fall neatly at the end of the line. At others, they will fall midway, creating an uneven appearance. Also, slight flecks of another color sometimes appear while you are creating your project. If you are not a perfectionist, just go with the flow and enjoy the charm of the yarn. While these yarns tend to be more expensive than corresponding lengths of individual colors, store sales and coupons or for individual products and total purchases can significantly decrease the cost. The four major self-striping yarn brands are Sweet Rolls by Premier Yarns, Caron Cakes, Mandala by Lion Brand, and Bernat Pop.For a comparison and analysis based on yardage, fiber, washing instructions, cost, where to buy, number of colors, and hook size, see: http://www.5littlemonsters.com/2017/03/self-striping-yarn-cakes-comparison-of.html. Heart, Hook, Home writes a comparison of Sweet Rolls and Caron Cakes. http://hearthookhome.com/caron-cakes-vs-sweet-rolls-an-independent-and-100-honest-review My first purchases of Sweet Roll were devoted to constructing my original designs for mismatched, coordinated fingerless gloves. Since I could pull the yarn from the outside or the center of the cake, I was not sure where each color would end, each glove was unique. Sometimes I would cut off contrasting pieces to make my signature flower accent. These gloves are treasured gifts by my friends and sell immediately at craft fairs. I am almost finished working out the details of my fingerless glove pattern and look forward to distributing it. http://www.lilcreates.com/lillians-blog/fingerless-gloves-mismatched-coordinated-handwarmers. Who says a baby blanket or baby cocoon has to be in pastel colors. The color variation alone creates detail. The photos of the cocoons featured below show the lively possibilities. The yellow to coral cocoon was adorned with flowers. The neutral cream to tan, and the several shades of blue are perfect for a little boy. These cocoons keep an infant warm and are attractive photo props. The cocoons featured below were adapted from designs in bevscountrycottage.com. Just be sure not to leave the baby asleep alone in the cocoon for safety reasons. I did not realize at first that Scarfie by Lion Brand offered a self-striping option to the knitter or crocheter. I have used skeins that carried from black to mixed to accent color. The yarn is classified as bulky (#5). The soft and lofty acrylic (78%) and wool (22%) contains enough yardage (312 yards) to knit or crochet a full length scarf. As the crafter works on the project an ombre effect emerges with a sofisticated blend of solid and heathered shades. Finished pieces can be machine washed if you wish, but should be laid flat to dry. Pieces knitted or crocheted with Scarfie work up quickly and easily. I love the dramatic effect achieved with this yarn. The photos below show pieces from a previous post on crocheting and knitting with black and white. http://www.lilcreates.com/lillians-blog/knitting-and-crocheting-in-black-and-white. Even the rustic yarn, Homespun by Lion Brand, has many skeins with bands of suble color variations. As this yarn has so much texture, I keep my stitches simple. Homespunis an ideal choice for my luxurious shawls. I usually takes me 3 skeins of the thicker yarn ( with some left over) to create a 56" shawl with a 6 inch fringe. I use the remnant for a contrasting band on my textured scarf. My most recent introduction to self-striping yarn was Caron Cakes (80% acrylic, 20% wool) which is sold exclusively at Michaels. The yarn was designed for Caron's 100th anniversary, but it proved so popular that the manufacture continue to produce it and extended its color line. With over 350 yards in a single skein, it contains enough yarn to complete a 72 inch scarf with border edge. Caron Cakes has quite a cult following with Facebook Groups and Pinterest Boards dedicated to work done with just this yarn. Devotees agonize when a favorite color combo discontinued or when a new one has not come to their locale. My first Caron Cakes project was "Road Trip" shawl, crocheted in shades of red, auburn, and speckled wheat. Since my piece was bigger than the model, I used parts of a second skein to complete the shawl. I was able to use the remainder by cutting out portions to create a pair of mismatched, fingerless gloves and a coordinated headband. The Crochet Club and other designers feature many tutorials and videos on several different scarves, shawls, and other projects. At this point most of the projects have been patterns for crochet. My brand new "Desert Winds Scarf" is a Caron Cakes crochet pattern published by makeanddocrew.com. The free download was available on Pinterest. The pattern was supposed to be easy, but I found myself frogging constantly when I lost track of my pattern rows. I finally wrote down the row number after each completed row to avoid my own mistakes. When the piece was done, I thought it looked a bit uneven although it followed the picture rather closely. Therefore, I heeded my own advice and crocheted a single crochet row followed by a picot edging. I held my breath as I crocheted my way around the scarf and had inches left when I made the last stitch. Now I can pat myself on the back. I am really proud of the piece. http://www.lilcreates.com/lillians-blog/crocheting-with-a-finished-edge. I am still in love with these products as they are beautiful and easy to work with. The gloves, scarves, shawls, and cocoons that I have created are unique and exciting. When Joanne's has a BOGO or 3 for $10 sale, I try to stock up on Sweet Roll. I make sure I carry my 50% off one item off coupon from Michaels with me when I go out. I have not been able to find Lion Brand Mandala or Bernat Pop at any local stores as of this date.
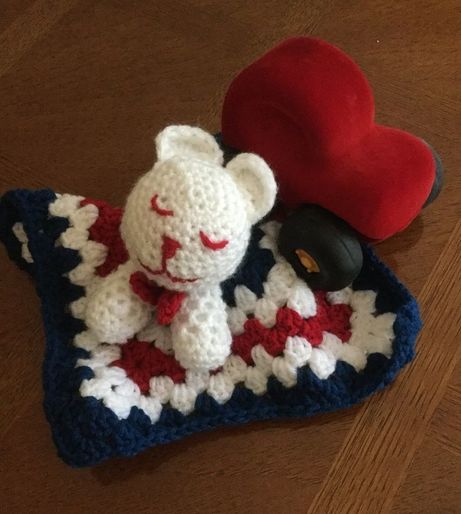
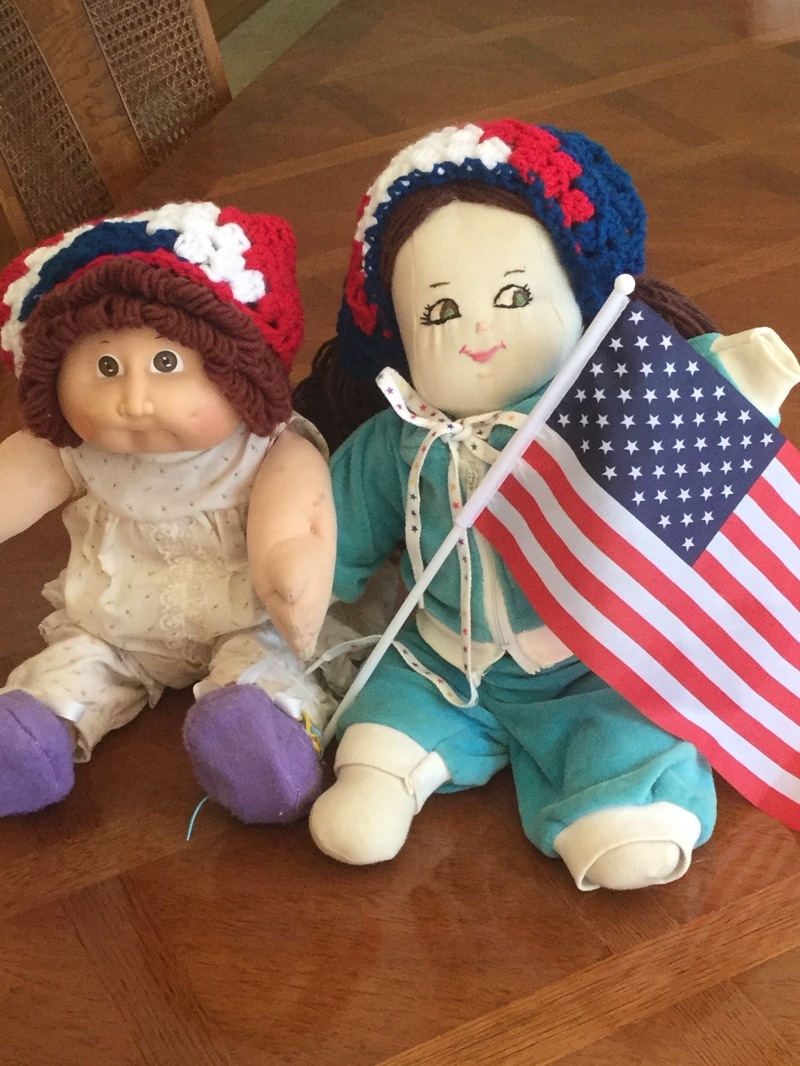
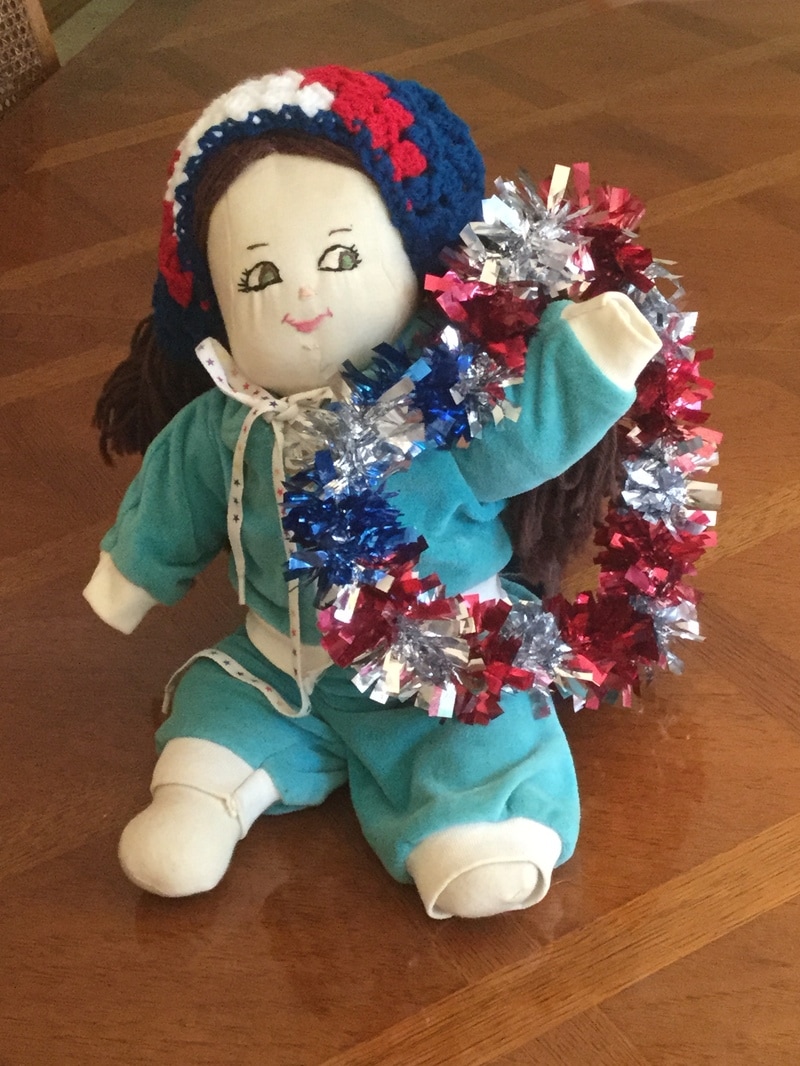
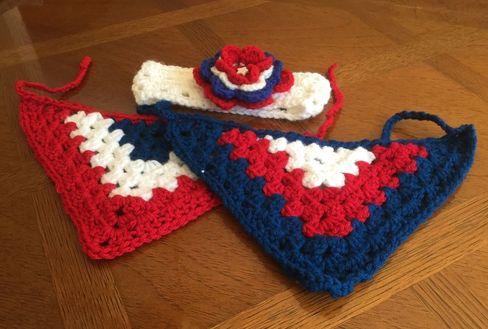
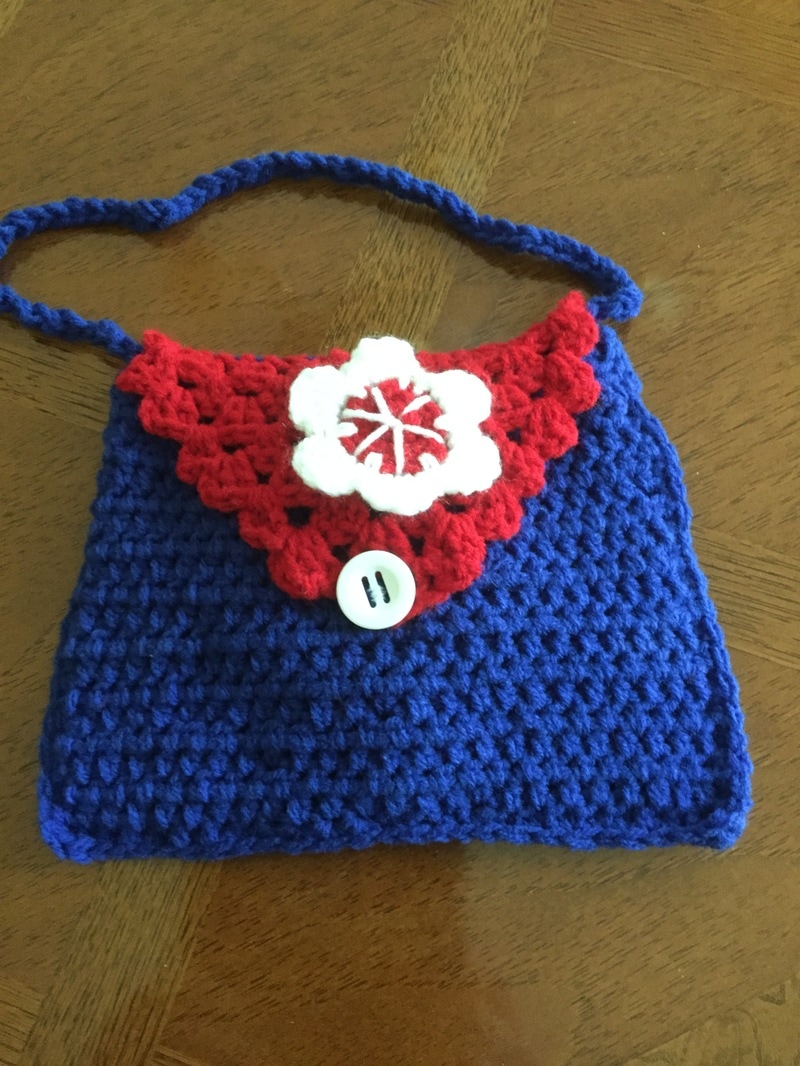
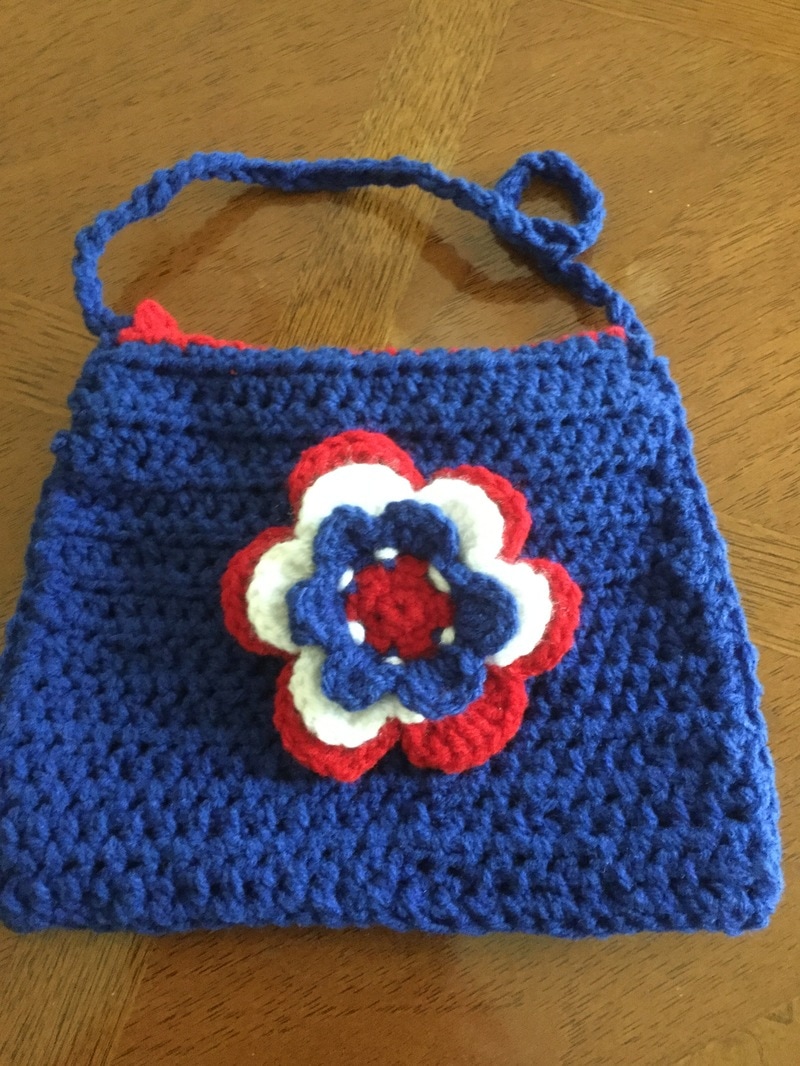
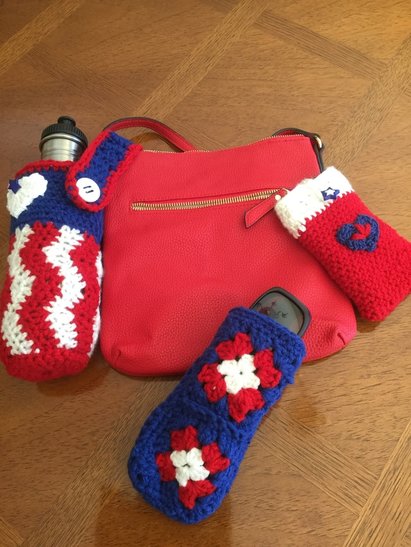
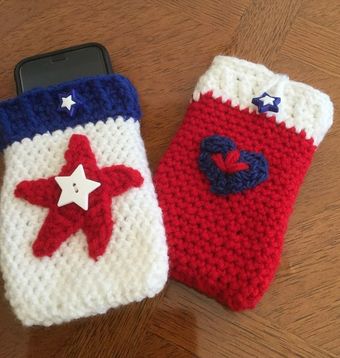
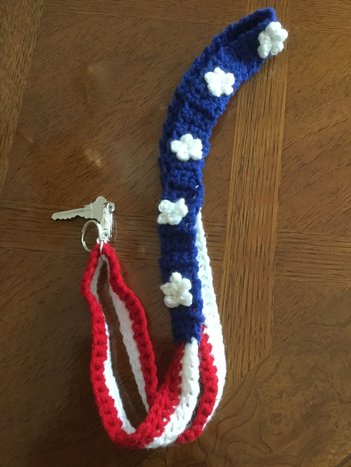
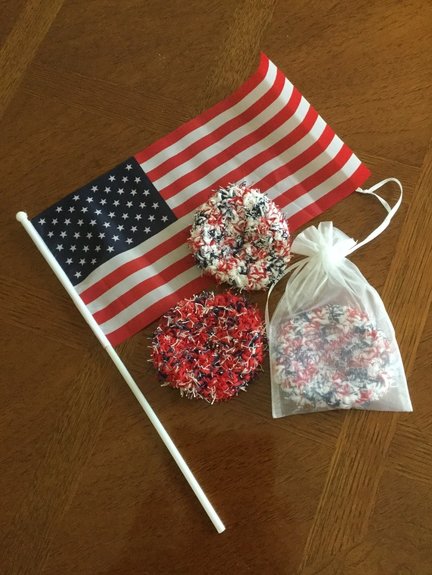
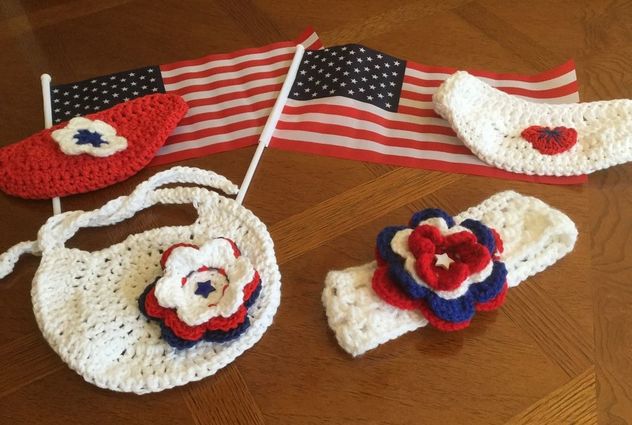
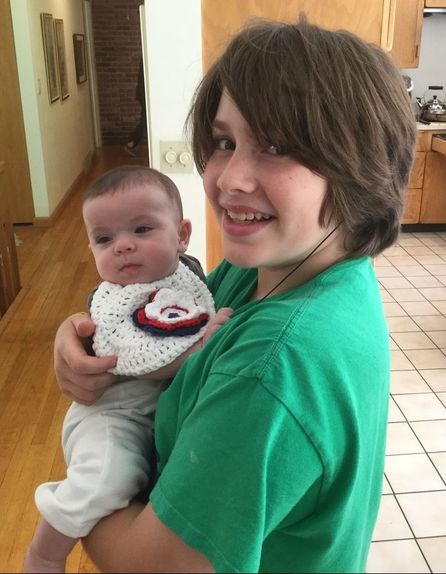
For the expert knitter or crocheter who is looking for speciality yarns, manufacturers such as Noro offer brilliant colors in wool and silk blends. These yarns are luxurious but tend to be from $10.00 to $20.00 for a small skein. I might consider investing in this yarn when I am sure of the pattern and the results I hope to achieve. Which self-striping yarn is your favorite? Which projects make you beam with joy? Please post your thoughts in comments at the end of this article or thoughts and photos of your projects when this post appears on Facebook. 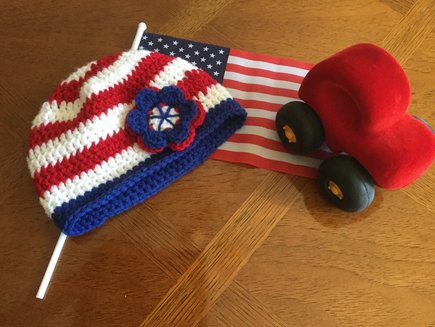 The Fourth of July makes me playful. With family time and outdoor celebrations, I look forward to picnics, hikes, games, and fun. Before I began my holiday preparations in earnest, I decided to experiment with the patriotic colors of red, white, and blue, Some of my projects are the tried and true hats, headbands, and scrubbies featured in previous posts. I even created an All-American Lovey for the occasion. For a smaller project, I translated the triangle scarf pattern into a seasonal granny stitch bandana mini-scarf that can be worn on the head or around the neck. See Patriotic Hair Bandanas at breannstitchery.com. My signature flowers decorate a girl's purse. I crocheted a rectangle 8 1/2" x 14" in a dark blue heavy worsted with an H hook to give it substance. Then I folded the piece together and SC around down from the top of one side, across the bottom, and up the last side. The flap was made with a cluster stitch to form a triangle with a loop for a button closure.The strap was two strands of chained together. Possibilities are endless and fun. The pieces can be adapted to any season or holiday and color scheme. I did not work from a pattern and made up the purse as I went along. Now that I like the results, I am going to work out the specific directions. With the summer heat, we want to keep hydrated. Slip this button closed wave stitch water bottle carrier on to your purse strap. You can get a free down load from Ravelry for Uncle Same Bottle Cozy. This little project helped me to learn the wave stitch. I had attempted this technique many times before, but was unsuccessful. The wave or ripple is supposed to be an easy pattern, but I always came up with the wrong number of stitches. This time things clicked, and I am quite proud of my water bottle carrier. Now I plan to try other ripple or wave patterns that I can prepare for my fall and winter collections. Keeping with the holiday spirit, I added cases for my cell phone and sun glasses. The cell phone case was crocheted in the round from a 30 stitch single crochet. After several inches I switched to a front post double crochet in a contrasting color for the trim. A loop was added for a button closure. The pattern came from ALLFREECROCHET. Search for The Perfect Phone Case. The sun glass case was made form 4 small granny squares. If you want to keep track of your keys, try this red, white , and blue stars and stripes lariat. I learned to make the mini stars in doing this project. See: www.repeatcrafterme.com/2014/06/crochet-stars-and-stripes-lanyard.html. I plan to hand out my Scrubbies as a favor to guests who come to our family celebration. These Scrubbies are a favorite for cleaning dishes and nonstick pots and pans. See my previous post on Scrubby Art for directions. My final piece in the red, white, and blue collection was a patriotic bib. My granddaughter is enjoying solid food now, and comes up with quite a bit of saliva as she teethes. Keeping her clean and cute was my goal. . The bib was made with a worsted weight cotton thread. My grandson adores his little cousin. There are so many other projects to try, but time has expired, and my guests are due to arrive this afternoon. A garland necklace, patriotic flip flops, bows, bracelets, and coasters will have to wait for another season. How do you celebrate with red, white, and blue in crochet. Please leave your thoughts and photos on the comments page or in my FB postings.
|
Archives
November 2022
Categories
|


 RSS Feed