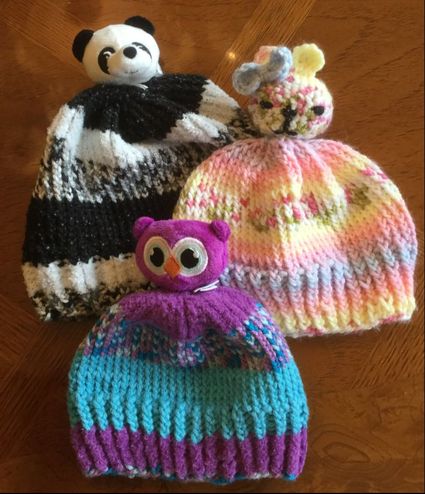
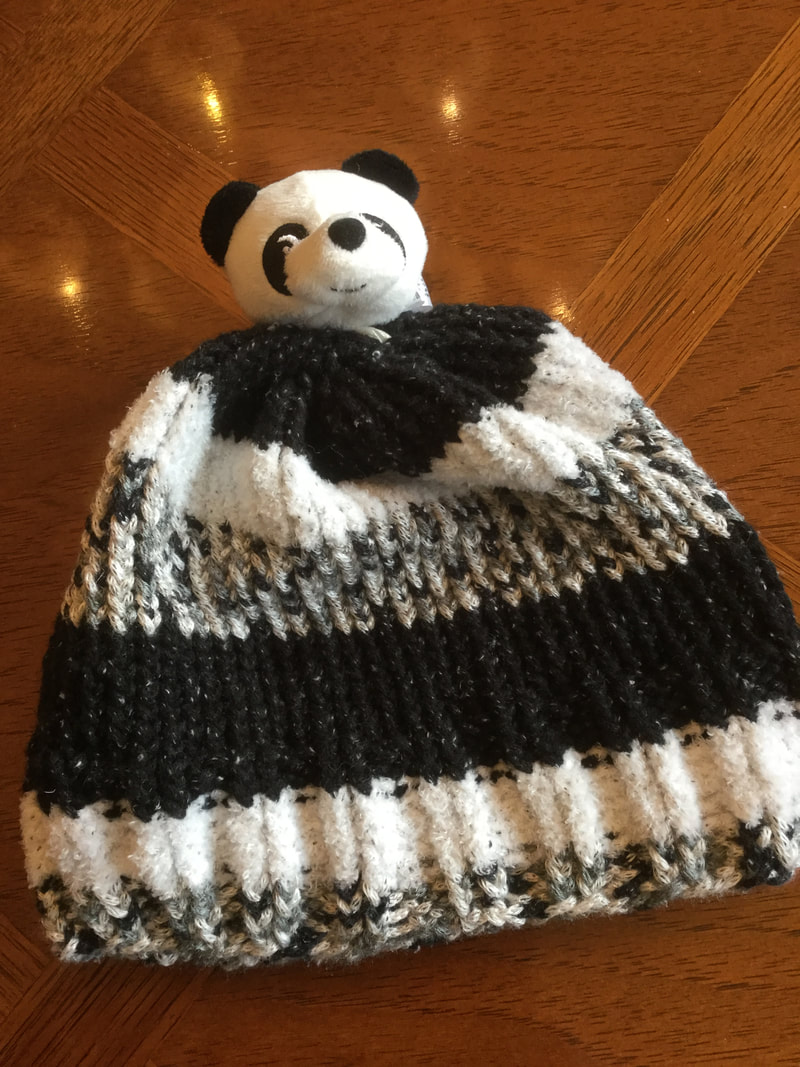
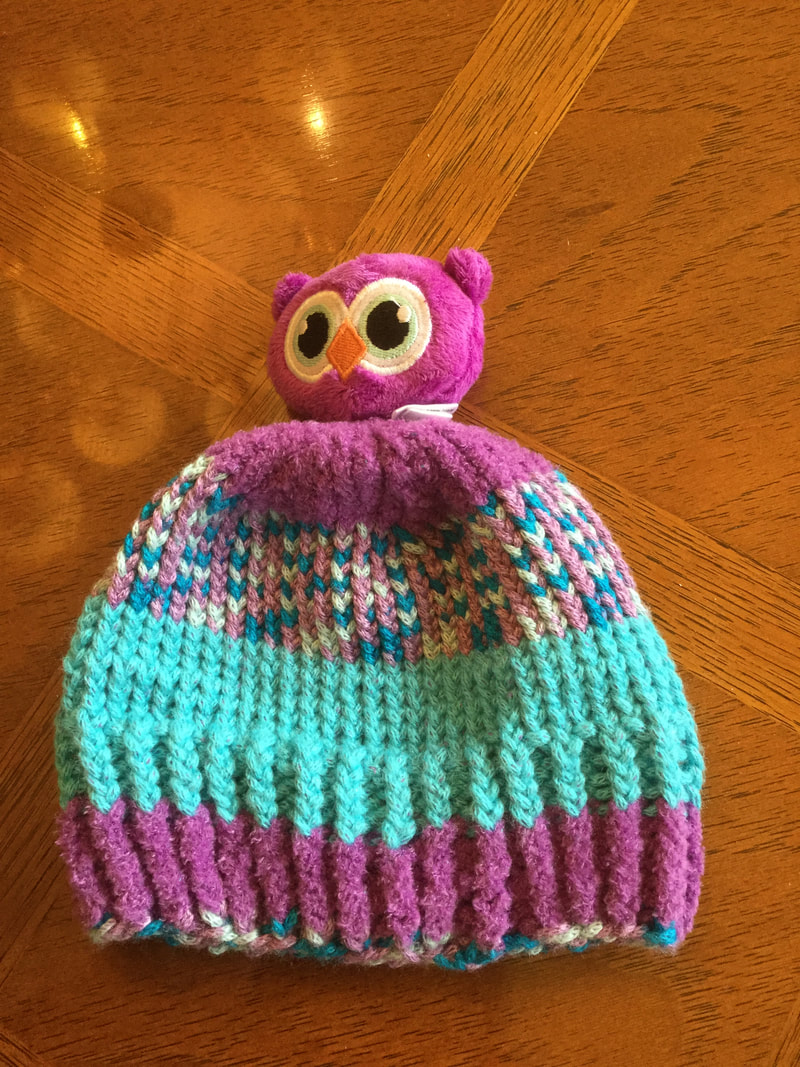
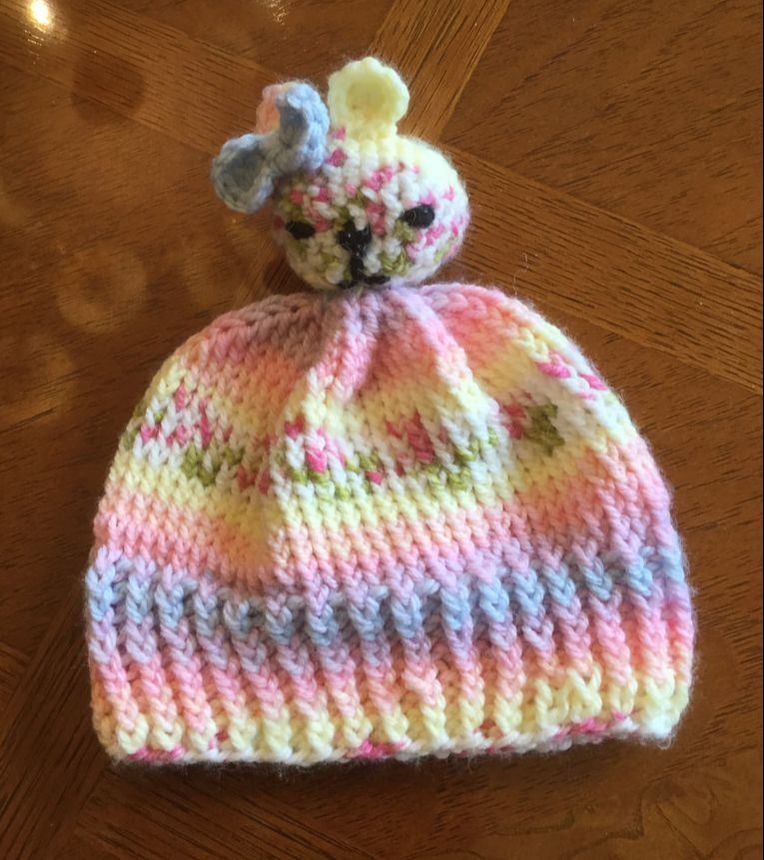
 Why are you attracted to the independent yarn store when the large mega craft stores offer such an array of yarns and frequently post sale prices? For me it is the promise of discovery, the opportunity to find an unusual yarn, a knitted or crocheted sweater. scarf or hat. These pieces that are constructed by the owners show me what I can do with my unusual find. On my last trip I discovered the Chunky Blossom Yarn and a basket full of Top This packages. IN my last post I knit up the Chunky Blossom Cardigan. I still wanted another small project because of my busy schedule, taking care of my husband and babysitting for my granddaughter. The sets of TOP THIS by DMC Creative World each consisted of a ball of 3 continusous textured yarns, just enough to make a baby or child's hat. What was unusual was a adorable animal head that would be attached to the completed beanie. I selected a black, white, and black-white varigated skein with a panda for the the animal topper. The directions on the back side of the wrapper were easy to follow. They called for a 16inch #9 circular needle with double tips to finish off the crown. After the cast on I knit approximately 2 inches of 1x1rib and followed with stockinette stitch. the spiral crown called for decreases until I reached the closing. The turquoise and purple owl hat was made for the infant. Neither of these hats was the right size for my granddaughter. the panda hat was too large, and the owl hat was too small. However, I had a sizable scrap from the Chunky Blossom Sweater. I increased the number of cast on stitches and added rows to the height of the hat. Since I did not have a stuffed animal head for the head, I created my own. I crocheted a small teddy bear head with a G hook and added a bow over one ear of the bear. If you have double pointed needles, you can knit the ball. The hat matched the sweater perfectly. I knew that I had a wonderful accessory for future sweaters. For inspiration on head designs, look for lovey designs on Pinterest. For a one year old, I did not want to make the head too big and only increased to 30 stitches. I made the head a bit shorter than the lovey head as I did not want the hat to be too top-heavy. The DMC Corporation has come up with a wonderful idea for hats that would make any boy or girl smile. For the knitter or crocheter, beanie styles are endless. "Top This" has their own copyrighted designs. These toppers are made with a plush fabric, and the facial features are fixed with a sewing machine. However, the knitter can use his/her own creativity to come up with original animal, floral, or superhero pieces to sew on top of a hat. As a matter of fact these hats can be a great use of scrap yarn with two solid shades and one varied band. My tiny infant beanies have flowers on top of the crown.
5 Comments
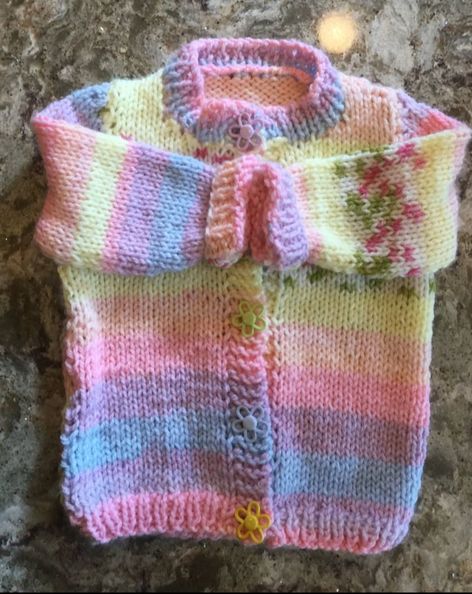
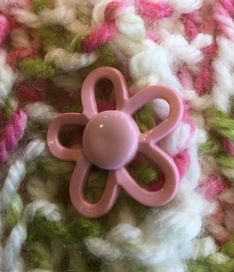
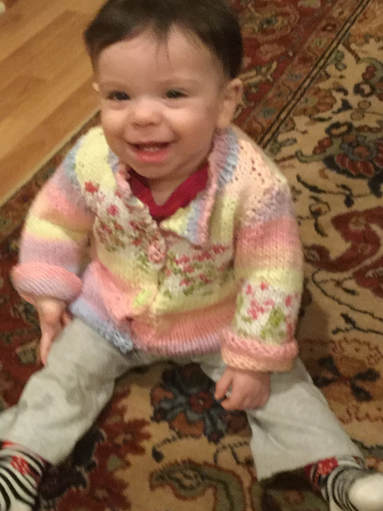 Picture this: two toddlers on riding musical toys traveling up and down the hall, two teenagers emerging from their bedrooms to replenish their food supply, 5 adults conversing in the kitchen and living room, and my injured husband sleeping in the bedroom with the effects of medication from a broken leg. Needless to say, knitting, crocheting, and blogging were not exactly at the top of my list this past week. Even when the company went home, there was so much more care taking to do and countless trips up and down stairs. When I finally got Bert somewhat more comfortable, I was able to think about myself for a while. For my frequently readers, you may remember my husband, Bert, from my Man Shawl post in September. Doing tree work with a friend in our garden, he managed to wedge his food between two logs and twist. We were relieved that the surgery went well, but now the long slow part continues. It is really hard for an active guy to be sedentary. I was able to get out to go for groceries and necessities, but I did not want to leave him stranded during the beginning for any length of time. As any of our fellow knitters will tell you, this is when that knitting stash comes in handy. I had been mostly crocheting for awhile, but I had enough of a special yarn to knit a cardigan for my granddaughter. This Baby Blossom Chunky by Hayfield Knitting Essentials is 70% Acrylic and 30% Nylon. It is a a#5 weight yarn that is knit with #9 and #10.5 needles (using USA scale). There are several selections of pastel banding yarn color combos. What makes this yarn special is that one of the bands has shorter strands of green and dark pink strands in the background color. When knit into a sweater, you get the effect of blossoms and leaves. Hayfield publishes an easy paid pattern (Baby Blossom Chunky #4677)for birth to 7 years, but any pattern for a chunky yarn will work with this yarn. Both round neck and v neck styles are offered. The cuffs and neck band are knit with a #9 needle. The body of the sweater is knit with a #10.5. The design is easy to follow, and the chunky yarn knits up quickly. This was a fortunate choice for a busy week. Since my granddaughter is a slender 1 year old, I selected the 1-2 year old size. It fits now, and will carry her through the spring, but I will have to make the larger 2-3 year old size for next season. One feature I like about the cardigan is the the button and button hole banding. They are knit right into the sweater without picking up rows of stitches. The buttons that I chose for the piece were pastel flowers that coordinated with the pastel bands in the cardigan. Now that I have blocked and photographed the cardigan, my granddaughter can wear it for winter into spring. As soon as I have time I will pick up one of the other color combinations for next year. Although this is a custom yarn, it does not cost too much to knit. I was able to knit the 1-2 year old size with two 100 gram balls. The 2-3 year old size will take two balls as well. Since I have yarn left from the smaller sweater, I will make a matching hat or headband.
Have you discovered a special yarn that makes you smile when you knit or crochet with it? Please share your recommendations and photos of any projects using the yarn.
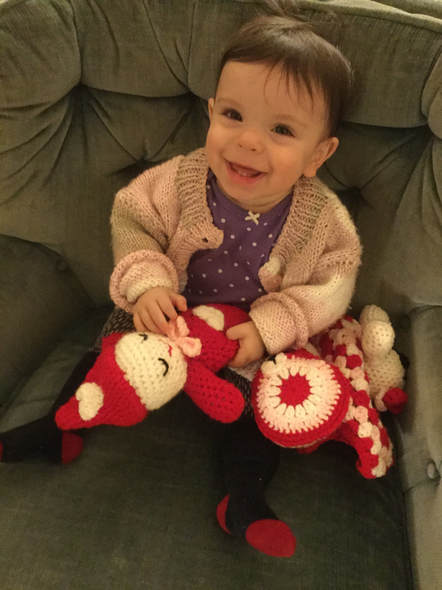
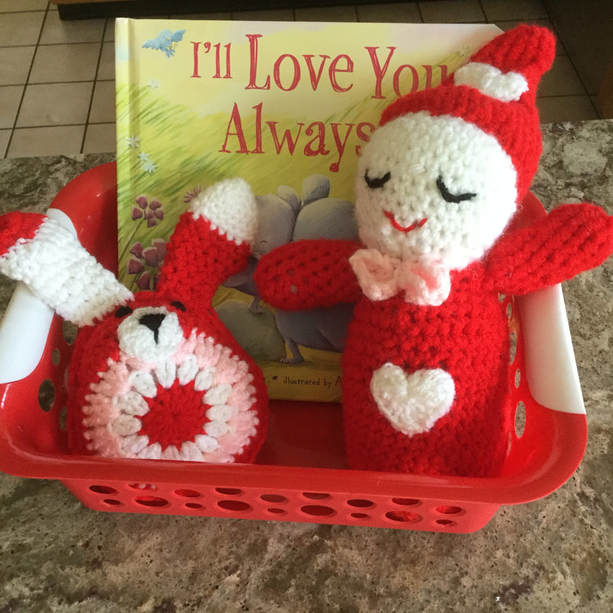
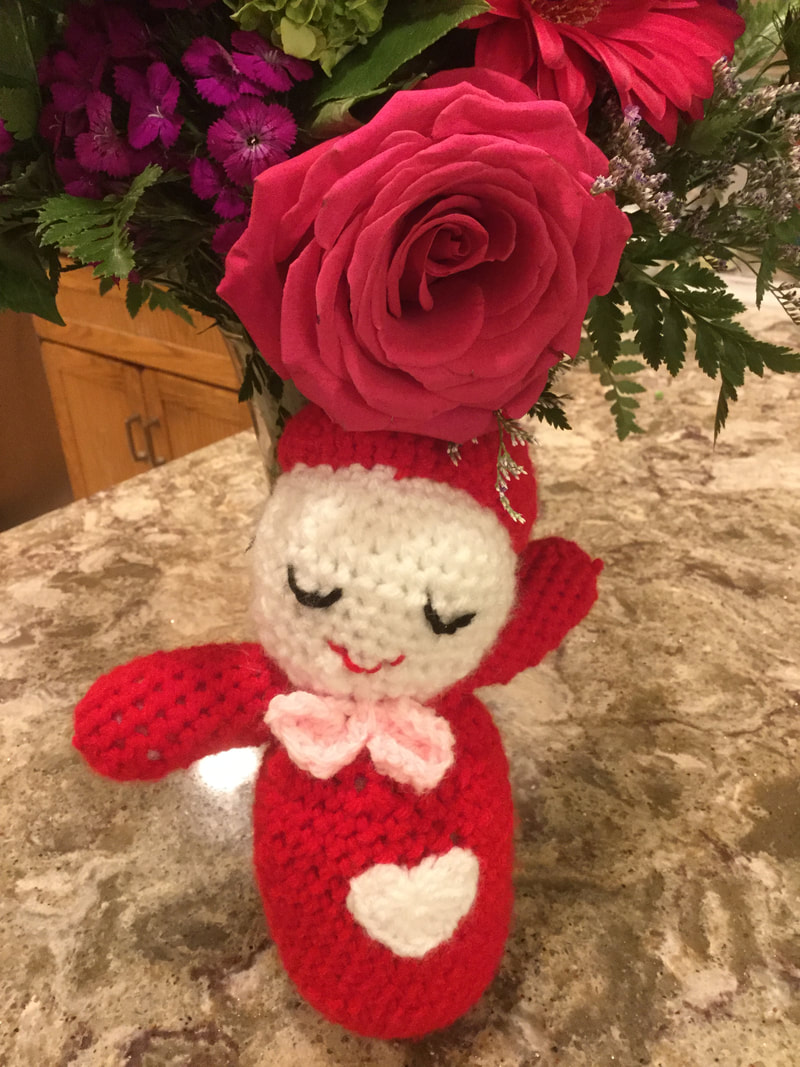
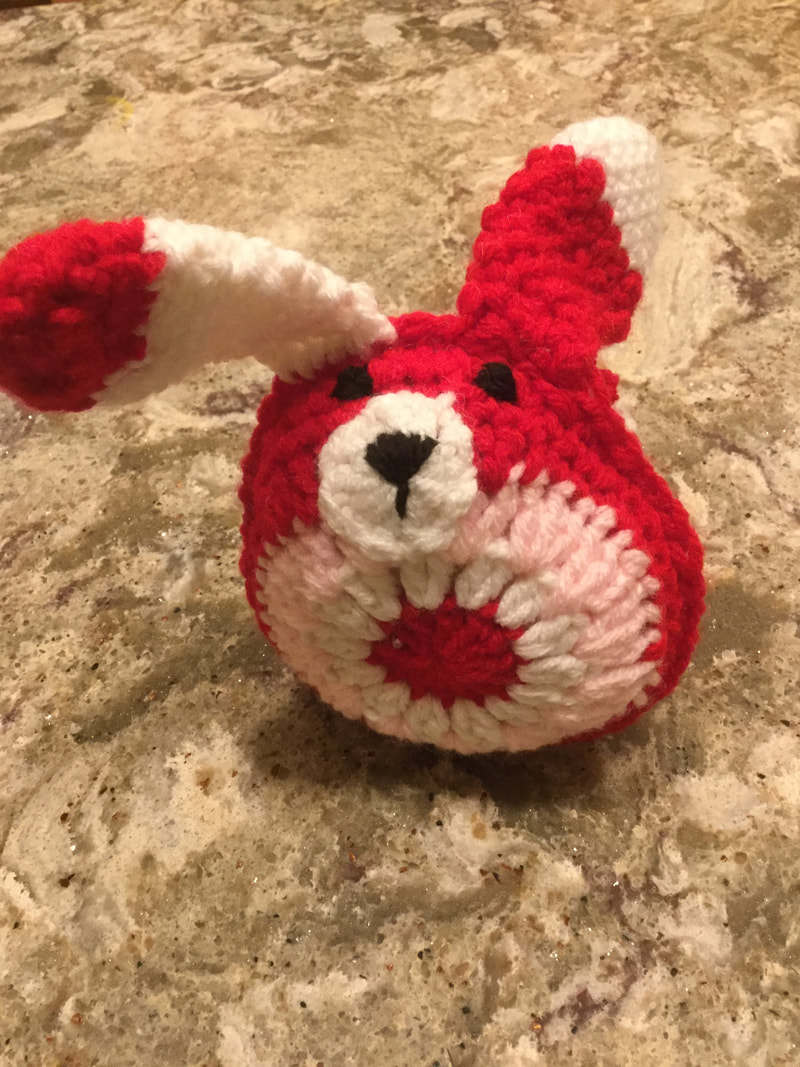
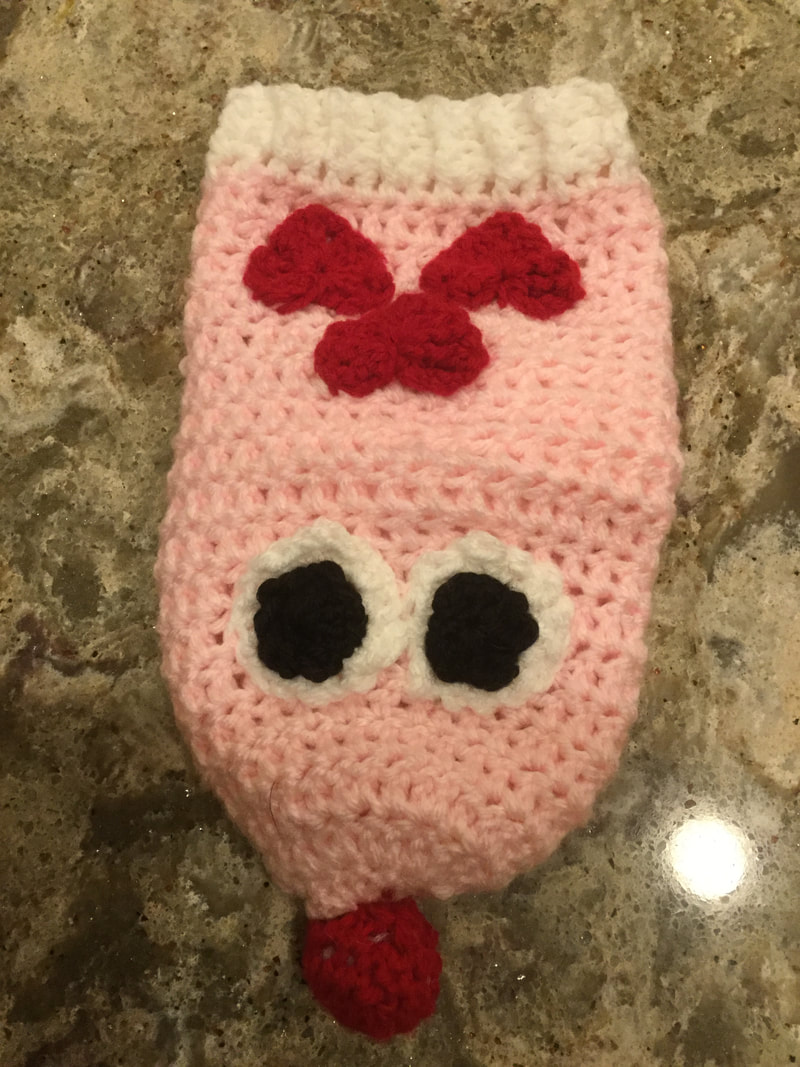
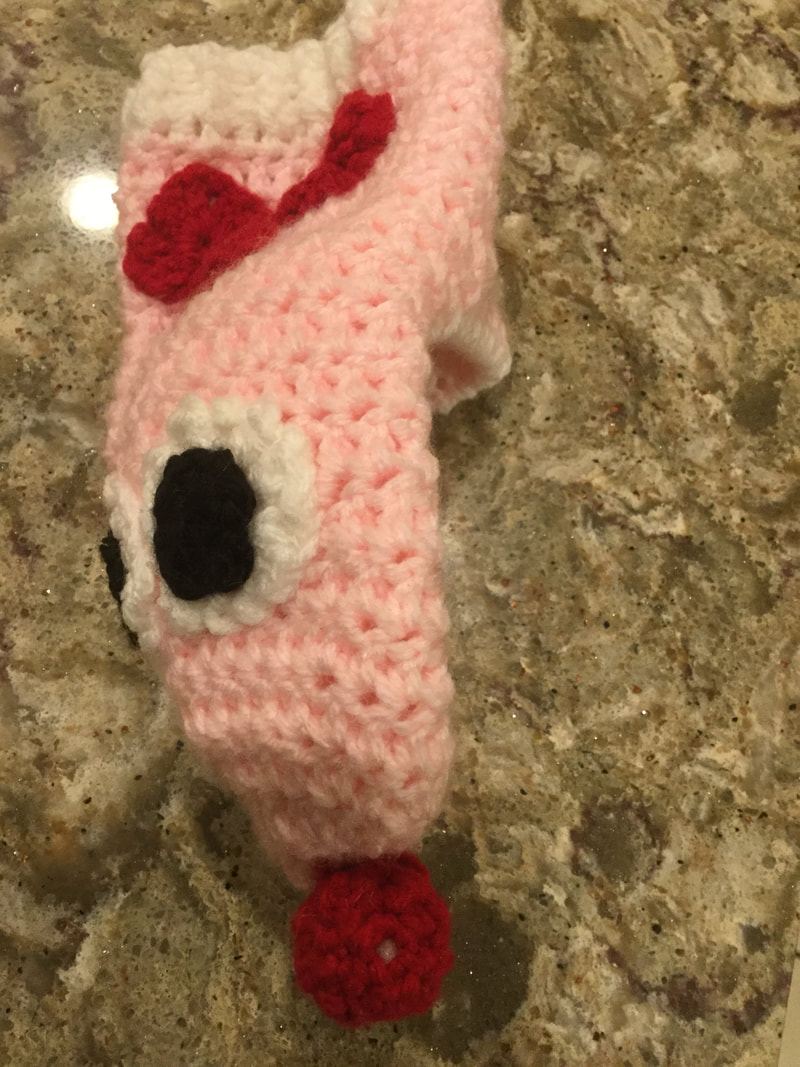
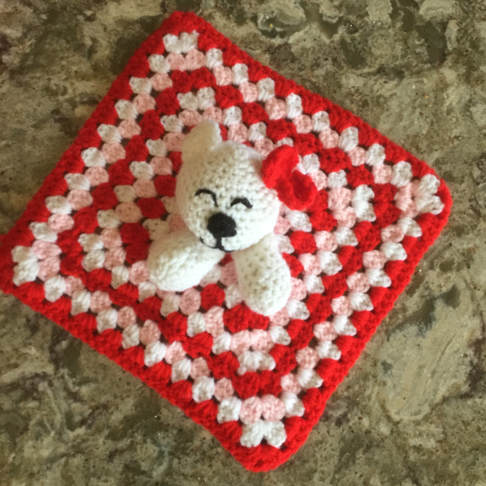
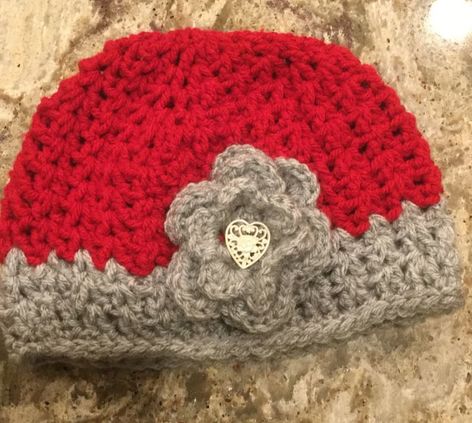
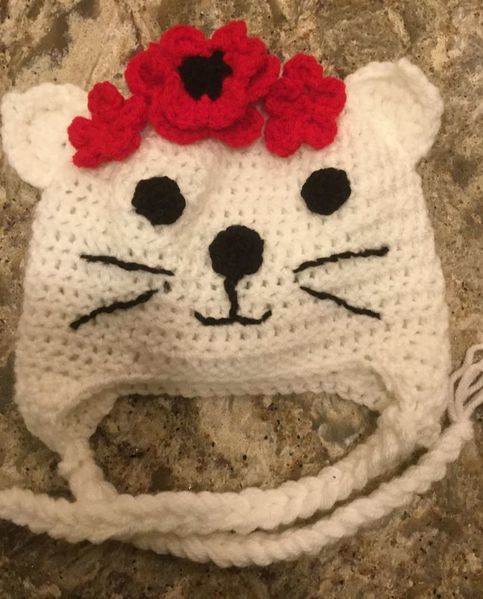
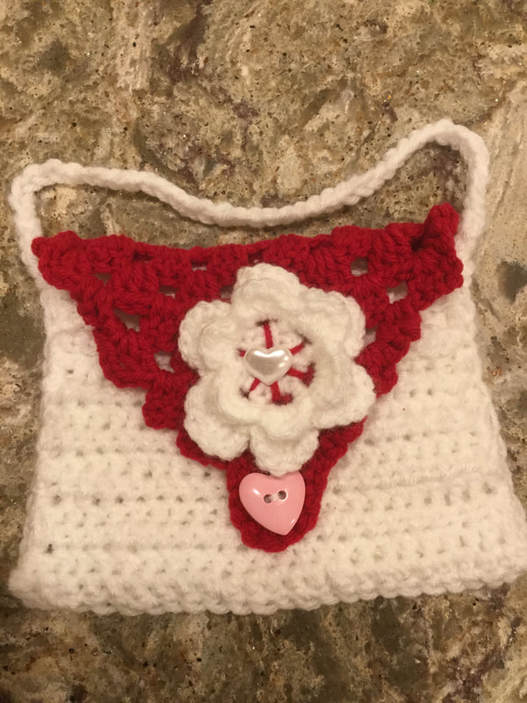
I first tried out the sleepy head amigurumi in pink, and my granddaughter liked it well enough to snuggle with it. However, she got really excited when I handed her the red and white sister version. The body and head are crocheted with a g hook with worsted weight yarn. The body and hat are crocheted separately and stuffed before joining. Then the two crocheted arms are attached. The cap is crocheted and attached at the end. I decided to add a contrasting heart applique for Valentine's Day. The doll is simple to crochet and can be made in one or two sessions. The following link will lead you to the pattern. Go to MaryJane's Mary Janes and scroll for Sleepy Baby Doll.The pattern is also found on Pinterest. The bunny amigurumi pattern tutorial allows the crocheter to use infinite color combinations. The crocheter starts with a magic circle and continues to build a series of several concentric circles. The same colors can be combined for several variations. The resulting doll is whimsical and is easily carried along for a nap time Valentine pal. By using soft pastels, the same pattern can be transformed for Easter. https://thegreendragonfly.files.wordpress.com/2013/03/crochet-bunny-free-pattern-11.jpg. If you have difficulty finding the url on your tablet or phone, go directly to The Green Dragon Fly and scroll for Easter Bunnies. or Kids love to interact with puppets. Pick a basic pattern and change the color and features to make a set. You can carry out your valentine theme or change them for other holidays. This design by Jenni Catavu, allows for a wide range of emotions The puppet is crocheted in worsted weight yarn using an H hook and a Double Crochet stitch. By making an opening for the mouth and stitching in a contrasting patch, you add a lot of personality to the little creature. The eyes and hair are easily altered to create a puppet family. http://byjennidesigns.blogspot.ca/2015/05/free-crochet-pattern-little-cs-silly.htm If you have trouble on your tablet, look for byjenni designs. Then look for Free Crochet Pattern: Little C's Silly Hand Puppets. I found this bunny on Pinterest at https://pinterest.com/pin/58265388910120628. One of my favorite baby and toddler toys is the teddy bear lovey. Crochet a 12 inch square Granny Stitch square Crochet a ball for the head, two arms, a pair of ears, an optional snout, flowers or bows, and you have a toy and a security cuddler. I wrote about these "lovable loveys" in a previous post, but I could not resist the temptation to change the colors for Valentine's Day. My little girl purses look great in red and white. http://www.lilcreates.com/lillians-blog/what-makes-a-lovey-loveable I am still making hats. The first beanie model with my signature flower is crocheted with a v stitch. and a border that alternates front and back post double crochet.. Over the Apple Tree offers a free pattern that is easy to follow. http://overtheappletree.blogspot.com/2015/11/v-stitch-winter-beanie.html?m=1 If you have trouble finding the site on your phone or table, go directly to Over the Apple Tree. The winter beanie is listed as a free pattern under Ravelry Hats with ear flaps are still a favorite. Hoffee and Nuffin offer a tutorial that enables you to make a hat like the original "Hello Kitty." I changed my hat up a bit to follow a design I found on a pair of socks that I gave to my granddaughter. By chaining with several strands of yarn I am able to make ties that are neater than the braided versions. Look for Hoffee and nuffin.blog.blogspot.com and scroll for Hello Kitty Cat Ears Tutorial or go to Pinterest. https://www.Pinterest.com/pin/174233079307180093 Don't forget the little girls' purses that were reposted with valentine colors last week. Toddlers just love to take their own purses when they go shopping like mommy. http://www.lilcreates.com/lillians-blog/crocheted-girls-purse-free-pattern There are so many delightful pieces we can create for our little lovelies for Valentine's Day. Don't forget the headbands, mittens, and flowered hair clips. Young men, I promise to devote a column to you before long. However, for now, I am focused on my littlest princess. What is on your hook for the holiday? Please share your photos and ideas.
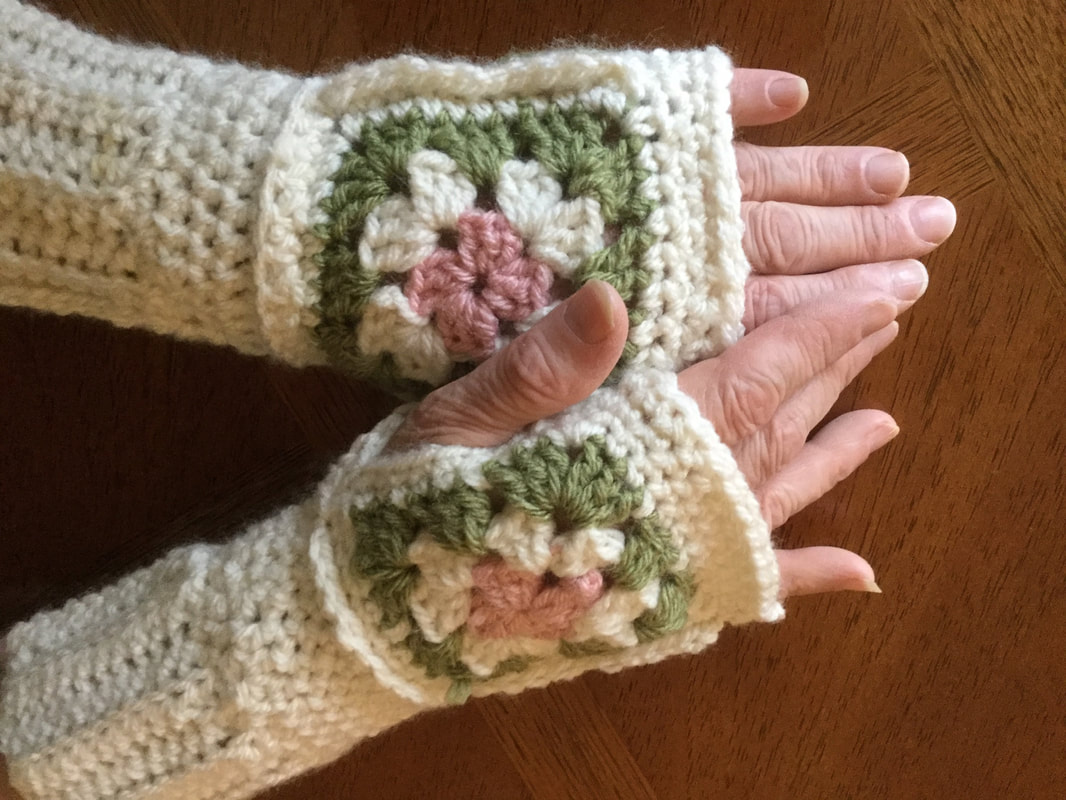
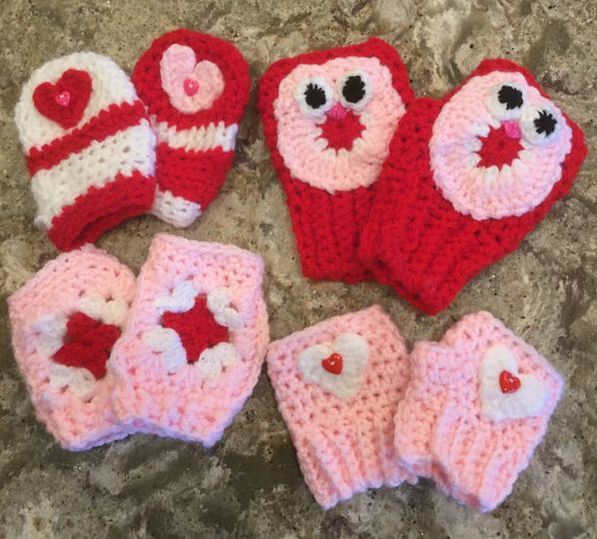
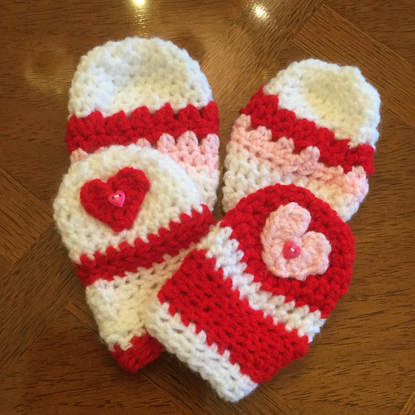
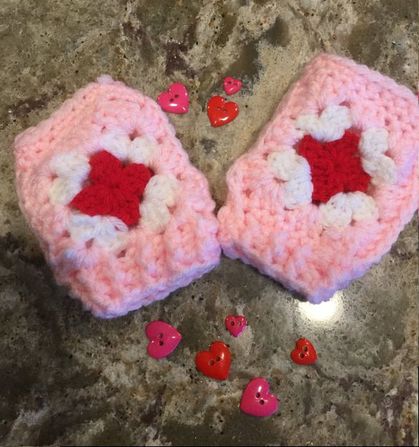
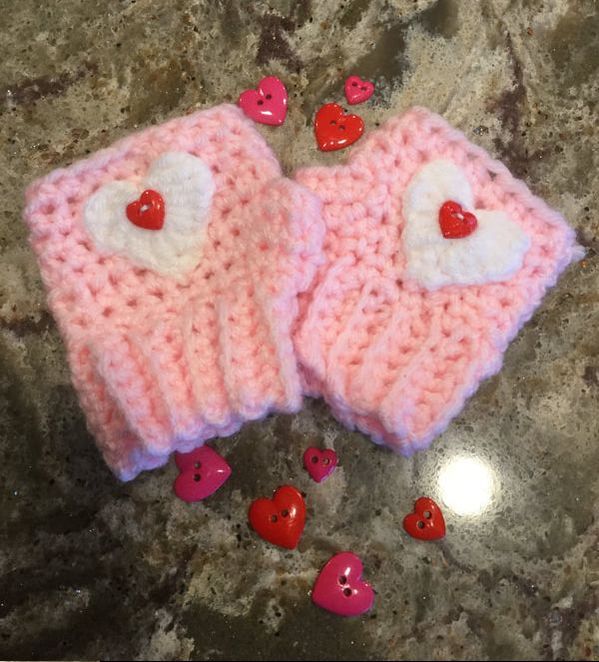
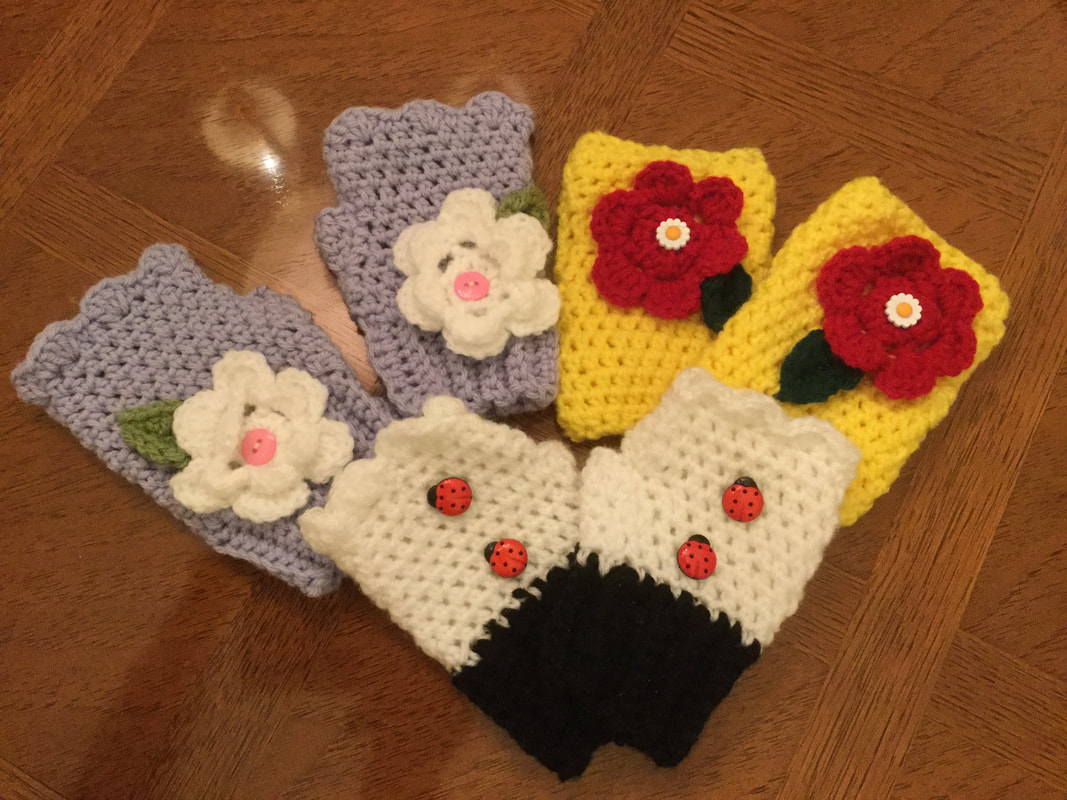
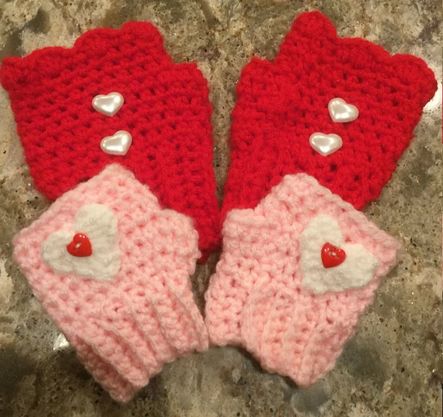 With our recent spell of frigid weather, I was inspired to find patterns that would work well to protect our little ones' hands and fingers. The featured, pink, and white color scheme looks toward Valentine's Day and Heart month. I already have a line of fingerless gloves that will fit children from 4 years to about 9 years. The flowered gloves have been a hit at various holiday fairs. I even had one mom buy a pair of adult fingerless gloves with a matching pair for her daughter. However, before I researched this article, I did not have any gloves for infants and toddlers. A friend of my son's requested a pair of mittens for his 1 year old son. He wanted a set with a string joining the mittens so that they would not get separated or lost. I finished them in a bright red for delivery in early December and even made an animal hat to go with them.This gift got me thinking, and this post is the result. That first pair was crocheted from a pattern from triflesntreasures.com (http://www.triflesntreasures.com/my-attempt-at-blogging/free-crochet-pattern1?crlt.pid=camp.zvzmoUZIgeDn#.Wlk80EtG1Gz) It can also be found on Pinterest. (https://www.pinterest.com/pin/97390410668507874/). The thumbless mitten is basically a pounch stitched in half double crochet. There are countless ways for decorating these mittens. My 1 year old granddaughter is wearing the mismatched pair decorated with stripes and hearts. The second pair in red and pink stripes.The crocheted string connecting the two mittens is optional. A couple of months ago I was playing around with granny squares and transforming them into fingerless gloves. The pair pictured below takes those experiments into the babywear category.
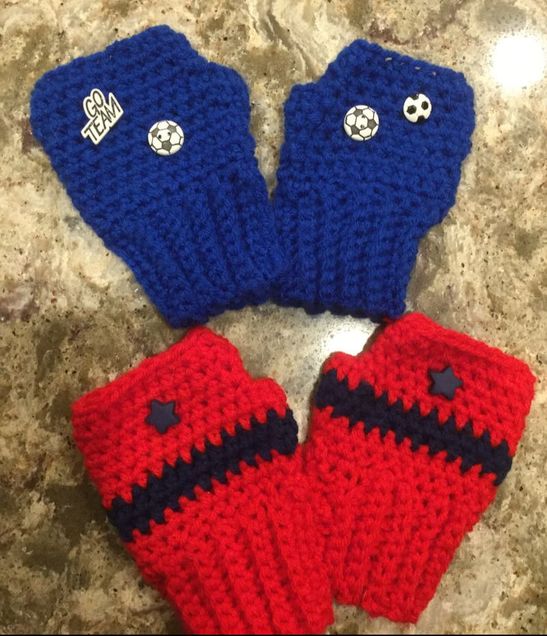
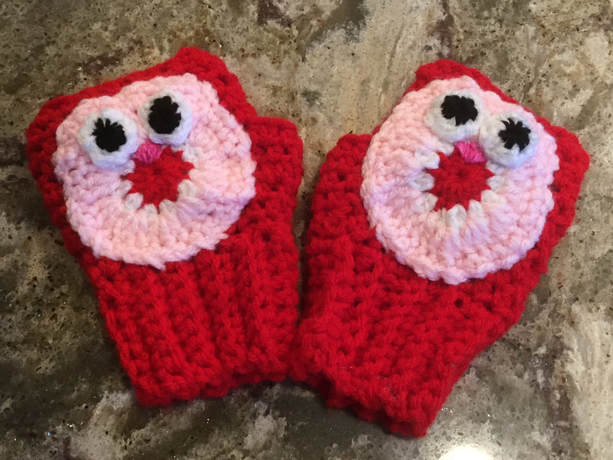
My all time favorite fingerless glove for children is a pattern by Two Little C's: Cute Crochet for all ages. the pattern features toddler size, child, and men's sizes. A woman's size is also available on another post. As noted above, I have been using the child size for years and have sold many gloves this season. The pattern directions are simple and easy to replicate. It wasn't until I began this latest project that I noticed that there were pattern directions for the toddler size. The designer prefers to make the toddler size wider than the child size because she feels that toddler hands are chubby. The resulting image of the glove is quite boxy. As this has not been my experience with children, I altered the pattern to use the narrower width of the child pattern with the length dimension of the toddler pattern. The color and decoration accents are endless. Flowers, stripes, and decorative buttons are just a few ways to add personality to your gloves I tend to crochet gloves for girls more than for boys. Boys like the bright colors, stripes and sports related buttons. I might even try a couple of camouflage mitts for next year. Kids love animal features on their gloves. The owl design was taken from The Green Dragonfly (https://thegreendragonfly.wordpress.com/2013/04/19/owl-mittens) The designer uses a crocheted rectangle as her glove base. The rectangle is folded in half and stitched on the long side, leaving room for the thumb hole. For my fingerless glove pair, I crocheted matching owls is red,white, and pink. I used the glove base from the Two C's pattern noted above. I adore these mittens, but they took hours to make. There is no way I could sell them at a reasonable price using any sensible pricing guide. Therefore, I will just hold them for my granddaughter until her hands get big enough. She loves everything in red. Projects for next year would include gloves with different animal motifs and mittens with a thumb. I will be continuing with the valentine color scheme and motifs in the weeks leading up to the holiday. I invite your feedback on these tiny treasures and welcome your thoughts experiences, photos, and ideas. Crocheting little mitts for little hands and fingers has been delightful.
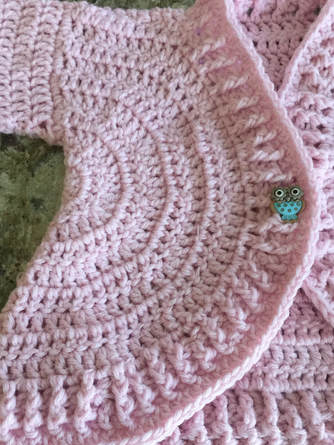
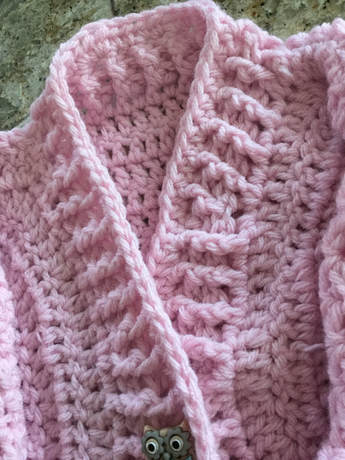
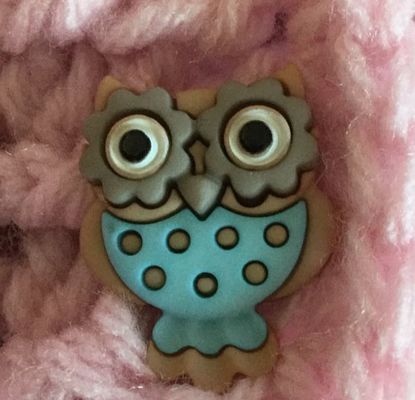
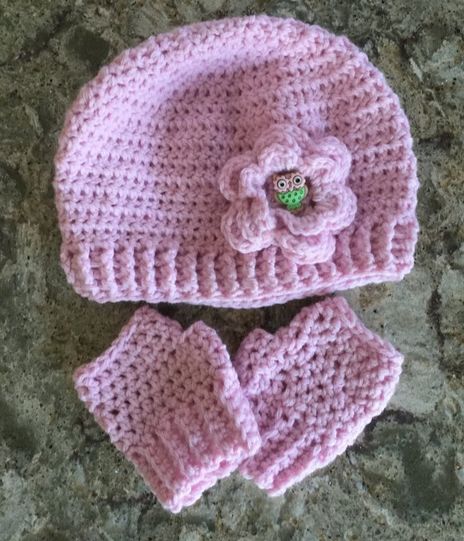
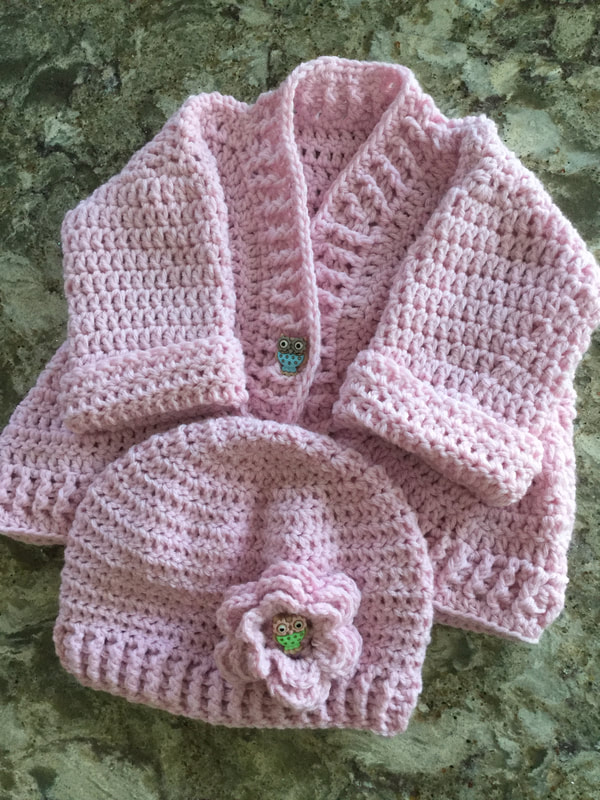
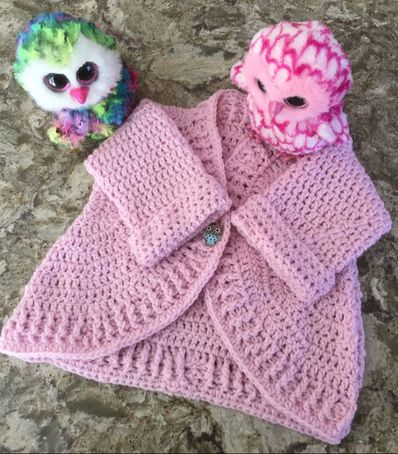 When I first saw the image and pattern for this jacket months ago, I definitely put the project at the top of my to-do list. I loved the shape and design and could picture my granddaughter wearing the sophisticated style. The piece was designed by KIki Crochet, and the designer provides clear directions for all phases of the jacket on a You Tube Video.(http://crochetdownloadpattern.tk/pattern-coat-crochet-for-kids/). While the instructor gives specific directions for a 2 year old, the pattern can easily be adapted for a younger or older child using her suggestions. The speaker bases her directions on measurements taken from a sizing chart for the chest circumference. In this case it as 54 cm Each front will be 23 cm, and the arm hole opening will be 10 cm. The instructor starts with a square back piece before proceeding to the semicircular front pieces. The semicircle front pieces are crocheted in the way you would crochet a hat in Double Crochet. However, after starting with the magic circle and in each increase row, you do not join to close the circle. By crocheting back and forth with the appropriate number of increases in each row, you will fashion two front pieces. Listen carefully to the video. The instructor shows you how to make the fronts that will fit perfectly onto the back piece. After she sews the sides together, she shows you how to crochet the arms from the opening. Throughout the presentation, I stopped and paused the video as I completed each stage of the directions. The last step is the ribbed edging that is crocheted with Double Crochet Front Post alternating with Double Crochet Back Post. While you will crochet one stitch in each stitch on the straight portions of the jacket, you will need to make increases on the semi-circular front sections. Again the demonstration is clear and helpful. A button hole is not needed as the spaces in the edging are flexible enough to allow a 3/4 inch button to pass through. In sorting through my button collection, I found two buttons that would work well with the design.The first was a pewter circle with an embossed flower. The second an owl in tan and turquoise with pink around the eyes. In the end I chose the owl. It was playful, and the pink matched the pink in the jacket. The jacket needed a hat and gloves to complete the ensemble. Here is where I decided to improvise. I had made another piece with the first skein of blushing pink yarn, but I wasn't thrilled with it. Therefore, I just loosened the end, and instead of rewinding into a ball, I crocheted directly from the discarded piece as it unraveled. A flower with a matching owl button was the perfect accent. I had enough yarn for toddler fingerless gloves. If I can find another pair of owl buttons, I will add them to the gloves. I decided to publish this article before I could get my granddaughter to model it. I hope to update the post when I have her picture.
It was fun to work the jacket along with the instructor as she demonstrated each part. You Tube videos have been quite helpful as I have learned new designs and techniques. Crocheting has never been easier with the wealth of video demonstrations to take you step by step. |
Archives
November 2022
Categories
|

 RSS Feed