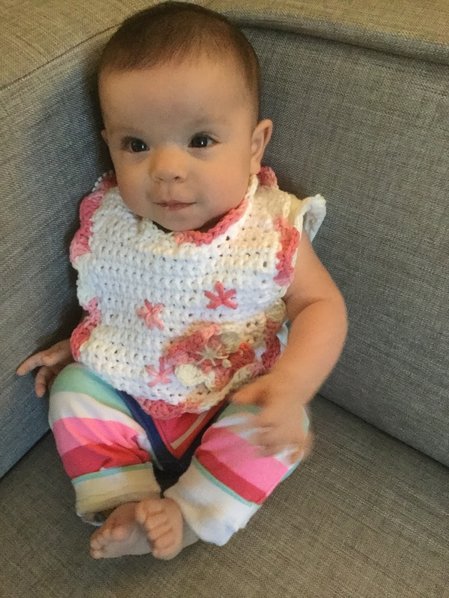
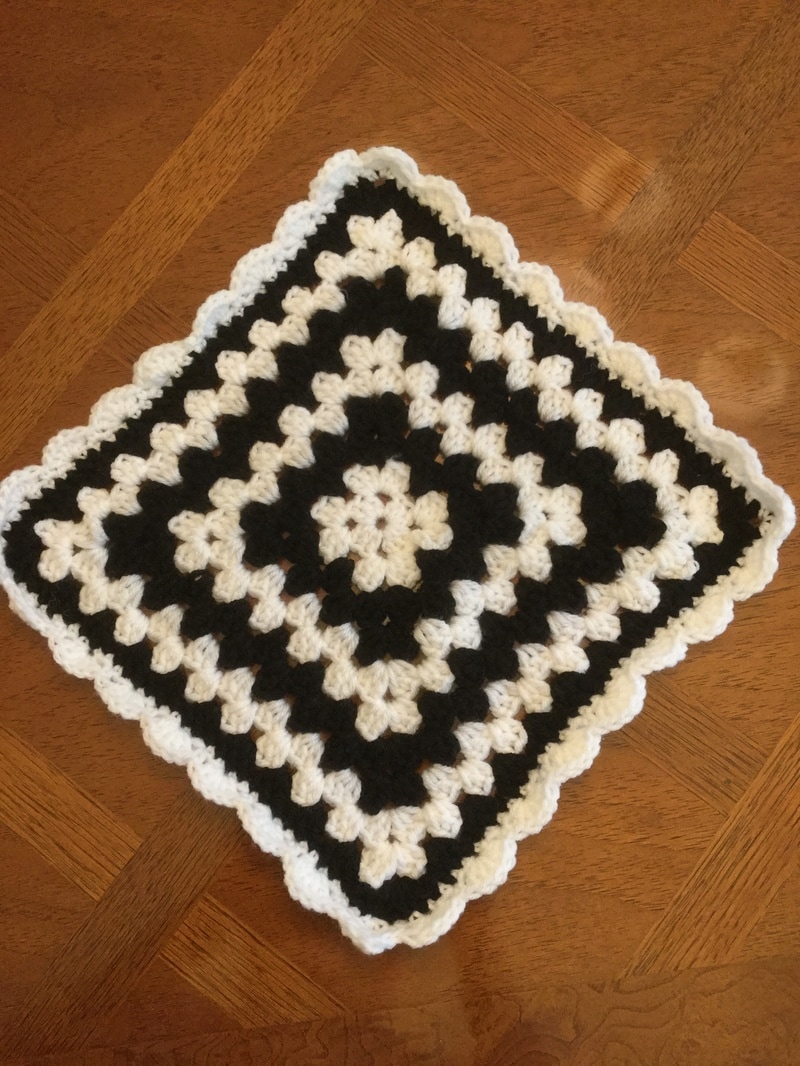
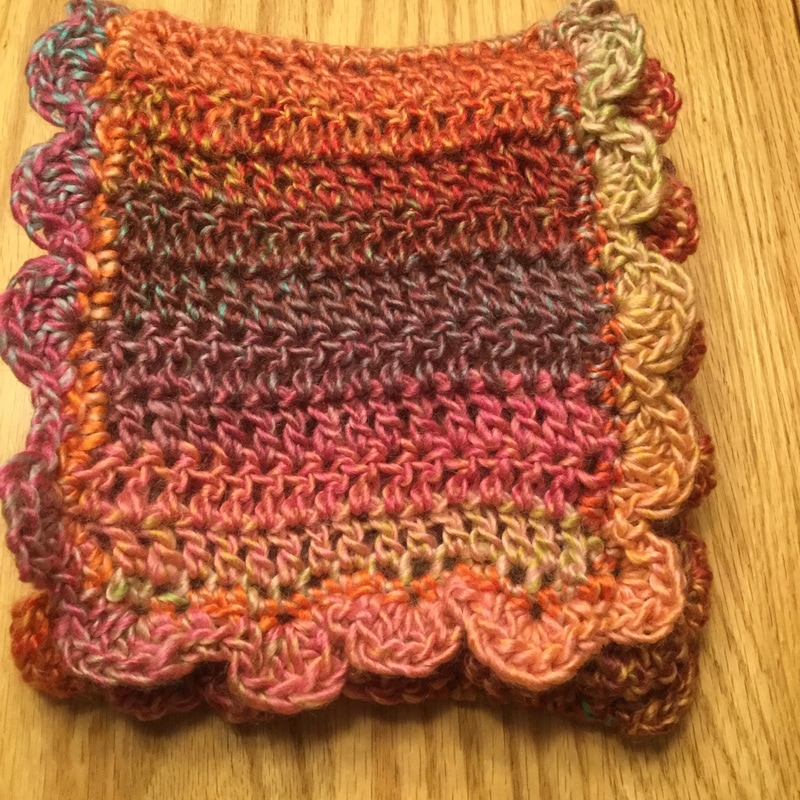
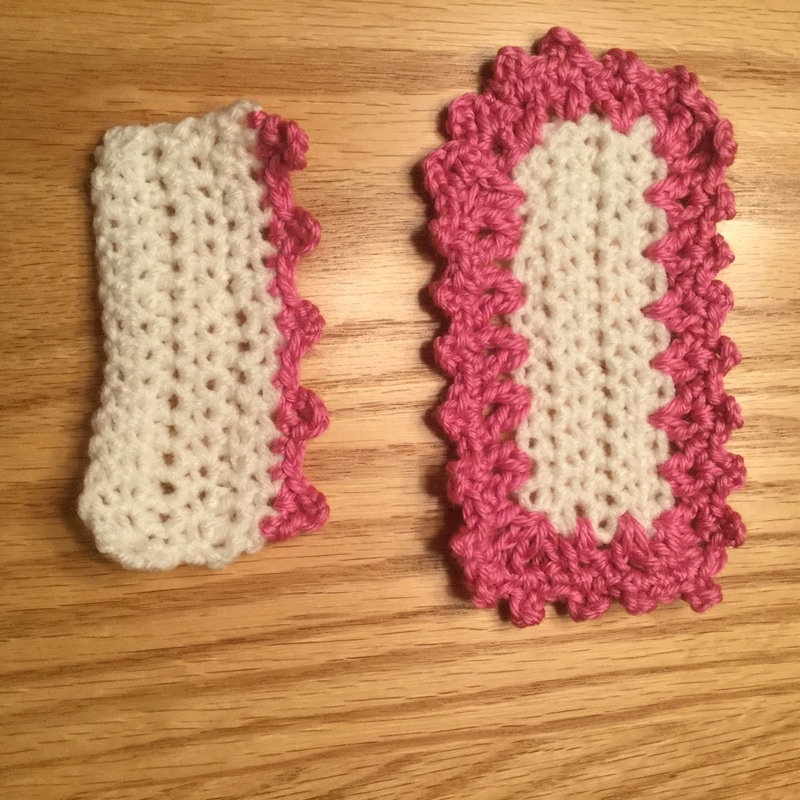
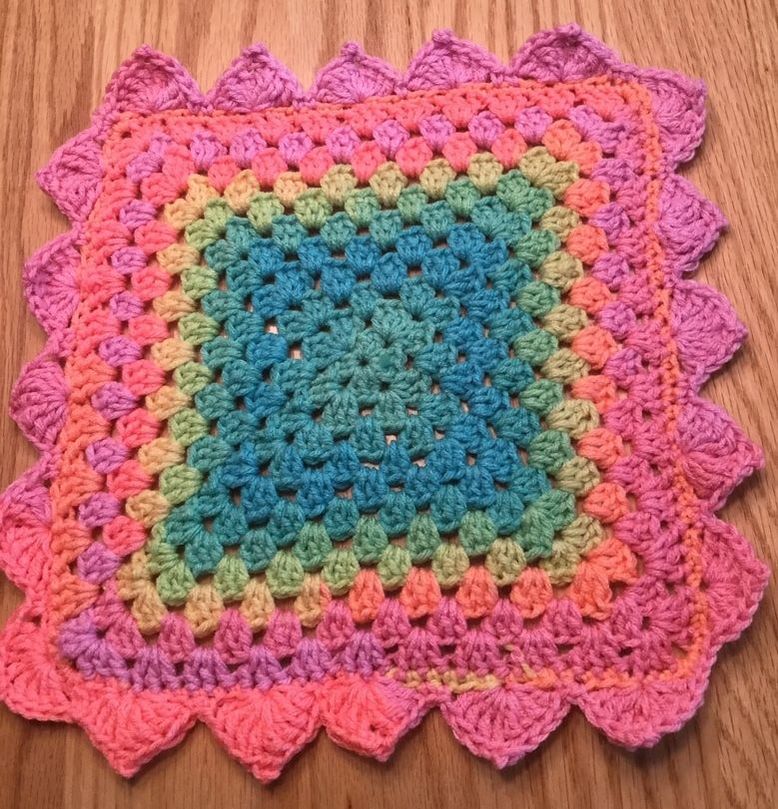
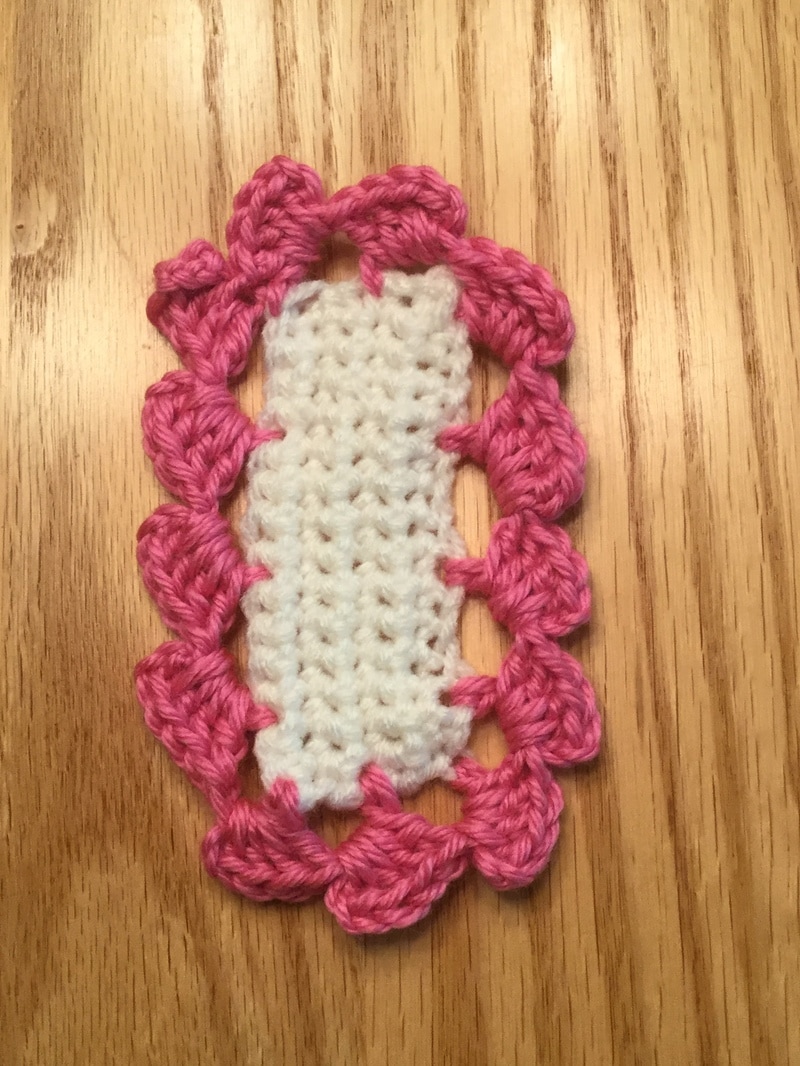
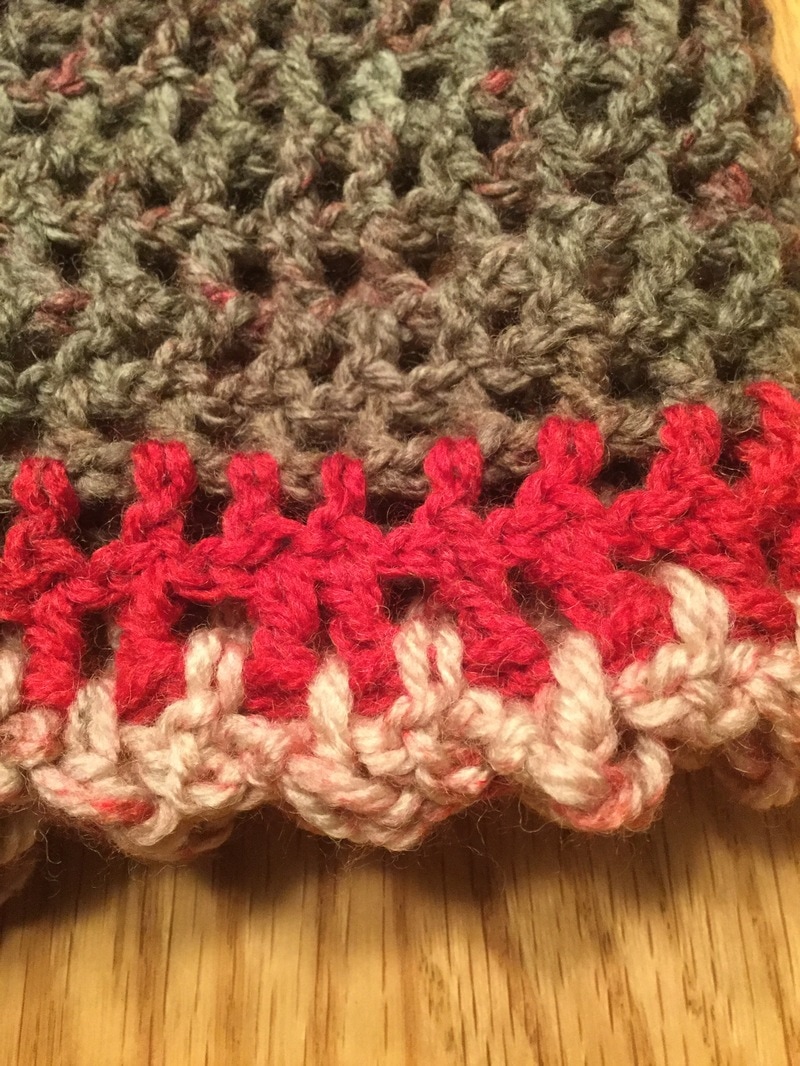
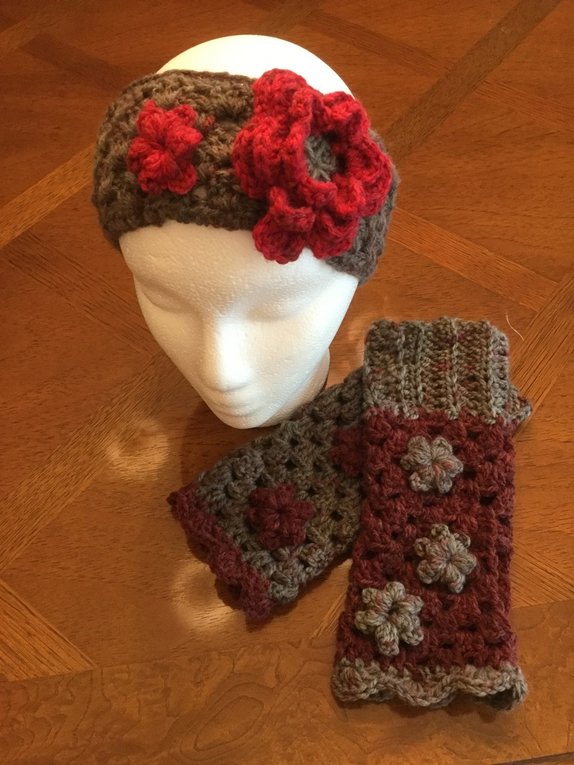
 When is your crocheted piece finished? When is it finally done? You have spent countless hours working the intricate stitches, counting rows ,and assembling parts as needed,. The colors are beautiful and flow into one another. The one last step that raises the quality of your presentation from good to extraordinary is the crocheted finished edge or border. As a blogger, I love sharing my journey as a fiber artist, creating and especially learning new stitches, techniques, approaches. So this week my quest leads me to the crocheted finished edge. It evens out rough spots, and adds an attractive and often sophisticated touch to your work. I have watched countless videos and analyzed many different photo-tutorials to the 11 edgings I find most useful, most attractive, reasonably easy to understand and execute. A few of these I already use to to finish and decorate my work. With others, I will make a concentrated effort to expand my repertoire to learn and repeat until they become a regular part of my crocheting toolbox of skills. The simplest, yet most useful edge is the single crochet (1). While the top and bottom of a piece have a smooth edge, the sides to a piece look rather rough. Just by crocheting one line of single crochet around, the crafter, neatens up the work. When your crochet was a single crochet, single crochet 1 stitch on the side border. For the half double or double crochet row, make 2 stitches on the side border. For the treble crochet, make 3 stitches. In this way your work will lay smoothly.. The line of single crochet is a must for more complicated edgings and provides a foundation for the more complicated stitches to follow. The single crochet may be in the same color as the main part of the piece, or it can be in a contrasting or complementary color. Be sure to crochet 3 single crochets into the corner so that the work lies flat. Frequently, I will follow the line of single crochet with a line of half double(2) or double crochet(3). Another simple, but effective border is achieved by alternatiing a double crochet with a single chain stitch(4). The crocheter can thread a slender ribbon through the open spaces. These were my main edgings until I decided to expand my knowledge base. The blanket stitch is another simple border. I have seen this edging in simple garter stitch knitted sweaters for infants. I just taught myself to do the reverse single, also called the crab stitch (5). It makes for a simple, but interesting effect, and be be executed with a double thread for a more defined accent. Execute this stitch by crocheting from left to right instead of from right to left. In the piece below, I show you my sample of this basic edging. How to Crochet: Reverse Single Crochet Stitch by Mooglyblog.com offers a You Tube video that can help you stitch in reverse order. Another edging that I frequently use is the Scallop or Shell (6). Use a small or regular scallop, depending on the size of the piece. I like the feminine touch it gives to the work. I usually like a shell at the corner when I am edging a blanket. The basic edge pattern is: 1SC,. sk 1, 5DC in the same stitch, sk1, 1SC to anchor the shell. Then repeat around the blanket, scarf, bib, etc. If you are a stitch short, you can usually leave out a stitch, and it will not be too noticeable. Some crocheters leave out the single crochet between the scallops. By placing a shell at the top of my fingerless gloves I gave a finished look that goes well with the flower accent. A Craftsy.com article, Five Simple and Stunning Edges provides written directions for completing the edging. It is worked over a multiple of 4 stitches plus 1. Fiberflux.blogspot.com offers a photo tutorial that shows the crocheter how to crochet the scallop edge around a square. This is a strategy that works for granny square blankets. When I was preparing for my last lovey posting I had to crochet several 12" x12" squares. I took advantage of the opportunity and crocheted the scalloped/ shell edge around a few of the squares to practice. The Double V Stitch (7) is easy to master, and it is also an attractive finish to a extended granny or cluster stitch project. In each space between the cluster stitches, crochet 2 DC in the same spot. Make 2 chain stitches, and then crochet 2 more DC. You now have a double V. Chain 2 stitches and continue around the square. At each corner, you will have the same double V stitch. The Picot Stitch (8) adds an attractive edging when you do not want to overwhelm the main piece. The size of the Picot and the stitches between raised stitches can be variable. I like to use a 4 stitch chain that can then be stitched back into the same stitch and to separate the picot with 2 SC stitches. The Picot can also be added to the to the V stitch to make a fancier edge.(9) Another border stitch that I just discovered is the Block Stitch (10) is demonstrated in a You Tube Video, Crochet: Block Edging tutorial. by Bella Coco. The stitch pattern is done in multiples of 4. My sample is done in single crochet, but it would look fine with Half Double Crochet. The sample swatch in the video is done in waffle stitch. The instructor shows the viewer in detail how to single crochet stabilizing row around the sample before starting the Block Stitch. The instructor uses British terms, but she frequently translates into American terms .Another helpful article, See How to Crochet 3 Beautiful Designs to Finish Your Project in Style by Alice Cullerne Browne (http://diyeverywhere.com) explains and demonstrates, the shell, picot, and block edges. The last edging that I would use with any frequency is the Cathedral Edging Stitch (11). The pattern repeat is 6 stitches. On my sample, I had the base of both triangles at the corner. It is gender neutral, but it uses quite a bit of yarn. The Cathedral Edging can be found as a free download. on Ravelry 6. There are so many edgings that can expand, finish, or enhance your crochet work. The nature of your work, and the purpose for the edging will determine which one you use. I would still like to master some of the more complicated finishes. The tulip edging looks especially pretty, but I have a lot of practice to do before I add it to a feminine piece. The intricate border for the "Road Trip Scarf" from a previous post was done in three rows. In the last row the crocheter had to remove the hook from the chain before weaving it through a loop and then replacing the hook. For a photo tutorial, see .the Road Trip Scarf from a previous posting. The final effect was worth the effort even though it required quite a bit of focus and and redoing. This kind of border is best used on a larger piece, such as a shawl or larger scarf. What is your favorite go-to edging? How do you use edgings to enhance your pieces? Please share your photos or your thoughts in the comments section or on Facebook when I post this article. What is your favorite go-to edging or border? How do you use edgings to enhance your pieces. Please share your photos or your thoughts in the comments section of this article or on one of the Facebook postings.
1 Comment
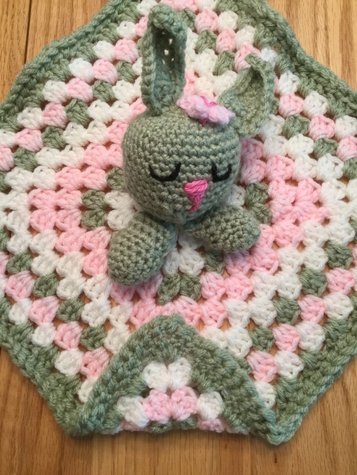
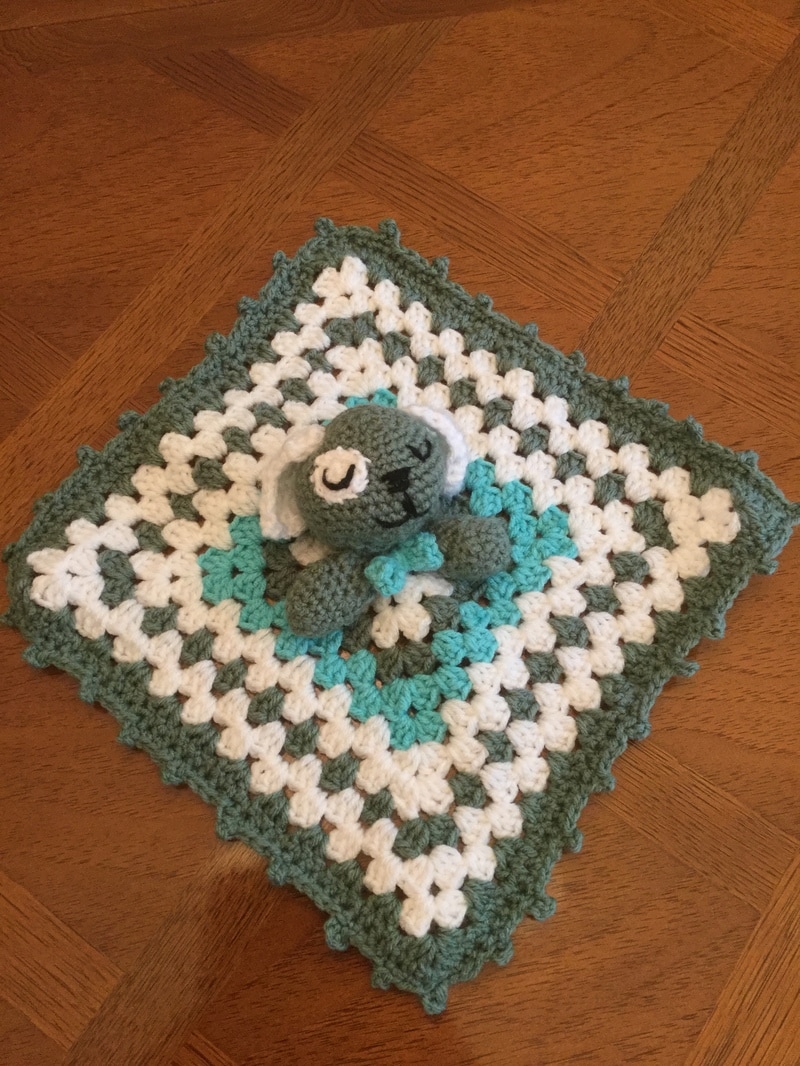
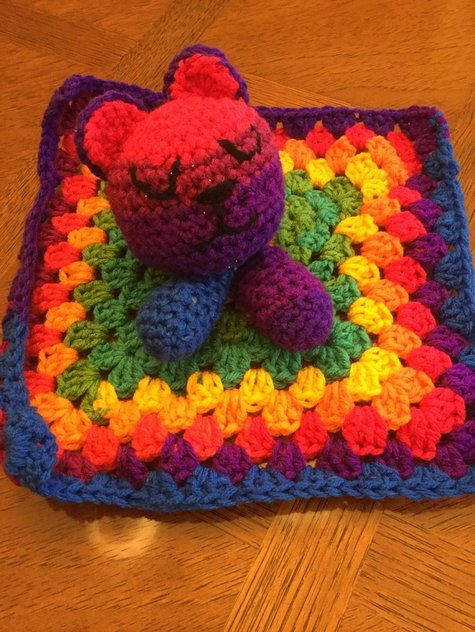
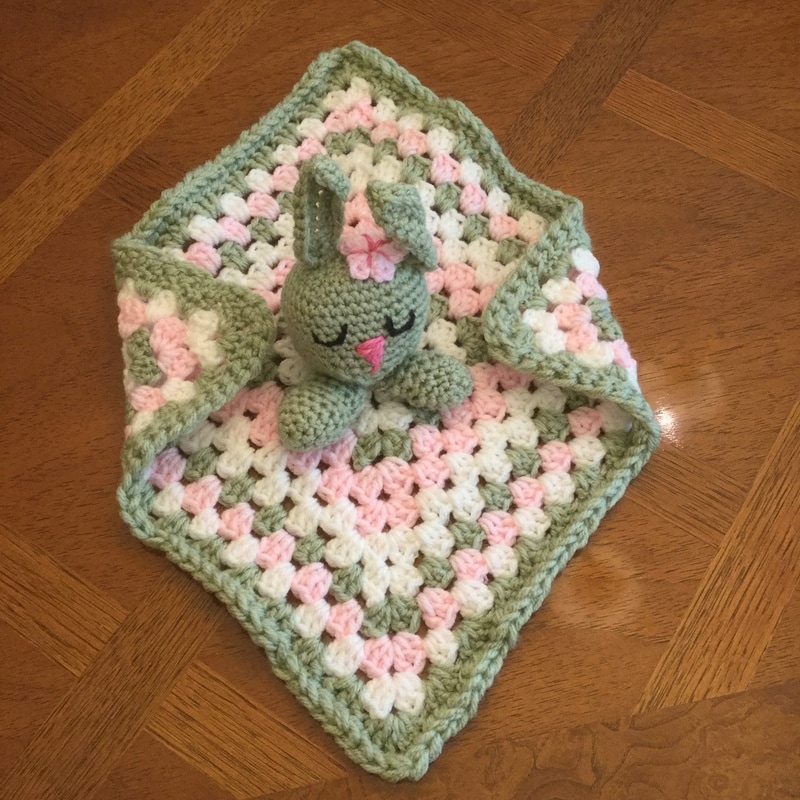
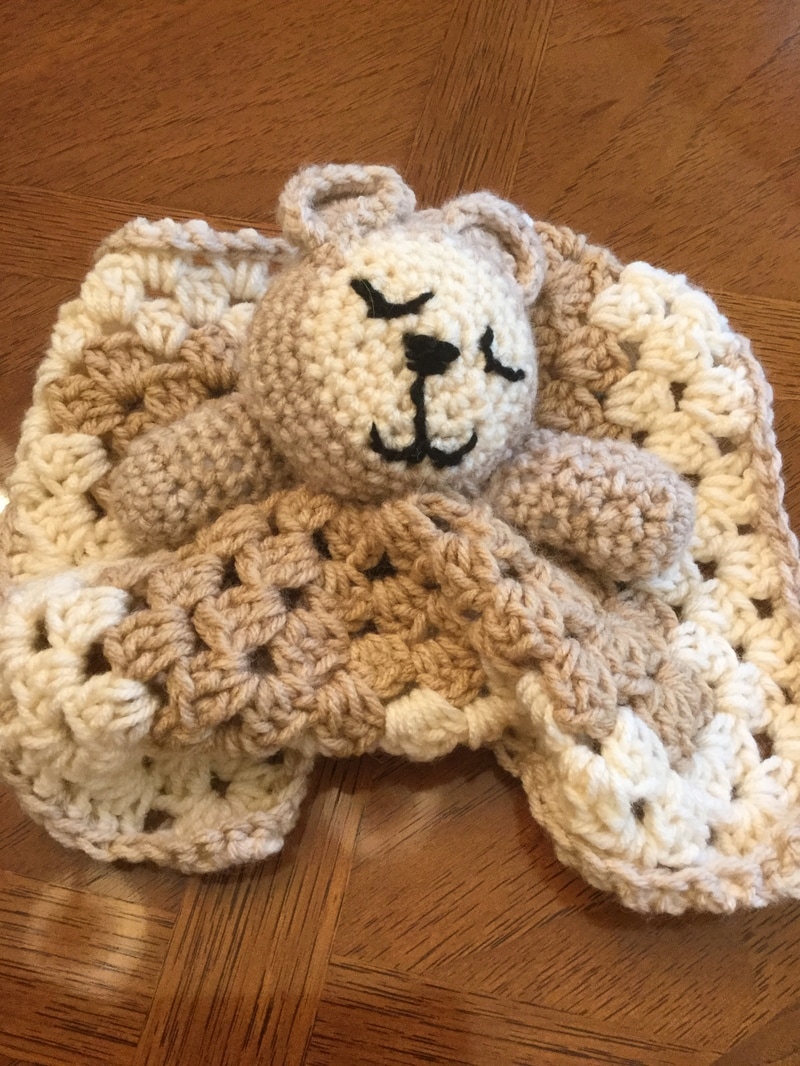
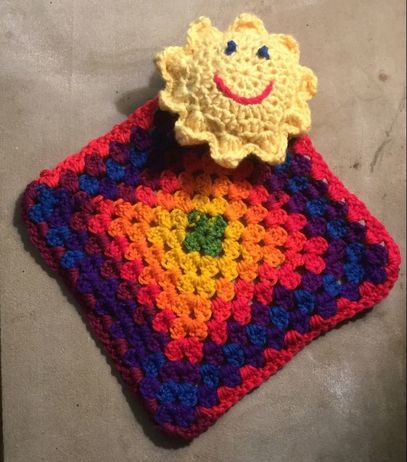
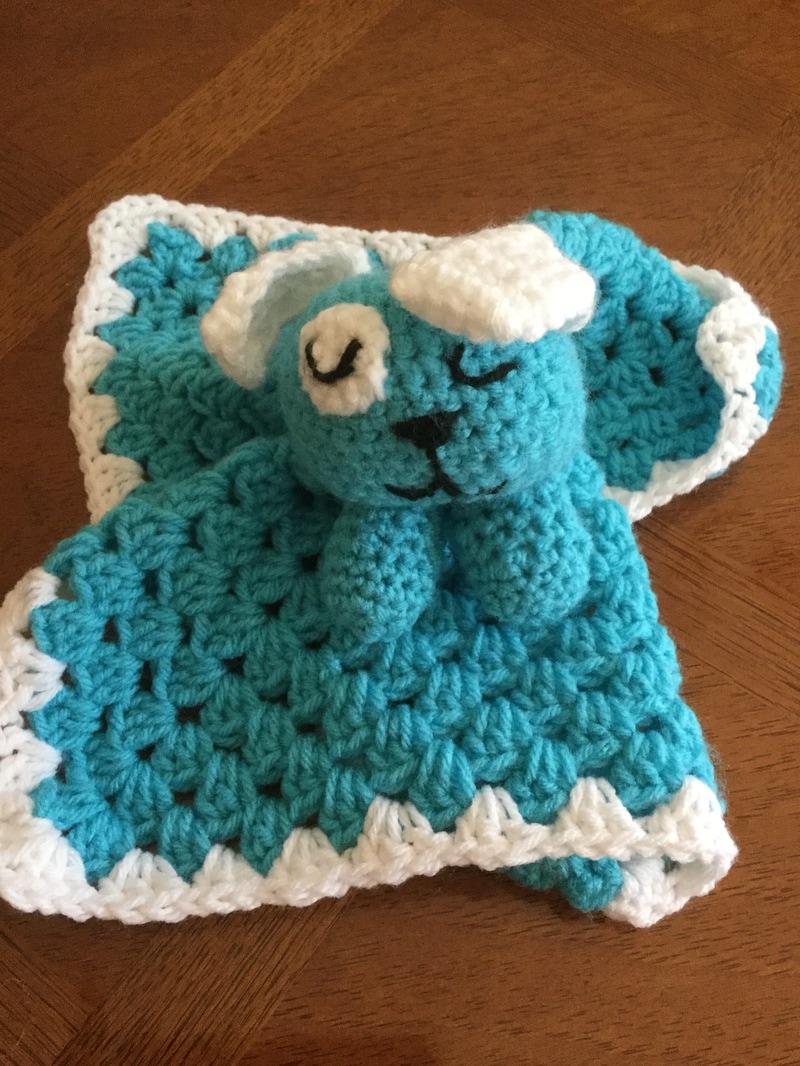
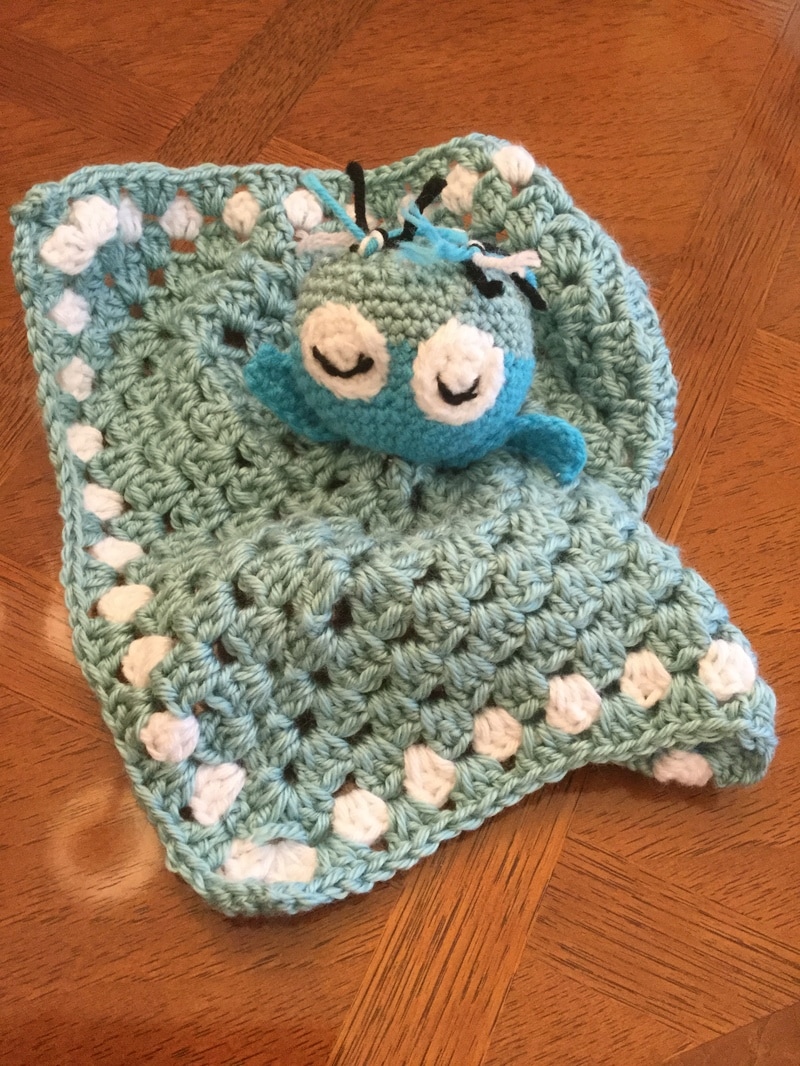
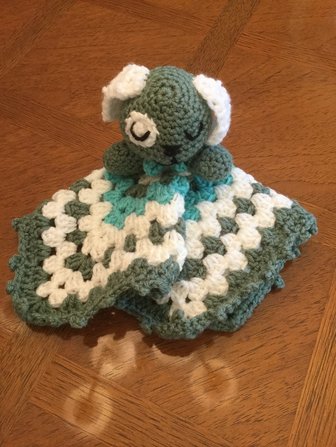
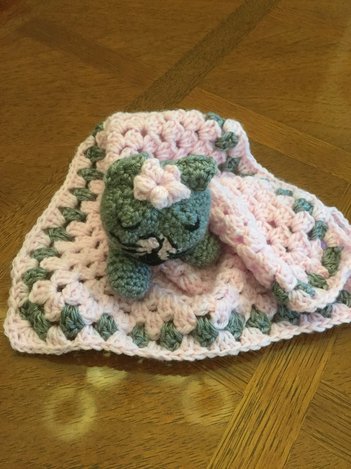
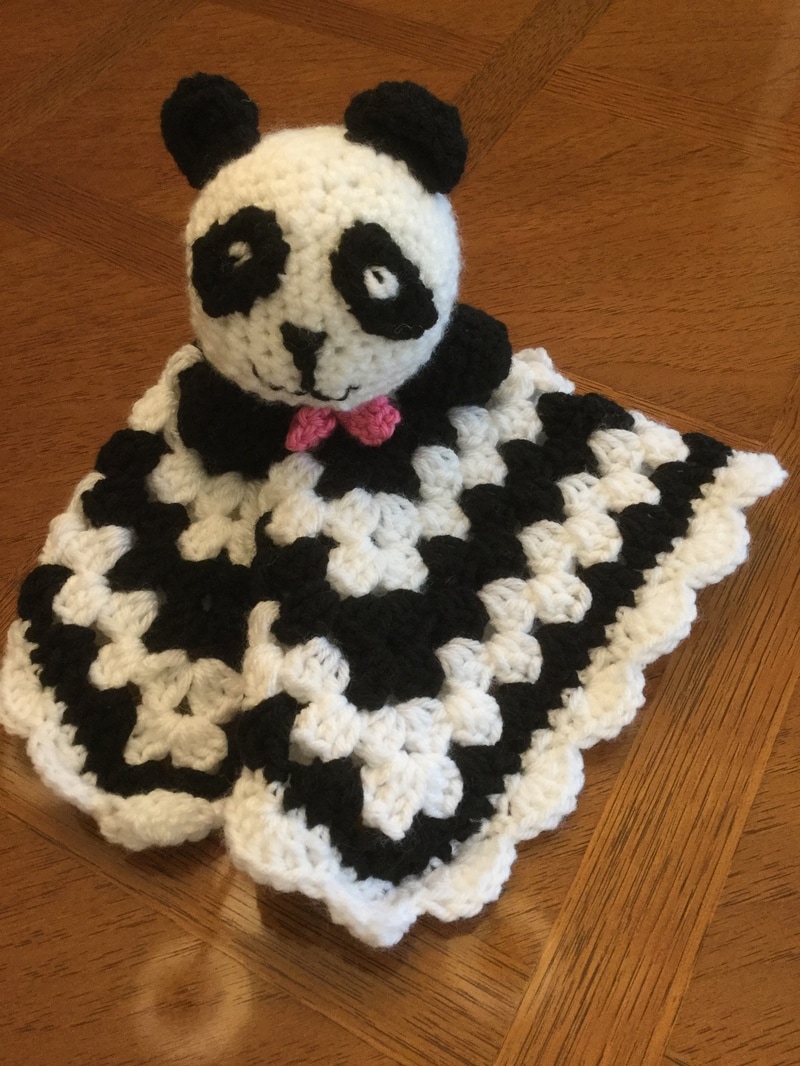
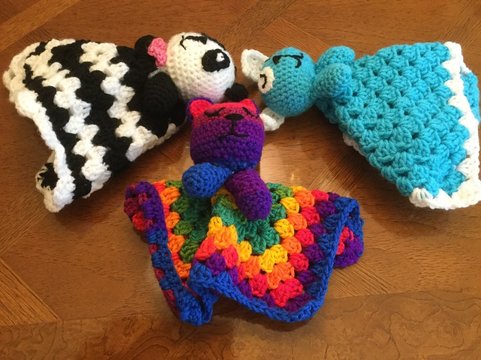
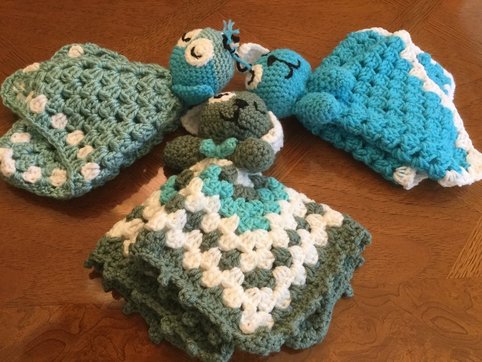
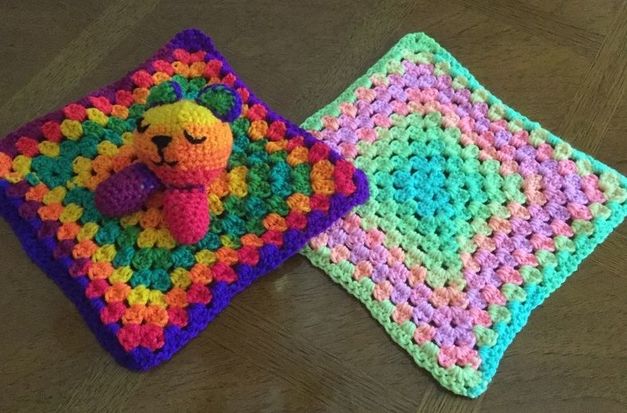
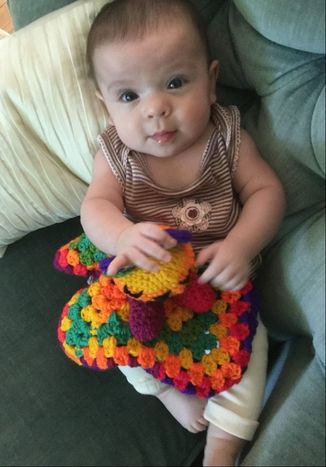 Simply WHAT MAKES A LOVEY LOVEABLE? To answer that question you might have to ask my 5 1/2 month old granddaughter. When presented with an array of crocheted loveys, she grabbed onto the brightly colored Teddy Bear with blanket and has enjoyed it ever since. Loveys, cuddlers security blankets, or blanket buddies are a joy to make because they are especially designed for their intended users, our babies and toddlers. Loveys are composed of a animal or creature head that is attached to the middle of a 12" crocheted or knitted mini-blanket. Unlike the larger crib blankets that my son and daughter trailed on the ground, the loveys can easily be grasped, cuddled and carried by infants and toddlers. They are small and personal, just waiting to be hugged and loved. The colors, patterns, animals, or other creatures are limited only by your imagination. Some children will be attracted by the colors, others by their favorite creature. Although you may want to use some of the softer less scratchy yarns like Caron Soft or Red Heart's BabyHugs or Baby Soft, you can pre-wash and dry some of the other brightly colored yarns to make them softer and fluffier. I just had to make another bright Teddy Lovey to replace the one my granddaughter chose. The colors are from Red Heart Stripes, and since each varigated skein begins or ends in a different place, the placement of the colors on each lovey is different and unique. Some of my favorite loveys are bears and bunnies, but I have seen elephants, bumble bees, lions, cows, funny monsters, mice, hippos, action figures, and many more. The Internet is an excellent source for designs and patterns. My own Pinterest board, https://www.pinterest.com/lillianmalkus/loveable-lovies/,includes more than 50 unique images. All Free Crochet offers delightful patterns for Rainbow Sunshine Lovey Blanket and Cuddley Crochet Koala Baby Lovey. 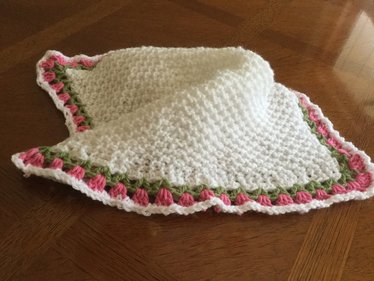 - Although loveys can be crocheted or knitted, I prefer to crochet mine. I can crochet the extended granny square in about an hour, but it takes me several hours to knit a blanket with similar dimensions. I also prefer making the figures from crocheted pieces, I did knit the white "blankie." Then I decided to crochet the lovely tulip border which softens the look. I am in the process of selecting a figure for the piece. Should it be white or pink? a bunny, cat, teddy, or flower with a face? The blankie with the tulip border came from an enlarged washcloth. There are so many crocheted and/ or knitted versions of these cloths. Just extend your favorite stitch pattern to 12" by12" and you have your unique piece. You can even mix knitted or crocheted bottoms with knitted or crocheted tops. While most basis are squares, I have also seen rectangles, hexagons, and stars. The lovey bases are a snap for me and have proved to be one of my favorite road trip past-times. However, the heads, arms, and crocheted faces can be time consuming. When I produce a truly adorable lovey figure, I am so pleased. Still at times, I have to remake some parts to get both arms the same size or redo a crooked smile. This is an intricate process with a variety of yarns, hooks, stuffing, needles, and props spread all over the table. This is where the loveable part comes in. What figure and blanket would be most appealing to a baby or toddler? Which lovey will your little girl or boy carry about kiss, cuddle, and lick? I have worked up several samples form my print and on-line sources. I still have several that I want to try, but it is time to publish this week's post. We know which one s my granddaughter's favorite. Which one would you like to create as a gift to a baby in your life?
 Road Trip- Road Trip! The car is packed, and my husband, Bert, and I are off to another destination. The siren call to America's highways and byways is luring us to beaches, campgrounds, historical places of interest, and of course, in our case, to so many interesting gardens and plant nurseries. Check: cooler of drinks, folding chairs, towels, lunch, sweatshirt, hat, phone with GPS, and of course my craft bag. While the destination may be the attraction for some, for me it is also the advantage of several hours for knitting or crocheting without having to feel guilty about that I am ignoring daily responsibilities or any of the items on my "to it" list. Besides traffic jams and other delays are easily endured when I am engrossed in my crocheting or knitting. With so many knitters and crocheters writing on this topic, I will try to post some added value.
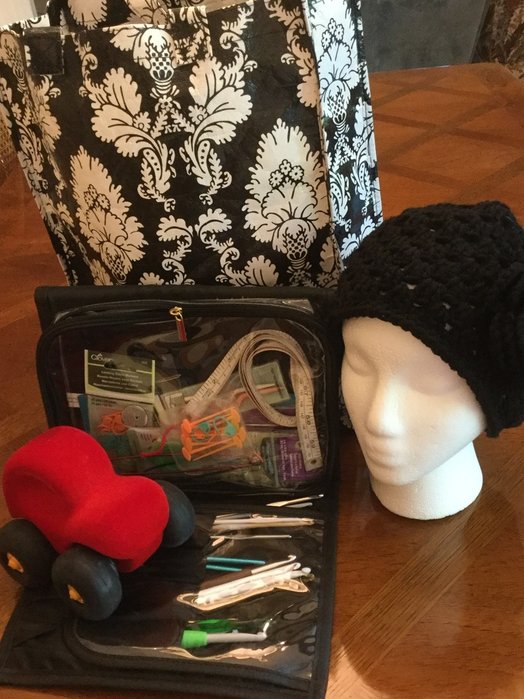
For several years, I have been keeping a travel zip plastic bag filled with the small items, I usually need for any project. This is an extra set, just reserved for travel.. In this way I have what I need on the trip, and I am not hunting for essential tools when I return home.
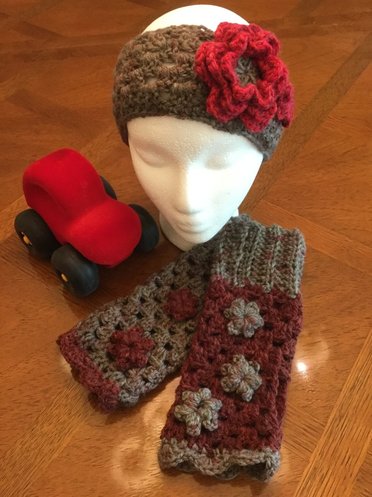
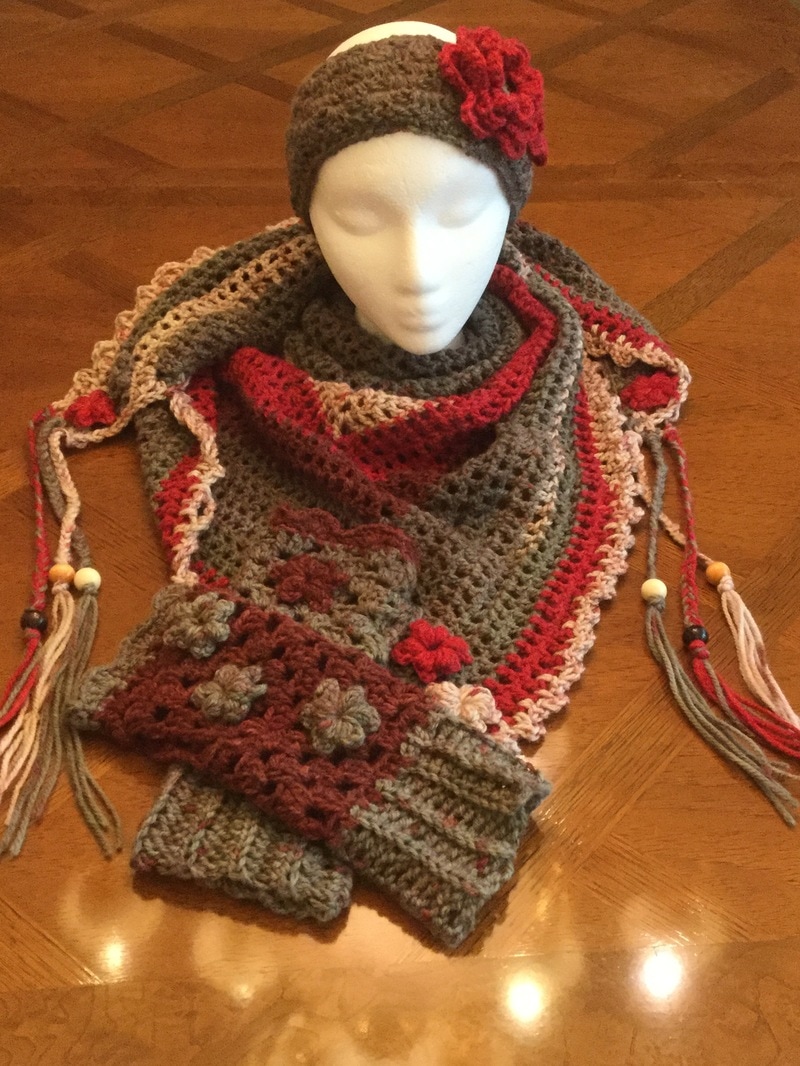
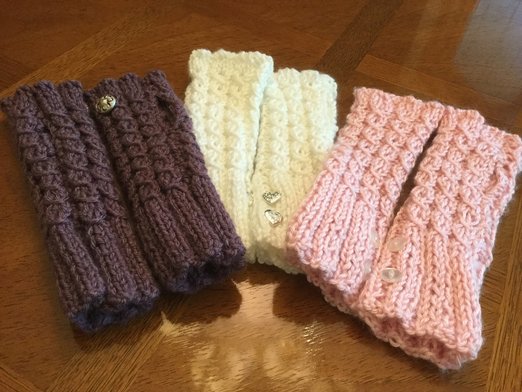
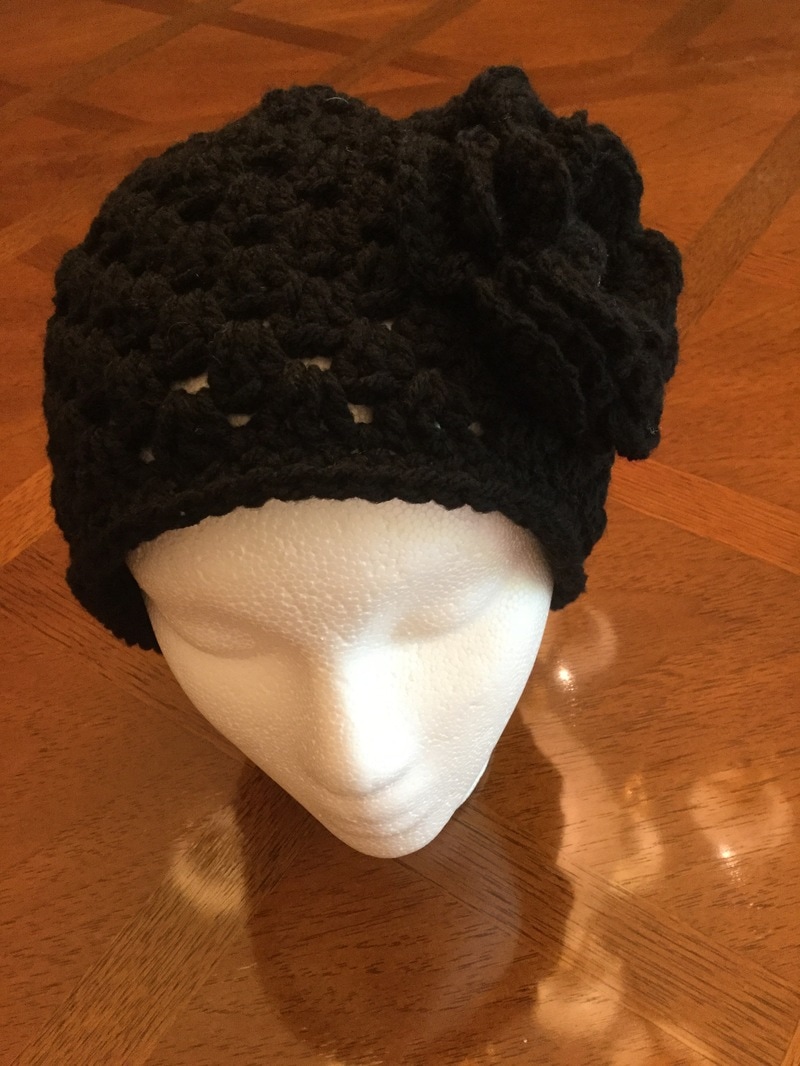
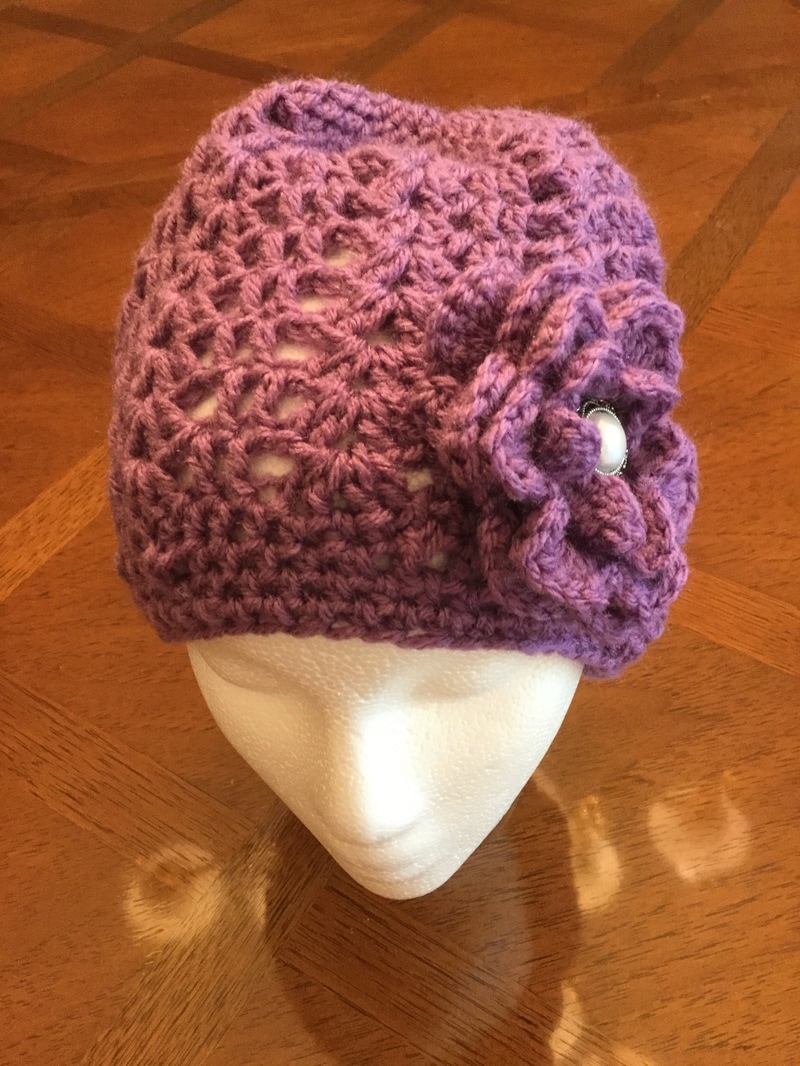
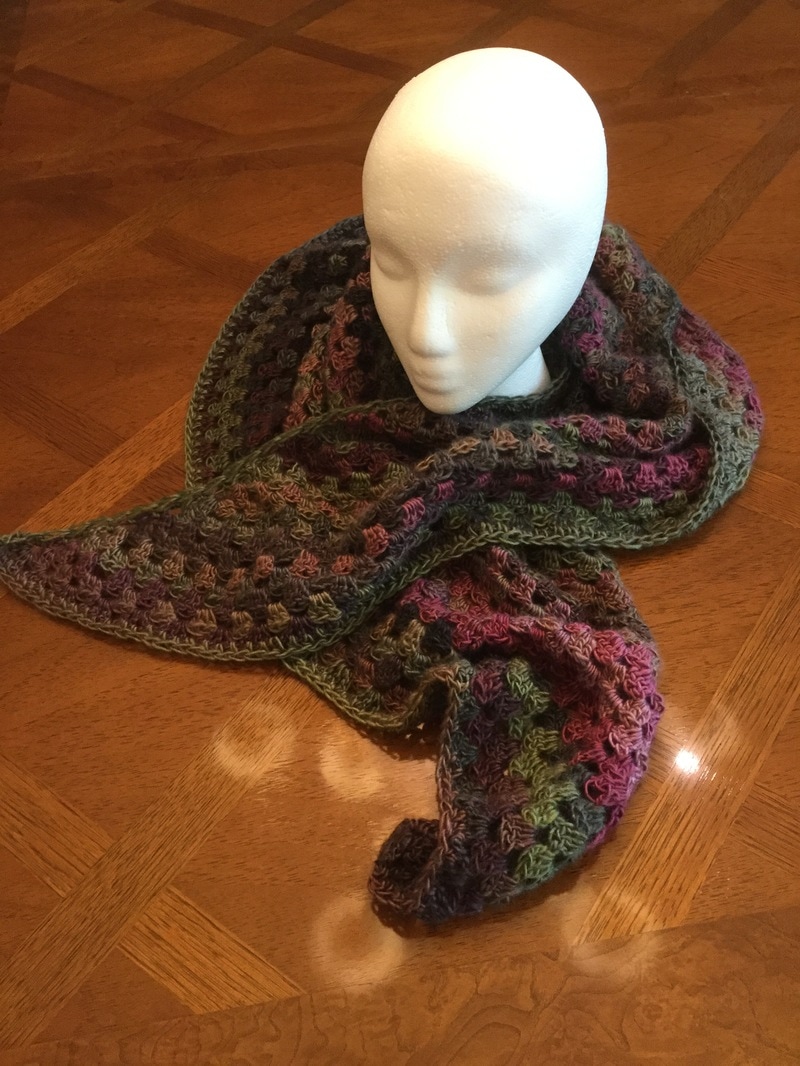
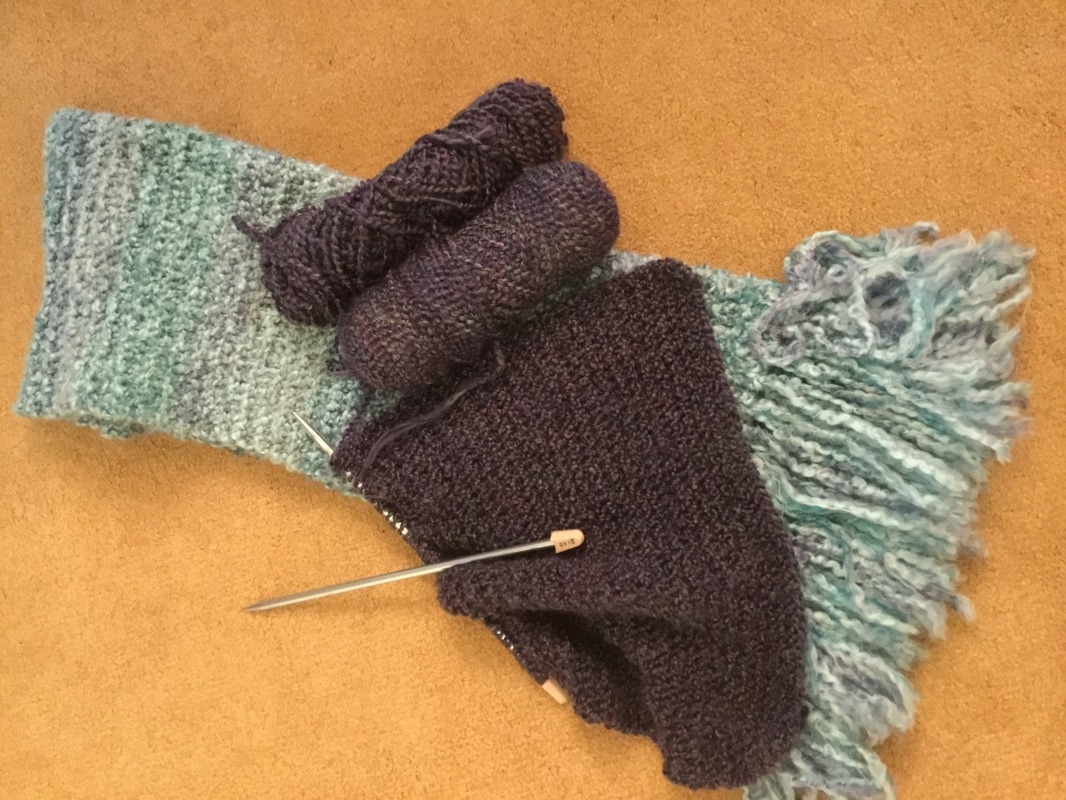
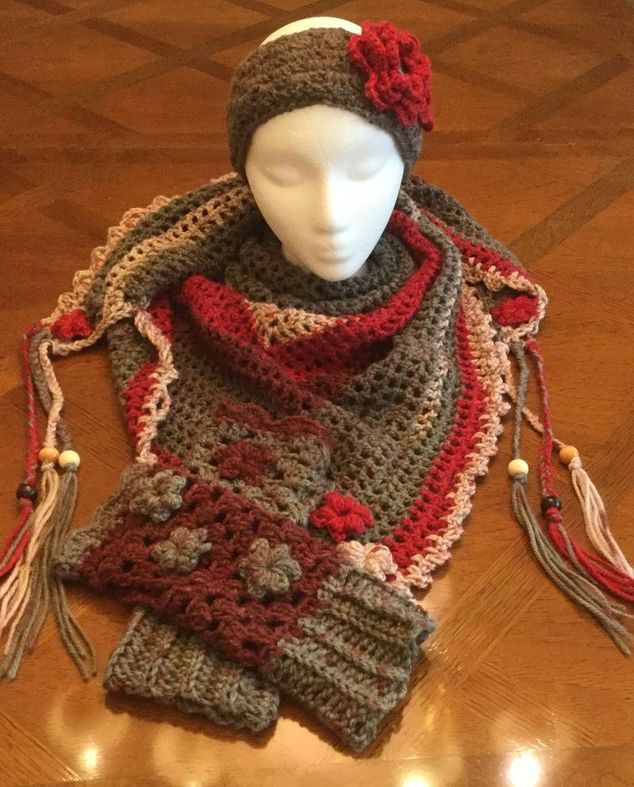
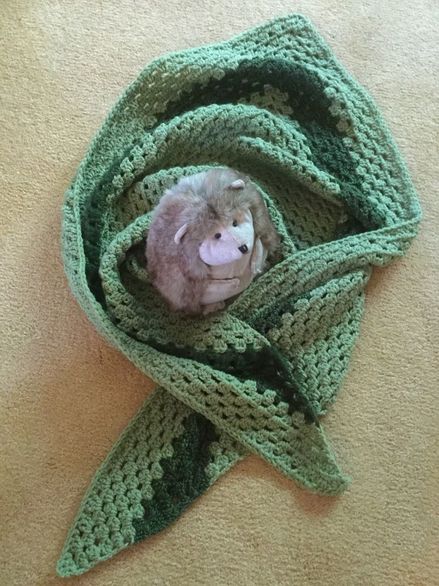
For crocheted projects, I sometimes keep hooks in a separate bag or pencil case. Recently I have repurposed a compact lady's travel, jewelry-cosmetic case with transparent zippered pocket and spaces for the hooks. For most knitted projects, I carry the shorter needles when possible or the extended needles on a plastic tubing. These are easily coiled and less likely to poke another passenger or the airbag. Sometimes it is helpful to carry an extra hook or set of needles as these tools always seem to fall between or under the seats. With an extra you don't have to wait for a pit stop to retrieve the item. I don't take buttons as I usually wait until I return home and can block my piece on a flat surface. I also take a photocopy of my pattern and a journal for writing down craft info or reflections about my travel experiences that are tied to my knitting and crocheting. My phone is my camera, and I am always taking pictures that provide ideas for future projects. My project take-along yarn takes up most of the space. The amount depends on the size of the project. To pack my yarn and equipment, I usually take a large open tote than can sit in the well by my feet. It is usually one of the more durable reusable or zippered ones from the grocery. However,for my most recent trip, I bought an attractive one from a local discount store, However, I have had my eye on an monogrammed canvas tote from L. L. Bean for some time now, but I haven't gotten around to gifting myself. The bag of choice leaves me room to sit and is sturdy enough so that knitting needles do not stick out. As a more attractive alternative to the plastic zip bag, the crafter can repurpose a lady's cosmetic or jewelry carrier that frequently has transparent pockets so that all tools can be snapped up or rolled in one convenient pouch. In researching this article, I found Yarn Pop at yarn pop.com. It has compartments for most crocheting or knitting supplies as well as grommets in the side to pull yarn through.. The crafter can easily access her yarn without chasing the ball of yarn around the car. After culling the lists of possible projects for a road trip, I have discarded small pieces and projects with frequent yarn changes. I will leave at home the large and heavy afghans, complicated sweaters and shawls as well as any enterprise requiring a great deal of stitch and row counting.While I am engaged in my crocheting and knitting, I want to socialize with my husband and take note of the surroundings. So what does that leave me?--actually quite a lot. First of all, I take projects with a familiar directions Stitch patterns must be limited to 4 rows, but I usually stop myself at 2. The pattern must be easy to execute, repetitive, and easy to memorize.Many bloggers recommend projects with lighter weight yarn, such as a DK (#3) or a light worsted, such as Unforgettable by Red Heart. In this way you will get many yards, and the yarn is easily compacted into a traveling craft bag. I generally classify my projects into 1 hour, 2 hours, 4 hours, and long term. In this way I will bring enough yarn for the piece I will be creating. In one hour I can usually complete a 12" square for the base of a lovie. I do the head and arms at home. I can also complete a cotton washcloth, a child's crocheted hat, a headband with crocheted flower, or one crocheted glove. If I have 2 hours, I can usually complete the pair of crocheted fingerless gloves or one knitted mock-cabled gloves. The gloves are knitted in a rectangle and later sewed together to form a fingerless glove. See an earlier post for instructions as to how to make the mock cabled gloves. http://www.lilcreates.com/lillians-blog/mock-cable-fingerless-gloves. I like working with this pattern and enjoy wearing the finished project. Also. two hours is enough to crochet an adult beanie. and the accent flower. In a 4 hour block of time, I can usually completed a simple crocheted scarf and about 1 foot of a knitted scarf. On two recent trips combined, I completed a triangle scarf with cluster stitching. I was using Unforgettable Yarn (4) and a J hook.The stitch was repetitive and I could crochet several stitches in a row without looking down at the work all of the time. I followed The Original Half Granny Square/ Shawl by Ambar Enid Alcala that is a free download from Ravelry. One of my current works in progress, was started in a 2 hour block of time. It is a simple rectangle shawl knitted in garter stitch on #13 needles. For directions, see my earlier post: http://www.lilcreates.com/lillians-blog/it-all-started-with-a-shawl. I usually use the Thick and Easy Homespun yarn for this project, but a donation of the regular Homespun Yarn was made to my chapter of Threads of Love, and I was happy to experiment with slightly lighter weight yarn. The purple, blue, and green threads are attractive, and the yarn is still plush. Since I want to make this piece about 57 inches long, I will need about 12 more hours for the knitting. I will fringe the scarf at home where I can keep track of the cut pieces more easily. As with many of my other pieces, it will be donated to a hospital patient. Since it is done in garter stitch, I can knit many stitches without looking. This benefit prevents me from getting carsick. I have to count stitches from time to time to make sure I have not lost a stitch. Still, t Our trip to Maine in August will be a challenge.The vacation entails 9 hours of driving each way plus travel time at our destination.I have not settled on the project for that journey, but I will probably post about those experiences with I return. I recently found a pattern for a scarf-shawl called Road Trip. The designer Is Zelna Oliver. Her collection and website can be found at zootyowlcards.blogspot.com.au. You can find images and pattern on Pinterest and Ravelry. Once I got a hang of the repetitive pattern, I was able to complete large sections in the car. The artist recommends a lighter worsted that will drape easily. I bought two different yarns for the project. The first was Cakes by Caron that I bought at Michaels. I crocheted a large amount of the scarf in the car, but completed the rest at home. I like the colors and the ways they blend together. However, I find the yarn coarser than Sweet Roll by Premier Yarns. Still, the colors, texture, and trim make for an attractive, yet rustic scarf. The pattern is rated as easy, but it took me a while to get the hang of it. I crocheted several additional rows to the piece so that the scarf/shawl would wind about the neck more comfortably. The decorative edging took quite a bit of concentration to get it right, but the total effect was lovely. When I added the decorative flower, braids, and wooden beads, I was quite pleased with the unique piece. I am looking forward to working on the lighter version in pearl to gray tones in Unfortgettable by Red Heart. Perhaps this would be a good project for my extended road trip to Maine in August. I am proud when I unpack the car at the end of a journey to reveal an attractive knitted or crocheted piece read to to construct, finish, or block. On our recent road trips to Pennsylvania, and eastern as well as norther Connecticut, I had fun with my husband and family while I made constructive use of travel time.
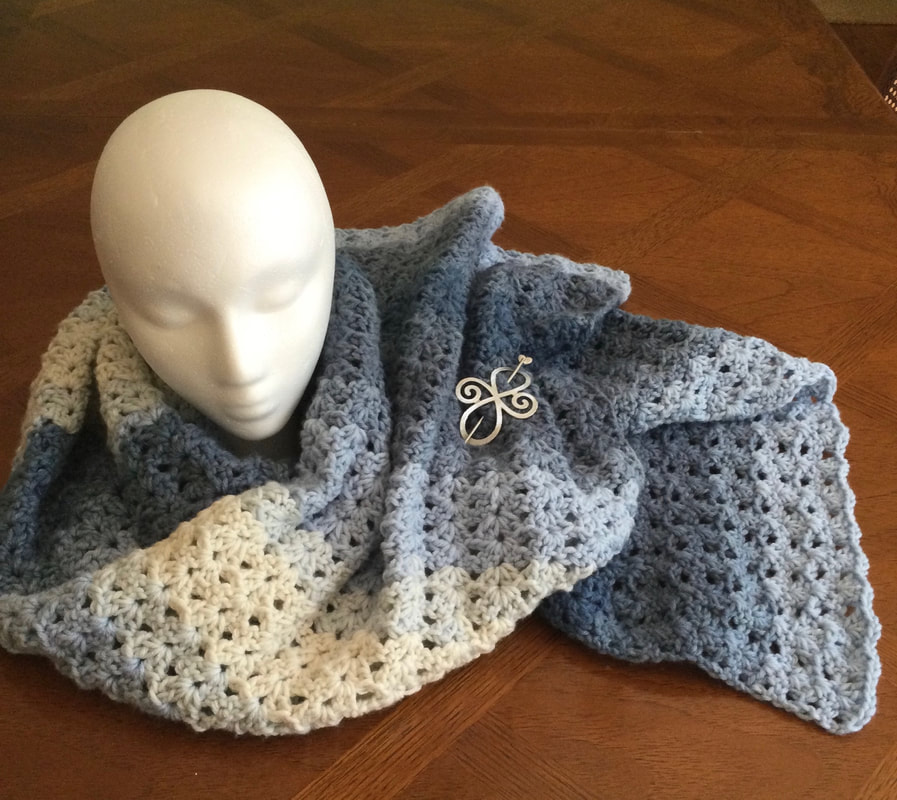
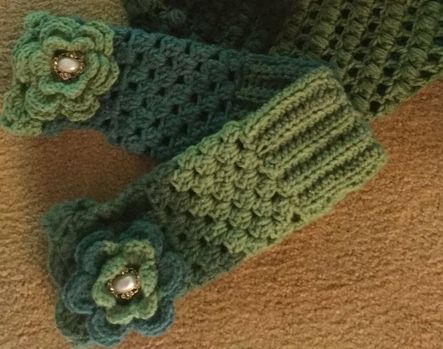
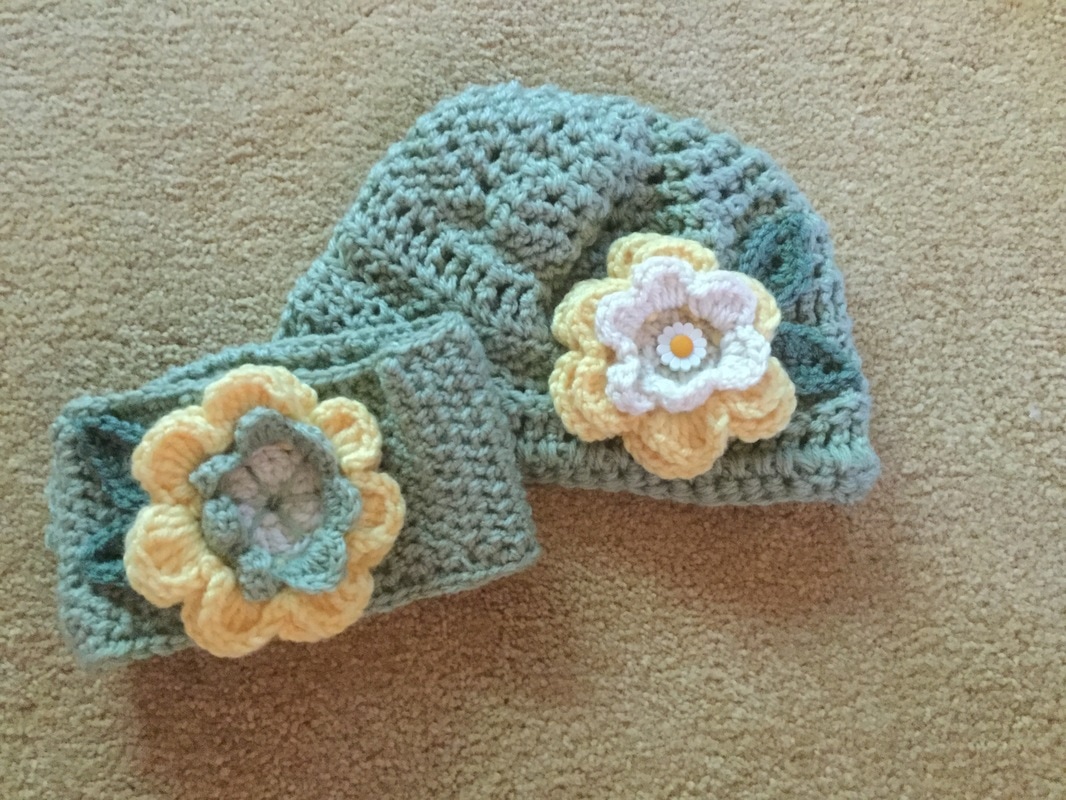
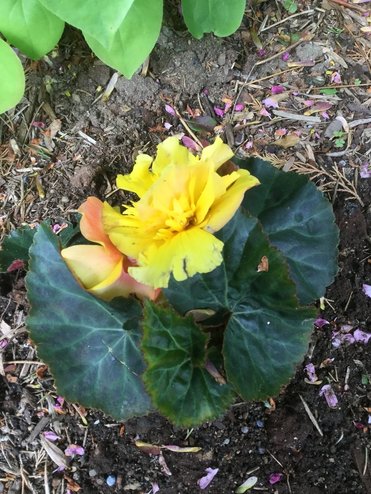
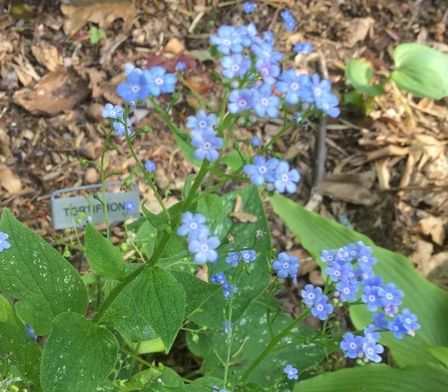
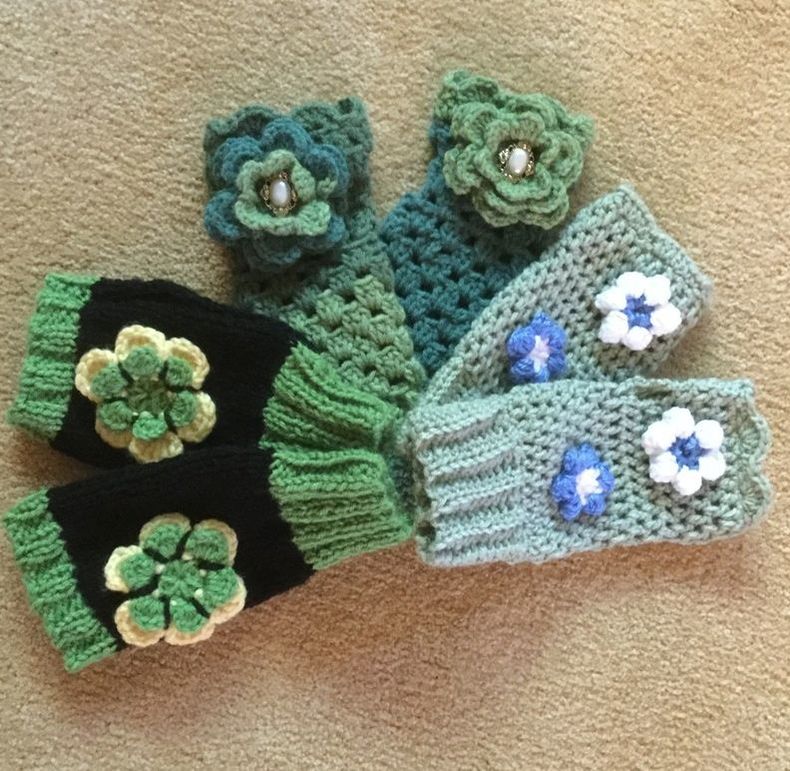
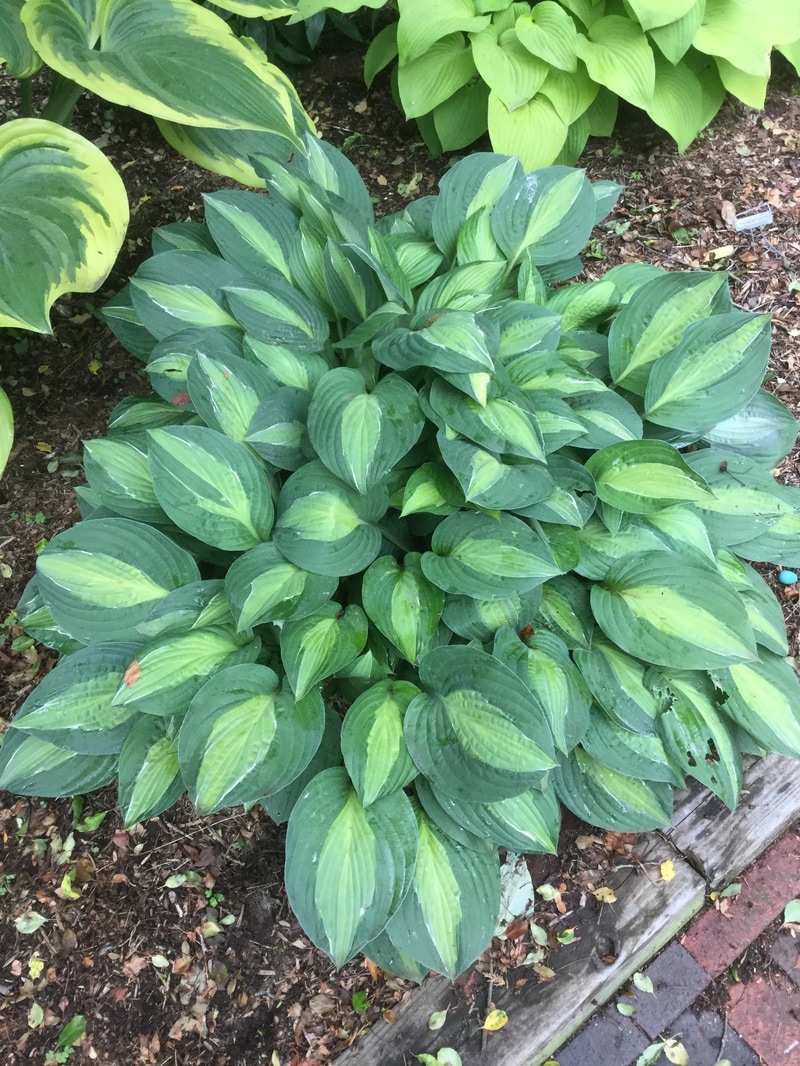
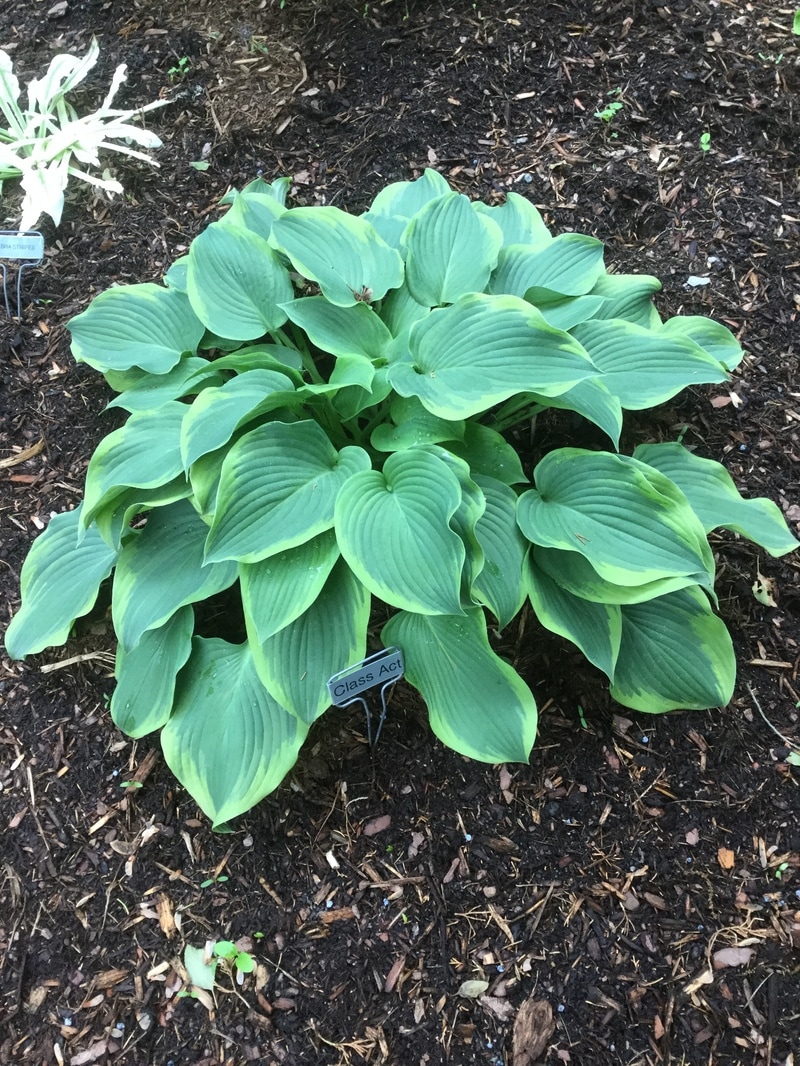
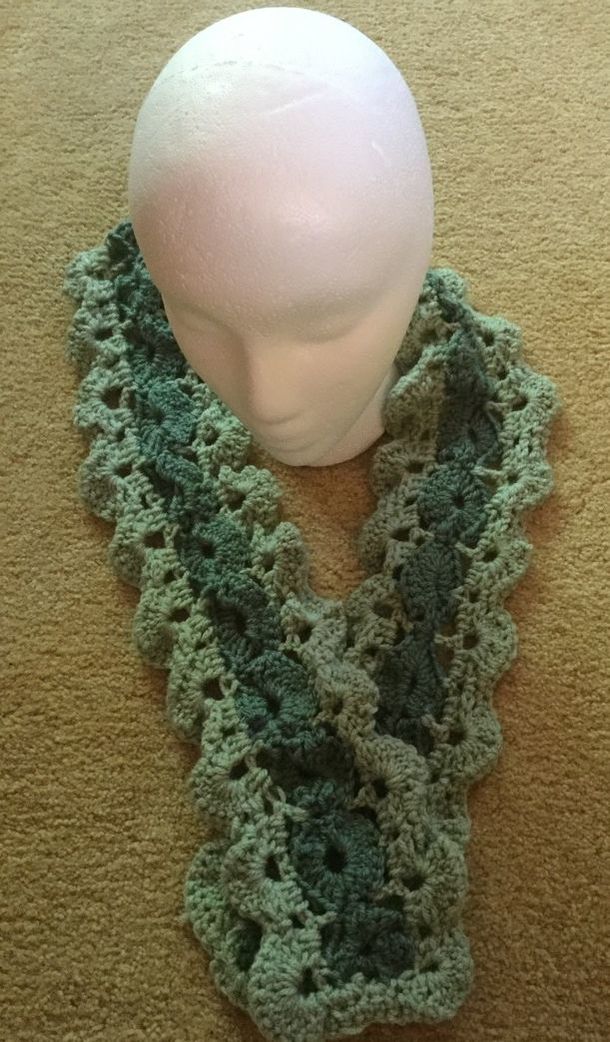
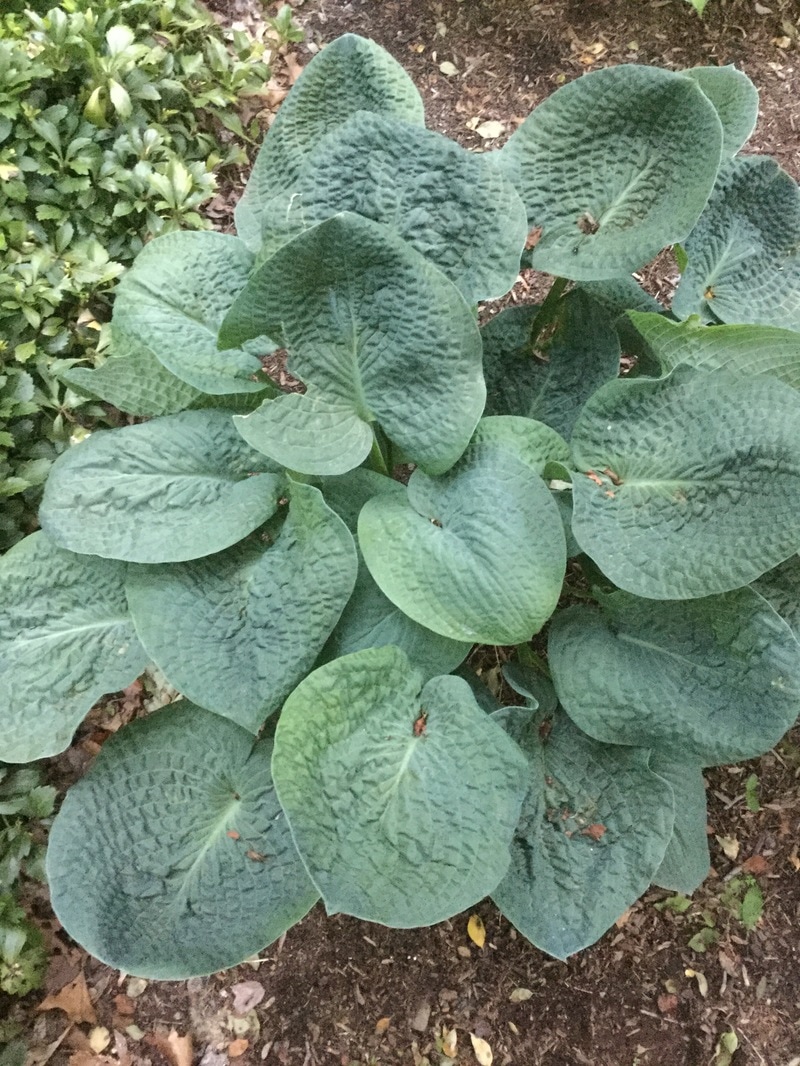
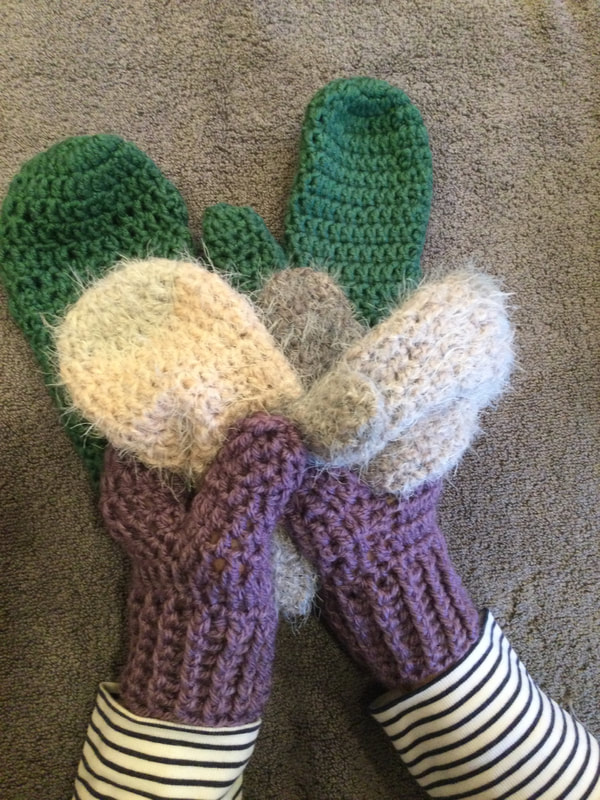
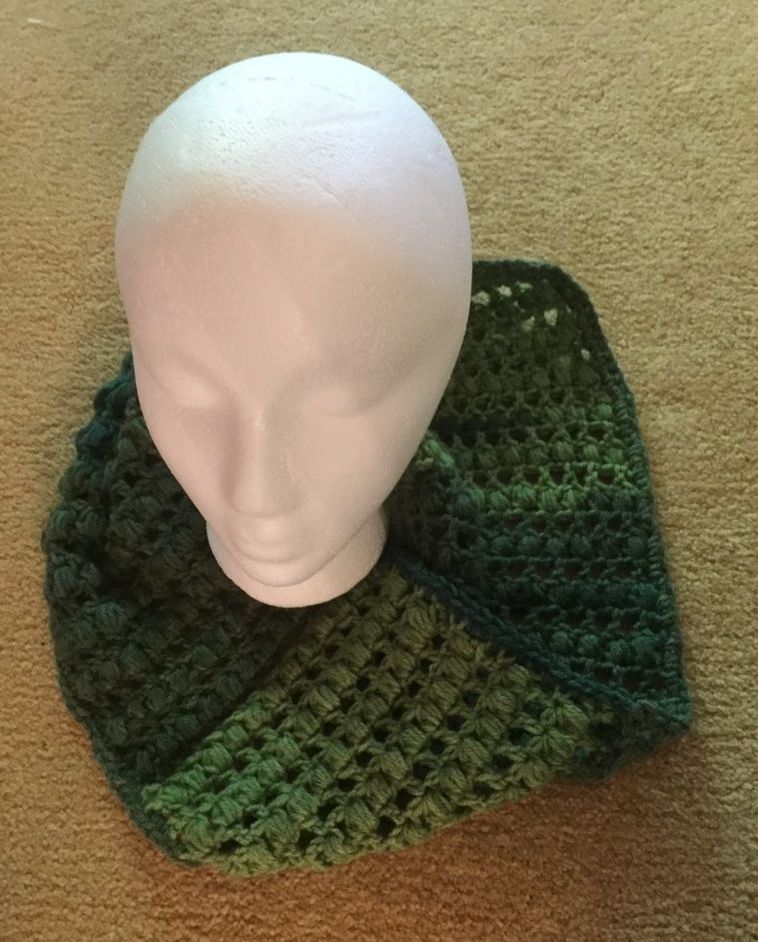
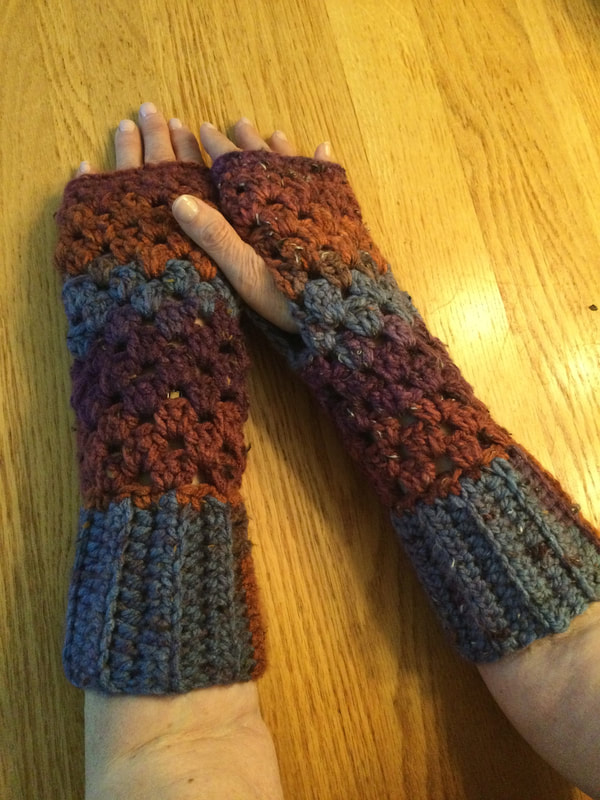
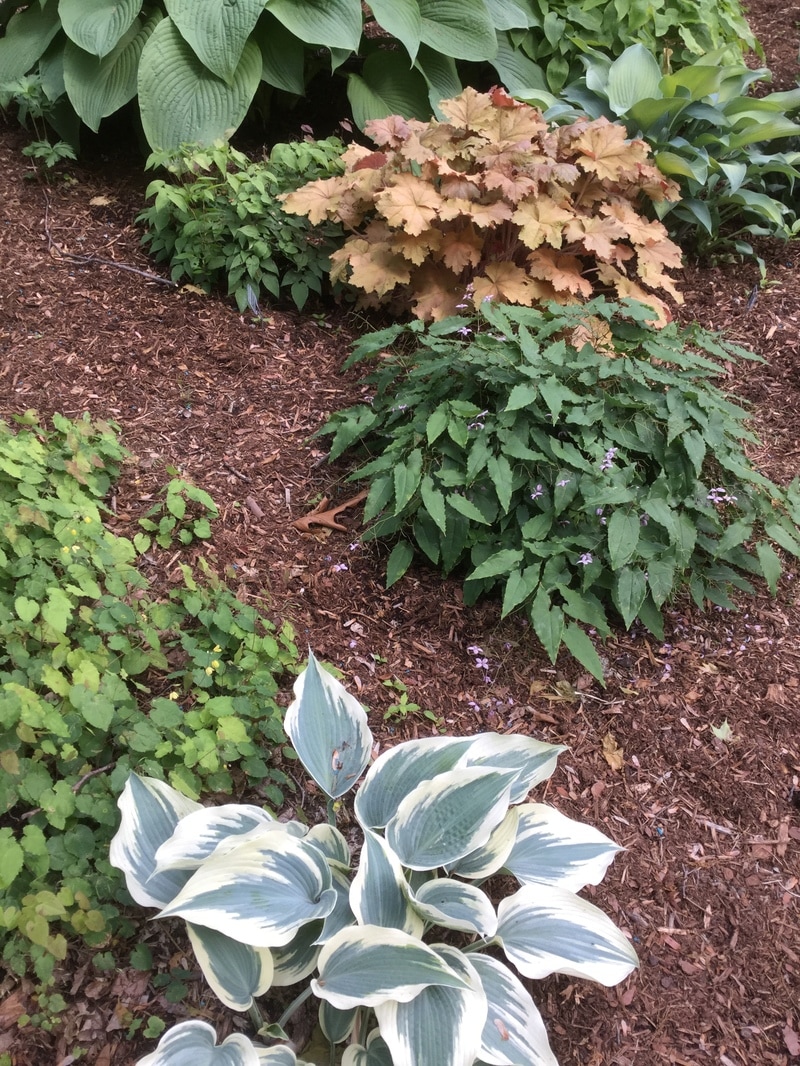
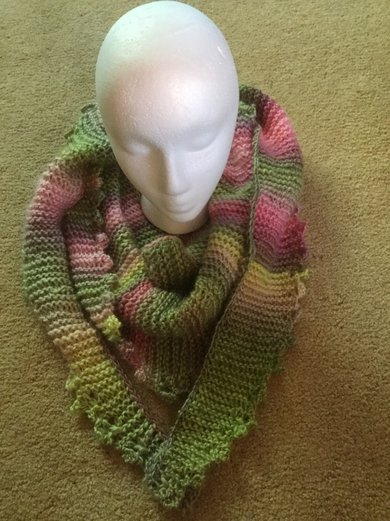
Fellow crocheters, do you use your travel time as opportunity to engage in your craft? What equipment do you take with you? How do you pack it? What projects do you enjoy making, and which ones can easily be executed on a rode trip? 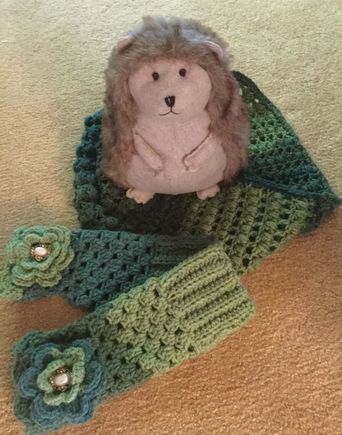 While black magic draws on the supernatural for evil and selfish purposes, GREEN MAGIC is inspired by and cultivates the natural world and outdoor spaces. Knitters and crocheters, let us celebrate the power and magic of our needles and hooks as we transform simple skein skeins of yarn into wondrous, wearable and useful art. When you observe an experienced knitter or crocheter at work, it is truly amazing to see how the fiber artist is able to make intricate loops and stitches. The motions are executed so swiftly and are frequently made without even looking at the work at hand. Yet, they produce finished pieces that can be intricate and quite lovely. It is truly magical!! "Why GREEN MAGIC?" For me is is a return to the garden theme. Two weeks ago, I invited you to view the garden paradise, that my husband Bert, created around our home. As I sat on the backyard deck, I enjoyed the lush greenery and flowers while daydreaming about the knitted and crocheted pieces based on the garden theme. . When I realized that I could turn my dreams into experiences into actual garments, it was an "aha" moment. Since then I have been energized to design and execute many new items that are featured in these postings. Today I invite you to venture with me along the garden paths to learn how GREEN MAGIC has moved me to incorporate more of the leaves and flowers into my wearable art. Unfortunately, it takes more than "abracadabra" to transform my stash of yarn into scarves, gloves, hats, or shawls. I have so many ideas. Time is the great limitation! One of my favorites, my mismatched fingerless gloves, was crocheted in muted green shades (Mint Swirl) from Sweet Roll by Premier Yarns. A headband and a child's hat were inspired by the begonia plant in the front yard. I also played with a multilayered yellow and green flower on a knitted black and green trimmed fingerless glove. The black was good here since it helped the other colors to stand out. On another pair, the forget-me-note, blue flowers on the light green gloves captured the look of the blooms that were there for such a short time. Many Hostas have tone on tone leaves. A dark center may be surrounded by a lighter green or a lighter green strip may be surrounded by a darker shade. I adapted a pattern called "Mirror Image" from Sassy Scarves by Liesure Arts. I crocheted two shades of worsted weight yarn with a shell pattern to achieve the look of that a Hosta with a dark green band down the center. My finished piece was abut 5" wide by 50" inches long. The ends can be joined to create a slim cowl. Another cowl features the bumpy texture of one of the varieties of Hosta.. The look was achieved by alternating a row of half double crochet with a row of puff stitch. The "Tea Leaf Pattern" by Jennifer Dickerson can be found at www.fiberfluxblog.com. I located the pattern on Pinterest. I am really pleased with the way my piece turned out. However, since I did not have enough yarn for a full length scarf, I stopped after about 32 inches and joined the edges to make a cowl. I really liked how the stitch definition showed with lighter colors in my self-striping yarn. The directions showed the scarf with a skein of "cream to taupe" yarn Scarfie by Lion Brand. I plan to make the piece again into a full length scarf with the suggested yarn or some other self-striping yarn in light muted colors. My final project for this post is a narrow extended triangle scarf (13" x75") called "Minnie." The pattern was designed by Annie Baker and is available as a downloadable pattern at Ravelry.com. (http://junnifpercablesknitting.com/2010/12/06/minnie-scarf) It is a self-fringing piece knitted in a garter stitch with 2 skeins of Red Heart Boutique Unforgettable (4) on size 10 1/2 knitting needles. The varigated yarn includes shades from yellow to lilac to rose, pink, and sage green. While no one flower or leaf has the exact tones found in the scarf, the combination reminds me of the many leaves and flowers in the garden. The self fringed edges can be found on many of the hostas or other plants in the garden. This was a feature that was easy to execute and made for a delightful accent on the finished piece. I enjoyed the sherbertlike colors and softness of the yarn. The finished scarf draped beautifully. However, unlike some other Red Heart Unforgetable Boutique skeins, this yarn tended to split and shred at times. I had to cut and rejoin, but the blocked scarf did not show where I wove in the ends. I almost hope that this scarf does not sell at my next craft fair as I look forward to wearing it myself. Green Magic has me going on and on, but I will have to leave some pieces for a future post.
Have you experienced GREEN MAGIC or any other kind of magic in creating or designing your knitted or crocheted pieces? How did your magic or muse help you. Please leave your thoughts and photos. You can find postings of my blog on Facebook. You can also follow me on Pinterest. Search for lilcreates to see all of my boards or go directly to the board with my blog and other creations. https://www.pinterest.com/lillianmalkus/lillians-blog-and-other-creations |
Archives
November 2022
Categories
|

 RSS Feed