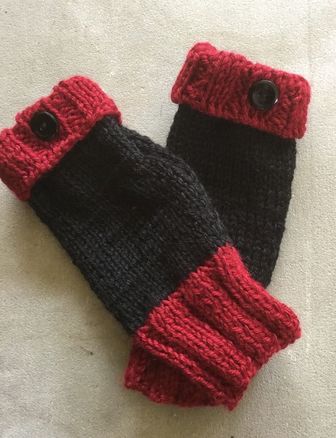
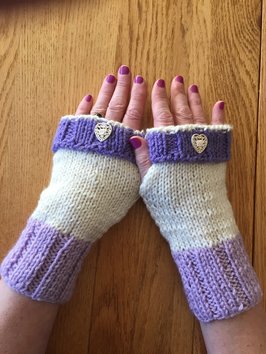
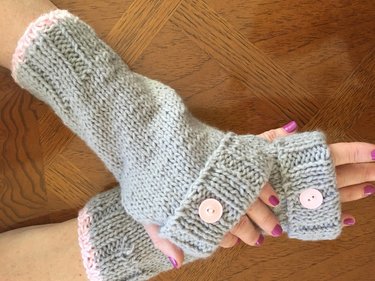
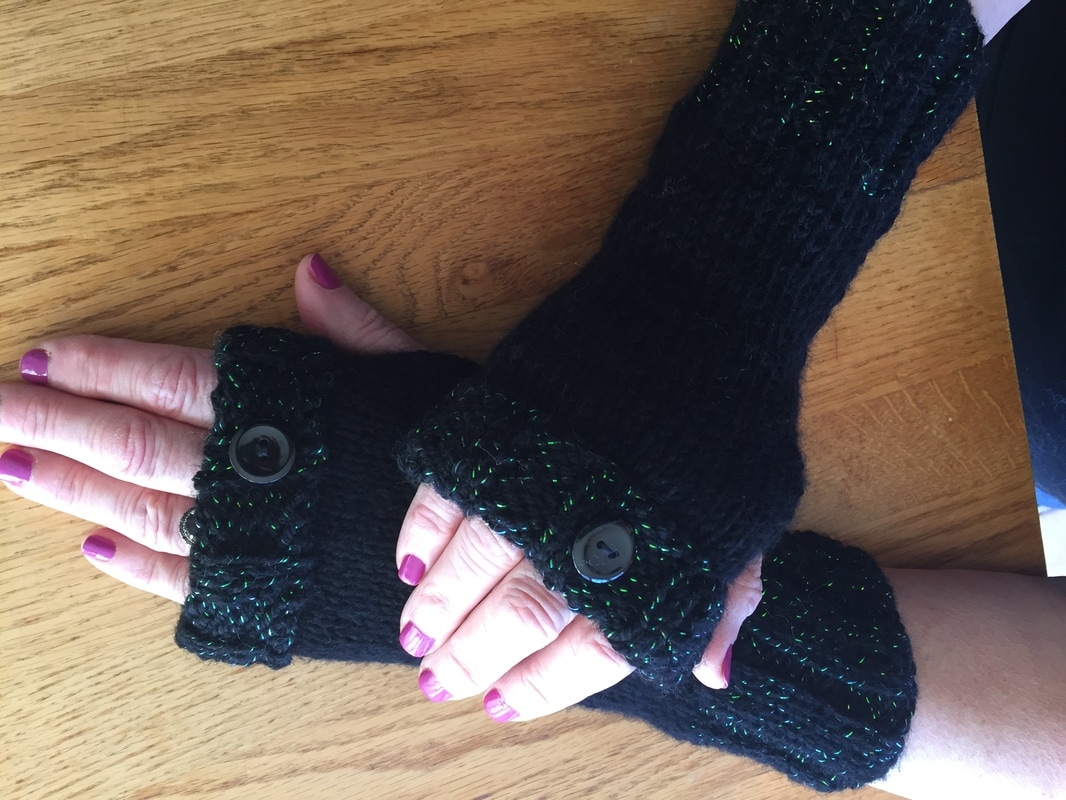
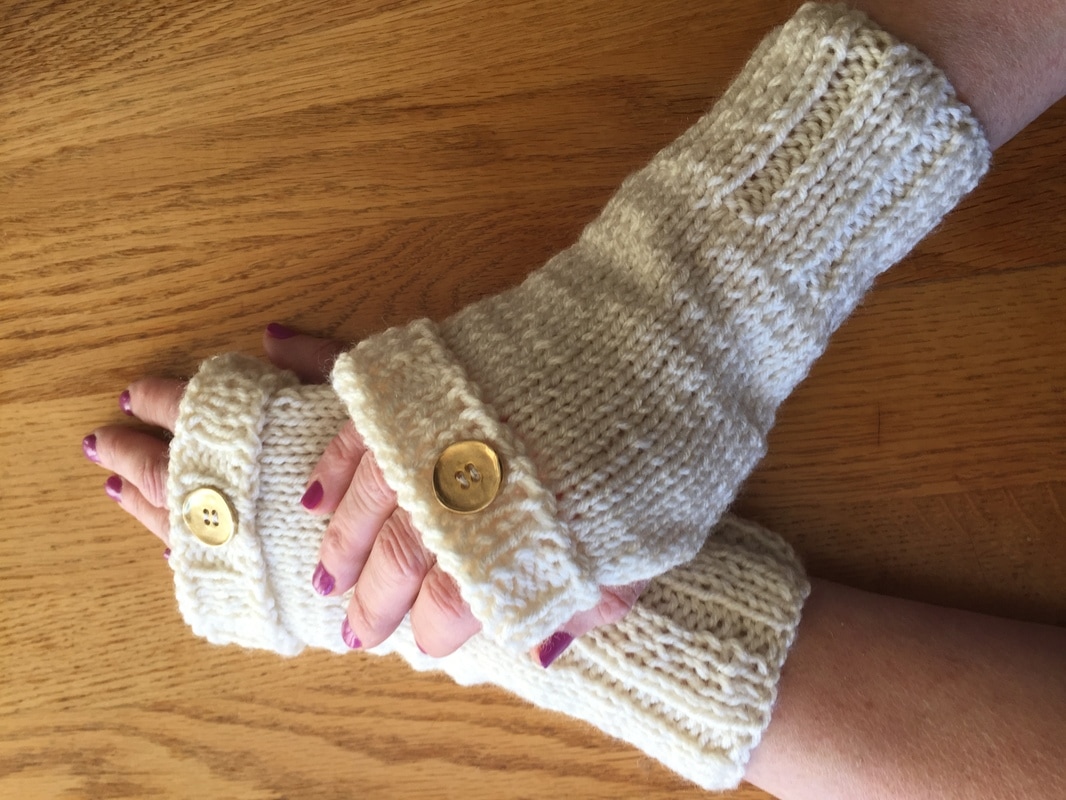
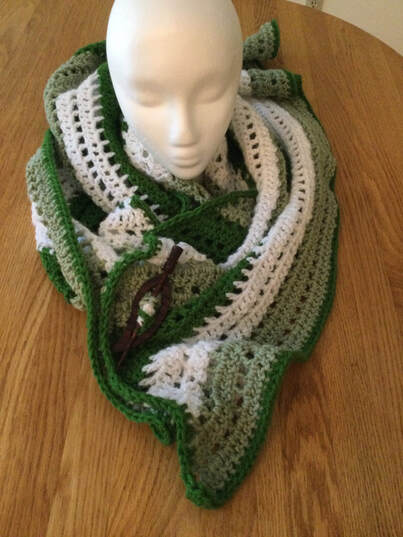
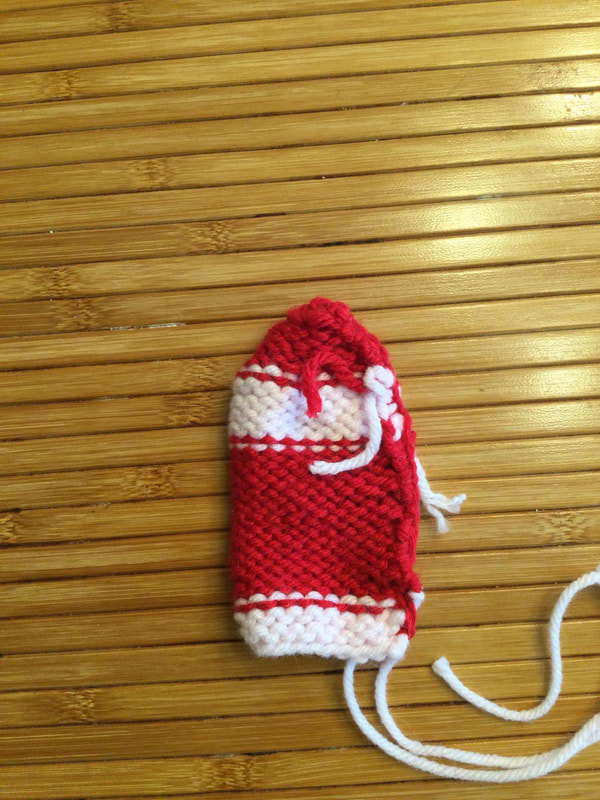
 You have just finished your scarf, shawl, afghan, or sweater, and you have used up most of the several skeins you needed for the project. Now you have part of a skein of perfectly good yarn, and you are reluctant to throw it away. WHAT DO YOU DO WITH YOUR SCRAPS? I roll mine into balls and squeeze them into my scrap box with the fervent hope that they will fit into a design that requires minimum yardage. Since I liked this yarn enough to buy it in the first place, I can expect that it could bring a bigger piece to life. Even better, I might be able to figure out how to incorporate several scraps into the same project. My FREE PATTERN for cuffed, fingerless gloves is just such a creation. Your ultimate design will be determined by the yardage in your scrap. For a larger ball, part of a really large one pound skein, you will probably get complete a solid pair. For about one-half of a regular skein, you can manage both the lower and upper contrast cuff from your scrap. For a lesser amount, make the lower cuffs in one color, the body in the main color, and the upper cuff in the second scrap. Another idea would be to stripe both lower and upper cuffs with accent colors from the scraps. Finally, if you knit just a few lines at the start of the bottom cuff and complete the glove with the main color, then you can catch the color again with a matching button on the fold over cuff. FREE PATTERN FOR CUFFED FINGERLESS GLOVES Make 2 rectangles that you will sew together to complete the pair of gloves. MATERIALS: 1 skein of worsted weight yarn for the body or for complete set of fingerless gloves. assorted scraps for cuffs as described above and pictured in the article size 8 straight knitting needles blunt sewing needle with eye big enough for yarn DIRECTIONS: LOWER CUFF: (main color or large scrap) Cast on 37 stitches. Knit in the following rib pattern for 16 rows. 2P, 3K, 2P, 3K, 2P... ending in 2P BODY: (main color) Knit in stockinnette for 5 inches. UPPER CUFF: (optional change back to same contrast color as lower cuff, or third color, or main color with a stripe) Since you will be folding the cuff over the top of the body of the glove, you will need to change the order of stitches in the ribbing. Start with 2K, 3P, 2K, 3P, 2K... ending with 2K. Continue with 13 rows or 2 1/4 inches. Bind off in rib. CONSTRUCTION: To construct the gloves place both right sides together. It helps to use plastic pins to keep the sides even. You may want to sew the cuff with the same color and switch to the body color so that the stitches do not show when you turn the glove right side out to wear it. Sew up from the bottom until you reach a point 2 1/4 inches from the upper cuff. Loosely stitch over one of the sides. At 1/4 inch from the upper cuff, sew 2 stitches to anchor both sides together. You just made the thumb hole. Since you will be folding he cuff down about 1 1/4 inches, you need to sew the upper cuff with the wrong sides together so that a rough ridge does not appear on the outside. Again, you may want to change the stitching color so that the stitches are not visible. Weave in all ends. Wash gloves in cool water in sink and block gloves on a towel on a flat surface. Attach a button to the middle of the top upper cuff. Be careful before you attach the button to the second glove. Lay the first glove down on the table with the button side up. Make sure that the thumb hole faces to the inside like you would place your hands to play the piano. Then place the second glove so that that the thumb hole is next to it. When you sew the button on the middle of that top cuff, both buttons will be on top. I hope that this pattern works well for you. Although I have made these gloves many times, this is the first time I have written down the pattern. Please leave any questions in the comments section of the post or on the Facebook page. I would love to see your experiments with scrap yarn. How have you puts your scraps to use? Leave a comment or post a picture or comment on Facebook.
0 Comments
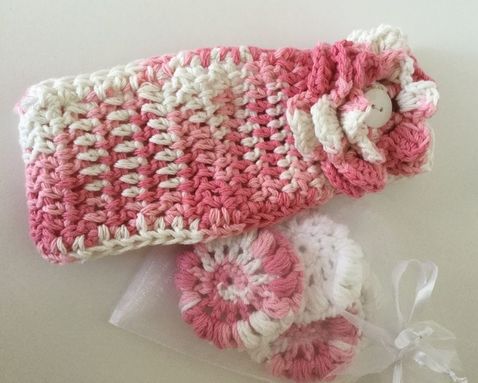
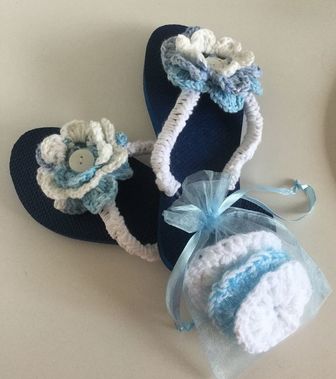 Mother's Day Crochet features "Crochet Day At the Spa." With Mother's Day quickly approaching, you have just enough time to dash off a couple of special projects to help Mom relax and focus on herself on her special day. A couple of weeks ago I wrote about creating cleansing scrubbies that could be part of Mom's beauty routine. To put together a spa package for Mom, I would be adding some additional pieces.
Arrange the collection with the scrubbies in a lovely basket, and you will have a luxurious, thoughtful gift. If you know the type of lotions or creams Mom prefers, that would be a lovely addition. For links to the reusable Scrubby face pads, refer back the posting entitled "Scrubby Art." A small basket for cotton balls or your scrubby pads is made from cotton yarn. Begin with a magic circle and made 12 double crochets into the ring. Proceed as you would for the crown of a child's hat until you have 48 stitches. In the next row for a ridge by single crocheting into the back loop around the circle. For the sides, use regular single crochet until you get the desired height. One version of the pampering, massage, back scrubber can be found on mooglyblog.com. The pattern uses a 5.50 "I" hook with 120 yards of cotton yarn. I usually use Sugar n' Cream by Lily. In a future post. I will be featuring crocheted over, decorated flip flops, but to get you started go to the "Posy Ruffle Flip Flop Pattern" by Lion Brand at Lionbrand.com Although we usually reserve headbands for cooler weather, you can adapt some designs for Mom's Spa Day Package by using cotton yarn. The band will keep her hair from getting in the way when she is applying ointments or creams or putting on cosmetics. A buttoned band by Red Heart works well for this purpose. See: www.redheart.co.uk. This will take you to Crochet Flowered Headband for pattern number LW2254EN. Please note the directions are in British terms. Therefore, you will be crocheting with with an American Half Double Crochet instead of the British Double Crochet called for in the pattern. Treat the Moms in your life to a Crochet Spa Day. Create these special crocheted items and package them along with a few of Mom's favorite beautify supplies. Make her breakfast in bed, and wait for the smile.
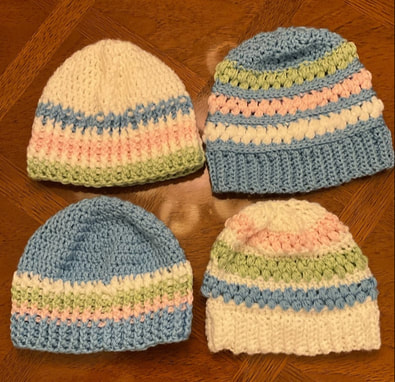 The gift of giving fills the heart and lifts the spirit. As crocheters and knitters, we can put our skills to work to benefit many worthy causes. The children and adults who receive our beautiful pieces know that a stranger cared enough to donate the time and energy in a very personal way. There is something soothing in a handmade hat, scarf, or blanket. It's like a warm hug that keeps on giving. My infant granddaughter weighed less than 5 lbs at birth. The nurses at the hospital would place donated handmade hats on her head to keep her warm. These little beanies had been fashioned by knitters and crocheters who wanted to help these little babies thrive. Local hospitals as well as national and international groups collect and distribute these hats for preemies and newborns. In researching this article, I found several of the major yarn companies and craft organizations posted articles on national and local organizations devoted to the cause of bringing handmade items to those in need. Some of these include:
Many groups were repeated in several articles. For more information, go to the websites for:
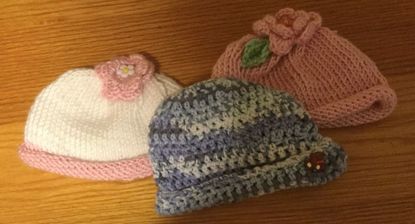
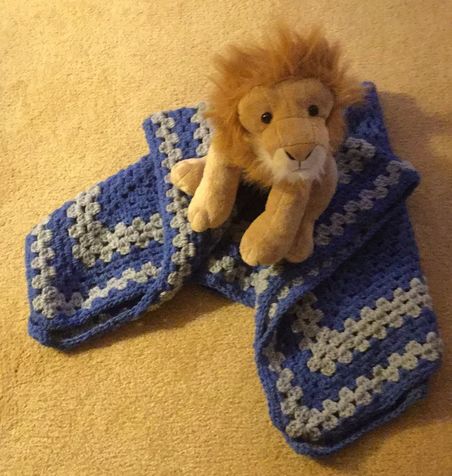
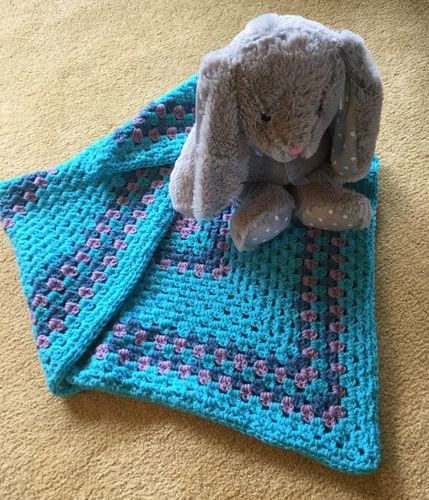
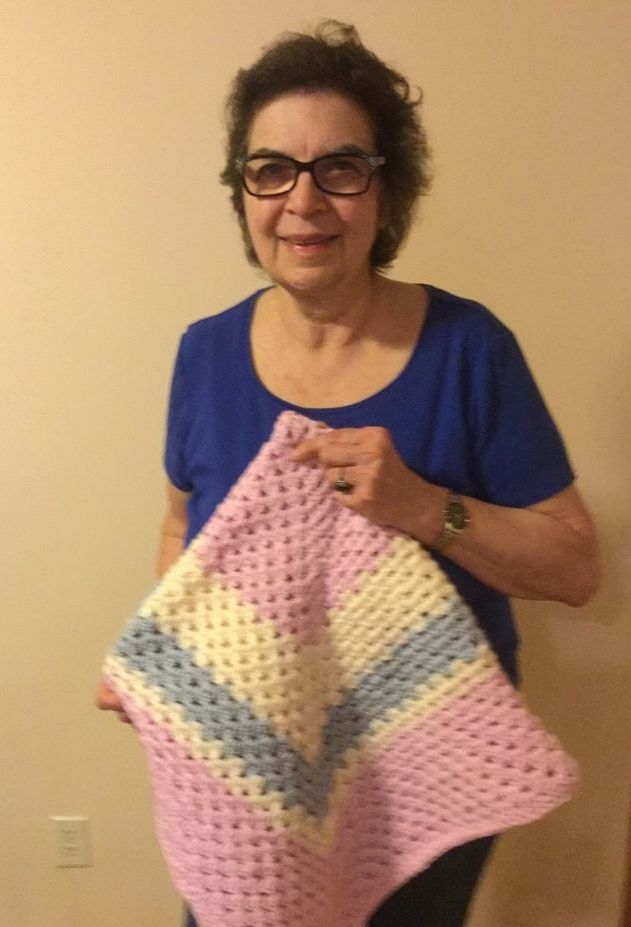
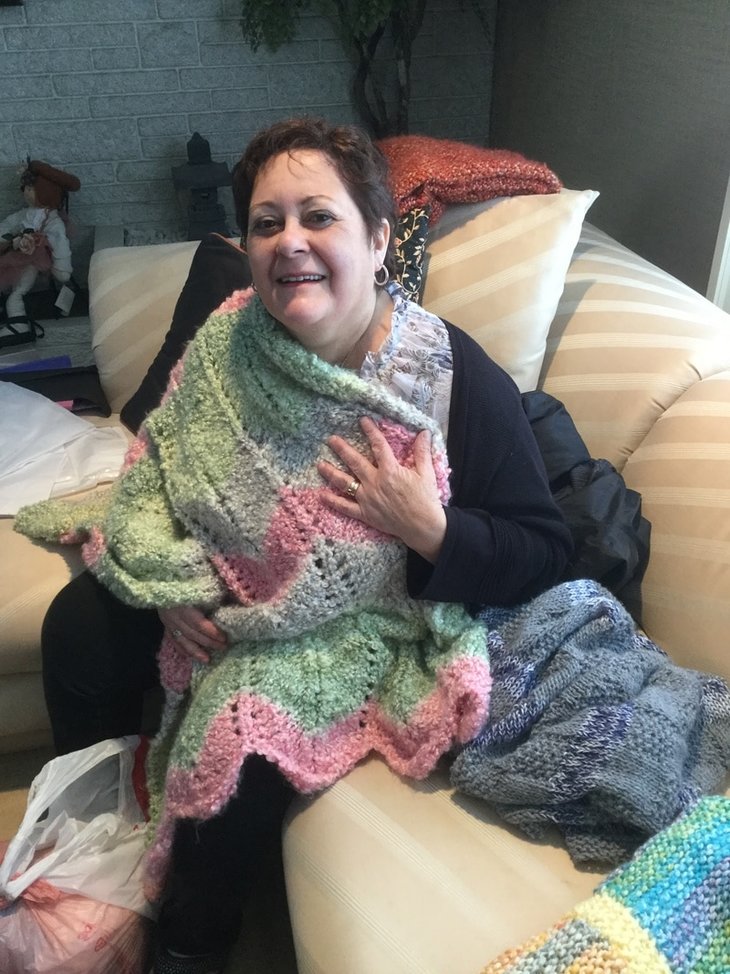
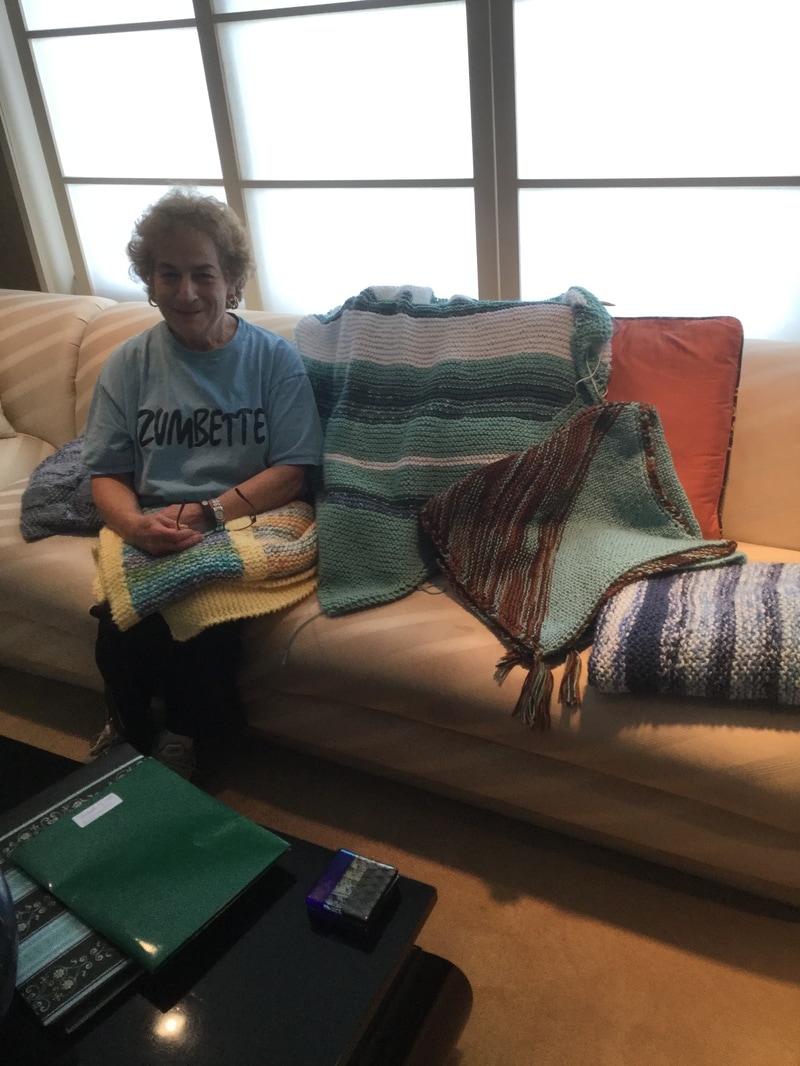
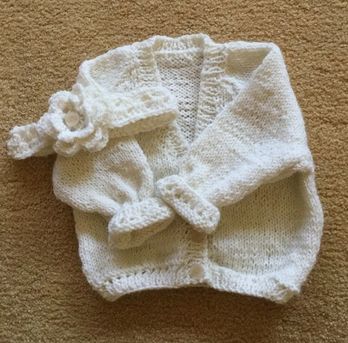
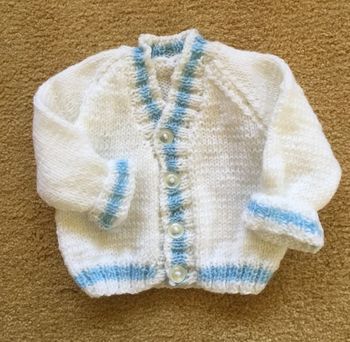
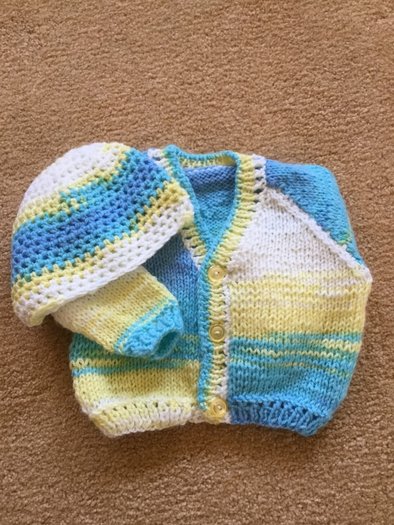
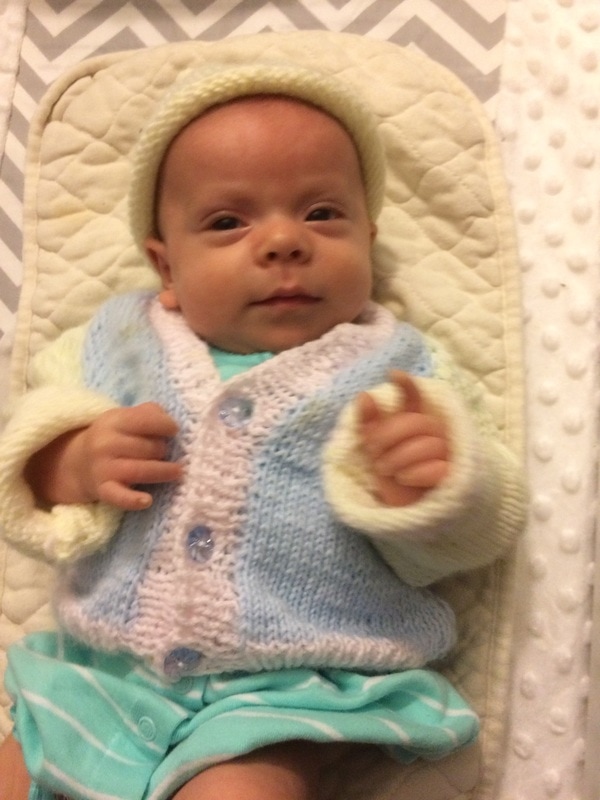
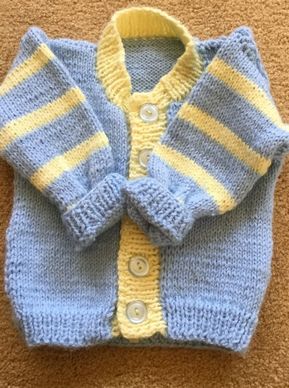
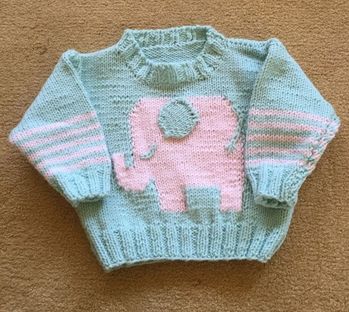
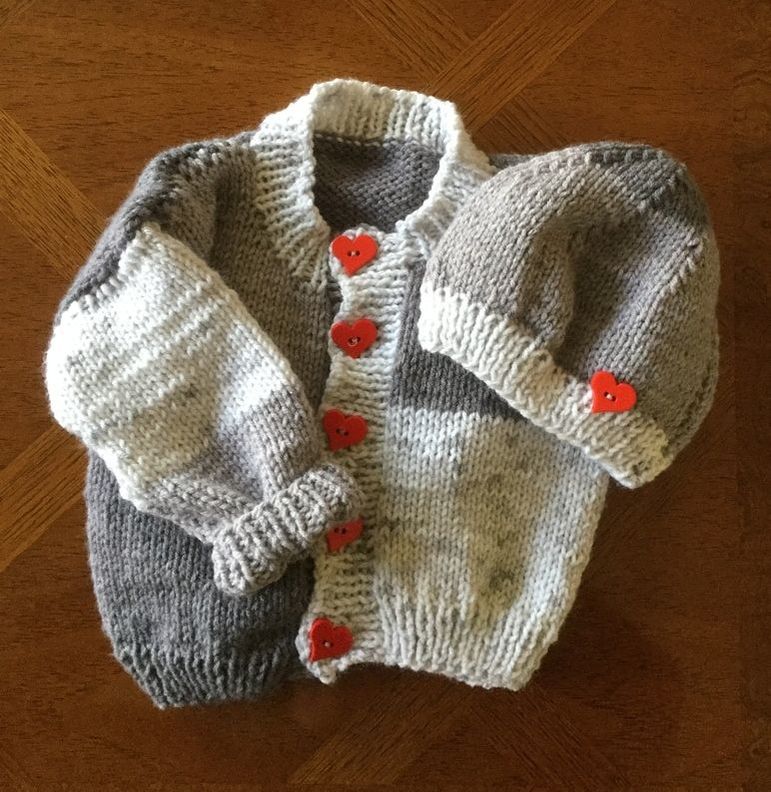
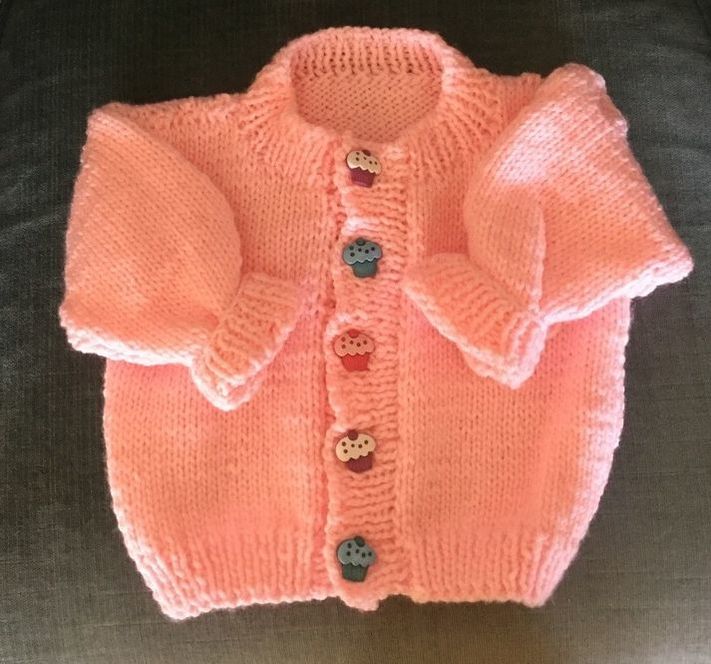
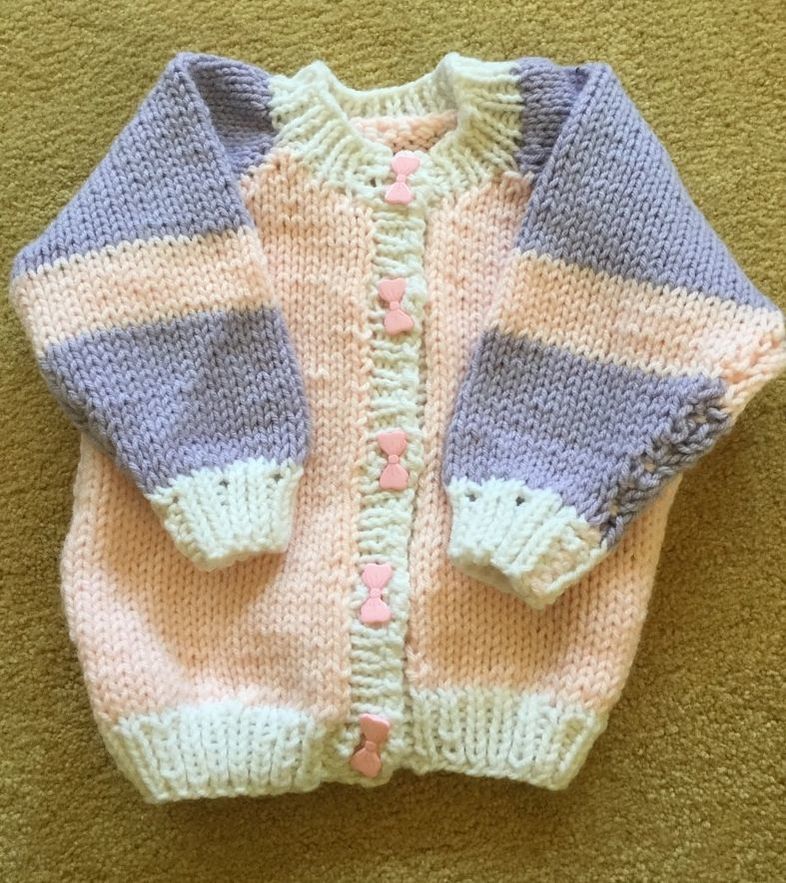
On the local level in your own town or community, you can reach out to such organizations as homeless shelters, women's shelters, and youth organizations that could benefit from your skills and open heart. Making these garments for unknown individuals allows my creativity to blossom as I experiment with yarn, color, texture, stitches, and patterns. Sometimes we are given yarn, and we are challenged to incorporate and mix different yarns in our pieces. My current child's blanket is an expanded granny square with alternating large stripes of multicolored navy, plum, and turquoise. It is bright and cheerful. I hope that the boy or girl who receives it will feel its comfort and love. For the past three years I have participated in Threads of Love. Our Connecticut chapter provides handmade crocheted or knitted blankets and shawls to children and adults with cancer or other serious medical conditions. Most recipients are patients at Yale-New Haven Hospital or other area hospitals. However, friends from the community and as far away as Florida or Washington have received these packages of hope and healing. Crocheters and knitters come from several towns in Connecticut and Massachusetts. Since the group began in 2009, local members gather about every 8 weeks to package the blankets and shawls in a hand-decorated bag. A card which expresses hope and caring wishes is placed in each bag. Last spring, the group celebrated a significant milestone, having completed and distributed 500 pieces. As a member of Threads of Love, I have benefited from the pervasive spirit of love, workmanship, and camaraderie. As our gifts wrap the recipients in softness, warmth, and beauty, we have gotten so much by giving. The group welcomes donations and new members. The only requirement for your handmade blankets or shawls is that they be 100% acrylic and washable. For more information contact: [email protected]. (Source: http://woodbridgetownnews.com/500-shawls/} Have you had any experience in crocheting or knitting for charity? Is there a specific organization that you would like to mention? Please share your thoughts in the comments section. This article will also be posted on Facebook. I welcome your comments and photos of your donated work. 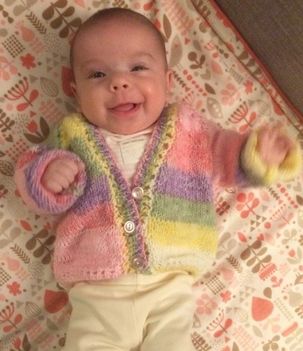 Why is it that with all of the free and for purchase patterns for knitting and crocheting, I keep going back to a favorite? I love experimenting with new yarns, stitches, techniques, and projects. However, these new endeavors frequently involve a significant amount of concentration, counting, and unfortunately ripping out mistakes. So when I want to be certain of the outcome, or I am in need of a relaxing knitting or crocheting session, I resort to my tired and true pattern. I can knit for several stitches without looking. This comes in handy when watching a favorite tv show or when embarking on a prolonged road trip. One of my favorite infant baby sweater patterns was a Chatterbox pattern published by Sidar. Unfortunately, the pattern is now out of print. Therefore, I have resorted to taping all of the worn and folded parts, and now it resides in a big binder, protected by a plastic sleeve, This 4 sided pattern includes a raglan and round necked cardigan, a matching hat, and a baby blanket. The raglan sleeve is especially comfortable for small babies who may be stiff when they have to extend their arms. My new granddaughter is very tiny, and she wore the newborn size up to 3 months.The pattern calls for DK yarns. I knitted with 100% acrylic yarn by Sidar that I purchased from my favorite specialty yarn boutique in Woodbridge, Connecticut. It is soft, but works up with a nice hand. As you will see from the photos below, the sweaters look lovely whether you work with solids, self patterning , or speckled yarn. I had a lot of fun figuring out the color placement for the multicolored pink, blue, and yellow garment. For girls' sweaters, the open work just above the ribbed bands adds a sweet detail. You could also vary the pattern with striping on the sleeves. A second favorite is a basic round neck cardigan and hat that comes from Creature Comforts by Amy Bahrt (Sixth&Spring Books, 2005).The author presents directions for foundation cardigans, pull-over sweaters, hats, and baby blankets. Then in subsequent chapters she shows the reader how to work in animal motifs and other designs right into the knitted piece. The worsted yarn works up quickly. The sizes range from 6 to 18 months. Both sweater and cardigan feature a dropped sleeve which is easy to seam and comfortable to wear. Contrasting ribbing or striping can make unique garments for boys or girls. In the photo decorative cupcake buttons provide the "pop" for pink cardigan. Red buttons add the "zip" to the self-striping cardigan in shades of gray. Do you have a favorite pattern? In what says do you vary the design? Please leave your comments. You can find me on Pinterest under the name [email protected].
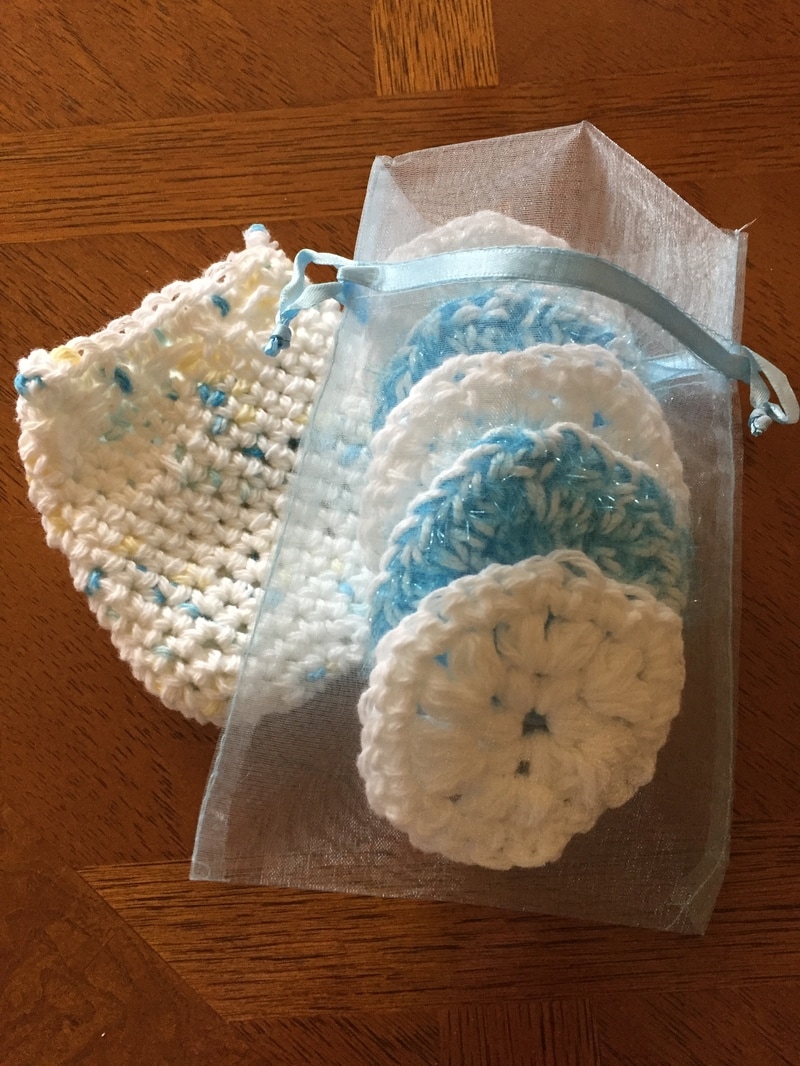
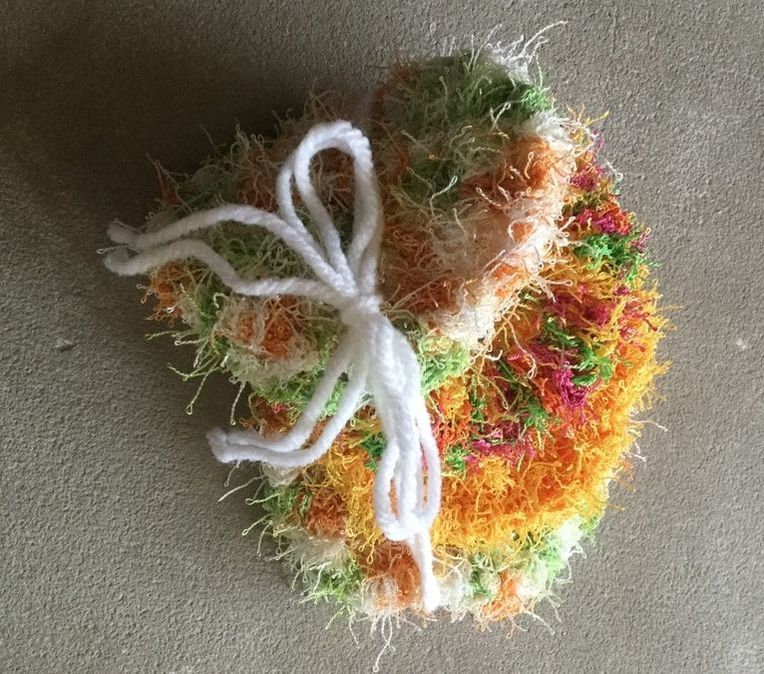
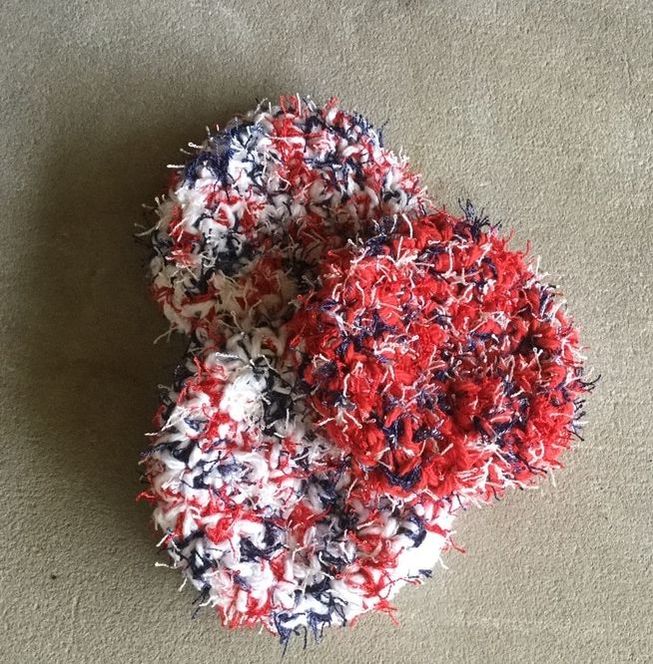
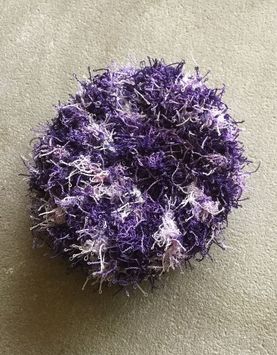
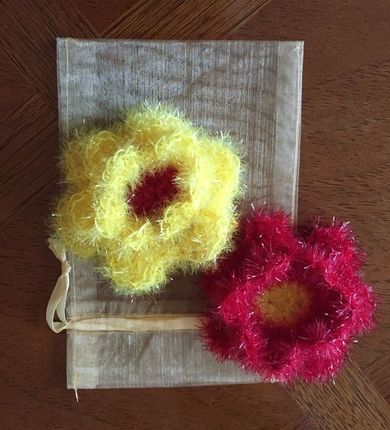
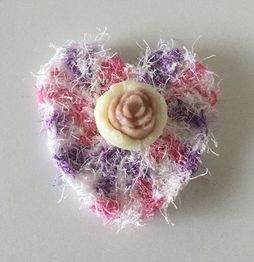 Scrubby art is where creativity and function come together. Although I usually crochet or knit projects that can be worn, lately I have been playing with the textured polyester yarn produced by Red Heart to create scrub pads for cleaning dishes and nonstick cookware. The textured pieces are mildly abrasive so that they can scrub off food particles without damaging the surface. Red Heart also claims that knitted pieces can be used as face cloths for exfoliating your skin. At a recent gathering of family and friends I spread these jewel-like circles out on the table and directed the guests to select one of their choice. Each person chose his or her favorite, but few had a clue as to how he or she would use these colorful pads. When I told them about how useful they could be, most wanted more than one. While textured pads are readily available at the supermarket and other retail establishments, these pads were much more fun. For those who need to separate cleaning pads for different purposes, color coding comes in handy. This textured yarn comes in many solid colors, coordinated varied combinations, and even sparkled yarn. In my first batch, I worked with mango, lime, and citrus. By using 3 skeins, I was able to come up with several different combinations. Since then I have worked with red, blue, white, and a patriotic combo. There are so many colors to try and so many designs to create. The swirly patterns and the concentric circles are easy to execute. Since Scrubby Yarn is a worsted weight, #4, Red Heart recommends using an I (5.5 mm) hook so that you can see the stitches more easily. However, I prefer the H (5.0 mm) hook to produce a denser pad. Still, if I were to make a cloth for cleaning my hands, feet, or face I would use the I (5.5 mm) for a lighter cloth. Whichever hook you prefer, crochet more loosely than you would usually so that you can see where to place the hook when you crochet your stitches. To crochet a circular pad, follow the procedure to make the crown of a child’s hat. End off when you reach a diameter of 3.5 to 4 inches. Weave in or tie off and cut the ends. The texture will hide the ends from sight. Starting with three rows from the circle, you could also make a heart or a 5 petal flower.
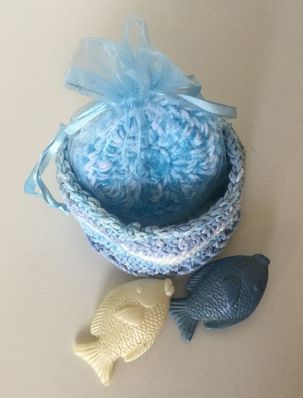
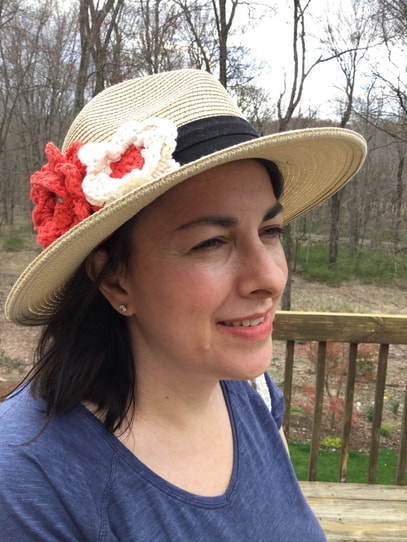
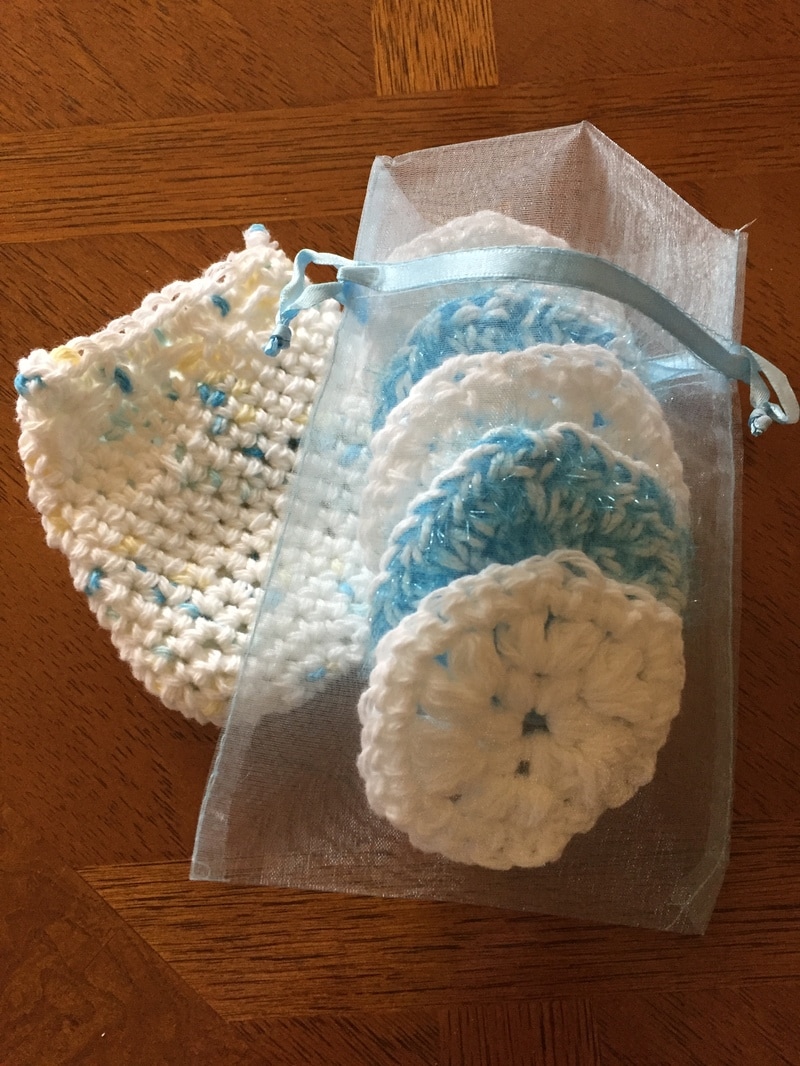
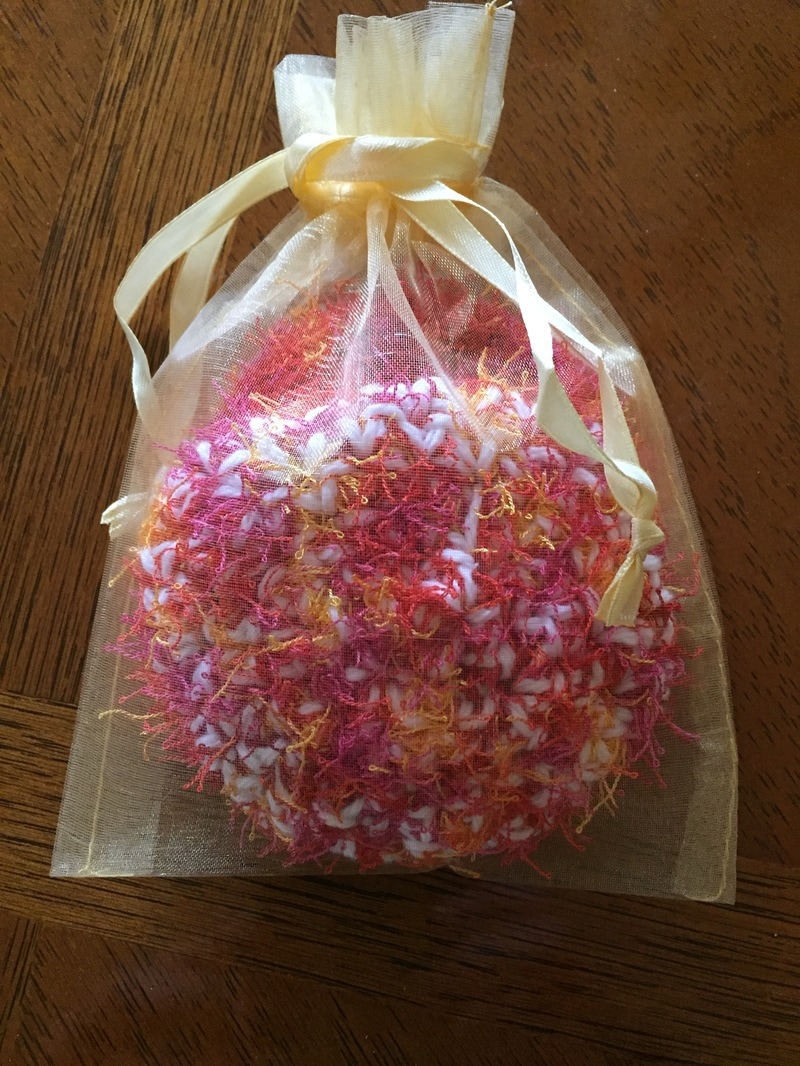
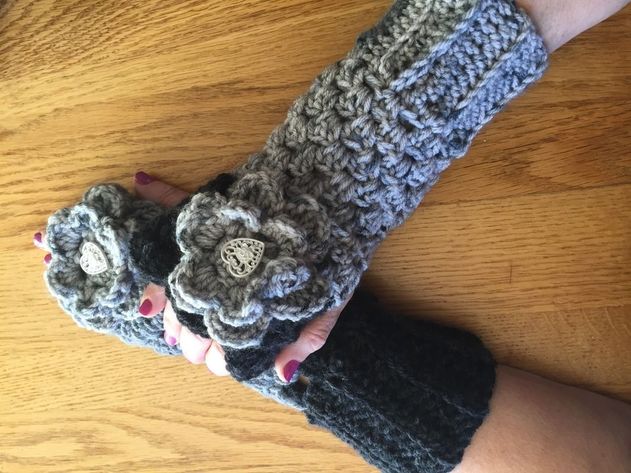
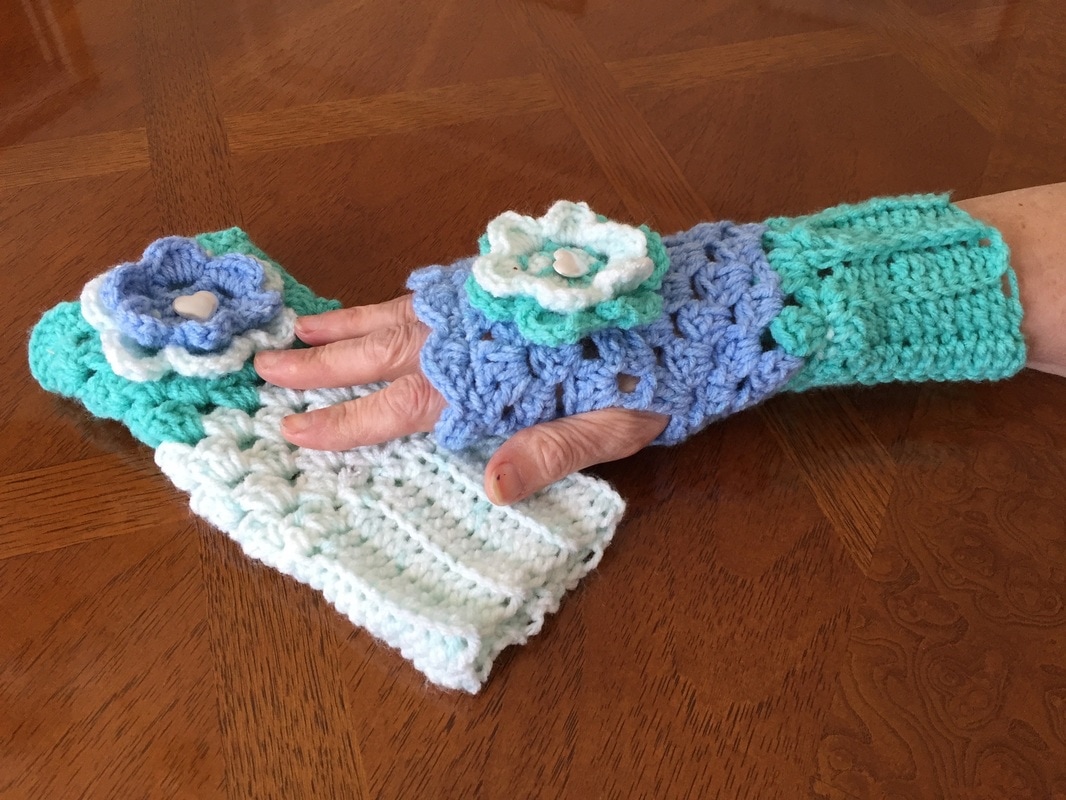
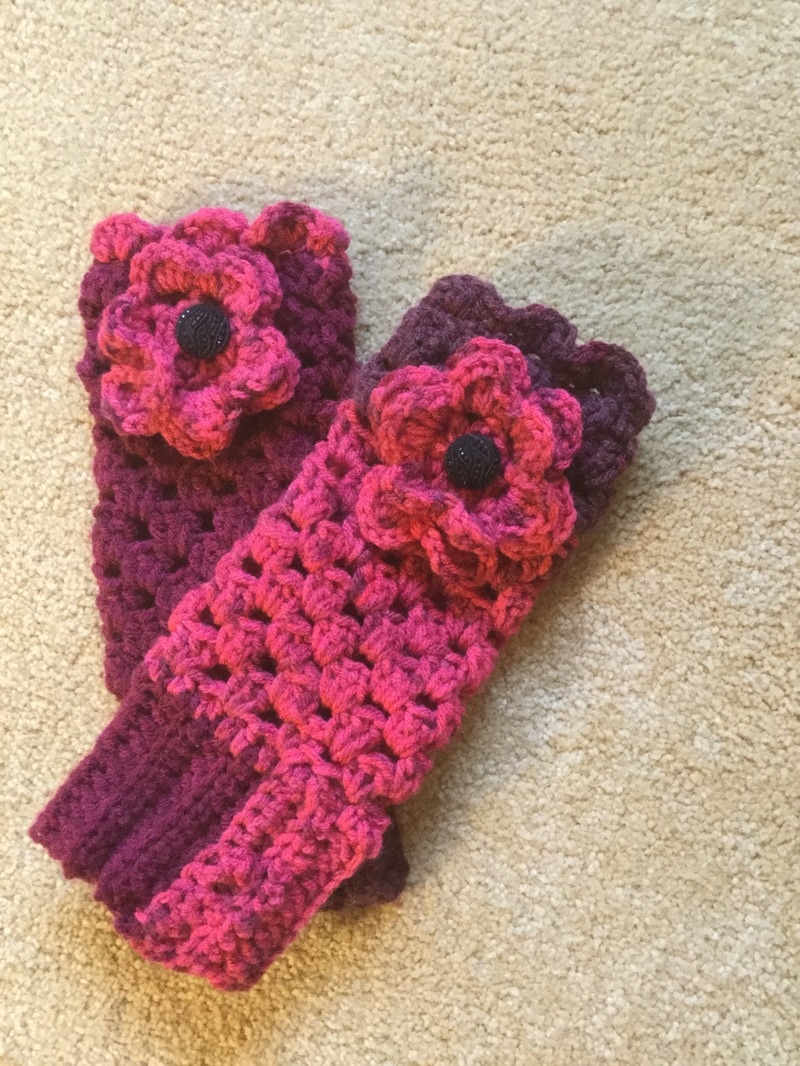
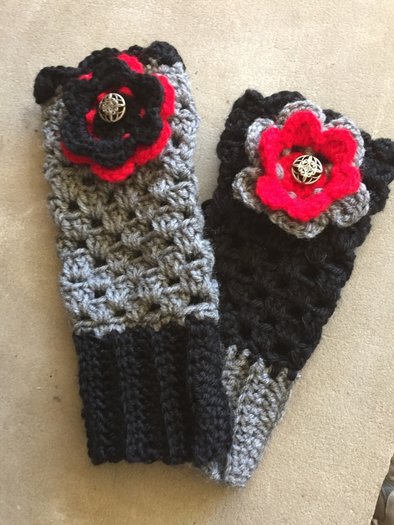
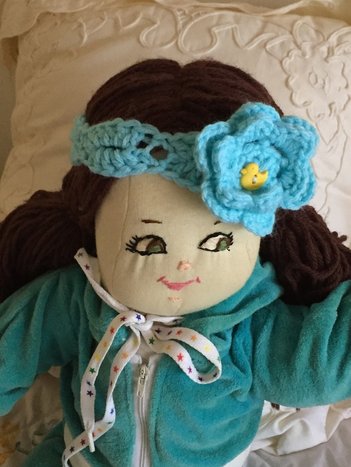
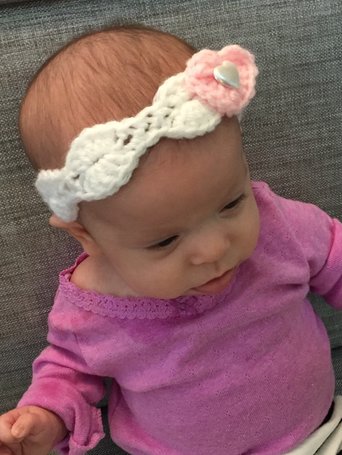
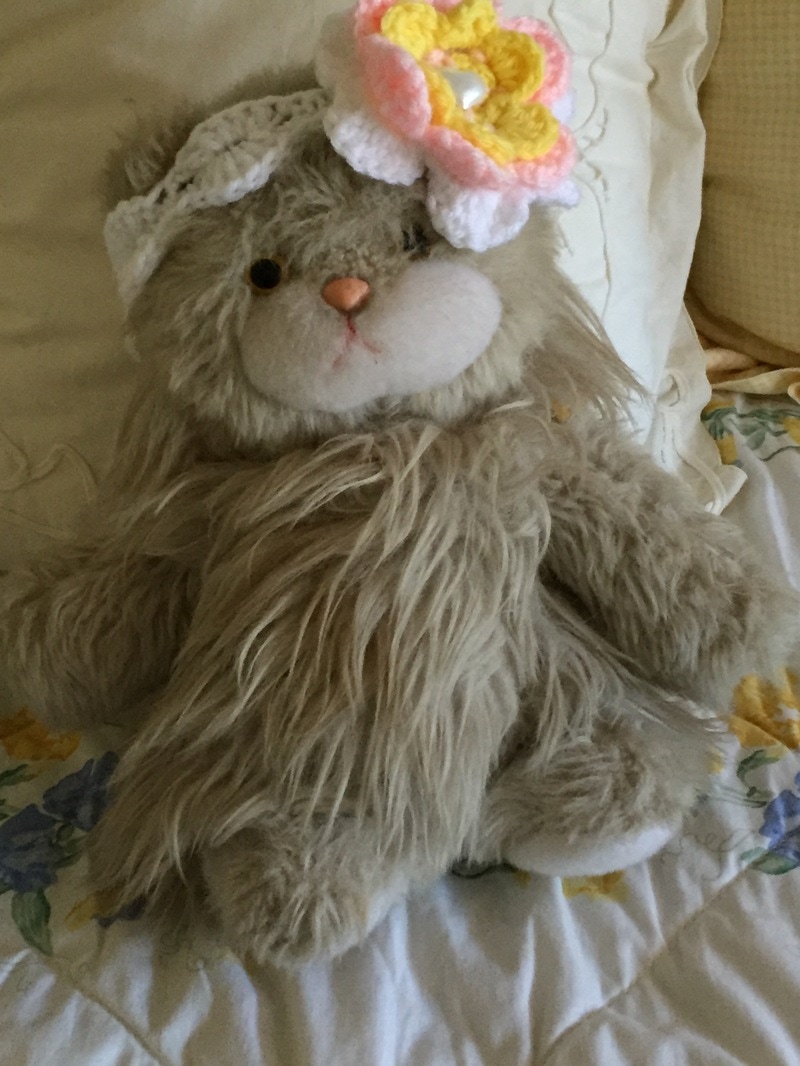
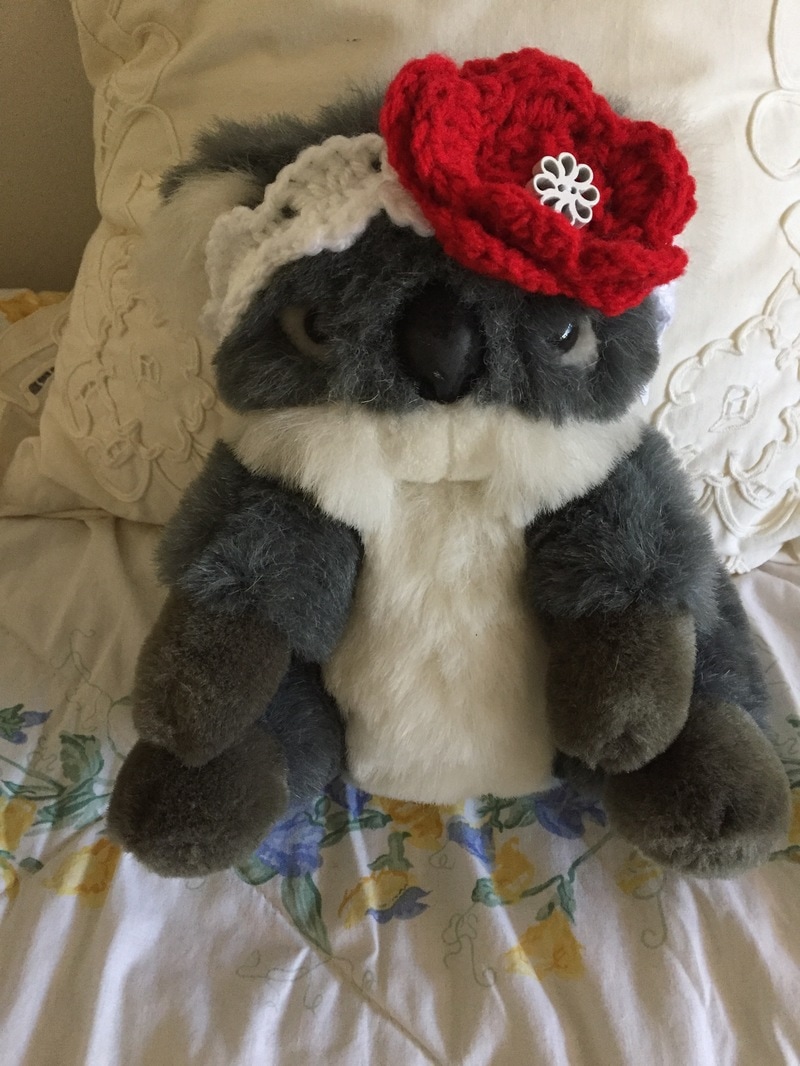
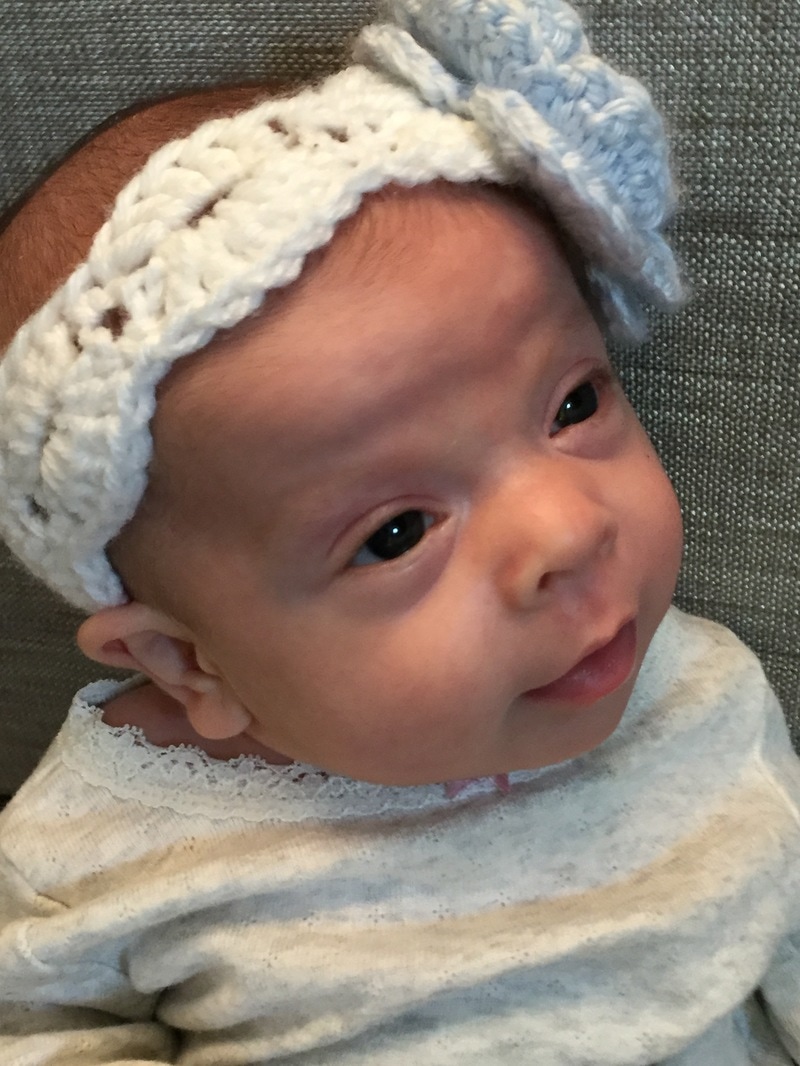
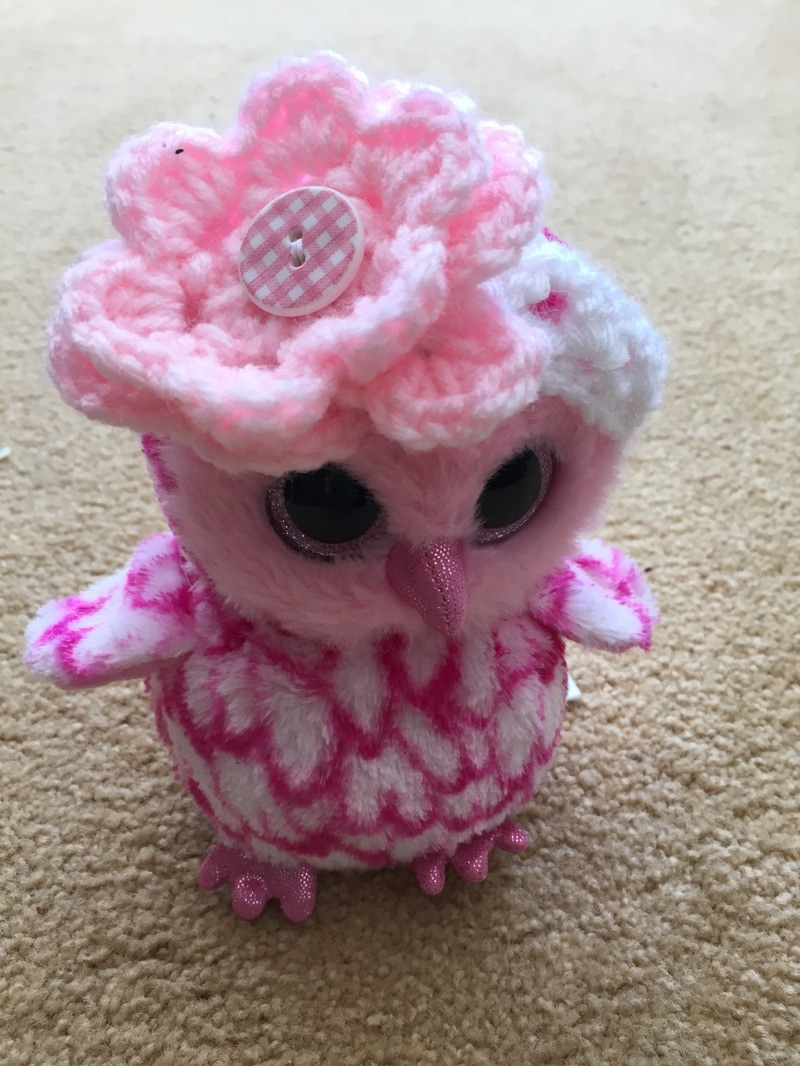
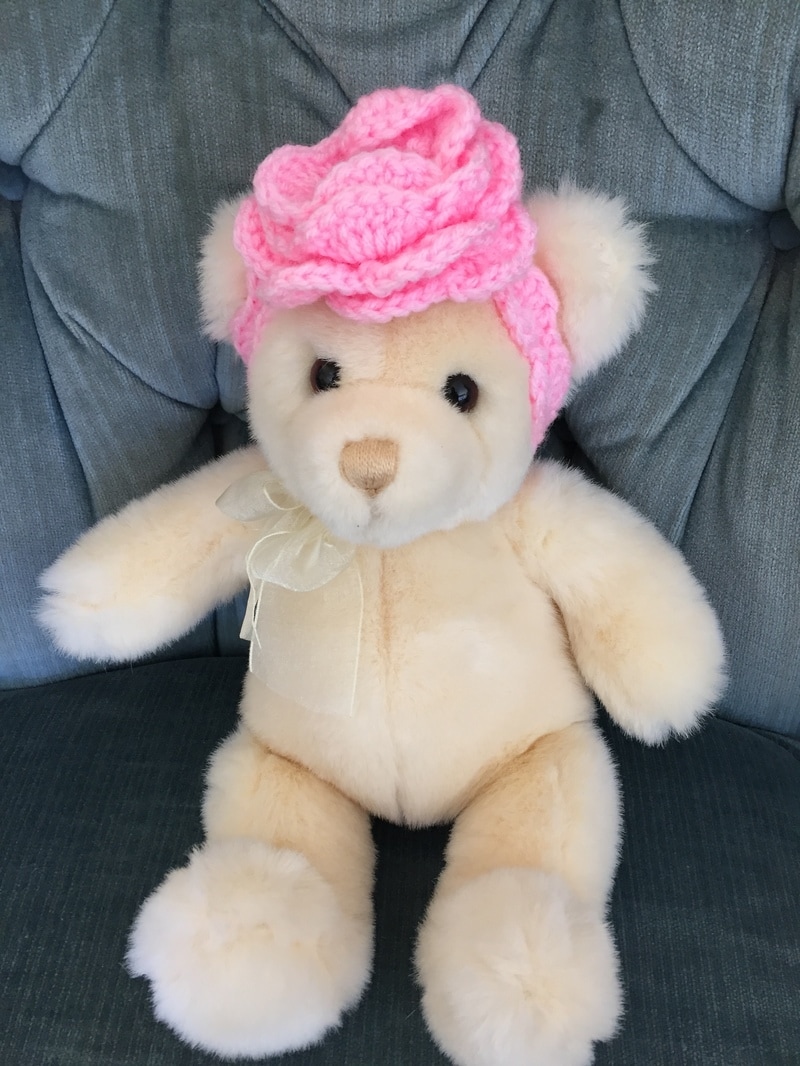
While you will always rinse out the pads after each use, you will ultimately need a more thorough cleaning. Red Heart recommends washing the pads in the washing machine and drying on low. I have also stuck a scrubby on one of the projections on the upper shelf of my dishwasher and was satisfied with the result. My only concern would be that the temperature did not get too hot. By combining the colors in a set of three coordinating scrubbies and perhaps one cotton yarn, you can end up with an attractive set. I crocheted a small cotton pouch out of a varigated yarn that could be used to hold soaps or small bottles of lotion or cream Together, they made an appealing spa set. Tie a piece of twine or a double strand of yarn and you have a house gift when you go to dinner when you go to dinner. Yesterday I found a set of attractive mesh bags at the Dollar Store. Add a gift tag and you are ready to go. I would imagine that you could also use them as a party favor that matched your color scheme. These versatile materials enable the crafter to come up with many products for the kitchen and bath. Keep on experimenting. Please share your results. Is there a scrubby in your crocheting or knitting future? 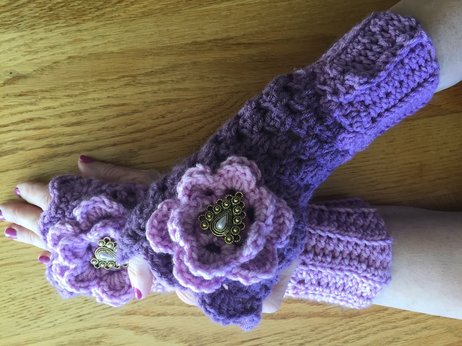 When the doors of the neighborhood holiday fair opened my first potential customer was drawn to my new product a pair of mismatched, coordinated fingerless gloves. She willingly paid the amount I requested and scooped up her "wearable art." "What is the appeal of a pair of gloves that coordinate, but don't match?" I wondered. It seems that you can develop a more interesting fashion accent that is just a bit funky by using similar colors with different placement of the bands or color elements. The color switch makes for an intriguing, though satisfying puzzle. In the case of this initial pair, I used the muted plum tones of Sweet Roll by Premier Yarns. Each skein presents 3 long color runs with interesting combinations that include coordinating pastels, a range of neutrals (such as shades of gray), or bold and brilliant jewel-like tones. The color for this first pair included plum tones that ranged from light mauve to a darker purple. A 2-layered flower with a decorative button at the center adorned the top of the glove near the fingers. One skein (245 yards) of this worsted 100% acrylic yarn was all I needed to complete the pair of fingerless gloves. I even had enough scrap to make a child's flowered headband. When I made a second pair, I had enough to make a child's pair of mismatched fingerless gloves. You will find the photo below. Since that fateful day, I have been inspired to create, sell. or gift dozens of these dramatic fashion accessories. I get that glow when someone who has acquired my gloves is actually wearing a pair. A few months ago my husband and I were at a new friend's home for dinner. Instead of bringing a bottle of wine or other house gift, I presented the hostess with a pair of gray to black gloves that I thought would coordinate with her winter coat. She smiled and said thank you, but I had no idea if she was just being polite. However, at a group event on a particularly cold evening, I saw her pull out the gloves before she went out into the night air. Smiling to myself, I could see that the gloves had been worn often and well. To construct these fingerless gloves, I begin with the cuff. I crochet a band of half-double crochet, on the back loop before sewing the ends together. The body of the piece is then worked in the round. For my first pair, I started with the lightest shade and transitioned to a medium tone. The second gloves started with the medium tone and transitioned to the darkest shade. A light flower decorated the glove with the dark fingers. A dark flower was placed on glove with the medium shade near the fingers. While I might be able to tolerate slight variations as I make the gloves myself, I am taking careful notes as I prepare a precise pattern for my readers. After I create and test the pattern, I will make it available for the followers of lilcreates .com. In the meantime I refer you to my board on Pinterest (Lillian Malkus/Love to Crochet) or the patterns available from Ravelry or AllFreeCrochet.com. Cakes by Caron also provides the multiple colors that enable the crocheter to work several inches before transitioning to a coordinating or complementary hue. This yarn, which is 80% acrylic and 20% wool, is only available at the Michaels chain of craft stores. Yardage is 350 yards per skein, and sells for a dollar more than Sweet Roll. For crocheters who are willing to experiment, you can achieve the coordinated mismatched effect by blending 3 or more of your own color choices of thicker worsted yarn. You will change the color placement, by making the cuff in one color and the body in a coordinating shade. Then make the switch for the opposite glove. Your flower will contrast with the body of each glove. I hope you enjoy your experimenting with mismatched gloves. Please write a comment in the reply section. My readers are an important source of inspiration and learning for me. 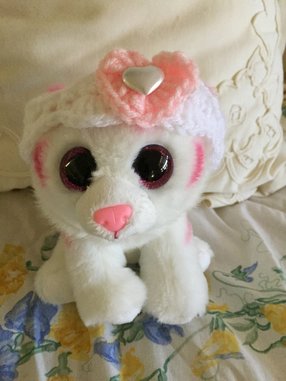 Crocheted and knitted baby headbands add the perfect touch to an infant’s outfit or handmade garment. East to execute, quick to produce, and requiring few resources, these accessories give the crafter a sense of accomplishment and perhaps a relief from working on much larger or involved projects. When a beautiful new granddaughter entered my life, my priorities, my schedule, and especially my knitting and crocheting project changed dramatically. I have been lucky to live close enough to see her frequently as her body grows and her behavior matures. Her smile just melts my heart. She has been my favorite model. Not wishing to overwhelm this tiny baby, my grown daughter's childhood stuffed animals and dolls have had do stand in duty as I photograph my creations for sharing and publication. My daughter, Robin, has been most accommodating in dressing her little daughter in clothes that coordinate with the pieces to be photographed. She has also had to problem-solve to keep her little one upright while making sure that she is safe and comfortable. After considerable experimentation, I wanted to share the baby headbands that are attractive, easy to construct, and comfortable for the baby or toddler with my readers. Overall, my favorite headband for an infant is the shell design. If you are crocheting or knitting to build on a long chain, the headband will be less stretchy, and you may have to make it a bit larger to fit the baby comfortably. If you are building on a short chain or knitting from a shorter cast on, the headband will have more give. 0-3 months: head: 13-15 inches; headband: 12 inches 3-6 months: head: 15-17 inches; headband: 13-14 inches 6-12 months: head: 16-19 inches; headband: 15-17 inches toddler: head: 18-19 inches; headband: headband: 16-18 inches If you have access to the baby, measure the circumference and subtract about 1 1/2 inches to get the required headband measurement. The following links provide free patterns. Each of the following bands in made in strip form. After making the strip, sew the ends together. You will be attaching the decoration to cover this joining spot. https://midwesternmoms.com/crochet-headband-pattern/ This pattern gives directions for a narrow headband with 3 double crochet on each shell. The number of chain stitches should be divisible by 4. http://mymerrymessylife.com/2012/03/crochet-shell-headband-free-crochet-pattern-2.html You will use worsted weight yarn and an I hook. There are 4 for each shell. Chain is divisible by 4+ 3 at the end. Having made this headband and an alternative allowing for only one skipped chain between each step in the band, I prefer the one skipped stitch option. I use a g hook with soft worsted yarn. Another choice for the baby headband is the cluster. After consulting the chart for the appropriate length, crochet a chain that is divisible by 5 add one. Row 1: SC in second chain from hook and continue across. Row 2: Chain 3 and Make 2 DC in base of chain 3. Ch 1. Skip 2 stitches. In next stitch make 3 DC and chain 1. Skip 2 stitches and continue with #DC and 1 chain. Turn work. Row 3: SC in second chain from hook. SC to end and end off yarn. Again you will be sewing ends together to make a circle and attaching decoration to the join spot. You can also build on a short chain until you get the desired length. For example, for a smaller baby, make a chain of 8 stitches with soft worsted yarn. Make a half-double crochet in third chain from the hook and continue with HDC until the end. Chain 2 and turn your work. Continue with half double crochet. If you want a ridged headband, HDC in the back loop. If the child is bigger, or you want a wider band, add a more stitches to your beginning chain. For knitters who want an attractive baby headband, go to https://www.allfreeknitting.com/Knitting-for-Babies/Blooming-Baby-Headband The knitter will use 3.7mm (#4) needles with DK yarn. The band has a contrasting edge with a matching knitted flower or bow. While some folks prefer to leave a headband plain, I love the many decorative options for creating unique pieces. Most frequently, I adorn my headbands with crocheted flowers to add a feminine touch. I just learned to crochet hearts. I even found a heart shaped pearl button to sew in the middle for a perfect accent. Other choices could be butterflies, animal or figure motifs, or stars. Sew your decoration to the place where you joined the ends of the band together. The photos in this blog posting show some of the many ways the crochet or knitting artist can create a fashion accessory for a baby. I made all of the headbands in the photos and have followed the directions in my pattern as well as in the sites I referenced. I have collected a large number of headbands on my Pinterest Board (Lillian Malkus). See Heavenly Headbands for ideas and inspiration .As a knitter and crocheter, I am impressed by the work of other yarn artists as a bridge to my own creative exploration. I hope you enjoy making a headband for the baby in your life. Please comment about your experiences. I will be posting my blog on Facebook, and I welcome your comments and photos. |
Archives
November 2022
Categories
|

 RSS Feed