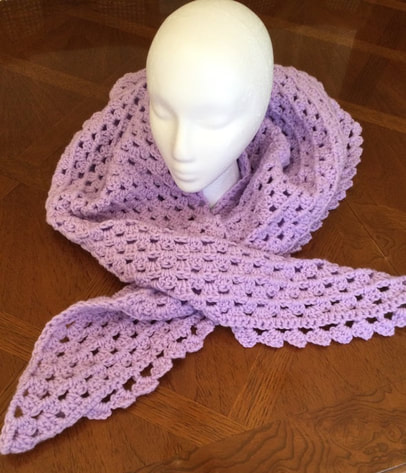
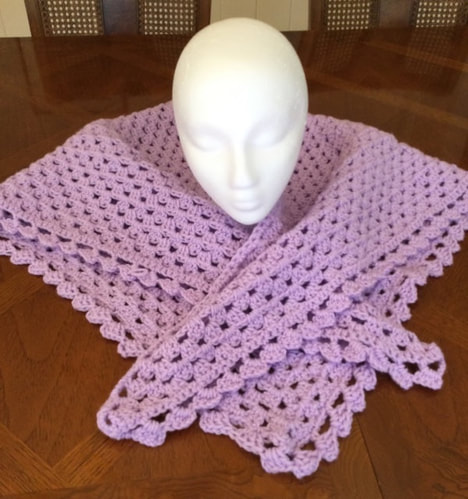
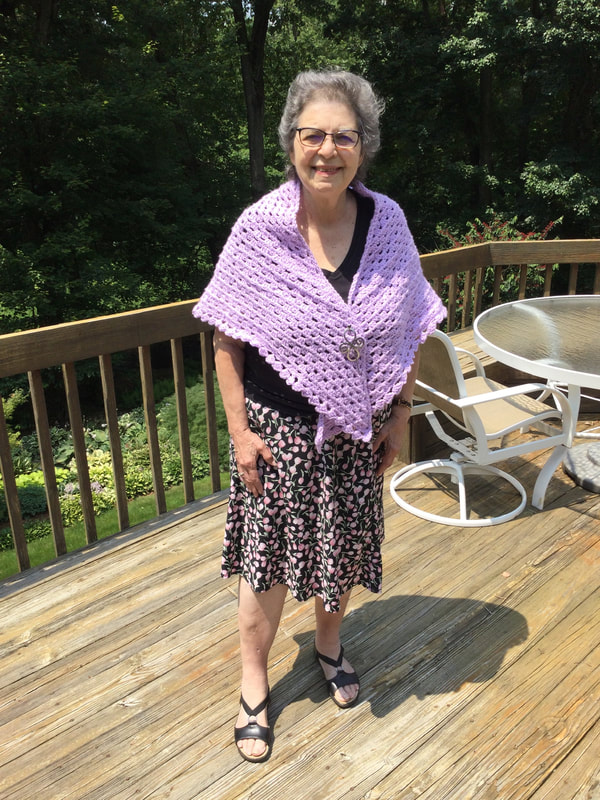
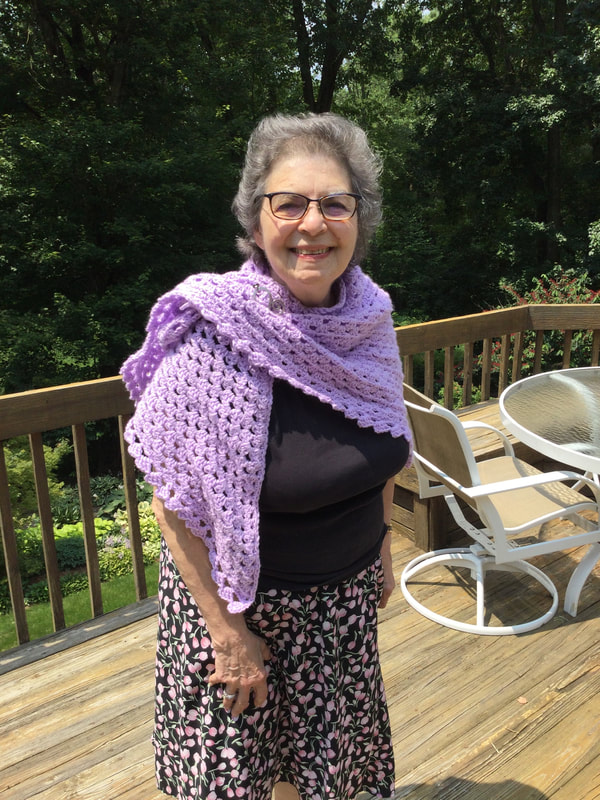
 My Triangle Shawl with Clean Straight Lines was the result of a long, but productive road trip to Chautauqua, New York. My husbanding I had not been on a vacation for over a year and a half and were excited about our adventure. Despite the pouring rain, we kept up our spirits, and I completed more than half of my piece before arriving at our destination. The basic project fit in with my own rules for crocheting on the road. Bring enough yarn. Make sure you have all essential hooks, measuring tapes, needles, instructions, and any other needed equipment. Trying to find a knitting or craft store in isolated locations can sabotage any project. However, most of all, do not try a new, unfamiliar, or detailed piece. I find it impossible to count and keep up my end of the conversation with my husband (who is driving) if my crocheting is too complicated. The triangle shawl I picked was familiar, but I also wanted to tackle the problem of the side pieces reaching up like wings. I also wanted to work on the contours so that the shawl was much wider than it was deep. The wider configuration is more flattering for me and many other women. 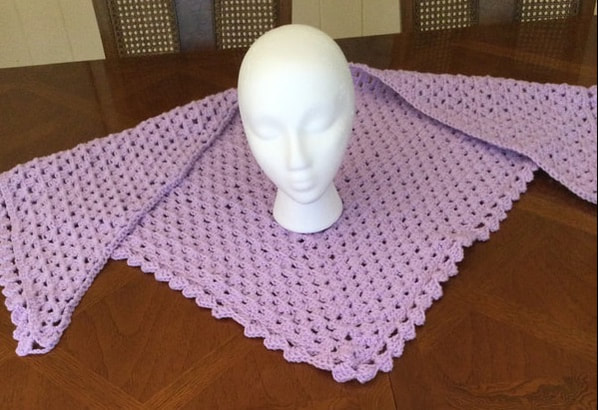 When I use the Granny Stitch Method to make a blanket, I usually leave out the chain 1 between the clusters because I like a denser blanket. However, when I make a shawl the piece does not drape when I do this. Also, in order to get the proper width. the shawl becomes much too deep and cumbersome. My first step in changing the shape of my shawls to add the ch1 between clusters. The second change was to chain 3 stiches instead of two in the central section of two Granny Stitch clusters. The third step I took was to chain 4 loosely instead of 3 at the end of each row. The chain 4 becomes a double crochet and a ch 1 in the next row. The extra stitch makes for more ease at the line that rests on the neck and down the front. As I lay out the steps for the triangle shaw, the directions become clearer. The shawl is worked from the bottom up and becomes larger as you add rows. Once the pattern is established, you repeat the same row until you have reached your desired size or until you run out of yarn. My completed shawl, before adding the edging, measured 60 inches wide and 31 deep. With the edging , the shawl measured 62 inches wide and 32 inches deep. I am 5 foot 6 1/2 inches tall and the shawl reached just below my hips.
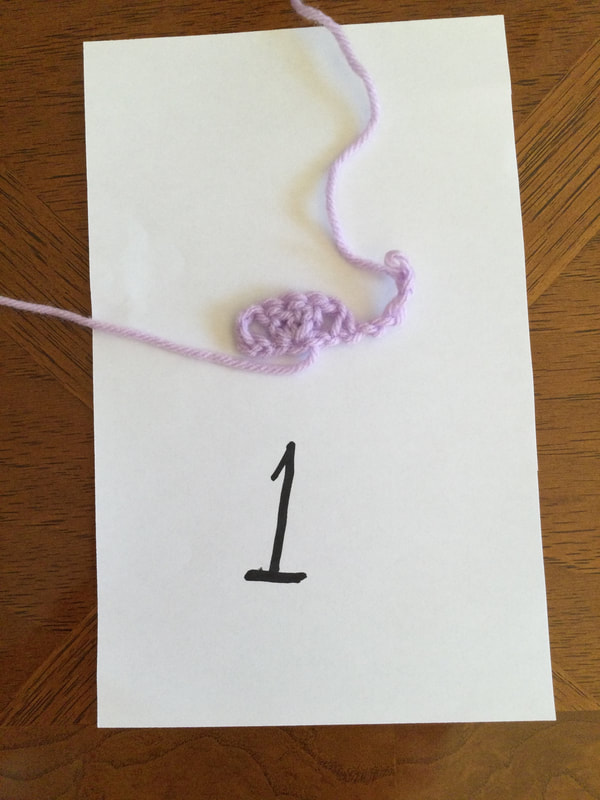
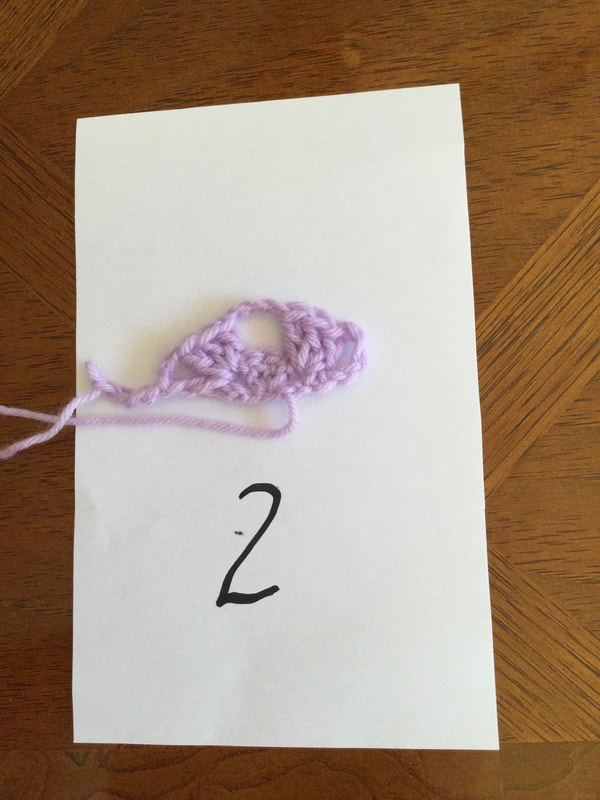
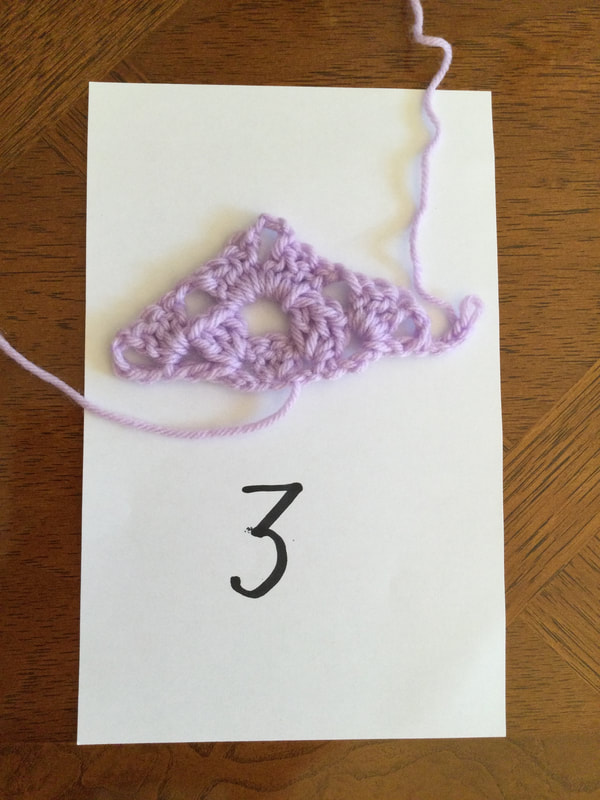
 Row 1: Make a magic circle and chain 4. . Crochet 3 DC into the magic circle ring. Ch 1 and make an additional DC into the ring. Pull the magic circle tight. Chain 4 loosely. Turn Row 2: Crochet 3 DC into to the ch1 space. Ch 3. Crochet 3 DC into the last ch1 space. Ch1 and make 1 DC in the same space. Chain 4 loosely.
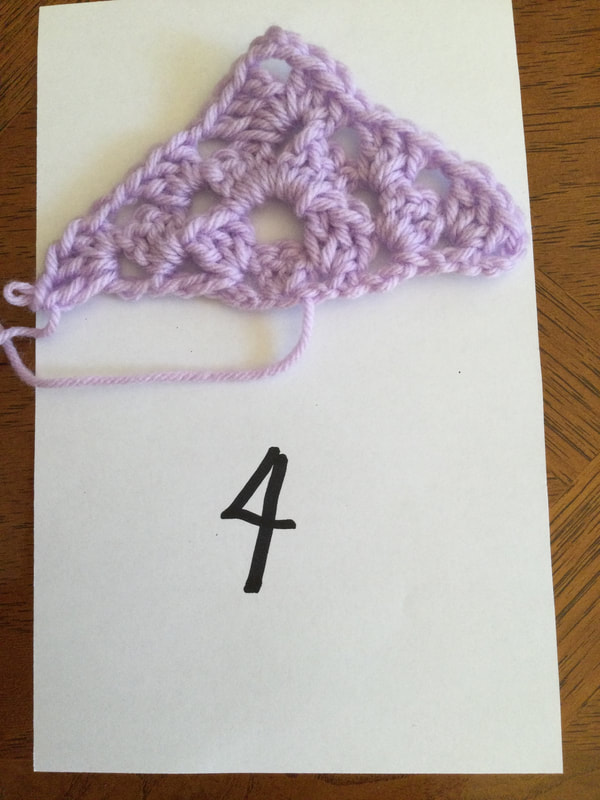
Row 3: Crochet 3 DC in the ch1 space. Ch1. Crochet 3 DC in ch3 space. Ch3. Crochet 3 DC in same space Ch1. Crochet 3 DC in last ch 1 space. Ch1 and make 1 DC in some space. Chain 4 loosely. Turn Row 4: Crochet 3 DC in first ch 1 space. Ch1. Crochet 3 DC in next ch 1 space. Ch 1. Crochet 3 DC in the 3 ch space. Ch 3. Crochet 3 DC in the same Ch 3 space. Ch1. Crochet 3 DC in next ch 1 space. Ch1. Crochet 3 DC in the last ch 1 space. Ch1 and make 1 DC in same space. Chain 4 loosely. Turn At this point the pattern for the shawl is established. You will be adding extra clusters in the chain 1 space at the beginning and end of each row. You will be crocheting 3 DC ch in each ch 1 space until you get to the center. Then you will make 3 DC, Ch 3, 3 DC in the central 3 chains. Ch1 and continue down the opposite site. When you get to the last ch 1 space, you will make 3 DC, Ch 1, 1 DC in the same space. Chain 4 loosely and turn your work. Repeat and continue until you have the size you desire.
The completed triangle lay flat, and I had reached my goal. Still I wanted to add an edging to make my shawl more exciting. Before starting any edging, I had to SC around all sides of the shawl to provide a solid base for the crocheted edging. The long flat side would remain plain, but even on this side, the SC finished off the stitches and made for a finer look. The Block Edging would add interest without being too fussy.The Block Edging consists of groups of leaning DC stitches. You work over a multiple of 4 stitches + 3. When I finished my row of sc I did not cut my yarn. I just started with Ch3, skipping the first 3 stitches. Continue with the following sequence. *Make 1 DC in the next stitch. Ch3. Crochet 3 DC around the DC and skip the next 3 stitches.* Repeat from* around. At the end, slip stitch into the third stitch of the beginning chain. Cut off the yarn and we've in the ends. 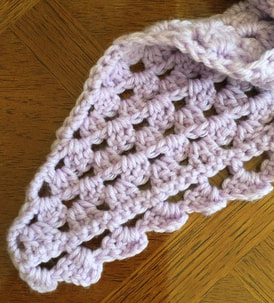 Each time I crochet or knit a project I like to learn something new. This was the first time tried the Block Edging, and I was quite pleased with the results. It added enough accent without weighing down the shawl.
I am glad that I chose lavender for this shawl. Since I rarely wear this color, I will not be tempted to add it to my growing stack of shawls and scarves. I will probably donate it to my local chapter of Threads of Love. This piece should provide a warm hug for a hospital patient. I hope my process inspires you to look at a familiar project in a new way . Even small experiments like my edging can breathe life and spirit into your crocheted garment. As always, I appreciate your feedback and reflection. I welcome you to join mean my stitching journey.
2 Comments
|
Archives
November 2022
Categories
|

 RSS Feed