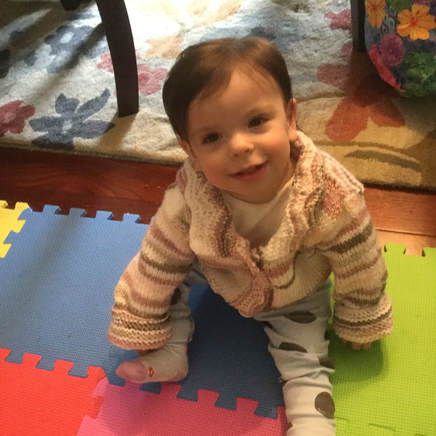
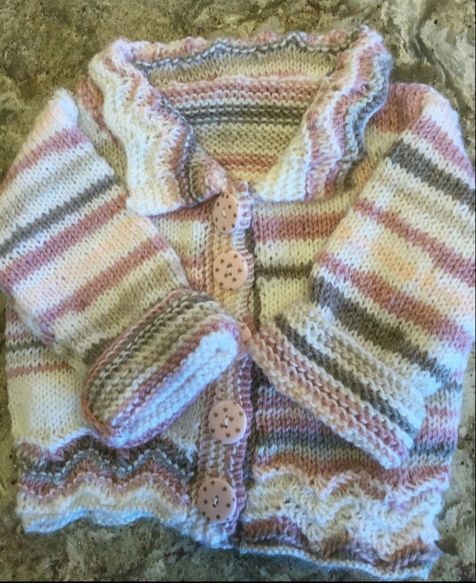
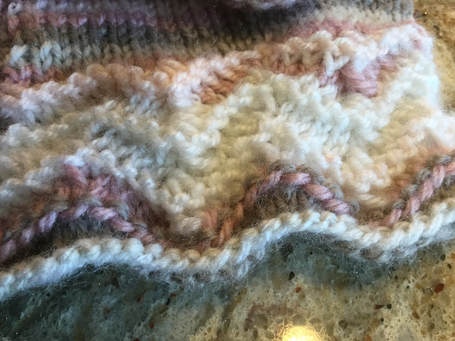
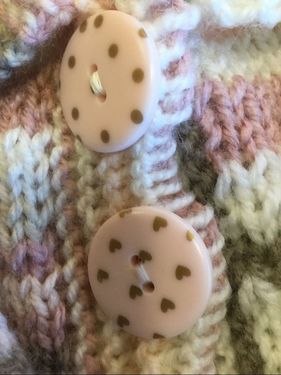
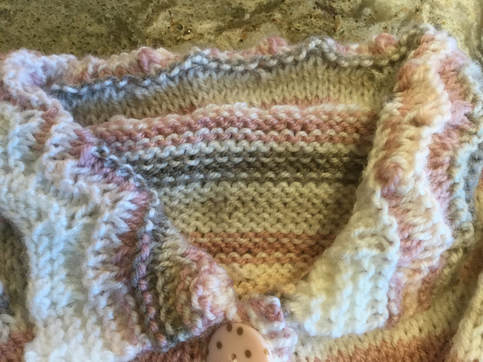
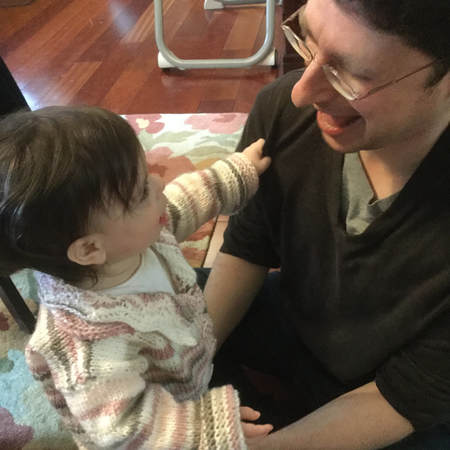
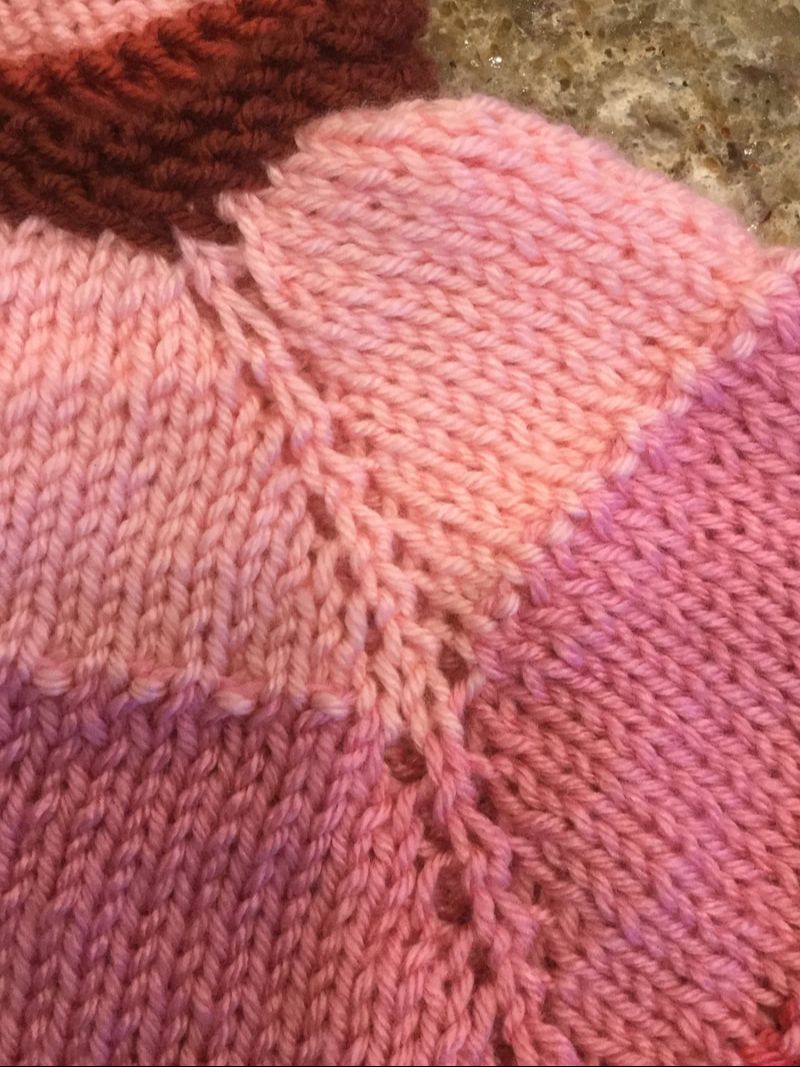
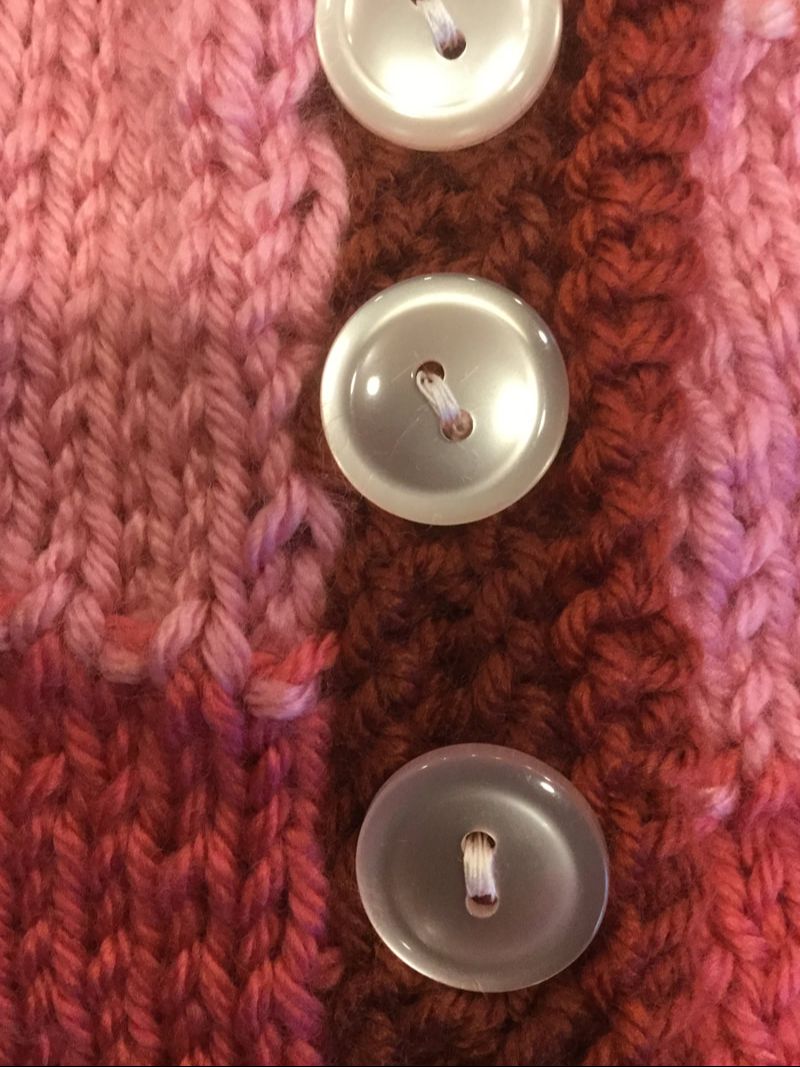
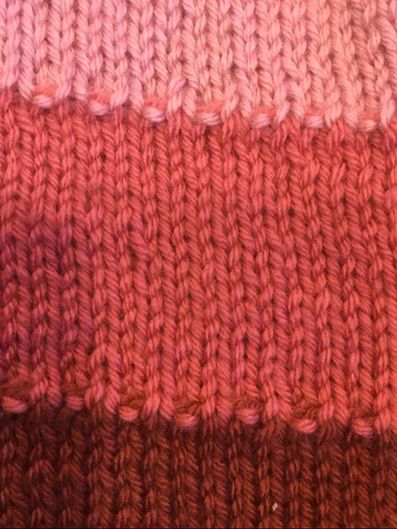
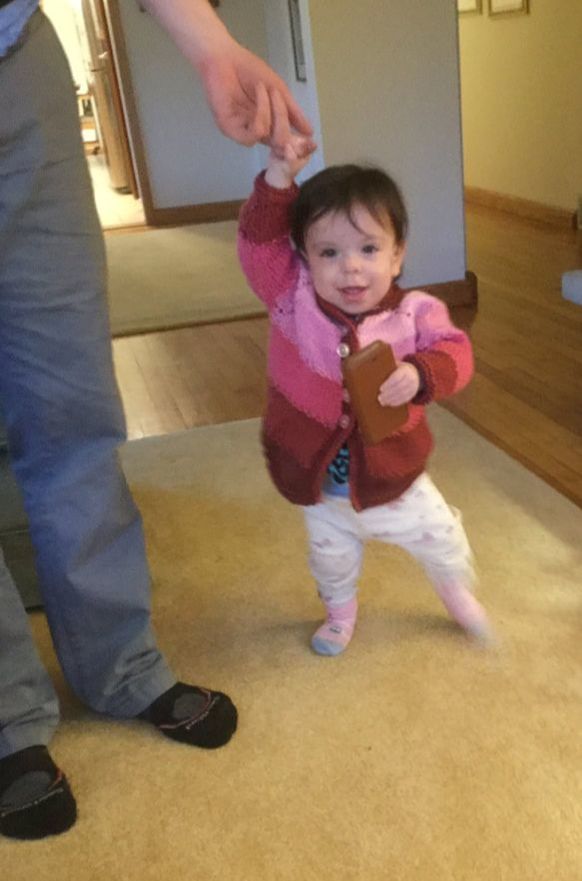
 The knitted chevron edged cardigan for infants and toddlers represented a challenge that would expand my kniting skills and play with my creative side. Although I have a considerable stash of yarn and a print as well as an online library of knitted and crocheted patterns, I still the felt the need of new inspiration. At these moments, I venture to my favorite independent knitting shop, The Yarn Barn, in Woodbridge, Connecticut. The proprietor lets me wander at will, but is always available to offer a new pattern or yarn to fill my knitting needs. My chevron pattern came from a booklet published by Classic Elite Yarns. Although the pattern called for four 50 gram skeins of Liberty Wool, the cost was prohibitive for a sweater that a toddler would wear for only a few months. Since I wanted the banded streaked effect, Arabella turned me to a selection of Toybox Candy by Plymouth Yarn. Two 100 gram skeins would easily do the job. I was pleased to select a colorway with ivory, dusty rose, and brownish grey that would look wonderful with my granddaughter's complexion and the clothes in her wardrobe. The featured buttons were outsize, and I was lucky to find the 1 inch dusty pink and polka dotted buttons at a local mega-craft store. They would harmonize with the sweater and provide an interesting pattern. The chevron edging and color had drawn me to the sweater in the first place. With each of my projects I like to teach myself something new: a stitch, a technique, a pattern, a new type of yarn. While the ripple stitch is a crocheting mainstay, I had not yet attempted this technique in knitting. The directions seemed simple, but I went along, I never seemed to end at the right place with the correct number of stitches left over. After several attempts at the bottom I was relieved to knit in stockinette for several inches. The main body of the sweater is knitted in one piece. At the arm hole, the sweater is divided to construct the back and two front sides. The sleeves are knitted separately, stitched or crocheted up the side and inserted into the body of the sweater. Since my buttons at 1 inch were a bit larger than the ones called for. I added two rows to the garter stitch button band. At this point I began the chevron collar and experienced the same difficulty I had with the bottom of the sweater. I knitted and frogged and knitted again. I was sorely tempted to abandon the piece and begin a project that was less frustrating. However, I knew that if I put the piece down to languish in a box of works to be continued, my granddaughter would have outgrown the cardigan before she even got a chance to wear it. At last I finished the chevron effect and knitted the rest of the collar in stockinette. The pattern called for a three needle bind off for neatly attaching the collar. I dutifully googled the term and found a simple tutorial for the technique. I even mastered the process. However, the collar would not lay straight. I had to frog again, bind off the color edge and attach it to the body of the sweater with a neat crocheted stitch. I was quite proud of myself. I had mastered several new stitches and the chevron edge. Although the 3 needle bind off did not work for this project, I had another skill which would work for a straighter edge. My piece was ready for blocking before I took it over to my daughter's home the next morning. My son-in-law, Gabe, accommodated me, and we managed to get a squirming toddler into her new cardigan to pose for a few pictures. Now that I had mastered the chevron edge, I would like to use the technique in future cardigans. This particular pattern tops out at 24 months, but I could substitute for a traditional ribbing on another pattern. However, I think I would prefer a simple band collar instead of the rippled effect. The sweater is comfortable and provides ample room at the chest and armhole. Although I took 1/2 off my armhole measurement, the arms were still too long for my petite granddaughter. The garter stitch band at the wrist makes it easy to fold up that part of the sleeve.
I can pat myself on the back for completing a challenging piece. Now I am ready to take on a new projects, a knitted scarf with a stockinette band that runs parallel to several inches of ribbon. It would be wonderful if I had the yarn in my stash. There are some special skeins just waiting for a creative treatment.
0 Comments
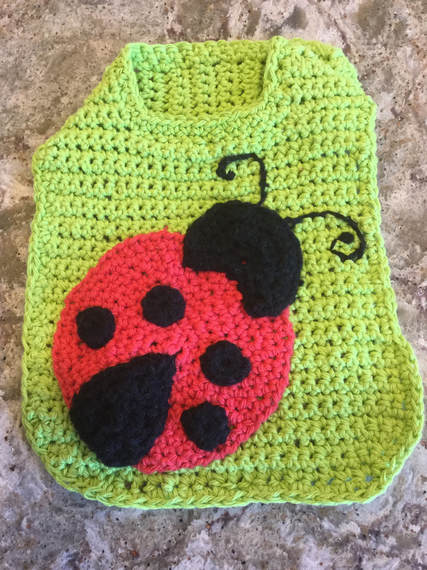
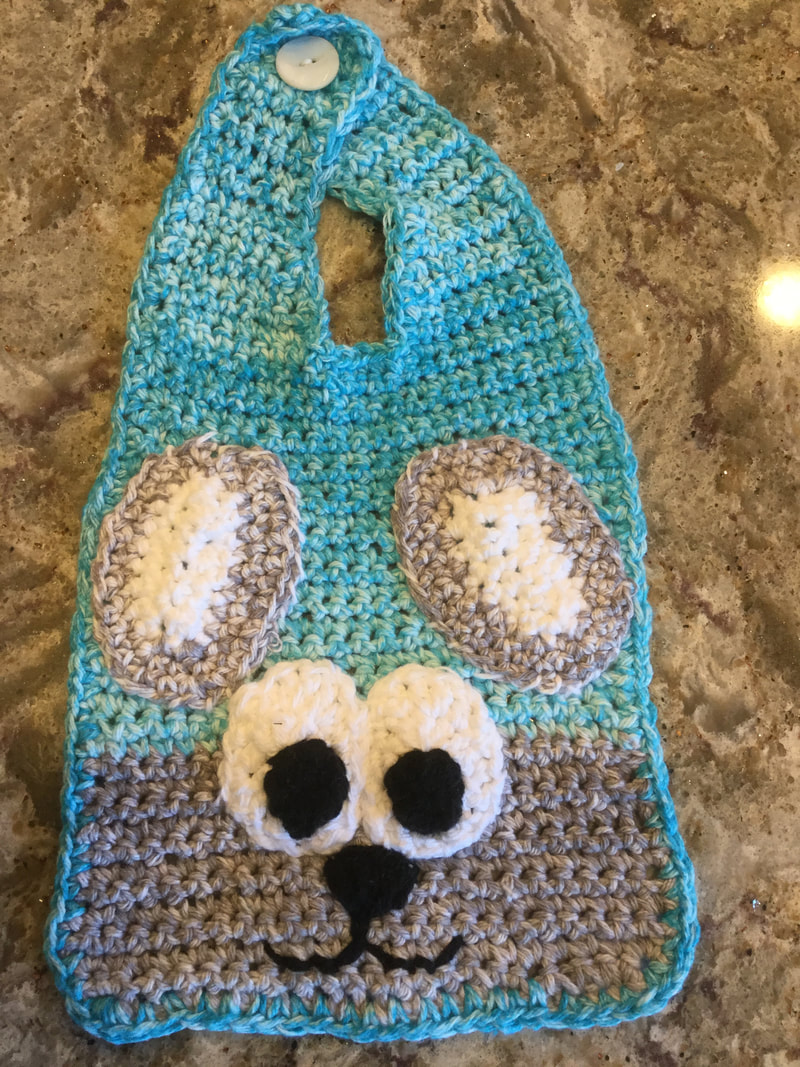
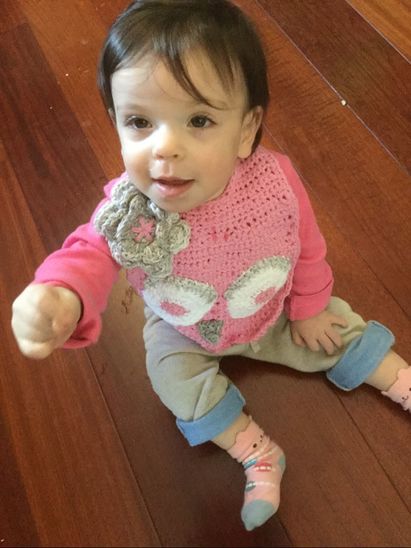
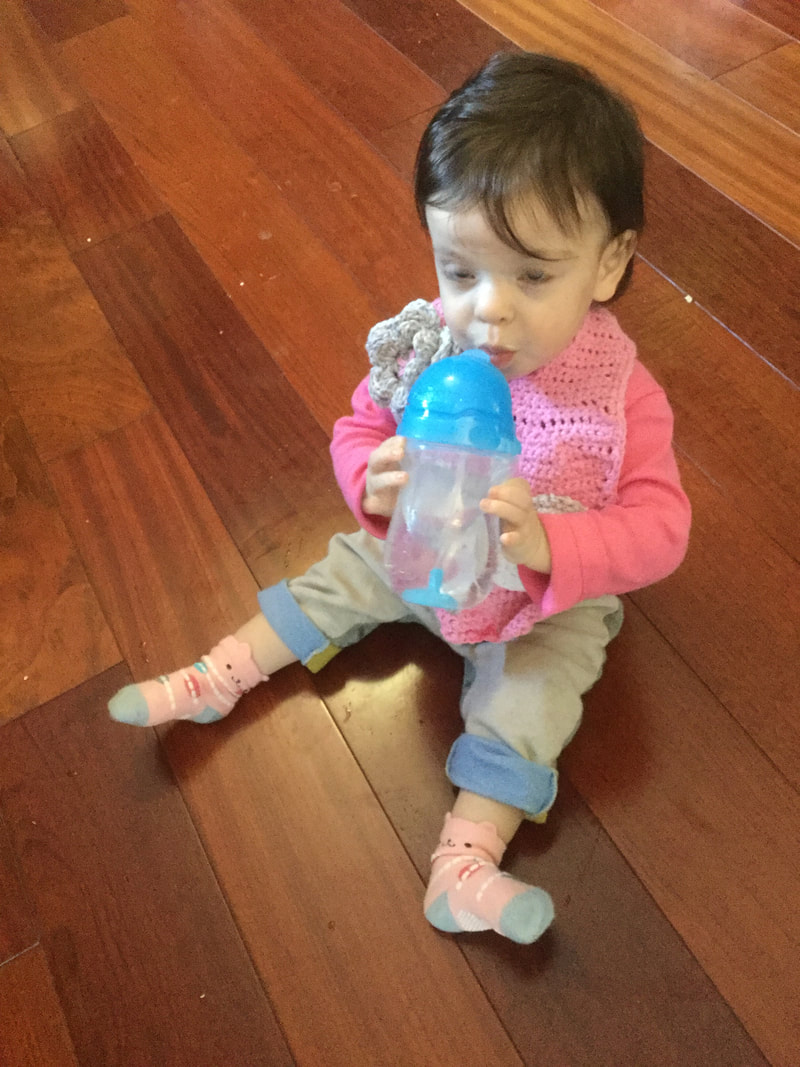
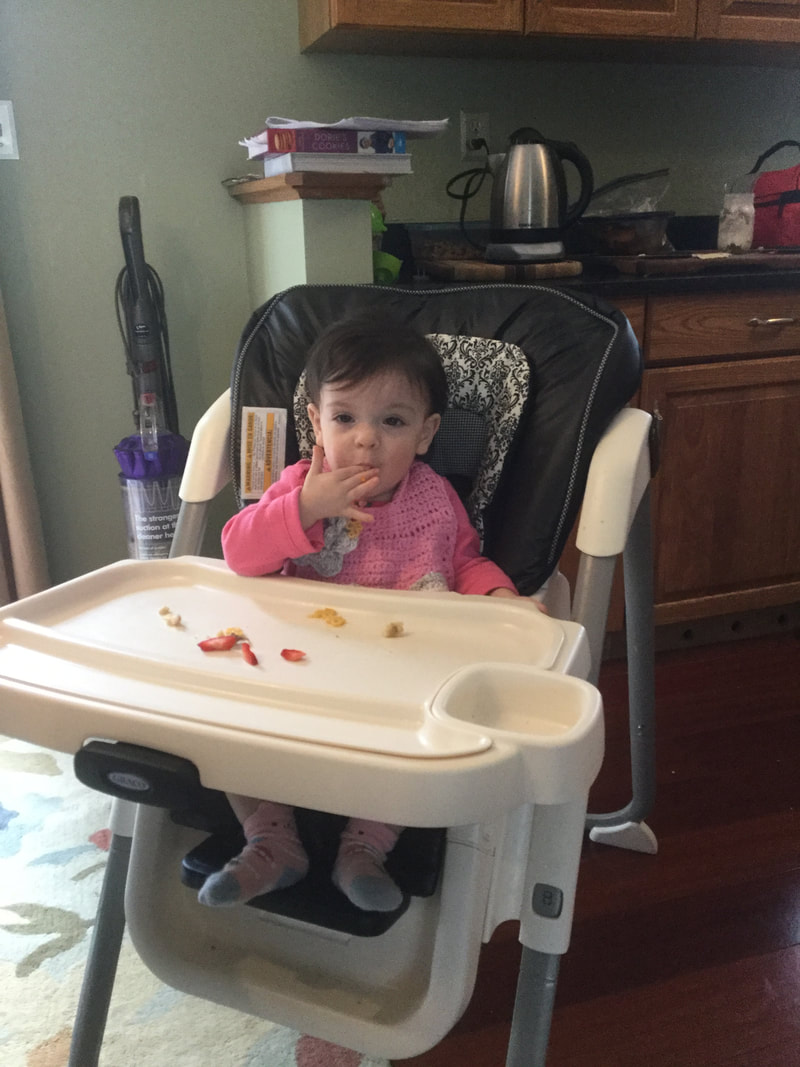
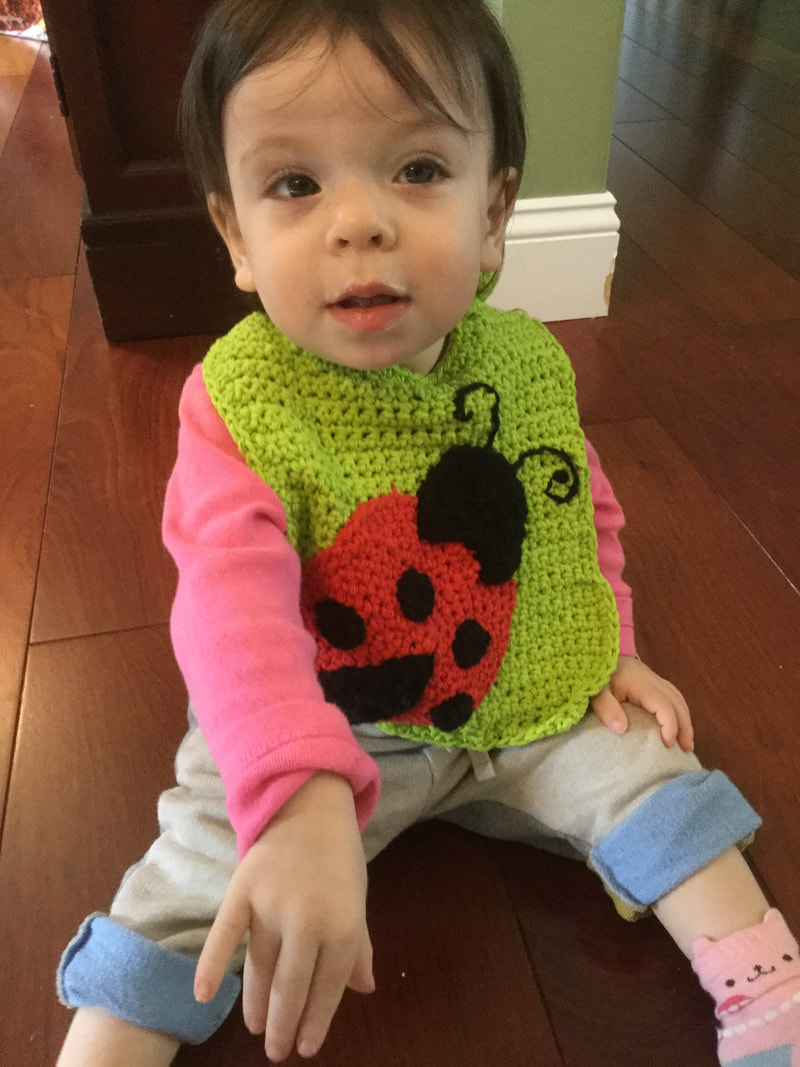
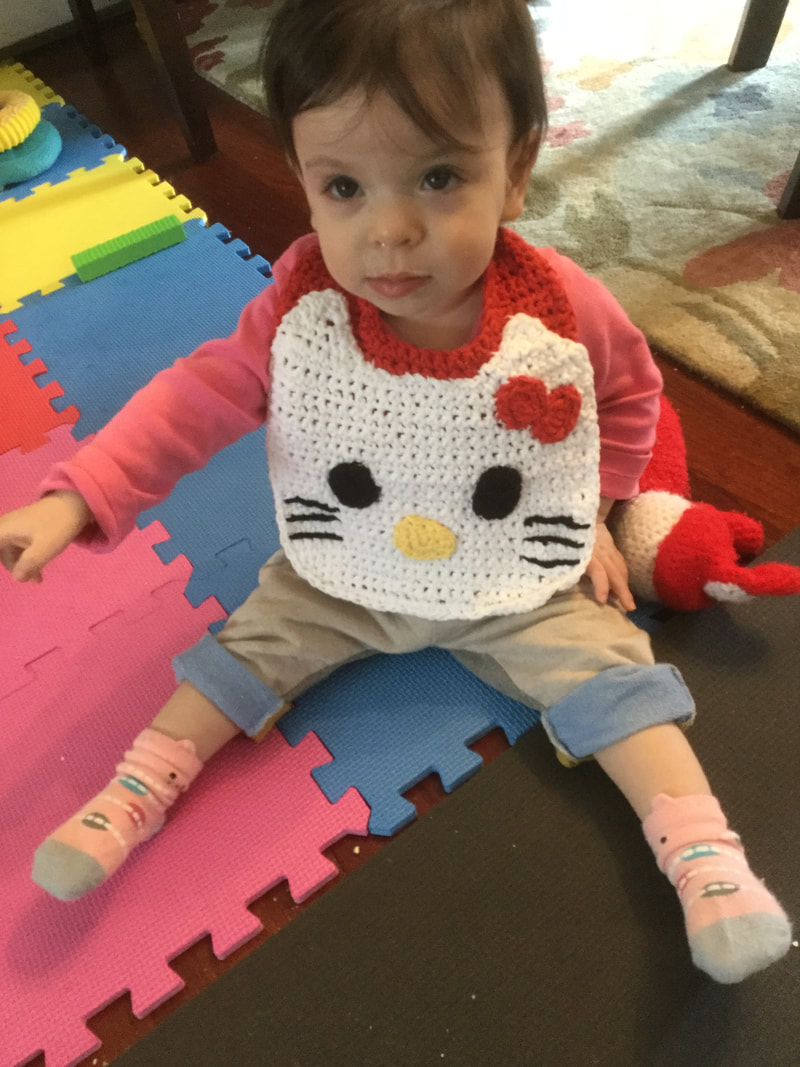
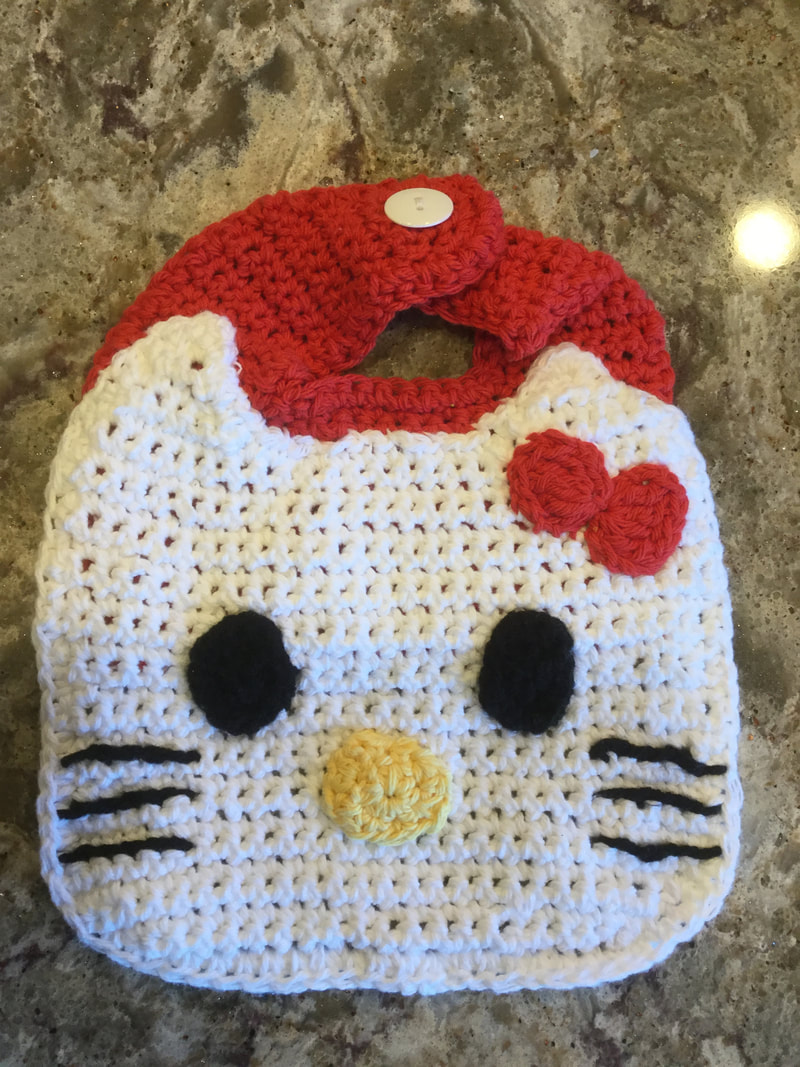
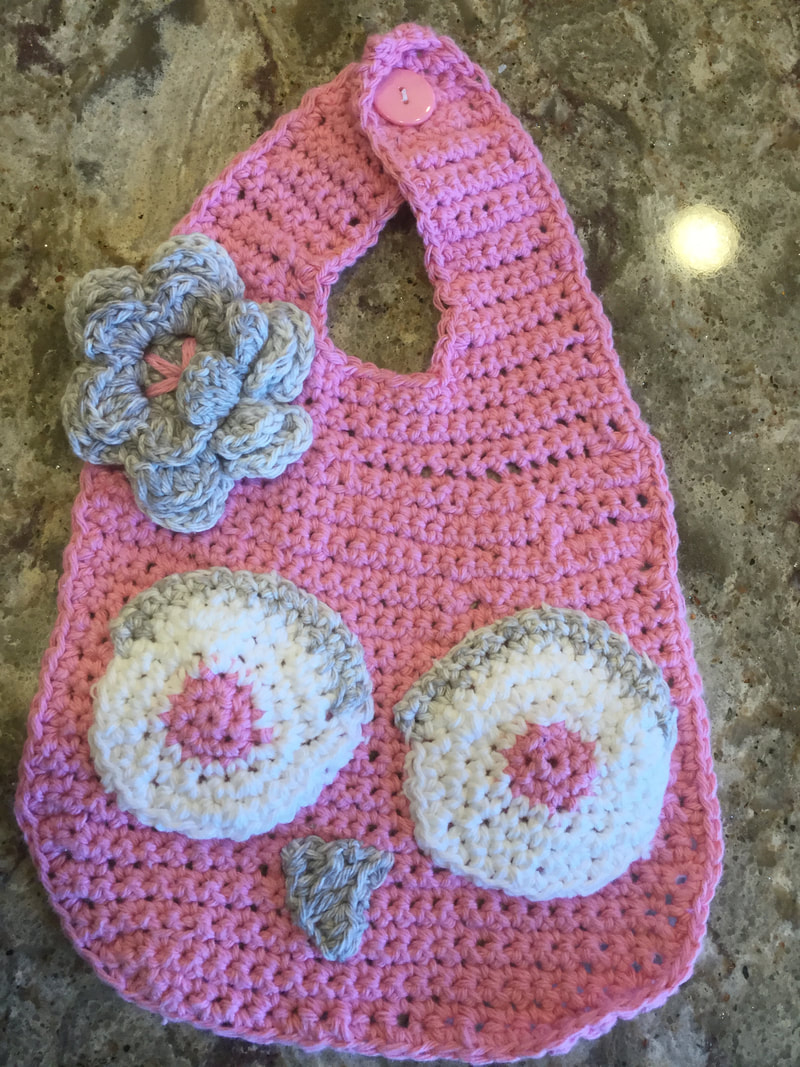
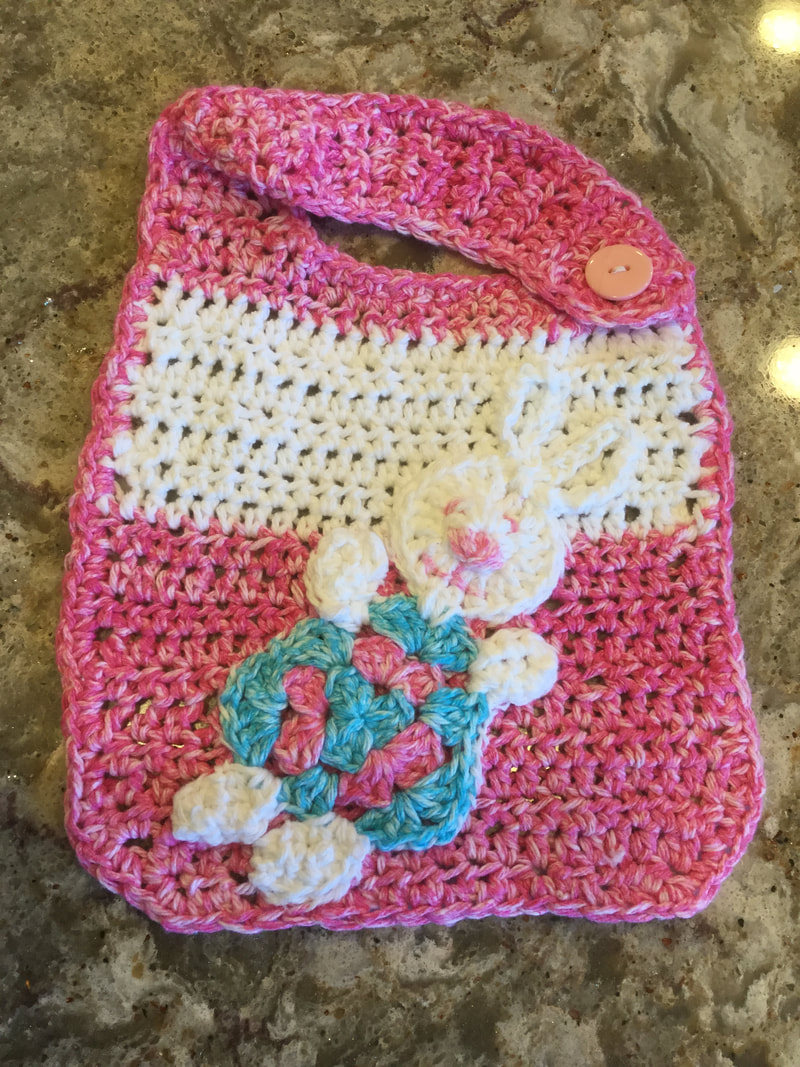
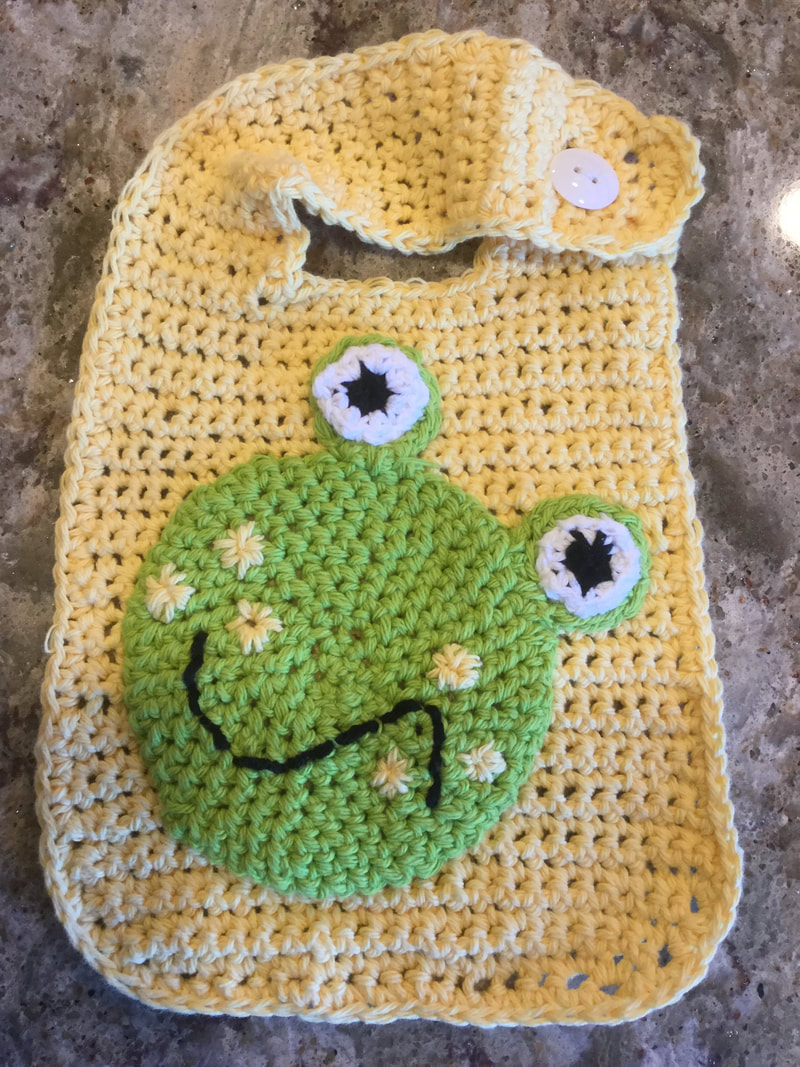
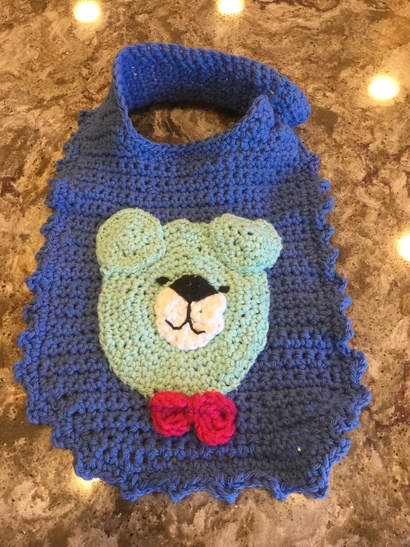
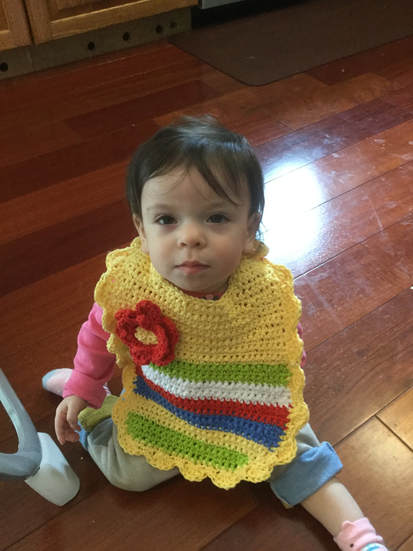
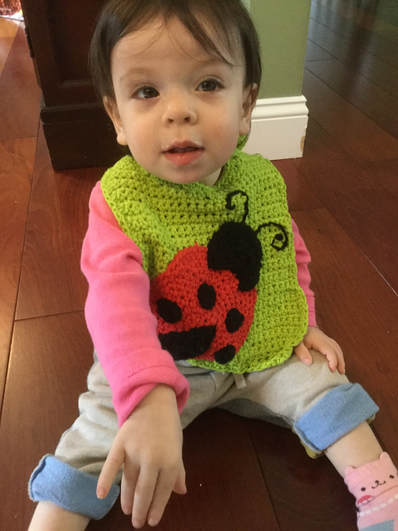 When I was in the middle of my engagement with stuffed animals, dolls and other amigurumi, my daughter requested that I crochet some bibs like the one I made several months ago for an article on crochet trims. It appears that most of the bibs that are available are shorter and reach only halfway down her toddler daughter's chest. As our little one has become an adventurous and therefore a messier eater, the infant bibs are not doing the job. Also, the material is not nearly as absorbent as she would like it to be. Lucky for me, I had a considerable supply of #4 weight cotton yarn that I had bought on sale. This would be a wonderful way to decrease my stash that seems to have a life of its own. My new challenge would be to produce larger bibs that would protect her clothing from water, spills and dribbles. They had to pass the comfort test or she would pull at the bibs and refuse to wear them. To satisfy me, they had to be cheerful, colorful, and creative. Hopefully, they would wash and dry well so that they could be used more than one time. After a week of intense crocheting activity, I arrived at my daughter's home with about 8 new bibs in hand. Before my granddaughter would become fussy, I managed to button up several and and pose her for my IPad camera. She did not complain, and so the comfort test was passed. As she was wearing a peach colored shirt and beige pants, we kept her in the white owl bib with peach and grey features and matching flower. My grandddaughter has been playing games with her water from her sippy cup lately. By mid-day, her shirt usually needs to be changed. Her new owl bib absorbed the water and kept her dry. We took the bib off before nap time and let it dry out on the table. These crocheted bibs are 8 to 9 inches wide and extend to 9 inches below the chin. A Picot or Scalloped trim would add to these dimensions. I used two different closures for the bib. In the first I crocheted a six inch arm to each side of the bib. On the left I crocheted a button hole, and on the right, I sewed a 3/4 inch button. This step would put the closing in back of her head at the neck. For the second, I extended the left hand arm to about 8-9 inches and crocheted a tab of about1-2 inches on the right. I crocheted a button hole at the end of the arm and sewed the button to the tab. In this style the button closure was at the front. If I were to leave out the tab on the right side, I would make the arm 9 plus inches so that it would button easily. For a bigger child, I might add an inch to the arms for both bibs. I did not make a version with tie strings as I felt it would take longer to make the bow. In mean time, the toddler could become fussy and squirmy. I experimented with my stitches and rows as I went along, but I finally decided to start with a chain of 20 stitches, using a 4.5mm G hook. (G comes in 4.0 and 4.5 sizes). In the first row I crocheted 2 Single Crochet (SC) stitches into the second stitch from the hook and crocheted across until the last stitch. I crocheted 2 SC stitches in the last stitch and chained 1 before turning my work. In row 2, I made 2 SC stitches in the first stitch, crocheted across and made 2 SC stitches in the last stitch and chained 1 just as I had done for the first row. I continued in the same manner for a total of 5 rows until my piece was 29 stitches wide. At this point I did not made any more increases. However I did make a chain one at the end of each row until the piece was about 9 inches long. Then I had to decide whether to make the bib with a back or a side closure. Back closure: Crochet a strip 8 SC stitches wide for 6 inches. To make the button hole, crochet 2 SC, chain 3, skip 4 stitches, and SC the last 2 stitches, chain 1. I realize that this makes only 6 stitches, but it works out. In the next row, Sc in first 2 stitches, SC 3stitchers in button hole space, SC in last 2 stitches, chain 1. In last row,make a SC decrease in first 3 stitches, s SC, and make a SC decrease in the last 3 stitches and fasten off. On the right hand side, crochet a strip of 8 SC stifches for 6 inches to match the right side. Add the next two rows without the button hole. End with the decrease row as you did on the left. Sew a 3/4 inch button at the end. Side Closure: Crochet a strip 8 SC stitches wide for 9 inches. for the last row make a SC decrease, Sc to the last 2 stitches and make a final SC decrease before fastening off. On the right side make atab1-2 inches tall before finishing row and fasten off. Sew a button at the end of the tab. Trim: For all bibs, single crochet (SC) around the entire bib. Make sure to SC 3 stitches in each corner stitch so that the bib lies flat. Picot: Start at the top at the right side and make 2 SC.In the next stitch SC and chain 4. SC in base of the same stitch. Continue around the outside of the bib in the same manner. I chose not to put the trim in the area that would lie on the neck as it may be irritating for the child. Continue around with the Picot, ending with 2 SC. Scallop: I crocheted a 5 stitch scallop and made the trim around the outside of the bib. While the trim was attractive, I would consider experimenting with a 3 stitch scallop so that the trim would be a less obvious feature. My son-in-law-will be bringing his daughter for dinner while my daughter attends evening classes. We will have another opportunity to observe and to see which bib designs work best. He selected the ladybug, frog, owl, and Hello Kitty bibs to keep at home. These bibs are truly made with love.
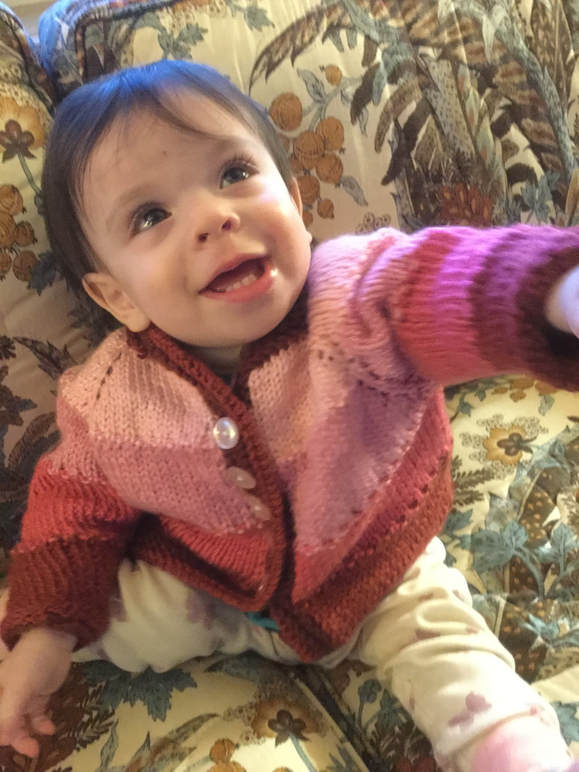
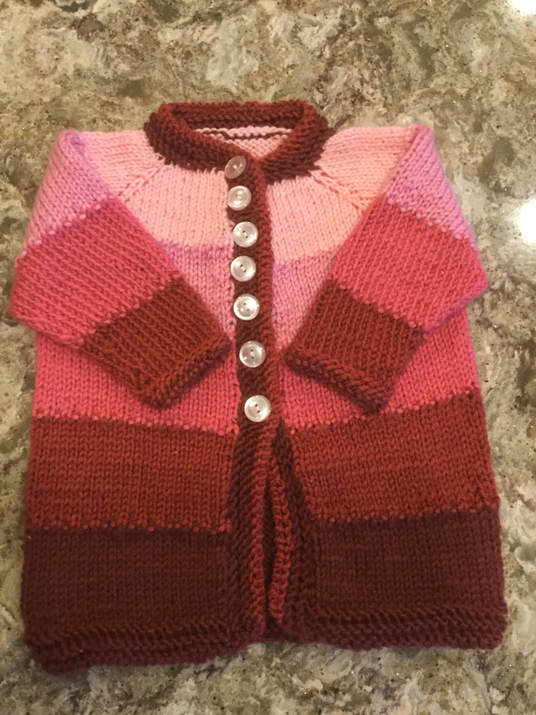
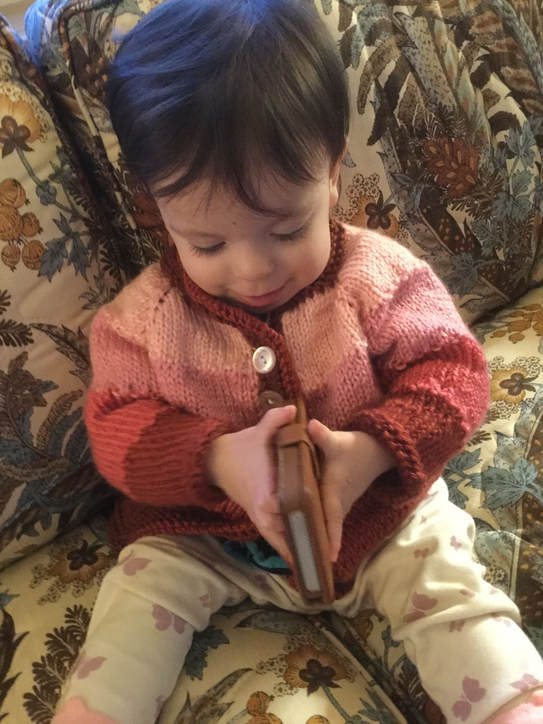 A prodigal knitter returns to her craft. As a fiber artist, I enjoy both knitting and crocheting. However, I must confess that after several years as a knitter, I became absorbed with various projects and stitches as a crocheter for several months. I had forgotten the rhythmic sensation of knitting and the relaxing ability of knitting for almost a whole line without even looking down at my work. I missed the smooth texture of my pieces and that wonderful hand feel of working with soft luxurious yarn. True these same sensations can be experienced in crochet, but they are not just the same. During my granddaughter's first year of life, I knitted sweaters for each stage of her development. I even celebrated her first birthday with an article that chronicled all of these pieces as my little one grew from an infant to an emergent toddler. http://www.lilcreates.com/lillians-blog/a-little-girl-grows-up-a-year-in-sweaters. What made me return to my knitting after crocheted sweaters,gloves, hats, and amigurumi? I was rummaging in my stash when I came across a box of gradient yarns manufactured by Premier Yarns. The Sunset ombre selection included 5 small skeins that ranged in color from a light pink to the darkest brick. Among the many projects suggested was a sweater ideal for a baby girl. Premier yarns even offered an easy-to-follow pattern created specifically for this collection of yarns. AlI needed to buy was a a large double pointed cable needle in #8. I located my set of double pointed needles and place markers from my box of knitting and crocheting tools, and I was all set to go. To find the free pattern online, search for Premier Yarns Ombre Cardigan. It was created by the Premier Yarn Design Team. Skill level is intermediate. The Premier Yarns website is www.premieryarns.com. The pattern was a top down design, and so there would be no seaming in the construction. Premier Yarns did all of the gradient color selection for the collection. When I opened the box to begin knitting, I noticed how smooth and soft the anti-pilling !00% acrylic yarn was.I was eager to create this sweater for my granddaughter. Even though she is a petite 15 month old, I selected the 24 month size since I wanted her to be able to wear the sweater for several months. As it turned out This was a good decision as this lighter weight sweater fit perfectly for spring, and there is a little room for growth during the summer and early fall. As I cast on and read the directions for the increases and place markers, I was filled with trepidation. would I be able to get the formula correct and add the correct number of stitches in the correct places. Some of my previous attempts with this method had not been successful. However, as I progress with the raglan sleeve and the additions for the yoke, I was pleased to note that I had the correct number of stitches. by the time I had to place the sleeves on stitch holders to knit the front and back panels, I as right on target. My box contained a total of 360 yards with 72 yards in each of the 5 colors. As I proceeded though the secitons and color changes, I began to worry that I might not have enough yarn to finish the size 24 month sweater which was the larges size for the pattern. I was playing a continuous game of yarn chicken as I finished knitting the sweater body and each sleeve. By the time I got to the front and collar edging, I was certain I had a problem with the darkest shade. there was only enough yarn to knit 3 of the 5 rows and bind off. I still had a remnant of the lighter brick. Therefore, I held my breath and knitted only 4 rows, proceeded to bind off and ended with 12 inches to spare. The change in the number of rows and the slight color variation did not appear to affect the design adversely. I would have preferred to knit the edging entirely in dark brick, but my subtle coping strategy [aid off, and the change was hardly noticeable. I will write to Premier Yarns about my experiences to help other knitters/ These yarns are soft and lovely. Stitches line up beautifully. Premier Yarns would do well to manufacture these yarns for purchase as regular skeins for each of the colors in their selection boxes. This color banded sweater was interesting to knit, and I think the finished garment is attractive. The color sequence is perfect for my granddaughter who walks proudly in her newest sweater. I like the pattern design, and would definitely consider recreating it with my own color choices. To avoid the problem of running out of yarn, I would need new skeins or remnants larger than the 72 yards for each color. The Premier yarns box cost $9.99 in the store and $14.00 online. I used up almost all of the yarn, and there was no waste. If I were to knit the sweater from new selection of yarns, it would probably cost me about $20-$25.00, but I would have a large remnant in each color. I could also use complementary colors for my stash even though they might not be in a gradient layout. If I recreated the sweater, I would make an important change in the button placement. The neckline is narrow, and I placed the buttonholes as directed from the neck border down. I think that the garment would be more comfortable, if I started placing the buttons an inch down from the neckline. With the current placement, I suggested to my daughter and son-in-law that they leave the top button and maybe even the top two buttons open. The sweater is a bit longer than most, and there are 7 buttons that reach halfway down the front. Leaving the top buttons open or making a change in button placement would not affect the look of the sweater. As I play with sweaters for my granddaughter's second year, I will probably include some crocheted items. However, I will always return to my first true love-knitting.
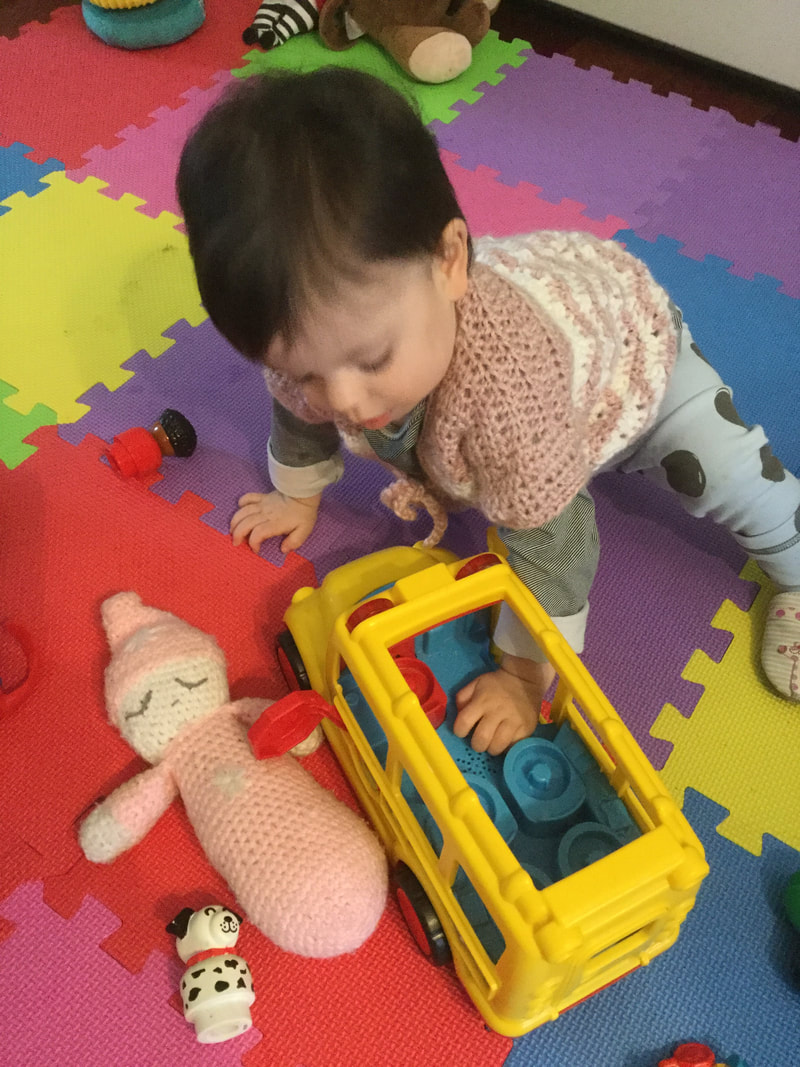
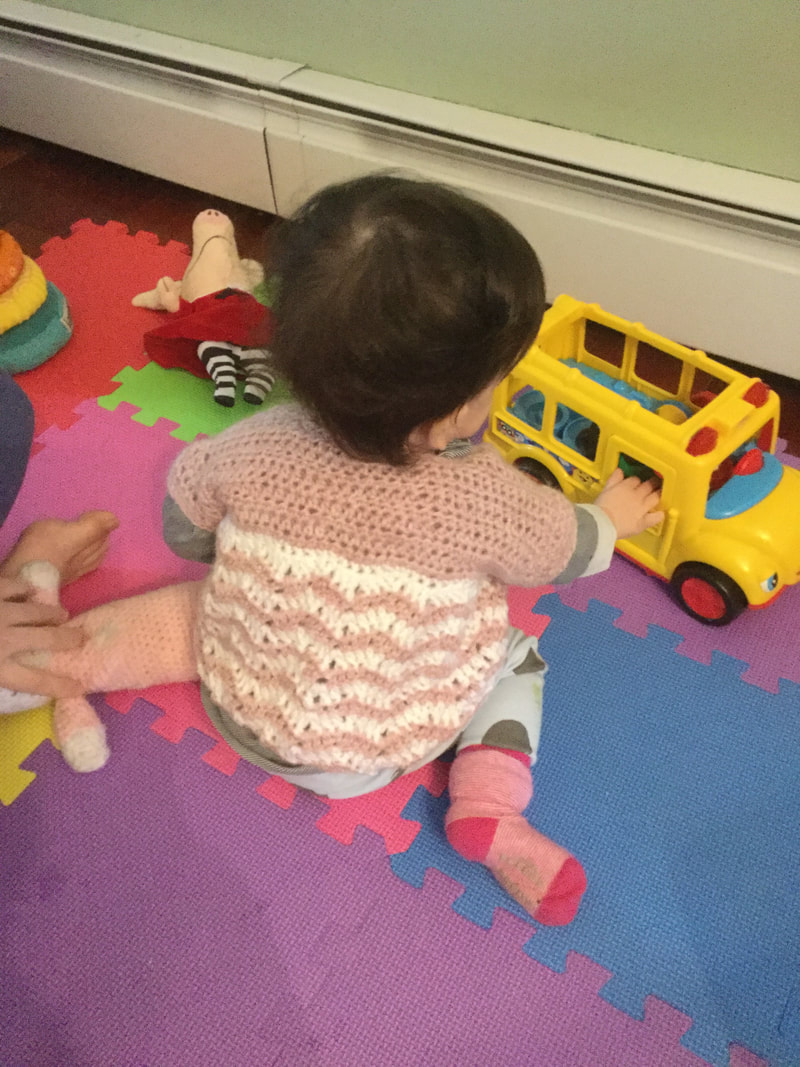
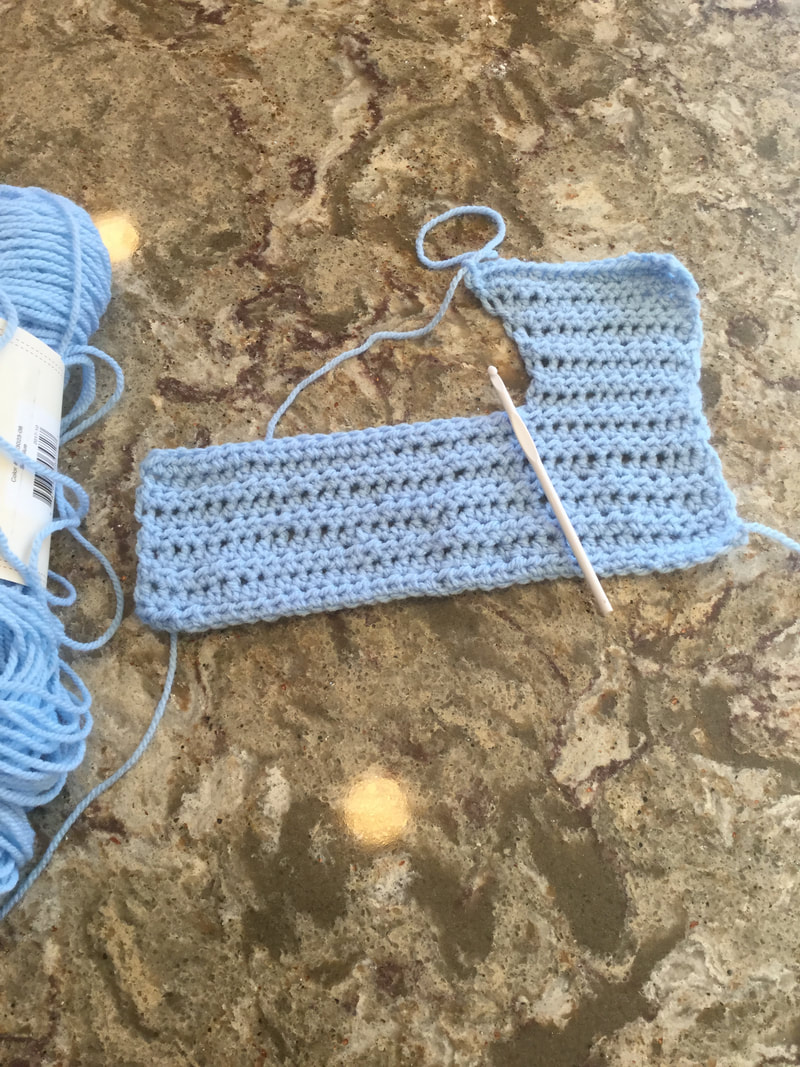
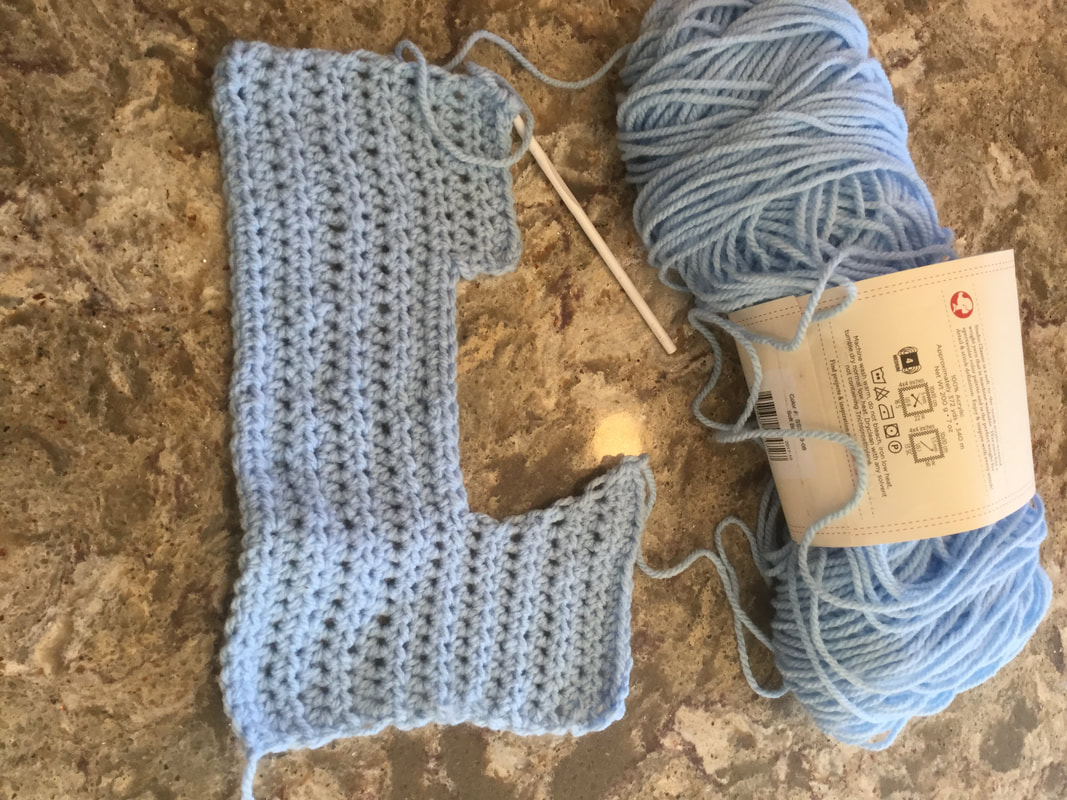
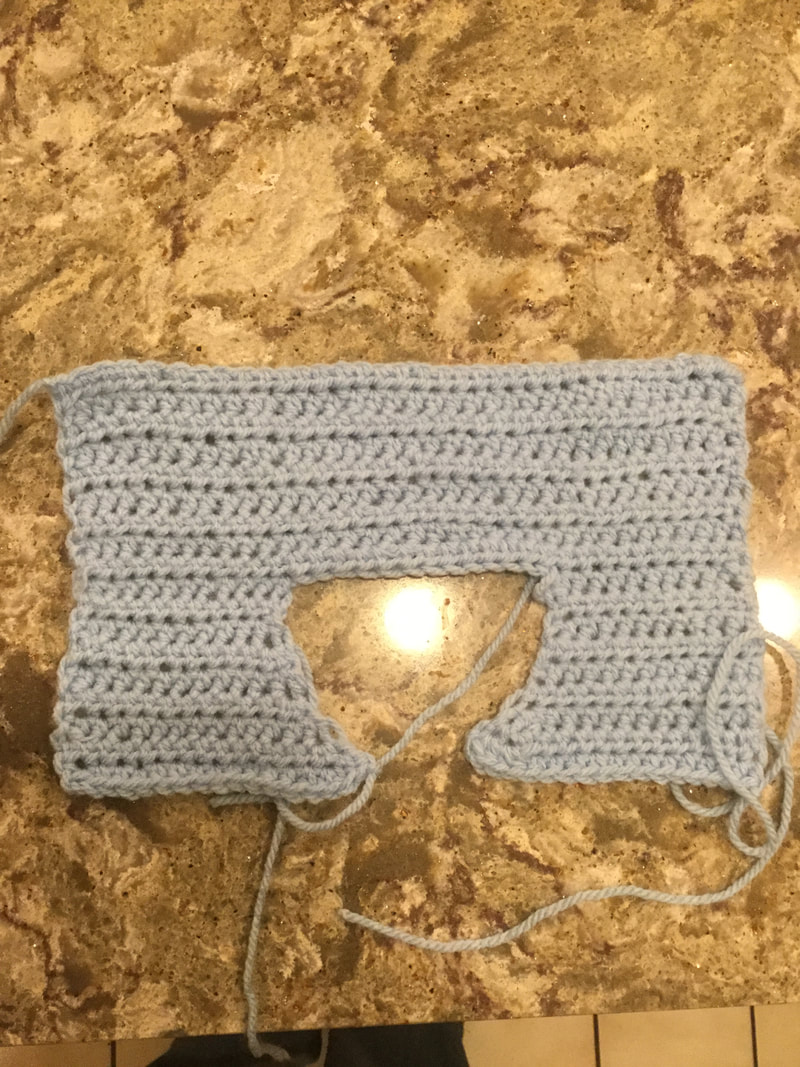
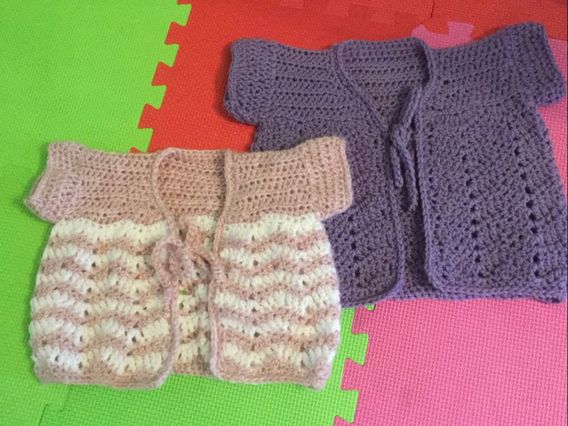
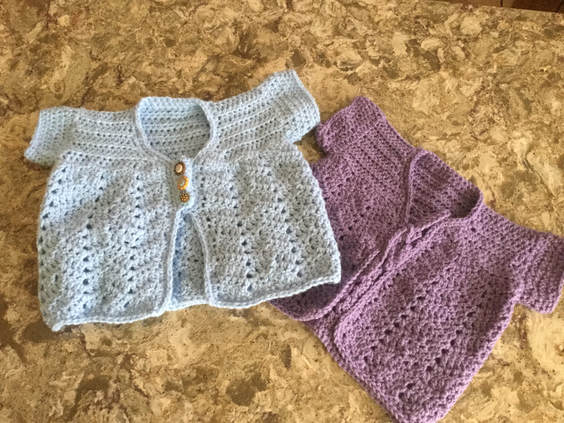
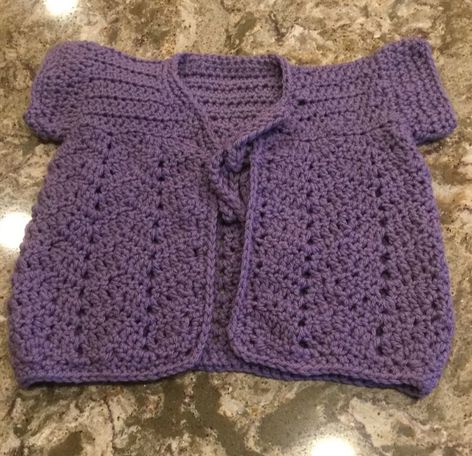
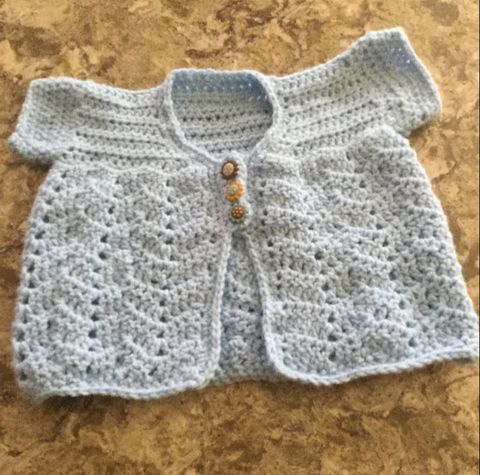
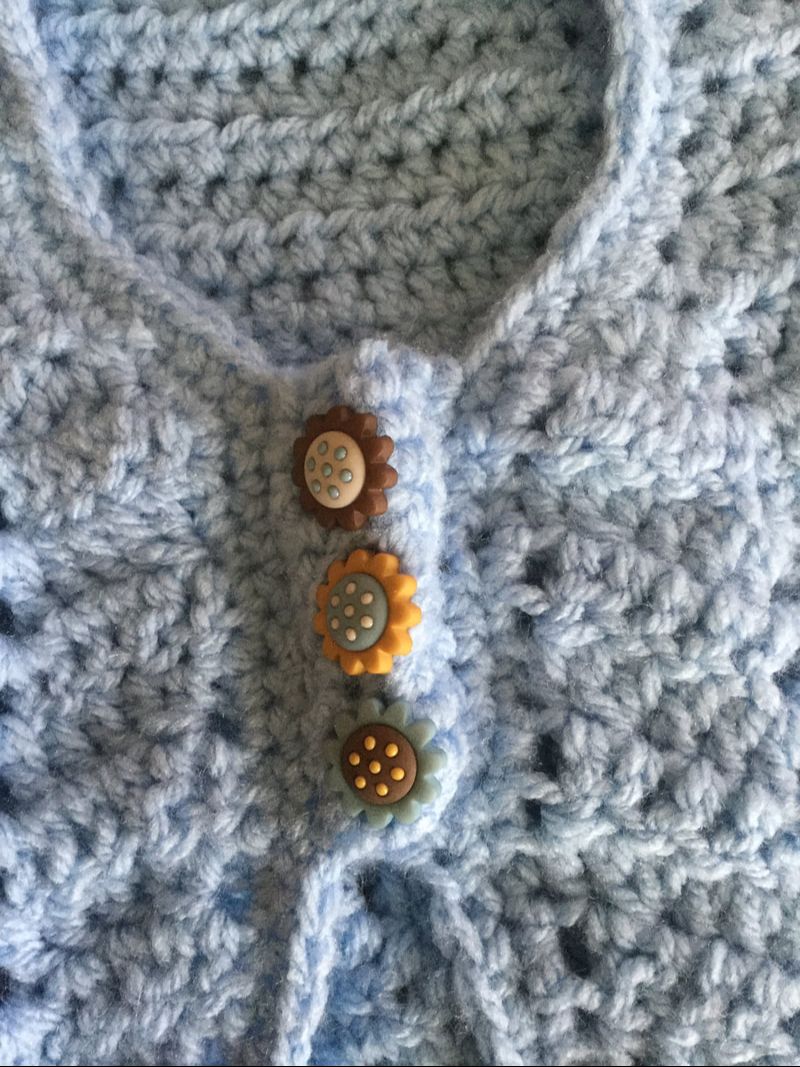
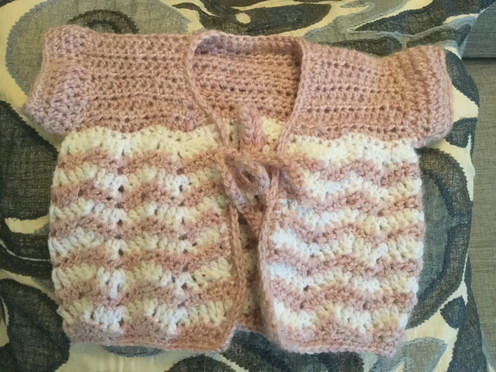 To celebrate Spring, I decided to get back to my website theme of wearable art. I thoroughly enjoyed my creative burst with amigurumi. Now it is time to renew my interest in stylish and playful apparel for the warmer weather. When my daughter saw this newest sweater, she immediately dressed her little one in the piece. This short sleeved version of a cardigan kept the chill off her daughter while she played inside. Yet, it was not too cumbersome to interfere with her activity. With each of my posts I like to teach myself something new. The ripple stitch short sleeve cardigan pattern provided the perfect medium. I admired the playful ripple effect in the pattern photo and decided to try the pattern first with two colors and then with a solid treatment. See: http://www.crochetforyoublog.com/2018/03/crochet-chevron-spring-baby-cardigan/ After the initial chain for the neckline, the back panel and front bodice pieces are crocheted with a Half Double Crochet into one piece. The crocheter is then directed to single crochet to provide a foundation for the body of the sweater and marks off the armholes. Directions are provide for the special stitches: DC2tog, V-st,2-DC cluster, and #DCtog. In the past I have tried to make chevron or ripple designs, but I always ended up with a stitch count that was way off when I got to the second and third rows of the sequence. The first cardigan took me about 10 hours to complete as I had to master stitches that were not automatic and familiar to me. The second purple cardigan was easier for me as my process was more automatic. The designers provide photos for most steps in this pattern tutorial.By the time I completed the blue sweater, I was able to crochet the sweaterwith its finishing touches in 7 1/2 hours. The pattern calls for a H hook (5.00mm) and worsted weight worsted (#4) on the lighter end of the range. An example would be Caron Simply Soft yarn. When I crocheted the solid purple and light blue versions, my yarn was heavier, and the sweater came out a bit larger. With my rose and white sweater, I crocheted 11 rows plus a final row before crocheting the edging (as directed in the pattern). The sweater was made for the 24 month size. My granddaughter (15 months) is rather petite. I think that this sweater would be too small for a child with average height and weight. Also, I added 2 more rows of ripple for the solid cardigans, and I prefer these proportions. I made two other changes to the solid pattern. I crocheted a second row of Single Crochet (SC) around the entire back fronts, and neck. Be sure to crochet 3 stitches in each corner so that the edge lays straight. In the solid version. The pattern calls for two rows of HDC on each side just below the neckline. As you wear the sweater, the right side has button holes, and the left side has button. As I was having trouble with this part of the directions, I left the panels out of the purple sweater and substituted a crocheted tie on each side. Having crocheted a second line of edging, it was easier to reinforce the tie. As I finished the blue sweater, I decided to try the bands again. This time I was able to work in the button holes. I think blue, gold, and brown flower buttons were the perfect accent, Once I decided to write an article on these pieces, I knew I needed photos of the beginning stages. Therefore, I added the blue cardigan. I tried to create the buttoned panels for this last design. When I tackle a new design I often make multiple pieces to master the technique. Many thanks to the designers at crochetforblog.com. I have enjoyed crocheting their pattern and have finally learned to do a ripple or chevron pattern.
|
Archives
November 2022
Categories
|

 RSS Feed