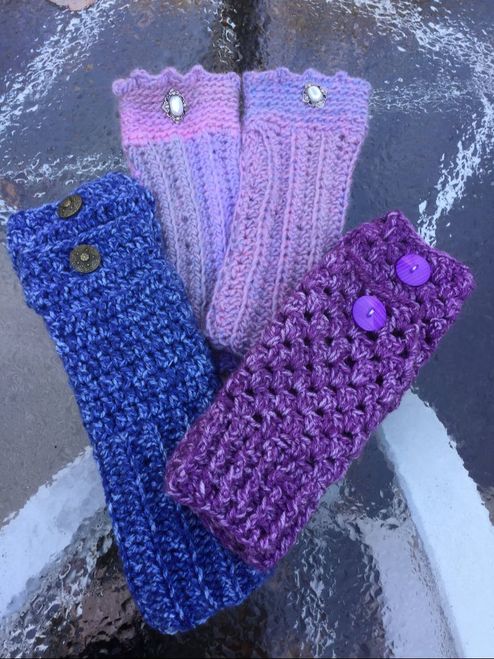
 iWhen I wrote "Outlandish" Knitting Styles on cowls and caplets based on the knitted wear from the Outlander Saga, I knew that I would create fingerless gloves and gauntlets to accompany these pieces. My first set of fingerless gloves were knitted, but since I write for different audiences, I knew that I would have to create a set of crocheted fingerless gloves as well. Besides, I just enjoy the many creative possibilities that crocheting allows me. If you are a crocheter who also likes to knit, you can find my set of knitted rustic fingerless gloves at http://www.lilcreates.com/lillians-blog/rustic-knitted-fingerless-gloves My first crocheted hand and arm warmer project was actually a gauntlet. It covers the hand and much of the arm, but there is no thumb hole. For this piece I chose a skein of Appalachia by Premier Yarns. It blends strands of pinkish and light bluer and gray in subtle self-striping bands. My piece was based on a pattern by Polly Foo Foo called Mrs.Fitz Wrist-warmers for Worsted Weight Yarns. (http://pollyfoofoo.blogspot.com/2014/10/mrs-fitz-wristwarmers-worsted-weight.html) Since I was using bulky weight yarn (#5) instead of worsted, I had to make several changes. To construct the arm piece I started with a chain of 22 stitches instead of 28 stitches. The original pattern called for single crochet off the back loop. I preferred the look of the half double crochet off the back loop. Once I sewed the seam and was ready to crochet in the round, I picked up 24 stitches instead of 32 stitches, put a place marker to show starting point and continued around with single crochet off back loop as I spiraled around. The pattern finished the hand piece with a scalloped edge. However, I found the yarn too thick for this decorative border and substituted a 3 stitch picot separated by 3 stitches. A jewel-like pearl button edged with silver was the perfect accent for this work. I guess all in all while I kept the basic concept, my version was quite different in the details. Look up the original in the link provided and see which version you like better. 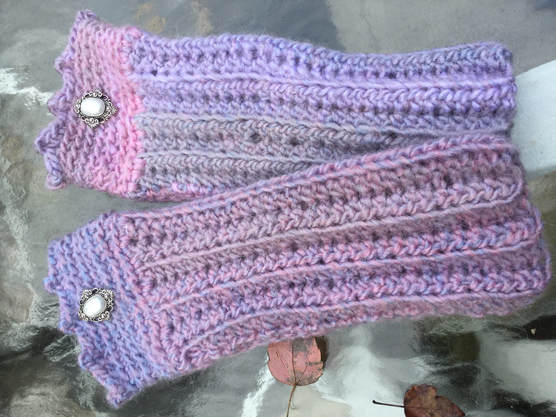 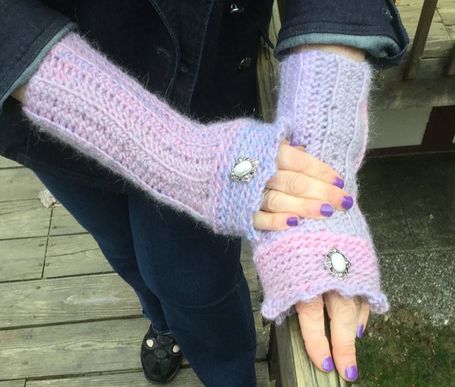 Since I taught myself to do the DCFRont Post, DCBack Post, I have had so much fun creating crocheted cuffs for my fingerless gloves. This version was rendered with a heathery Purple Mist from Vanna's Choice , a worsted weight yarn (#4)Lion Brand. The body of the glove was done in cluster stitches. Although I usually decorate this type of glove with a crocheted flower, I wanted to maintain the outdoorsy, rustic charm, and ended with a straight edge and a coordinating plum/purple pearlized button for an accent.   When I began the blue denim glove from the same yarn, I was not sure how I would execute this piece. Eventually, I chose the cuff I described in the first gauntlet. I crocheted 22 stitches and began my HDC on the second stitch of the chain. In this way the bottom of the cuff would have a smoother edge. When the rectangle fit comfortably around my wrist, I joined the two sides together so that the raised ridges went from the hand toward the arm. Counting the joined seams, I now had 10 raised ridges. I made a row of single crochet around the top and joined with a slip stitch. The hand part of the glove was stitched with 6 rows of double crochet. There were four more rows for the thumb hold and two more rows of double crochet at the top. A last row of SC finished the piece. This time I choose a bronze tone button to place on the center back of the glove. Confession time: I ran out of yarn with two rows to go. Luckily, I had purchased 2 skeins before I started this project. If I want to make this glove from only one skein, I will have to make the cuff shorter. 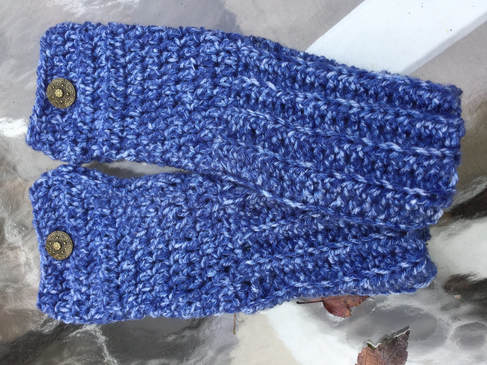 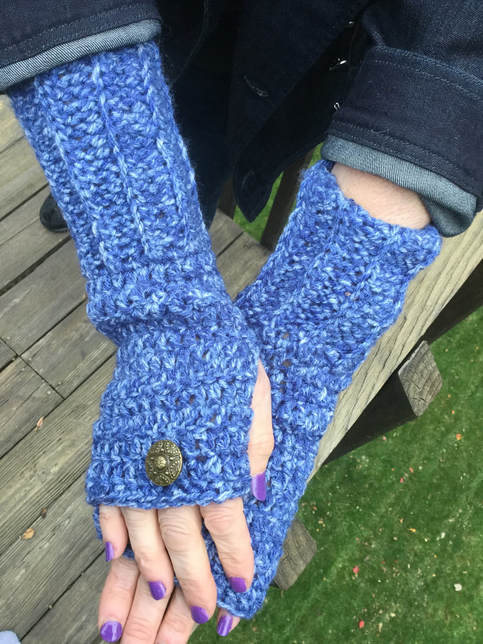 I see the work that goes into making patterns for others to follow. To make a pattern that someone can visualize and repeat is quite an endeavor. My hat is off to my fellow designers. I have been promising myself that I would finish the directions for my mismatched mittens for some time. Now I have added this double crochet heather mitten to my list.
0 Comments
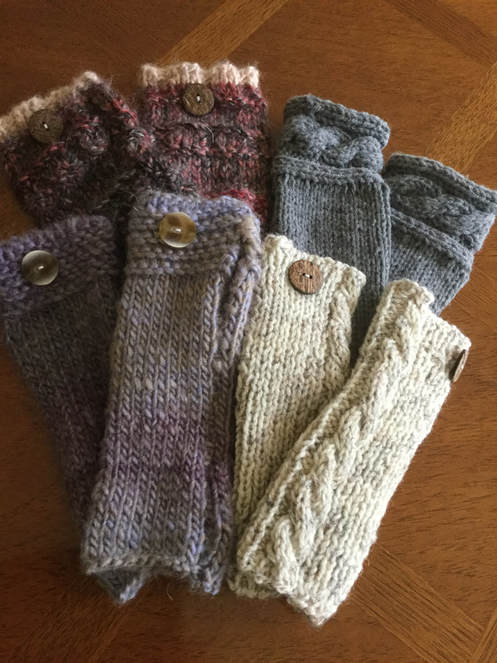 Rustic fingerless gloves provide a wonderful medium for exploring creativity by combining heathery colors with textures. In my last posting I shared my interpretations of knitted pieces inspired by the Outlander saga. To accompany the lovely cowls, I knew I wanted to explore the many fingerless gloves and gauntlets that would keep the Highland folk's hands warm in the chilled Scottish weather. I have been knitting and crocheting fingerless gloves for several years. However this new slant provided me with a new slant to my creative projects. Fingerless gloves are useful as well as decorative in that they leave the fingers free to accomplish tasks which keeping the hand warm. I will be writing about these rustic fingerless gloves in two articles. This page is devoted to knitted styles. For my friends in the crochet community you can also refer keep posted for my next article on Rusted Crocheted Fingerless Gloves and Gauntlets. My first style, based on a glove warn by Mrs. Fitz, was knitted in a flat panel with bulky yarn (#5) on US 9 needles. It was adapted from a pattern by Polly Foo Foo (http://pollyfoofoo.blogspot.com/2014/09/mrs-fitz-mini-mitts.html?spref=pi). As I like to experiment with new yarns, Appalachia by Premier Yarns fit the bill. The yarn is 90% acrylic and 10% Alpaca. The Roanake colorway has heathery strands of grayish purple, and brown. The bottom half of the piece is knitted in stockinnette, and the upper cuff is knitted in garter stitch. When completed, the flat panel is seamed, leaving 1.5 inches for the thumb hole. I altered the pattern by casting on 24 stitches instead of the 22 called for. I also knit 8 inches for the stockinnette section instead of the 6 directed in the pattern. I love to add a coordinating or complementary button from my vast collection to add the perfect accent. This glove could easily accompany the gray cowl from my previous post. (http://www.lilcreates.com/lillians-blog/knittisg-outlandish-styles) To touch this piece is to love it. 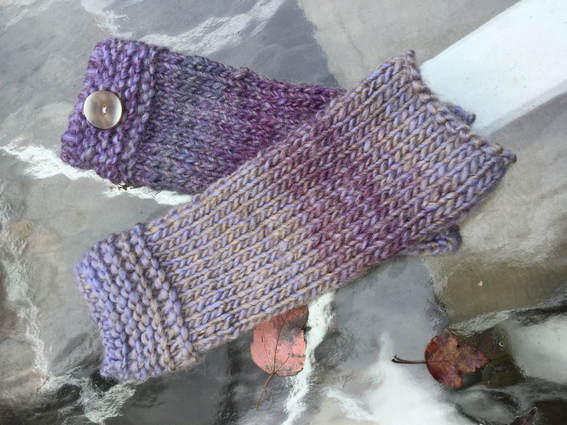 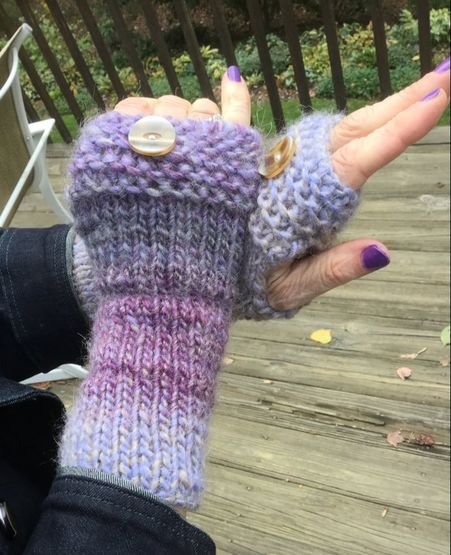 Sometimes you have a pattern in mind and look for the right yarn to knit the project. At other times, you hold the yarn in your hand and think about the perfect pattern. My skein of Wool-Ease by Lion Brand Yarns was oatmeal intertwined with the slender threads of dark brown that gave a truly rustic effect. This glove was also knitted in a flat panel with a cable that ran the length from arm to finger tips. My finished version was 8.5 inches long and used most of the single skein. I adapted a free knitting pattern from Lion Brand for my project (Free Knitting Pattern Lion Brand Cashmere Blend Knit Cabled Wristlets # 60157AD). I had expected the cable to run up the middle of the back of the hand, when I attempted to follow the construction directions, the cable ran up the side. I still like the finished project. The dark brown wooden button with the scatched surface brought out the brown in the slender threads. At 8.5 inches this glove reaches midway up my forearm, but it could easily be extended to be an arm warmer that comes closer to the elbow. The twisting of the cables could be symbolic of the intertwining relationships between Claire, Jaime, and Jack in the saga. 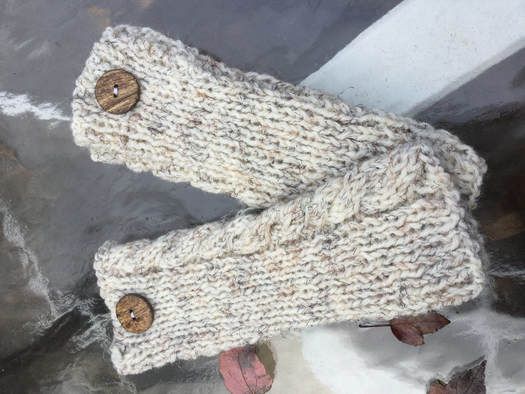 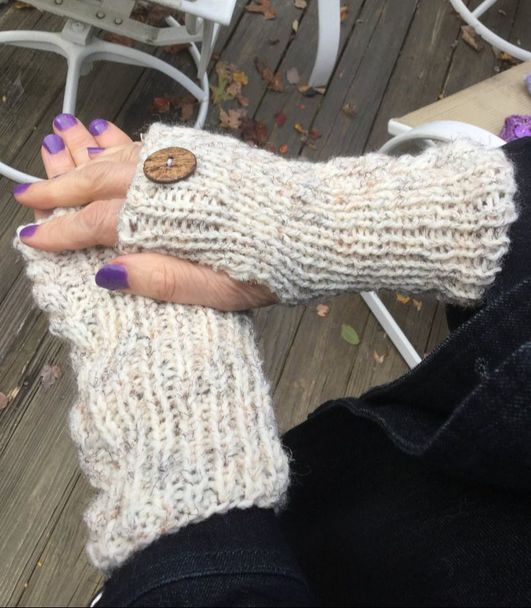 I found two sources for the armwarmer gauntlet that featured a cabled panel at the top of the glove, but I ended up adapting the design and making my own pattern as I went along. The "Heal's Hands Gauntlets" designed by Kristen Brooks in Highland Knits provided a stitch guide and a chart for the cabled section. However, there was no option for a thumb hole. Also I must confess that at this point, I have not yet learned to follow a knitting chart. Another version showed up as "Claire's Fingerless Gloves" in Warm Up With Knits published by Leisure Arts. This pattern was attractive and complex, but I decided to leave this project for another time. Still, I liked the idea of the cabled pattern to adorn the top of a glove. After several run-throughs I finally executed a glove that was interesting and relatively easy to follow. I am still working on the specific details, but for those who want to tackle this glove with the premliminary directions, here you go: For this project I used a heavier worsted weight charcoal yarn from my stash that I knitted with #9 needles. This glove knitted from the top down in a flat panel and is executed in two main steps. Cabled section: Cast on 16 stitches. Pattern: Row 1: P3, K2, P6, K2, P3 Row 2: K3, P2, K6, P2, K3 Row 3: P3, K2, P6, K2, P3 Row 4, K3, P2, Place 3 stitches on cable and bring to front, Knit next 3 stitches, Knit 3 stitches from cable, P2, K3. Row 5: P3, K2, P6, K2, P3 Row 6: K3, P2, K6, P2, K3 Knit this pattern a total of 6 times and bind off, but leave a 2 foot tail. Hand and Arm: Place cabled section face up on table. On the side opposite the yarns from your bind off, start to pick up stitches from the k3 border. You should have 30 stitches in all. Continue in stockinnet for 6 inches. Rib k1P1 for 8 rows and bind off pattern. Construction: Fold rectangle in half lengthwise with wrong sides showing. Single crochet edges from top of cabled panel just up to top of last 3 knitted stitches in panel. Single crochet on one side only for 1.5 inches. This is your thumb hole. Join both sides together again and crochet to bottom before finishing off. Use the tail from the end of the cable section to single crochet on the other side of the thumb hole. Weave in ends and turn glove right side out. Moisten and lay flat on towel to block. 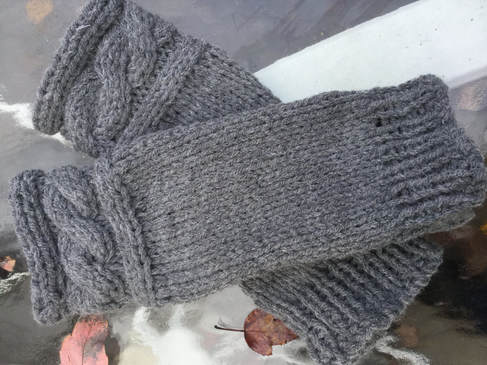 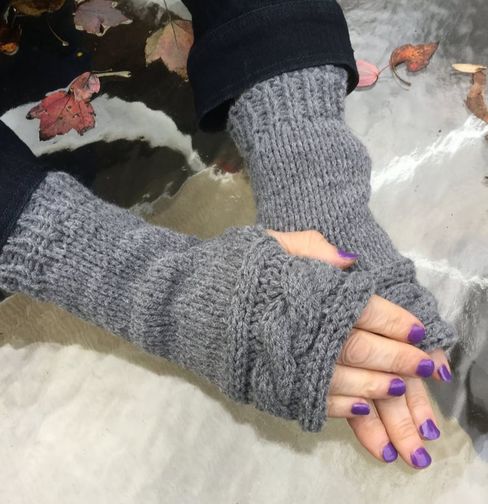 My final rustic knitted fingerless glove is also from a design that I created. The Appalachia yarn (#5) by Premier Yarns is called Bramwell. This acrylic-alpaca mix is a self striping yarn with tone and strands ranging from darkest browns and navies to autumn rusts and wheats. When I first started this glove I decided to use the strategy of knitting from yarns on the outside and inside of the skein. In this way I could knit both gloves at the same time and have a better chance of making them both equal. However, the self striping was deceptive. The first glove was wonderful. Colors started from muted gray-rust combo to the darker browns, to a more brown and rust and finally to wheat. However, the second glove gave me a few surprises. The yarn from the center also started with the same muted gray-rust combo, but then the colors transitioned to a brighter rust, wheat combo. That was okay, but the color band was so long that my second glove looked completely different from the first. I pulled out all of the yarn remaining, hoping that I would find some of the darker shades. When I found what I was looking for, I frogged glove #2 half-way back and then attacked some of the darker yarn and knitted in pattern until the last few rows. I attached the wheat color again. The clothes were not look alike, but harmonious. A dark brown wooden button finished off the piece. I am currently knitting the same glove in a solid charcoal bulky and will publish the directions in the near future. 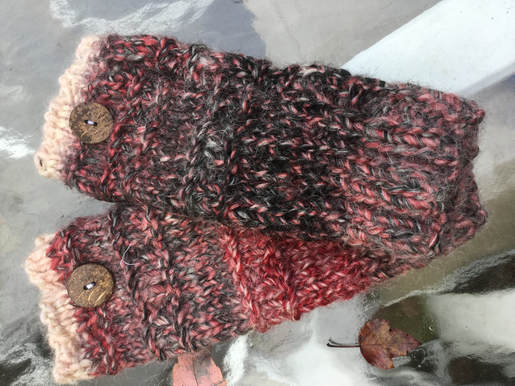 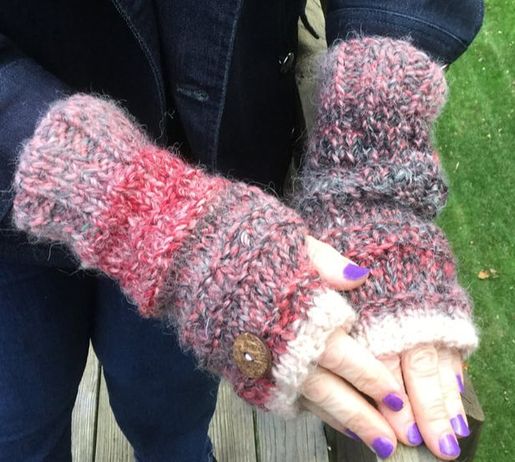 These rustic fingerless gloves are a new line for me. I hope to present them at a couple of upcoming Holiday Craft shows. I hope that you enjoyed the gloves featured. I would appreciate your feedback.
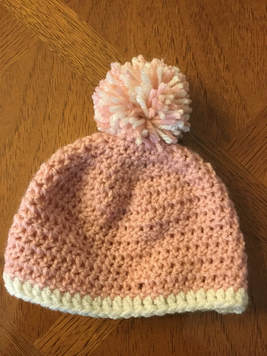
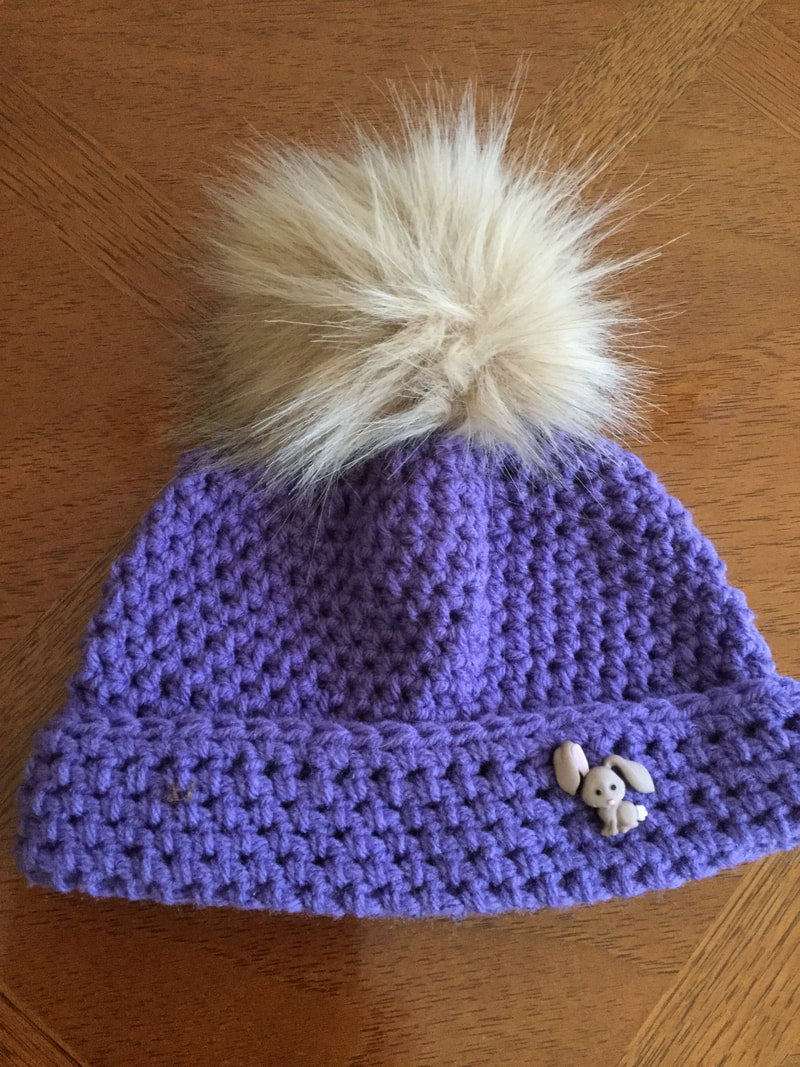
Please share your photos and experiences in comments or on Facebook. 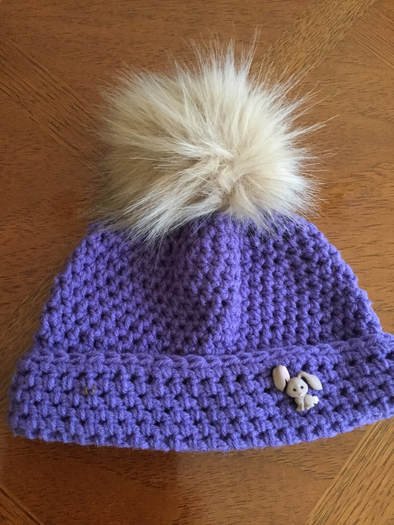 Put some pizzazz in your winter headgear. beanies keep your head warm in colder temperatures. However, you really need the wow factor to put a smile on your face. My flower decorated beanies have been one of my top sellers since I started on my lilcreates enterprise. this winter season, i decided to add a new embellishment-- pompoms. Pompoms add height, textures, a colorful accent, and a playful attitude.
Before we examine the pompoms, let's take a look at the foundation, the beanies. While beanies can be constructed from the bottom up or the top down, I find that most styles start with a circle of increasing rows at the crown. Charts are available to help the crocheter scale the beanie based on the age of the wearer, the circumference of the crown, and the height of the beanie. The following useful chart has helped me to create my beanies when I work without a fixed pattern. (Type into your search bar: http://thecrochetcrowd.com/wp-content/uploads/2015/11/Hat-Sizing-Measurements.pdf) Once I reach the diameter for my chosen wearer, I fix a marker to the edge and continue to crochet down the sides with the same number of stitches as I used in the last row. A simple beanie will end at the last row. I usually use a need one size smaller for the last couple for rows to make for a snugger fit. For a cuffed beanie, I continue crocheting for an additional 1" -1/2" so that I can fold up the added rows. For a ribbed edge, I stop my basic pattern stitch about 1"-1 1/4" before the desired height and create a rib based on alternating stitches of front Post Double crochet (FPDC) and back post double crochet (BPDC) these beanies may be crocheted in single crochet (SC), Half Double Crochet(HDC) and Double Crochet (DC). Sometimes the crown may be worked in one of the above stitches and the sizes will be stitched in clusters before returning to the stitch used for the crown for the border. When I am working on my own without a fixed pattern, I prefer to crochet in worsted with an h hook (5.0) and use a G hook (4. 5) for ribbed border. When done I add a coordinating button and pompom. If you need to work directly from a pattern the following sources are helpful:
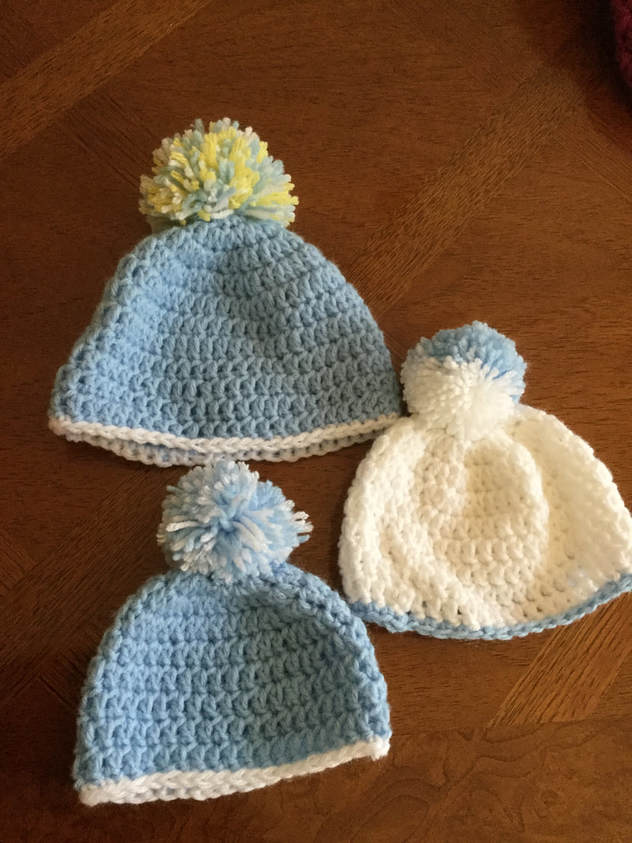
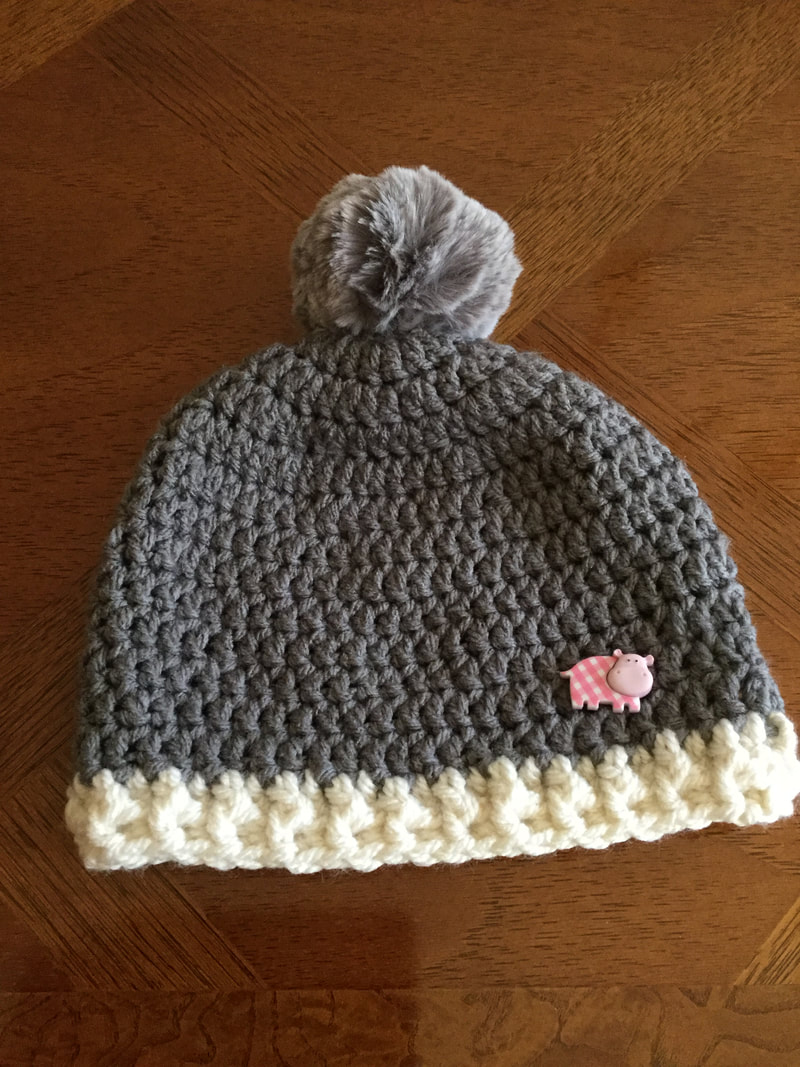
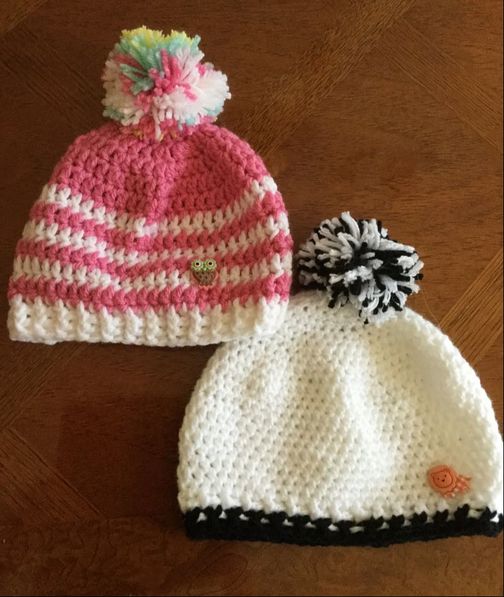 When beanies are worked from the bottom up, the crocheter usually makes a separate band that is joined to make a circle. The crocheter then works stitches onto the band before continuing up the sides. Sometimes the crochet just cinches up the sides to meet in the center. At other times, the crocheter makes a series of decreases before cinching the stitches at the top of the crown. The hat below was crocheted with alternating rows of puff stitch and HDC. The Crochet Puff Stitch Beanie can be found at www.rescuedpawdesigns.com 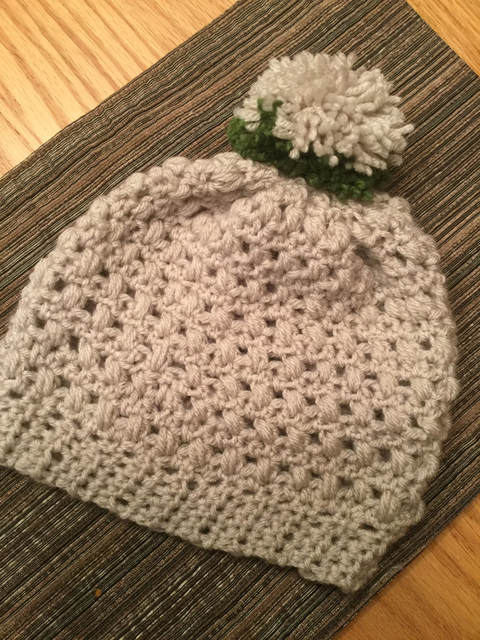 At the end of the last winter craft season, I was able to scoop up some ready made pompoms in red, white, and cream that had been reduced from $4.00 to $1.00 a piece. They sat in my resource tub, until I was ready to embark on this season's pompom project. at 3.5" in diameter these full and puffy decorations set securely on the navy toddler and child beanies pictured below.These cuffed hats were crocheted in HDC. 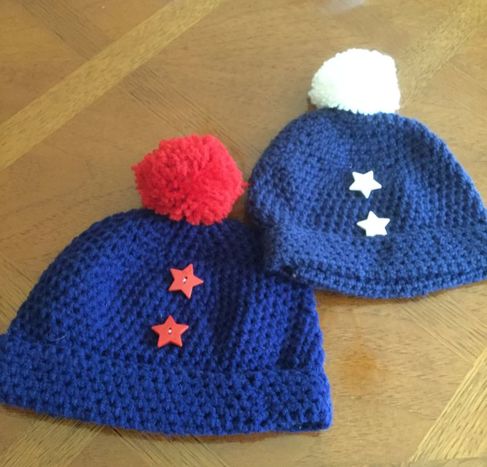 Since my supply of pompoms was limited and would soon be exhausted, I obtained a Clover Pompom Maker manufactured by Clover Needlecaft, Inc. so I could make pompoms on my own. After my first spindly pompom, I realized that I had to wind my wool over several layers to obtain the right number of strands for my pompoms. I used a heavy bladed scissors to cut through the layers and tied the a piece of yarn between the two halves of the devise.When I separated the arms and popped off the devise, I just needed to fluff up the strands to form a perfectly round pompom. I gave the ball a bit of a haircut, and we were all set. The manufacturer included a diagram on the back of the device to show how to make the perfect pompom. Solid pompoms are attractive accent, but there are several other ways to add excitement to your yarn pompom. use striped yarn with bright colors. Cut your yarn so that you include yarn from two bright contrasting or complementary color bands.
A low tech option would be to take 2 plastic lids, cut off the trim, and cut a matching C-like shape in each. you till then wind the yarn in much the same way as you did with the Clover device. When finished winding, cut between the layers and tie as above. The same objective can be accomplished with using cardboard to make your own cardboard pompom maker. 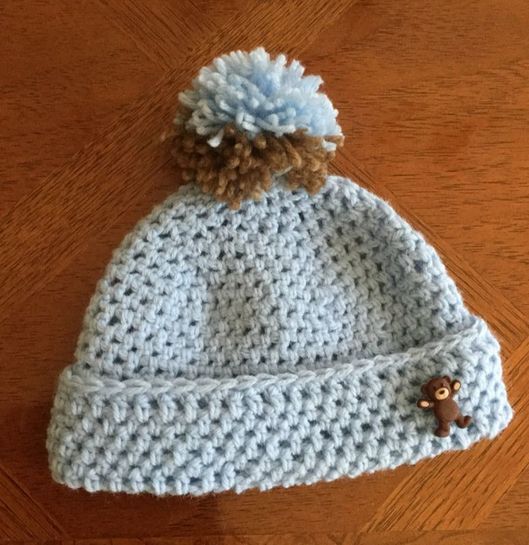 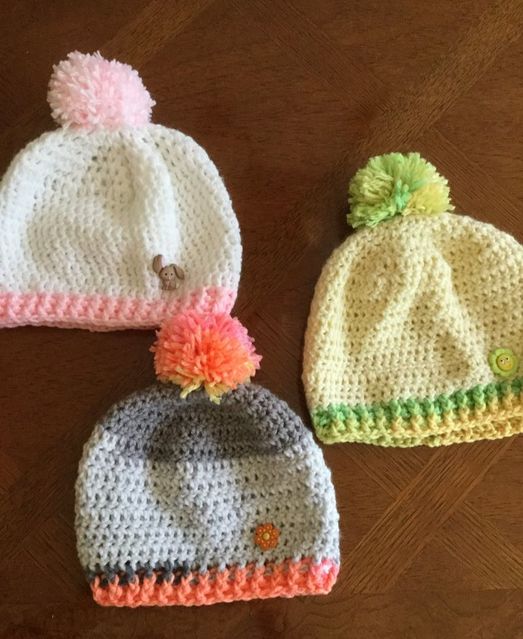 Last winter, I admired the lovely beanies with the fur pompoms affixed to the top. I researched several sources for pompoms and found them to be quite expensive. By chance I stumbled upon a Pinterest Tytorial on how to make a pom pom from fun fur (How to Make Faux Fun Fur Pom Poms in Mintutes from Heart, Hook, Home) What is more, from a 1/4 yard of fun fur fabric, I could assemble more than 2 dozen. I traced lids and bowl on the fabric backed side to get the desired diameter. Then I cut with a sturdy scissor also from the back, trying not to cut the fur. I needed about a 4" circle for a toddler, a 5" circle for a child, and a 6" circle for an adult. I sewed around the edges, gathered the stitches, used a light stuffing, and secured the bottom before attaching to the top of the hat. The fluffier, long furred furs looked the best. 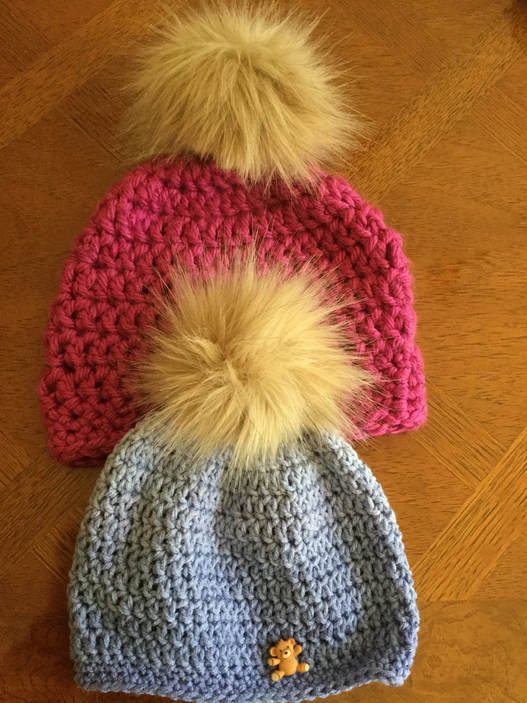
'I was able to find a bag of two inch furry pompoms 40 to a bag. They are suitable for a baby hat. However, I think I would prefer to make the smaller version of the pompom with the pom pom maker. I am currently in the process of crocheting pom poms from fun fur yarn. When I have perfected the operation, I will alter this article and post online.
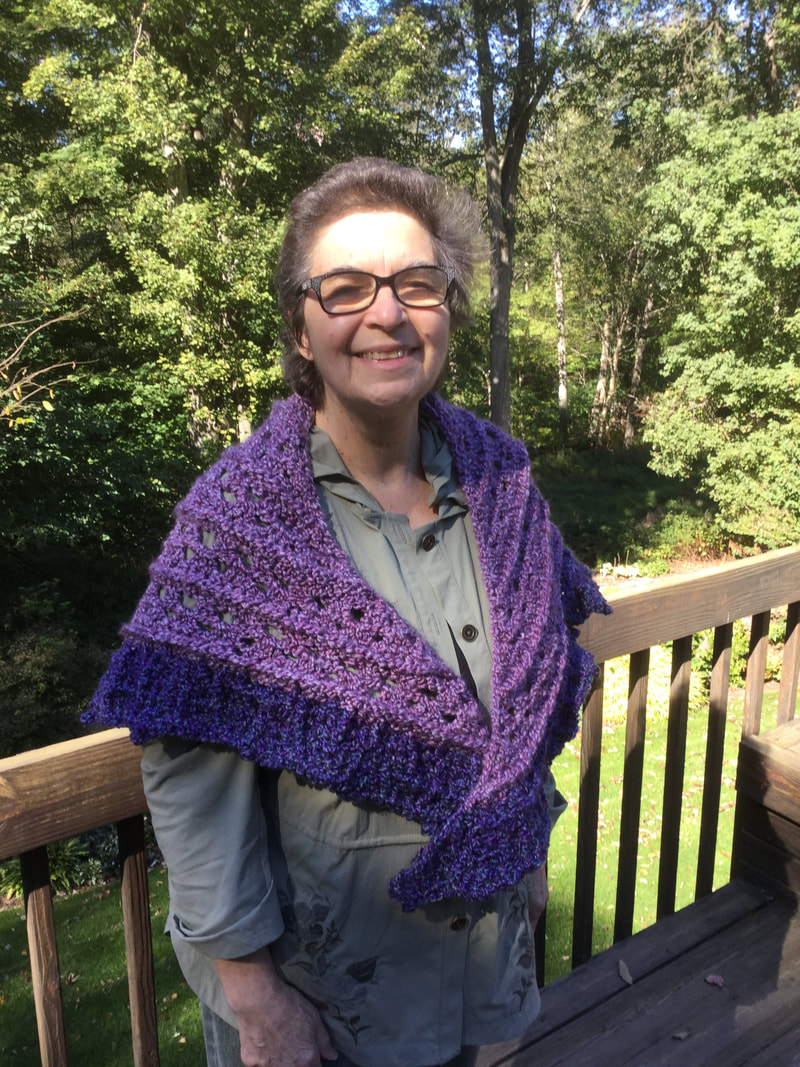
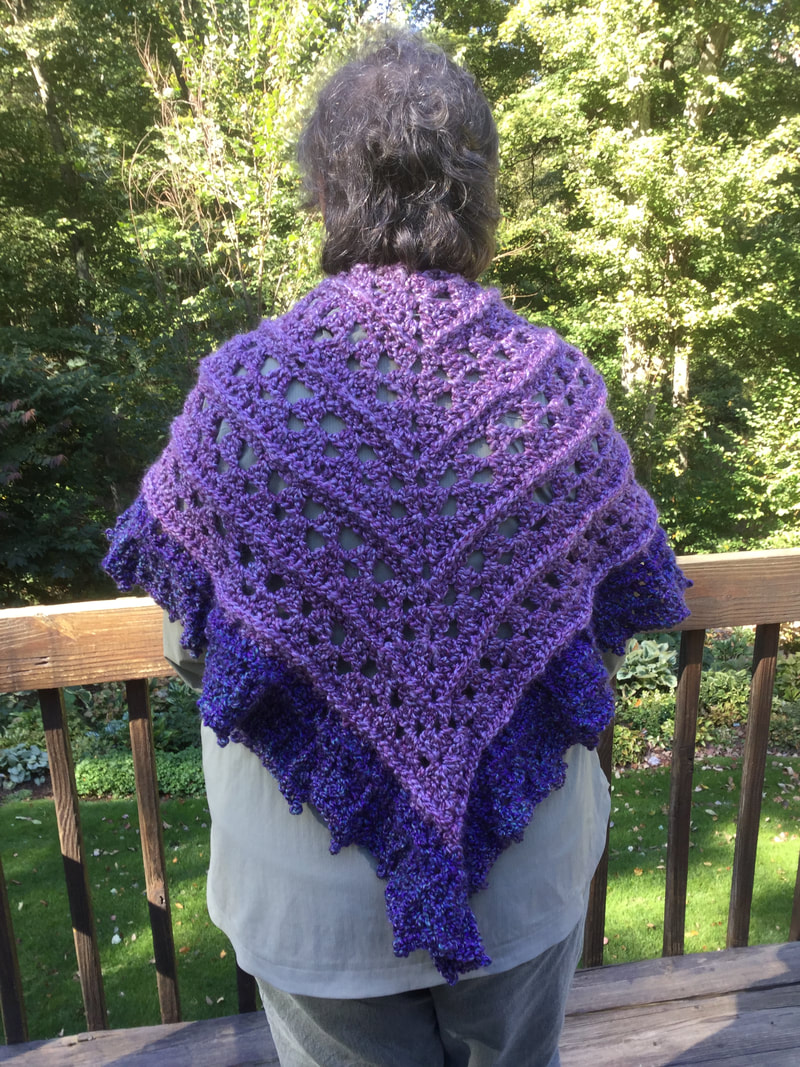
These hats should make an exciting addition to my beanies at this year's Holiday Fairs. I think that family and friends will be be thrilled to receive a playful pom pom beanie as a winter fashion accessory. Have you tried to accent your hats with any of a variety of pompoms? I would love to see your efforts. Please share your photos and experiences. 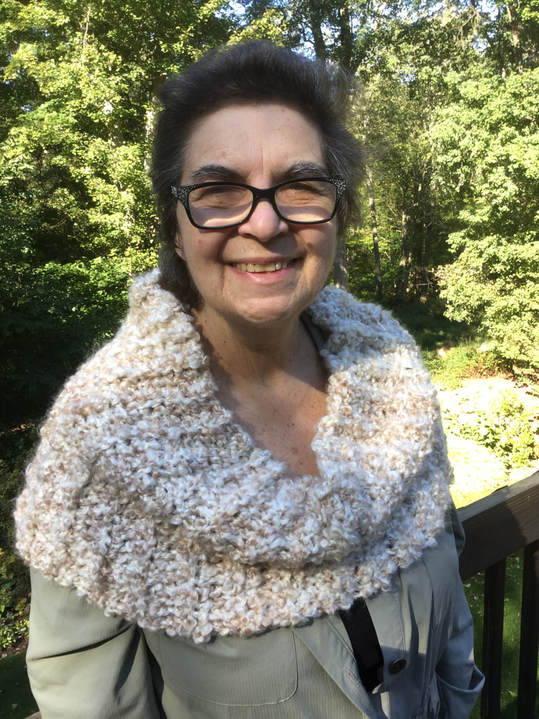 Take a favorite yarn and shift your creative efforts in a new direction. I started my blogging journey with luscious fringed Homespun shawls Homespun Yarn, manufactured by Lion Brand is a silky beautifully colored, textured yarn that works up quickly. Both the regular Homespun in bulky weight #5 and Thick and Quick Homespun in superbulky weight #6 enable the fiber artist to produce pieces with a wonderful finish. My early projects were knitted in garter stitch on large needles. (Size 10.5 for homespun weight #5 and size 13 needles for Thick and Quick #6). The heavily textured yarn obscured the fact that the entire shawl was knitted with such a simple stitch. However, as much as I enjoyed this rich fiber, I had been stuck in a knitted rectangular prayer shawl rut for too long. I imagined that there must be other ways to explore this yarn's creative potential. Then, on a recent browsing trip to a favorite megacraft store, I spied Quick Styles For You by Leisure Arts. With a closer look I realized that the book was dedicated to my favorite Homespun yarns. My excitement built up when I realized for the first time I had a crochet option in the 10 patterns. I could not wait to begin. 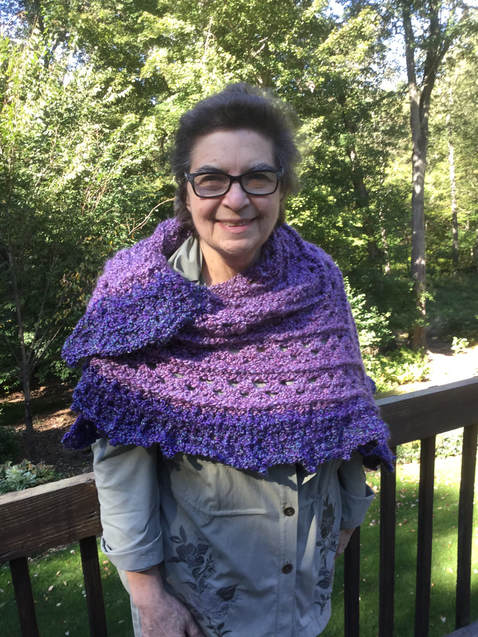 Since I wanted a project that was interesting and different, I selected the Two-toned Shawl that called for 2 skeins of of regular homespun for the main part of the shawl with an additional skein for the wide border. I had already purchased Baroque and had remnants fo Barrington left from a previous shawl. A wonderful quality of the Homespun yarns is additional threads that run through the main color. Baroque was predominantly raision, but it was blended with blues,grays,whites, and other hues. The predominantly blue Barrington made for the perfect accent. The pattern intrigued me with a mix of Double Crochet, Large and Small Shells, as well as Front and Back Post Double Crochet. As I was crocheting this shawl, I learned a valuable lesson. A common problem with triangle shawls is that the ends of the triangle sometimes angle up like wings. After frogging the piece when it was almost half done. I discovered that I could overcome this problem by making sure that the initial and final chains in a row were loosely crocheted. This strategy allowed the shawl to relax and lie flat. While I had plenty of yarn for the body of the shawl, I realized that my remnants were not quite enough for the entire border. Therefore, I eliminated row six and altered the final row with five single crochet between picot stitches. The completed shawl met all of my expectations. The project was unique and attractive. The feature that I liked best was the raised rows of stitches that met in a V along the back. They occurred in 5 inch intervals and were produced by repeated rows of the Front Post Double Crochet. The shawl can styled in several ways. Traditionally, the deep V would fall down my back with the narrow ends falling in front. I actually prefer to angle the shawl over one shoulder and tie ends at the opposing side. An attractive shawl pain can also be used to secure the ends in place. This piece will be the perfect accent to my denim jackets, jeans, and skirts.
The next piece I tackled was a simple crocheted cowl that called for super-bulky Thick and Quick Homespun. The Pearls skein in the book photograph was a soft off-white blended with light shades of taupe. While it is challenging to find the holes for inserting knitting needles, I found it an even more difficult job to crochet the superbulky yarn. Again, it was essential to crochet loosely, or this process could be stressful. The pattern called for single crochet through the back loop. This stitch produced a lovely ridged pattern that could be mistaken for knitting. The pattern listed the cowl's measurements as 13 inches high with a 33 inch circumference. Since I had some extra yarn, I crocheted until I had 36 inches before slip stitching the short ends of the rectangle together. The extra couple of inches gave me stylish option as I was able to bring the bottom of the cowl over my shoulders, much like a caplet. 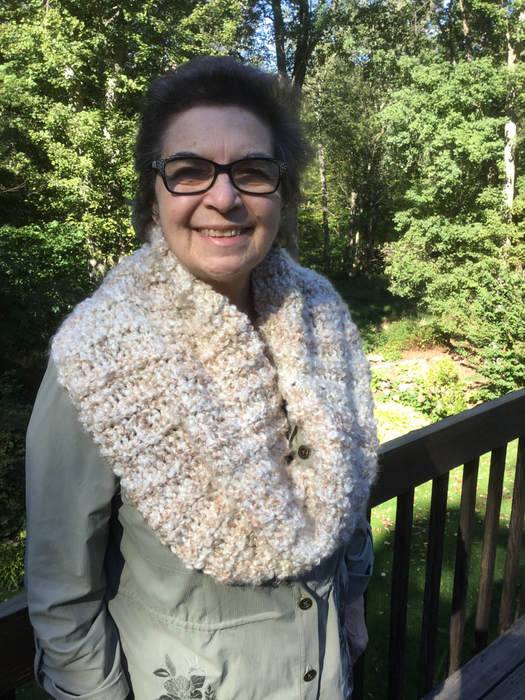 Although I crochet many hats, I can only wear hats that fit comfortably and loosely around my head. The hooded cowl pattern was the answer to my comfort problem. The piece could be worn around the neck or picked up as a loose hed covering in extremely cold weather. The light grayish blue and light grayish taupe bands would coordinate well with my black winter coat. 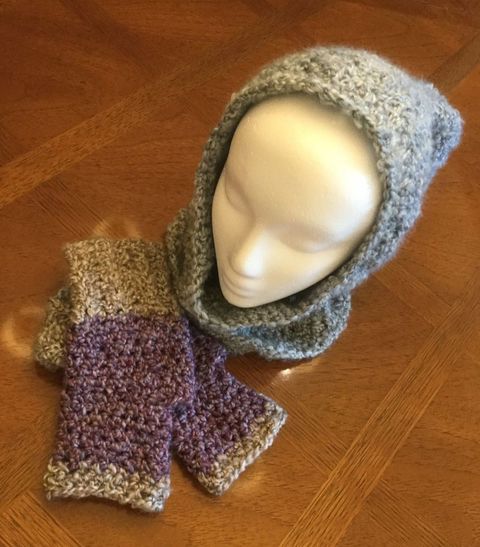 When I was finished with the shawl, cowl, and hood, I still needed to find a way to keep my hands warm. I was able to adapt a favorite simple fingerless glove pattern that called for worsted to my bulky yarn by reducing the number of stitches.I used the bluish gray from my hood for the cuff of my first glove, the raisin yarn with gray threads for the hand, and the taupe for a two row top accent. These gloves were slightly mismatched. The second cuff was more taupe, but I followed the same procedure. 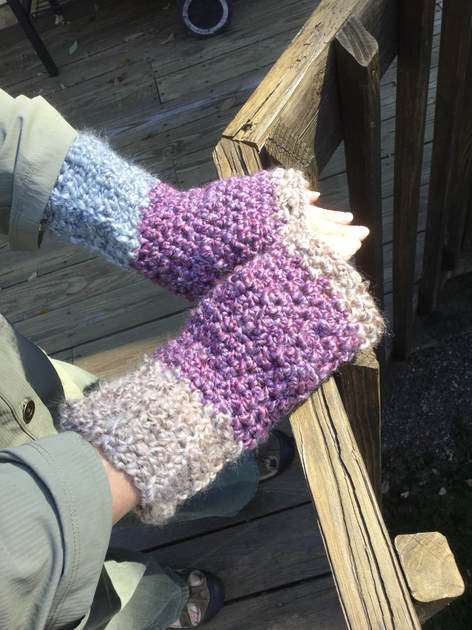 After further research, I found a fingerless glove pattern for Homespun yarn. The glove has a shorter cuff and features a thumb gusset. See: http://www.imfrayedknot.com/2017/06/24/homespun-fingerless-gloves. The same pattern is available as a paid pattern on ravelry.com. See: http://www.ravelry.com/patterns/library/homesspun-fingerless-gloves
Normally, I do not look forward to the cold weather, but with my new Homespun fashions, I am all set. As Homespun works up so quickly, I was able to finish all of these pieces in about 10 days. Please share your photos and experiences with Homespun yarn. I would love to see your creative efforts with this wonderful fiber. |
Archives
November 2022
Categories
|

 RSS Feed