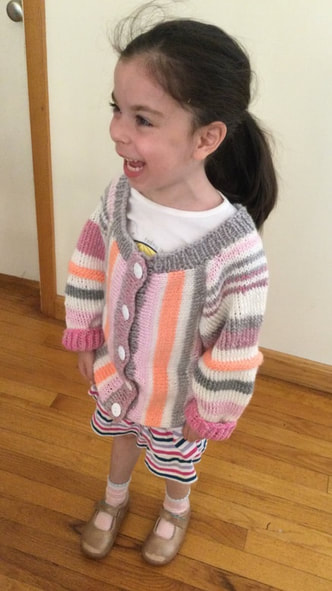
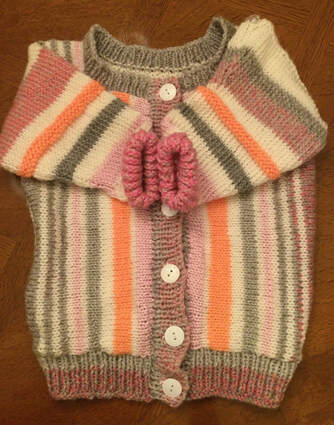
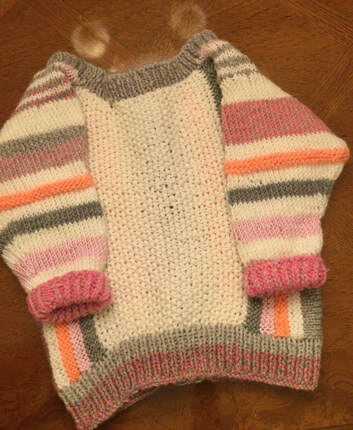
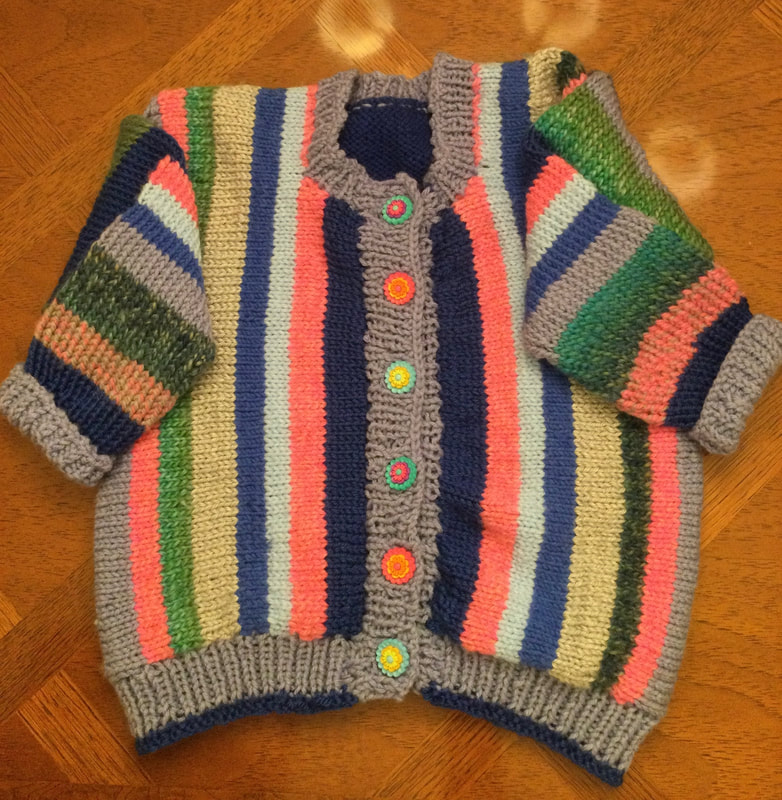
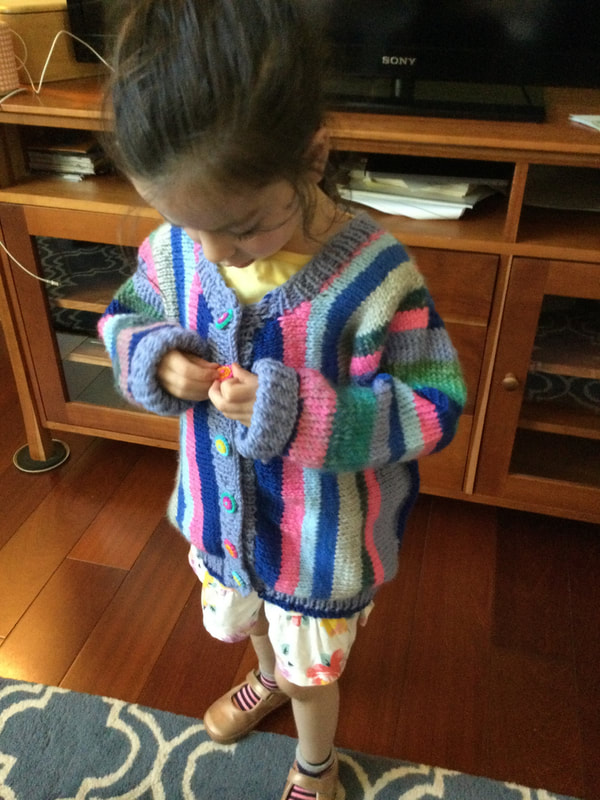
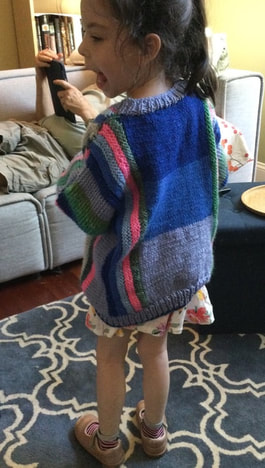
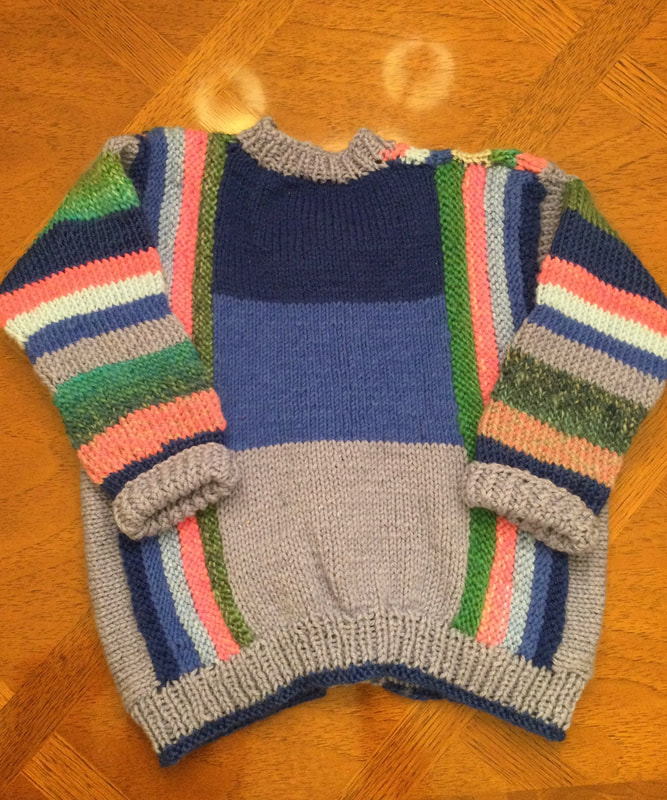
 I just love the way stripes and colors play with each other to create fantastic sweaters and cardigans.The works of many artists, especially Stephen West (West Knits), have inspired me to interpret the process of joining the vertical and horizontal knitting to produce sweaters of my own. The model that I frequently use is my darling 5 1/2 year old granddaughter who is growing into size 6. Using her measurements and a sweater that I had already knit for her as a base, I launched my first project. It wa great to incorporate my scraps to bring out pops of color. Remnants of a neon pink-gray multi, light pink, tangerine, and white made for a cheerful combo. Since I ws constructing my piece entirely without pattern, it would be creative experiment -- a kind of knit as you go effort. As I knitted, I added stripes based on contrast and the amount of yarn I had available. I started with an 8 by 11 inch tall white seed stitch panel. Then I turned my work 90 degrees and picked up stitches along the length so that I could work horizontally. Stripes that created welts were purled in grey, pink, tangerine, and white on either side of the back panel. A wider short strip in grey multi made for the transition to the front in shorter rows that allowed for the armhole. Stitches were cast on so that the front of the armhole would match the back. On the front I continued to add stripes that coordinated with the back. For the sleeves, I picked up 60 stitches and knit in the round alternating white with colored stripes The beginning of a row was marked so that decreases at regular intervals could be made before and after the start of the row. The collar, bottom bands, and the button bands were ribbed in pink-gray multi. As a first effort, I was generally pleased with my sweater. I loved the way the stripes and colors played with one another. The sweater was slightly larger than my granddaughter's size frame, but was consistent with the other size six sweaters I had knit or crocheted from a pattern. She is growing and will be wearing this piece into the spring season. This time I started with 3 narrower color blocks, knitted in stock and net, in grey-blue, medium blue, and dark blue. When I turned my work the stripes were knitted in blue green, neon pink, grey blue, medium blue, and dark blue on both sides of the black. Grey-blue was used for side and underarm. Again, I played with an array of stripes to form the shoulder and front. Decreases were made to form the neckline. As in the first sweater,I pickled up about 60 inches from the armhole to make the sleeve. The sleeves were knitted in the round with stripes in the same colors as the body of the sweater. I put a stitch marker into the beginning of the rows so that I could make decreases at regular intervals before and after the marker. The cuffs, neck, bottom, and button bands were ribbed in grey-blue.When I ran out of grey-blue yarn, I just added a few rows of dark blue to get the correct length. The neckline of this sweater was better fit as I made the shoulder at least 1 inch wider on both sides. However, what made this sweater exciting were the fantastic buttons that used most of the colors in the sweater and highlighted the stripes. I could not resist them.
i thoroughly enjoyed this knitting adventure, since I did not know how either sweater would evolve when I started to knit. Now I plan to expand this process to a crocheted version. Please remember folks, the development of these sweaters was a process and not a specific pattern. I hope that you will try to experiment on your own. I invite you to join me on my stitching journey. As always I appreciate your feedback and reflections.
0 Comments
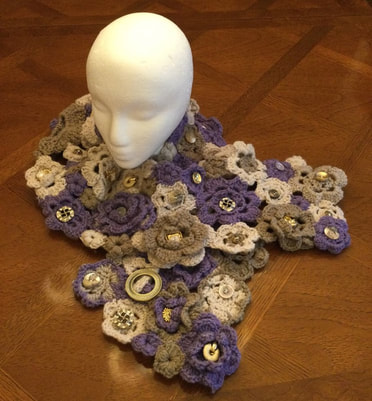
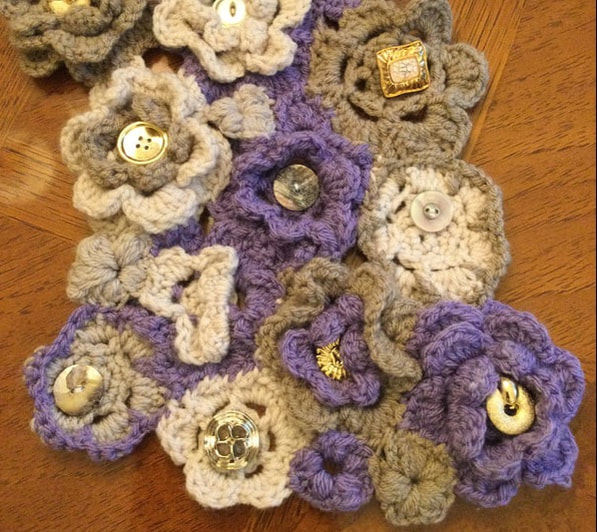
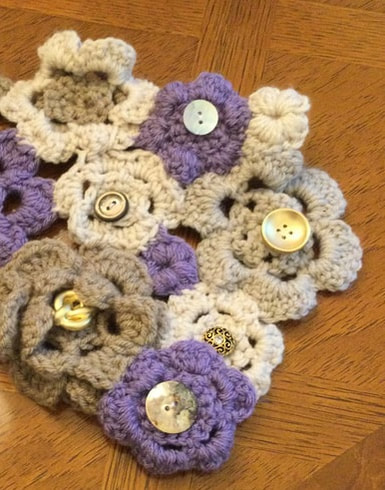
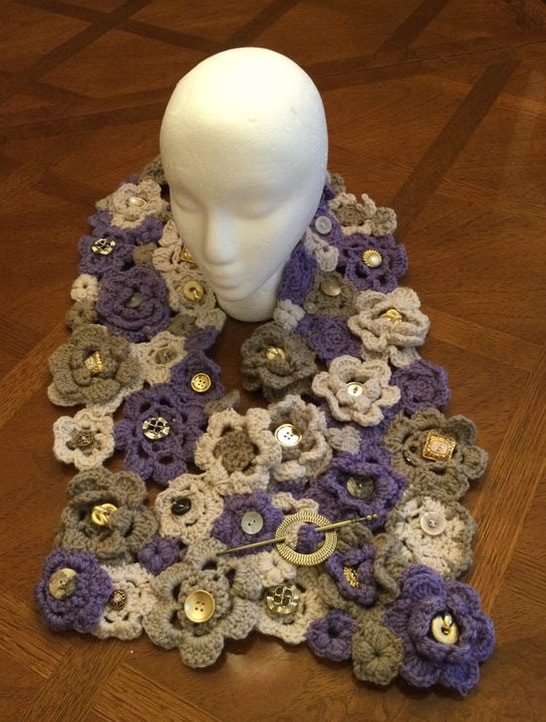
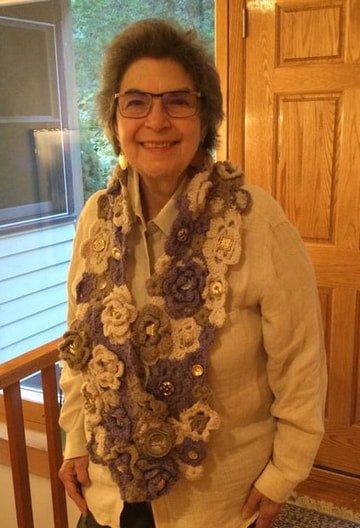 My crocheted floral scarf was created as a freeform 3D piece from individual motifs that were joined to form the finished piece.The original inspiration was a Lacy Floral Scarf featured in Noro Knitting Magazine #4 (2022).It was crocheted with a single skein of Noro Sock Yarn that's a #2 weight in bright jewel tones. While I applied the process to create my scarf, I changed just about everything else. I incorporated muted hues in worsted weight yarns. The original scarf was 5 inches wide and 44 inches long. I needed amore substantial piece as I am taller, ands I needed enough flowers to fill in a 7 inch wide scarf that would be 57 in ches long. Creating the scarf starts with crocheting the individual flower motifs in bud, small, medium ,and large sizes. I started with the number of flowers recommended in the original scarf, and added flowers as I constructed mown.. I ended up with 20 large flowers, 7 large open work flowers, 6 medium flowers, 16 small flowers,and 22 tiny buds. Surprisingly, my local Dollar store has added a yarn section. The selections of Premier Just Yarn worked well with my project. I used about 3 linen and 3 taupe. Then I added lavender Impecable yarn from Michaels that I had in my stash. I worked with a G+ (#7) hook to create my floral motifs. In the beginning I followed directions for the flowers suggested in the magazine, but I found that I preferred to work with my favorite flowers that I have used for many projects through the years. My flowers yielded different textures so that the scarf had a 3D aspect. Since I crocheted from memory, I had to look for flower patterns that would provide my readers with simple accurate directions. The large and medium flowers were similar those found on Pinterest: Free Crochet Flower Pattern at stitching-together.com. As these flowers can be made in one, two, or three layers they worked well in my design and enabled me to use more than one color in some of the individual flowers. I also created a large flat motif that allowed changes in texture and design. The bud was similar to Easy Puff Flower Free Crochet Pattern also found on Pinterest. Now I had a pile of flowers that I would combine to create my scarf. I lay the pieces out on my kitchen table as I combined sizes, textures, and colors. I started with the larger layered and flat pieces and filled in with the medium and small. When there were holes, I added buds to fill in the area. When I reached the original 45 inch length, I calculated that I would needed more flowers to add 6 inches to each side. That meant I would crochet about 8-10 more large flowers, 4-6 more medium blossoms, 4-6 more small bits, and about 10 more buds.Building the freeform scarf was an evolving process, and I moved pieces to develop contrast and balance. Since I wanted to remember the location of each flower if I had put the work aside before I finished sttching the flowers together, I took several photos to ensure that I would get the exact placement. To connect the flowers, I sewed with an overhand stitch with yarn from the flowers. When possible I sewed with yarn that was used in the specific flower. As the colors were all muted, and there was ample texture, most of the stitches seemed to disappear in the work. The finished piece measured 5 inches below my waist. The scarf had a lot of body to it and hung straight. I used a simple shawl pin to close the scarf with style. Still I was not finished. The muted colors needed some pizzaz. I dug into my extensive button collection and obtained many different gold tone, natural shell, and other different buttons.. I extended the scarf to its full length and sorted the buttons by color, size, texture, and interesting features. This was another part of the freeform process. I felt as though I was painting as I placed the buttons on the flowers. Since it would be difficult to pick up the scarf and buttons if I had cleen up before I finished, I alloted about 2 hours for this process. However, I took photos of my button placement since I had to lift my working edge as I secured the individual buttons. I was thrilled that I had so many different buttons in my stash. They were just the right accent to the scarf add light and dimension to my creation. When winter comes I will be ready with my sculptured f scarf. I enjoyed the challenge and process of creating this piece without a specific pattern in a freeform design. It was a process rather than a definite set of directions. I seem to be entering a new stage of my crocheting and knitting career. In subsequent articles I will be featuring freeform sweaters that I created for my granddaughters.
As always, I appreciate your reflections and feedback on my work and the creative process. I welcome you to join my stitching journey. If you decide to make your own freeform floral scarf, i would love to see photos of your work. |
Archives
November 2022
Categories
|

 RSS Feed