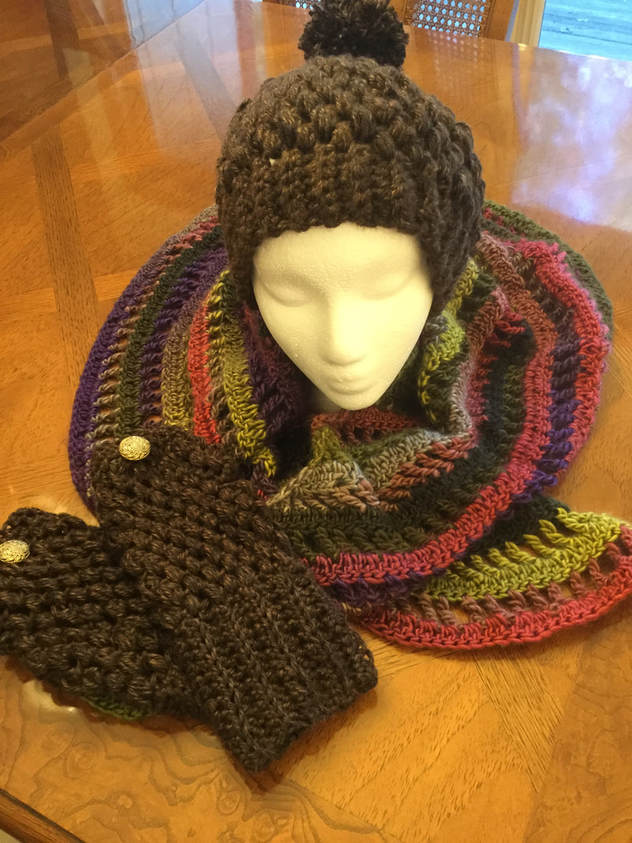
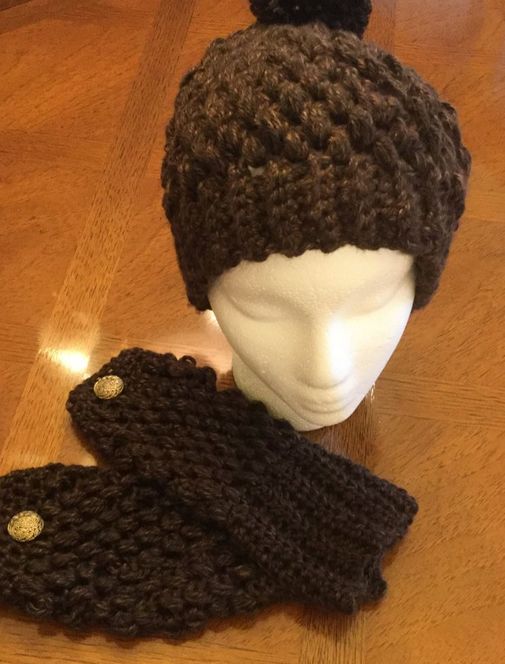
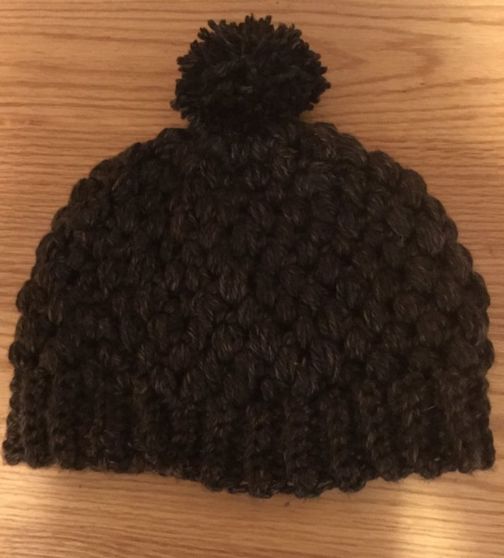
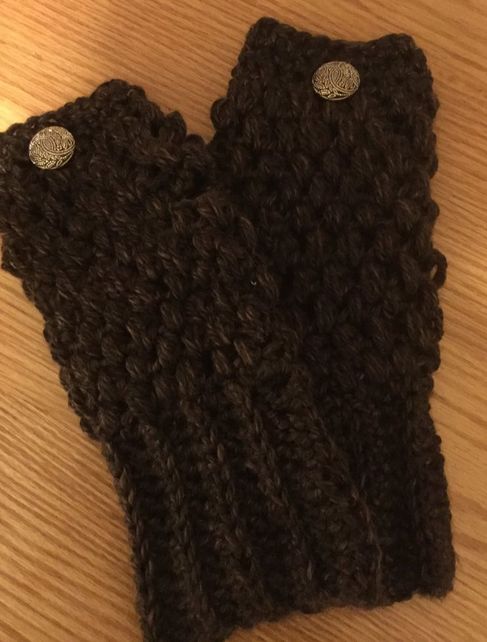
 The rich browns hues of autumn draw me in. Just give me a luscious skein of dark brown or rust, and I am driven to create a set of fall accessories to accent my wardrobe. A ball of varied shades of green, gold, brown, rust, or beige calls out to me, and before long I have completed a shawl to drape over a sweater or jacket. I am keeping to my promise, and I will take the time to coordinate these pieces and wear them when I venture out from my cozy cocoon or mingle with friends. They are too exciting to leave in a drawer, and they will represent my new style. If I spend so much of my week with my hooks and needles, my passion should be represented in my new look. The open weave of the Lydia Shawl by Denise Crawford can be downloaded as a free pattern from Ravelry. I have crocheted this pattern before , but it was a perfect medium for the exciting pallette of colors in Lion Brand's Landscape in the Rain forest color view. This worsted weight (#4) yarn is luscious and works up easily. After the initial set up, the triangle pattern is basically two alternating pattern lines. The first is mainly double crochet. The second is a triple crochet chain 1 sequence. The designer suggested an H hook, but I was more comfortable with an J hook. I can wear the shawl clasped in front with a broach or tied on the side over one shoulder. The piece took three skeins of yarn. My hat and fingerless glove set helped me to master the bubble stitch. The Crochet Gradient Beanie Hat Puff Stitch, posted on Pinterest, delivers the hat pattern in video form. There is no verbal audio, but written instructions appear on the screen from time to time. The video shows how to execute the puff stitch as you make the hat. Lion Brand's Heartland (worsted weight #4) in Sequoia color view gave me a rich dark brown and that was highlighted by a tawny lighter hue. The hat was comfortable and fit perfectly. To create the matching bubble stitch fingerless gloves, I had to improvise and adapt my pattern for mismatched fingerless glove pattern. These directions are general. I plan to make a step by step pattern in the near future, and will write down my procedures at each stopping point. I started with a cuff, chaining 14 stitches with a H hook. Crocheting half double crochet stitches into the second stitch from the hook gave me a 12 stitch wide cuff. in each succeeding row I crocheted into the back stitch of each chain. When the piece was large enough to fit around my wrist, I crocheted my ends together to make a circle. To create a base for the puff stitches, I crocheted 21 HDC stitches into the cuff. When I completed the foundation row, I chained 3 and began my first puff stitch. After a couple of experimental tries, I found that 14 puff stitches gave me a snug , but comfortable sizing for my hand. I crocheted 6 rows of puff stitches before making my thumb hole. While my mismatched glove with 3 stitch cluster stitches could tolerate a vertical thumbhole, the puff stitch glove needed a horizontal thumb hole. I chained 9 stitches and skipped two puffs before crocheting a puff stitch into the space between the next two stitches . I continued stitching around until I came to the chain and created two puff stitches on the chain before continuing onto the body of the glove.I made three more rows of puff stitch and transitioned into the final trim. Since I like the glove to fit more tightly around the upper fingers, I switched to a G hook to crochet 3 rows of HDC (Half Double Crochet). Then I repeated the process for a second glove. I placed the gloves so that the thumb holes faced one another. Then I sewed a decorative button to the top of each hand.
As I repeat the process from this posting, I will be able to execute exact directions that can be replicated by my readers. Then I will post them in this blog and on Ravelry.In the meantime, I lookf orward to wearing my stylish autumn accessories.
0 Comments
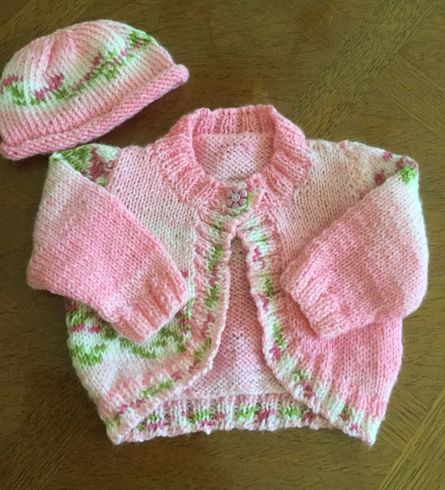
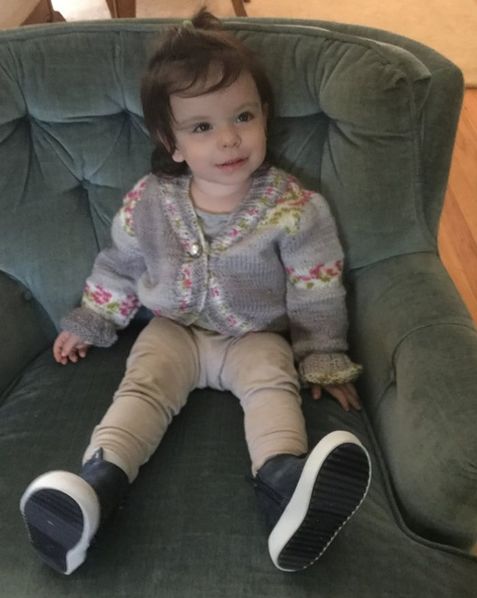
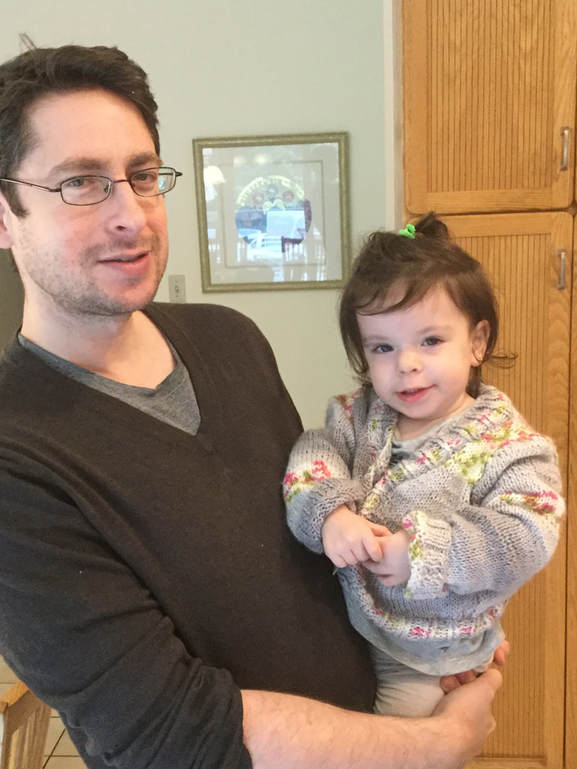
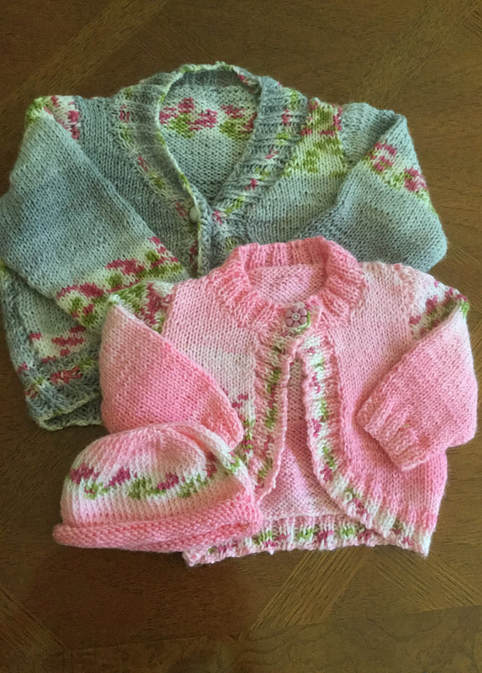 -The pattern calls out to you and says your name.In addition, there is a suggested yarn, that the independent yarn store has in stock.(The Yarn Barn, Woodbridge, Connecticut) Nirvana! I can see myself knitting the piece and can even imagine how it will look the baby or child who will wear my work. I am an avid knitter and crocheter, who enjoys searching Pinterest and Ravelry for free patterns, but when I see a purchased pattern that I can take home with me right away, I am taken. The pattern in question had been tested. There was a diagram showing how the knitted pieces would look. Best yet, there was a full range of sizes so that I could make the pattern for a new granddaughter to be born in December as well as a 21 month old who wears anything that I can make. The pattern was designed to go with Baby Blossom DK by Hayfield (#4841). The yarn featured bands of color in varying shades of one color. Inaddition, one of the bands featured snips of pink and green that worked out to look like like blossoms when knitted. I bought a peachy apricot for the younger baby and grey tones for the toddler. I used a 3 1/4mm for the ribbing and a 4mm for the body and sleeves. Although I usually knit with worsted (#4), this DK (#3) yarn worked up easily and quickly. The pattern could be knitted with a round neck or a V-neck. I chose the round neck for the new infant and the V-neck for the toddler. I made the infant style first. As I began knitting I surprised to see that I would knit the body and sleeves first and add bottom, front, and neck trim when the pieces were sewn together. The only exception was the sleeves. I began with the rib here and knitted the rest of the sleeve. While most, baby sweaters seem to have a i knit-1purl rib, this sweater called for a 2 knit-2purl rib. I liked the way this rib gave slightly ruffled look to the piece. I will be attending the baby shower in November, and I will be proud to include this sweater and hat with the rest of my presents. I added a roll knit cap to go with the sweater. It is seamless and is worked on doubled pointed needles. My granddaughter was pleased to wear her gray tone sweater. The grays will go well with any outfit. Besides the DK weight is just right for wearing indoors on a chilly day. She can also wear it under a jacket or in the car without the bulk of a heavy jacket. My next projects are worsted weight hooded cardigans for this sweet girl and for my new step-granddaughter. My needles and hooks are always clicking. It is a pleasure to have such wonderful children to make sweaters for.
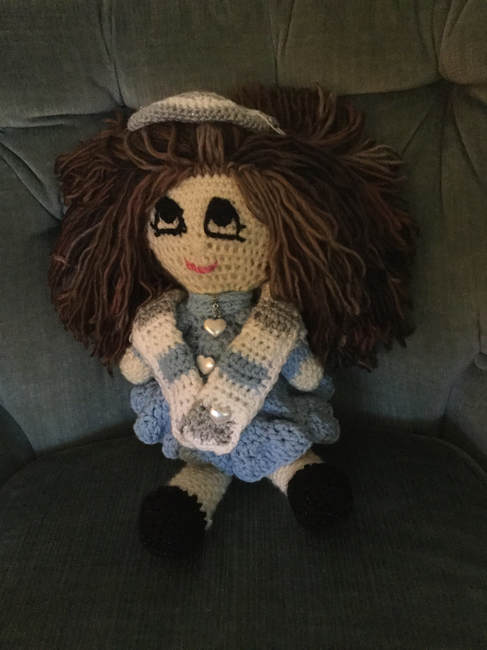
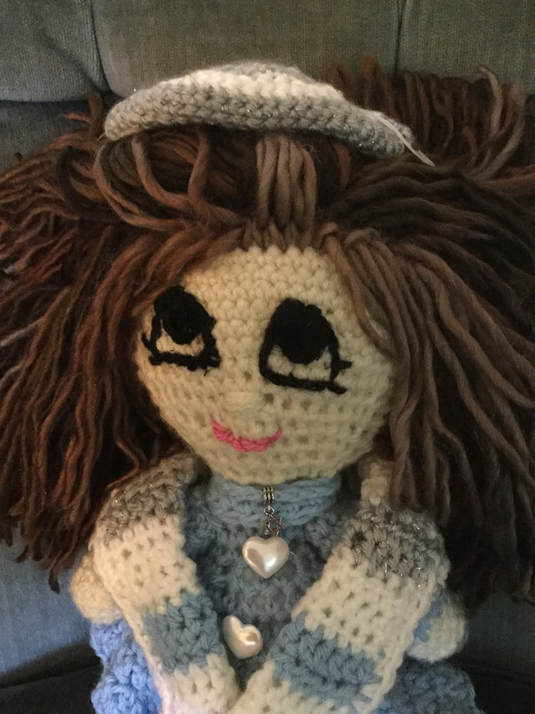
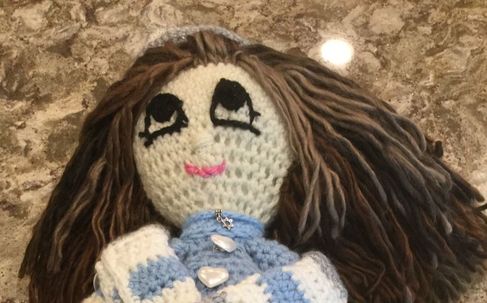
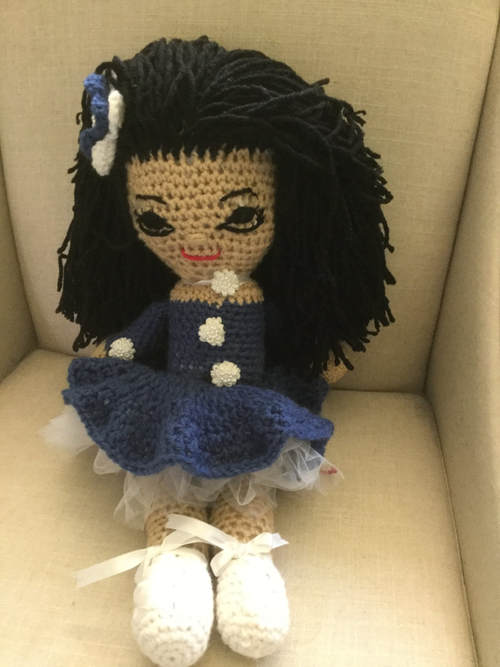
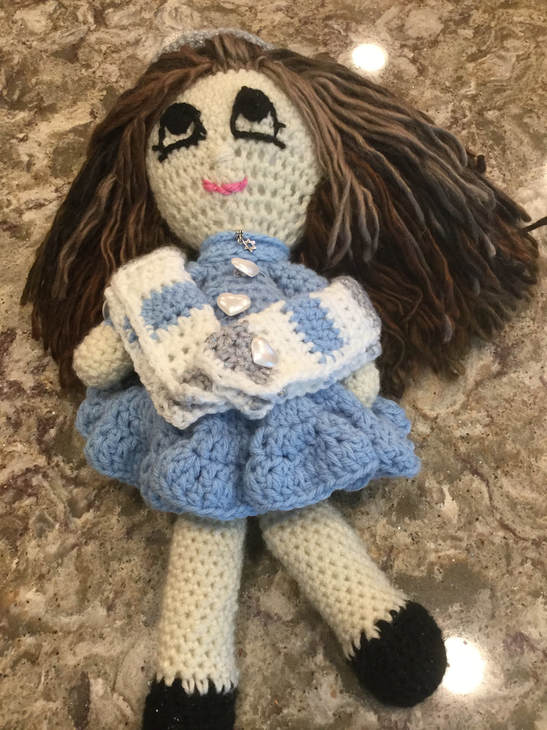 It is good to be back at blogging again. After 18 months of consistent posting I found myself, traveling, preparing for the Jewish New Year, babysitting, and engaged in obsessive preparation for the fall Holiday craft season.Despite all of the activity, I found myself with a large collection of new inventory. In the past my creativity and production were partnered with interesting and informative articles. However, for the last few weeks I was unable to put down my hooks to write and share with my Lilcreates audience. On Tuesday I delivered my latest specialty doll from my ANNA line to my synagogue for their Comedy Night Silent Auction. I laid her out and wrapped her in a large transparent gift bag secured with white and silver ribbons. This doll was truly a labor of love. I had made a few ethnic dolls, but since this little lady was going to the synagogue, I decided to accessorize her with fittings for a girl who was experiencing her Bat Mitzvah. The dolls in my ANNA line are made with acrylic yarns and stand about 17 inches tall. They all have names beginning with "A." These creations were inspired by my mother ,Anna. With each new addition, I keep her in my heart and mind. My niece named Adina, is a mother with a daughter of her own. Who ever wins the bid on this doll will rename her make her her own. For now this creation will always be with me as Adina. Her design and creation were a journey. When we arrived at our destination, it was hard to let her go. My ANNA dolls follow the same basic pattern that I wrote about in an earlier post. http://www.lilcreates.com/lillians-blog/all-dolled-up-designing-and-crocheting-a-line-of-dolls-for-little-girls I have made a few changes that make her neater and eliminate a few steps. I plan on editing the pattern to include these revisions. *Instead of adding a crocheted pair of panties, I crocheted the entire body in the same contrast color for the dress, The top part of the legs was crocheted in this same color. *To fashion the dress, I crocheted the last few rows of the body in the facial tone to create a neckline. For the arms, I crocheted the first 6 rows with the flesh, facial tone.for the hands. Then I switched to the dress color for the remainder of the arm. When both arms were attached to the body, the bodice part of the dress was precise, and I did not need an additional layer. As with the previous dolls, I began the skirt by crocheting a line of single crochet right from the doll's waistline. While the rest of the doll is done in single crochet, I use a double crochet with strategic increases to make the skirt. To create and complete my doll on time, I had to crochet the basic body, head, arms, and legs before, we left for our vacation on Cape Cod. The tasks that remained were the crocheted face, the dress skirt, the accessories, and the doll's mane of hair. I find the crocheted eyes to be one of the most challenging parts of every dolls. It usually takes me several tries to get the eyes to be the correct size, spacing on the face, and focus with an appealing expression. This detail took me most of one evening. After I finished the skirt, I set out to make the yamulke (hat) and tallit (prayer shawl). I did not have a specific pattern, but I worked with the doll to get the dimensions correct. The yamulke was crocheted from a magic circle as I used single crochet and made increases and added rows until the crown was the right size for the doll's head. Then I crocheted a couple of rows with the same number of stitches so that the curve of the yamulke would sit on head. I used the same hairclips that many adults use to keep their caps in place. The main color for the yamulke was white, and I used stripes of the dress blue with some silver threads to spruce it up. The prayer shawl was basically a rectangle that draped the figure. At the end I added another pearl heart button that I had used on the dress bodice and sleeves. I overlapped the bottom pieces so that the prayer shawl did not fall off the doll. The mane of hair is the signature feature of my ANNA Dolls.I usually use Lion Brand Homespun for the hair. Its soft and crinkly texture makes my dolls unique. Despite the fact that we were on vacation, my husband was willing to scout out a Joanne's or Michael's store to get the supplies I needed. Alas, a realistic shade of brown in Homespun was not available. We scanned the shelves and found 3 possible choices. I ultimately decided on 2 skeins of Unforgettable. Designing and executing the head of hair is a painstaking and time consuming job. Each strand is cut and secured individually to the doll's head. I usually start by making a running stitch around the area for hair. I have to decide where to place the hair on the forehead and how the hair will fall on the sides. When I am finished I easily remove these loose threads. With each succeeding doll, I have learned some tips to make the hair more realistic and to cut down waste. I generally start with strands that are 12 inches long for the first row on the back of the neck. When the strand is folded in half to knot onto the doll's head, it generally falls to the middle of the back. However, as I go up the head, I add about half an inch to the strands so that they will lie at about the same length at the bottom.With this technique, I had less wastage than when I used to make all of the strands 14 inches. When the hair was done, I only had to clip some ends a bit to get a pleasing look. My Adina doll was almost complete, but I needed one small detail to complete her. I wanted a small Star of David necklace that would be just the right accessory to complete her look. We searched craft and jewelry stores on the Cape. We scanned the internet. We found a few of these pendants, but they wee way to expensive for a doll. Finally Goody Beads proved to be my salvation. The 3/16 inch charms were $1.00, but were on sale for 40 cents. I ordered 30 as I did not want to go through this process again with future custom orders. The beads were $12, and the express mailing was $13. The package arrived on the morning I was to take my doll to the synagogue. I loved this tiny accent, and the pursuit was worth the effort.
The story is not over. The silent auction will take place on Saturday. Everyone who has seen this special doll has admired her. However, the retail price is $75 with a minimum bid of $45. Hopefully, some thoughtful mother, grandparent, friend will want to buy this wonderful gift for a special young lady in their lives. I took the opportunity to advertise my ANNA dolls as a custom order and left a descriptive letter with business cards so that any future patrons could order dolls with specific hair color, costume, or special interest. In September, I completed a special order for mom with an adopted Chinese daughter who was an avid ice skater. I will keep all of you posted. Please think positive thoughts. |
Archives
November 2022
Categories
|

 RSS Feed