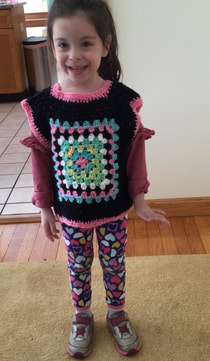
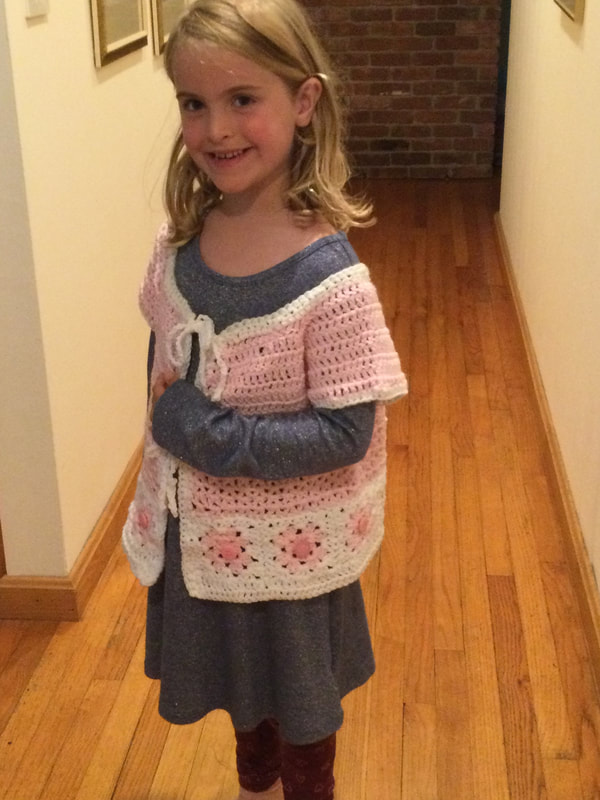
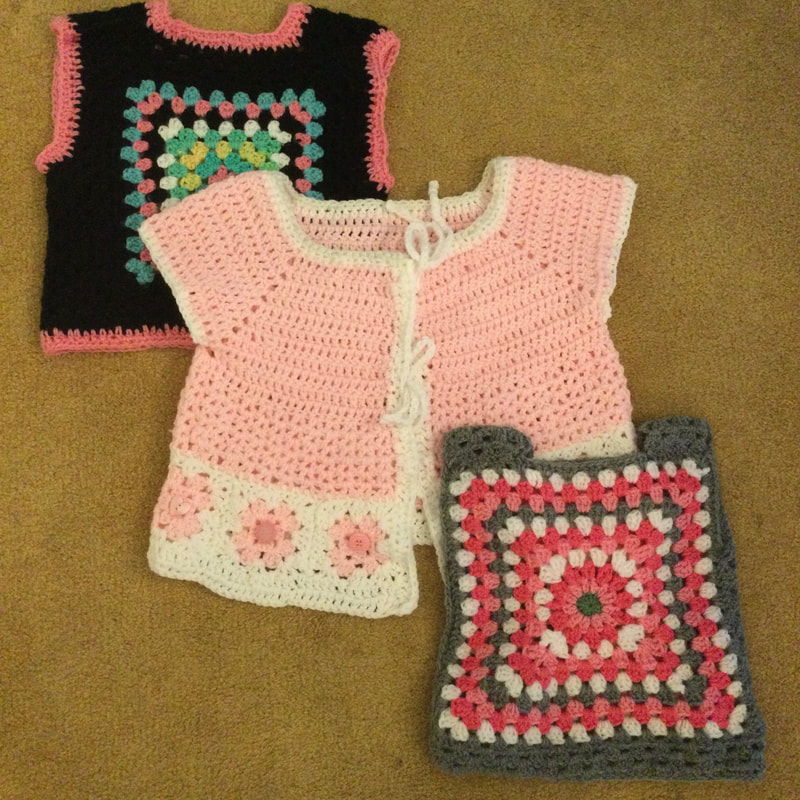
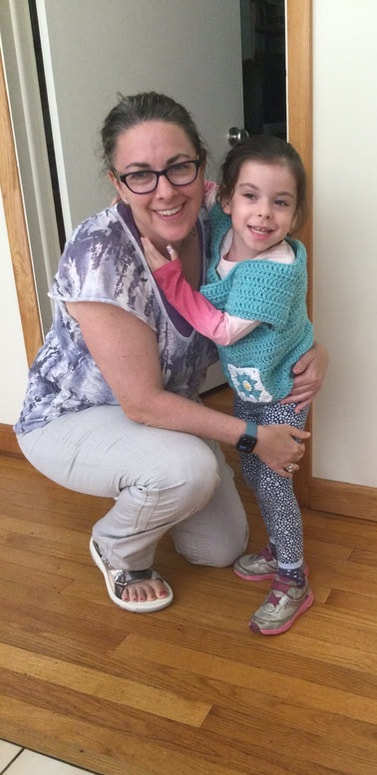
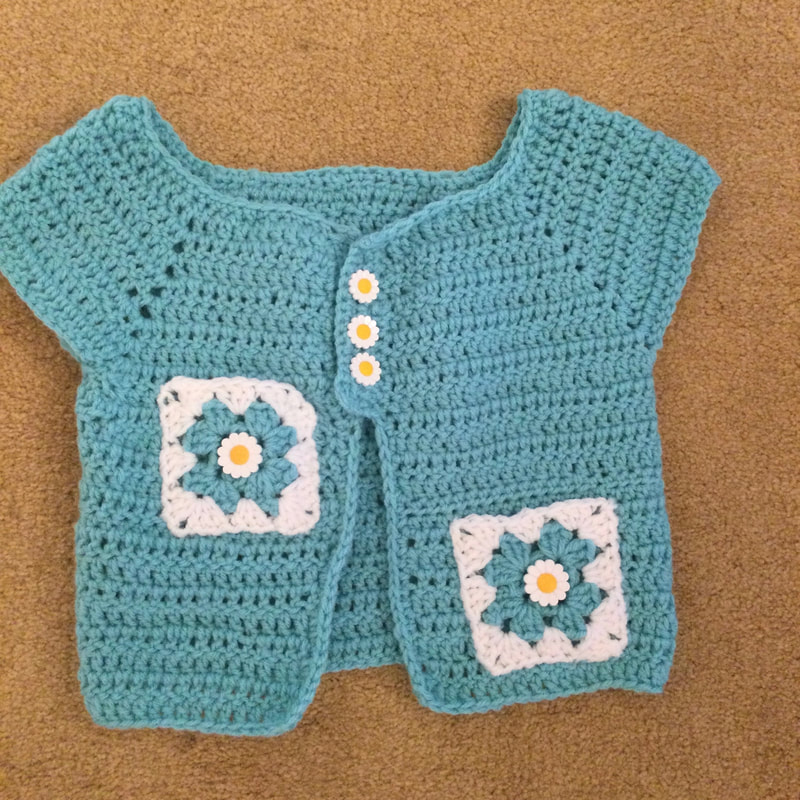
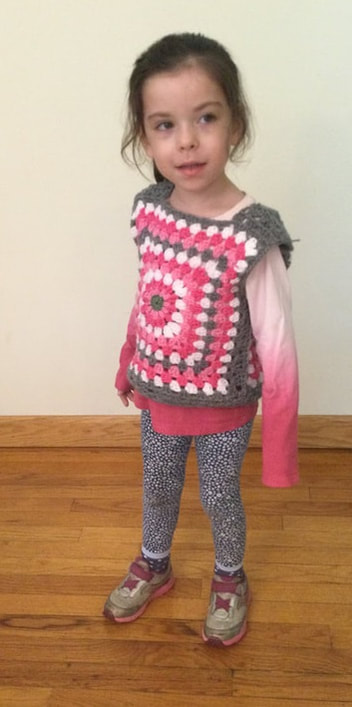
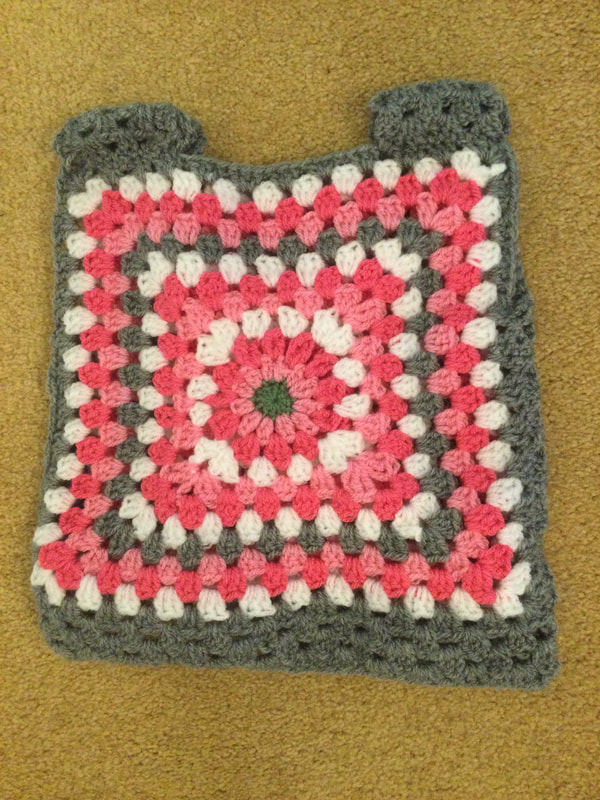
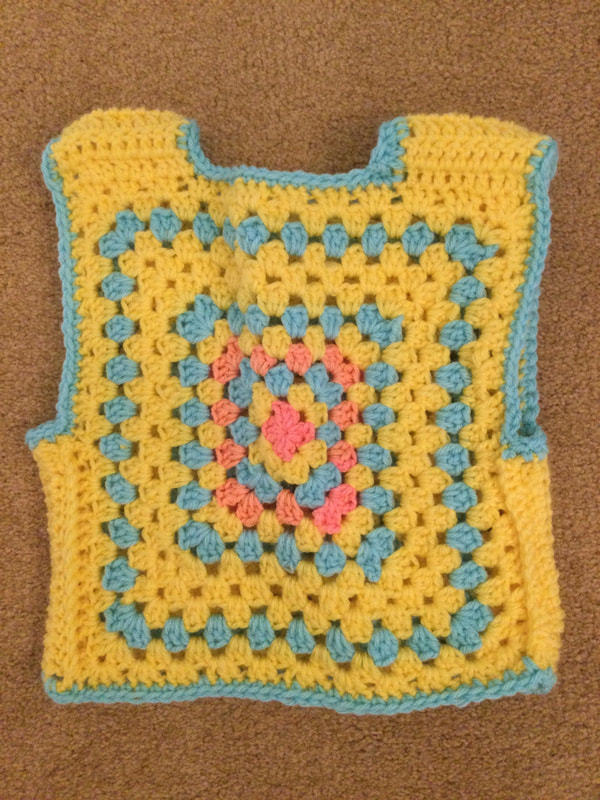
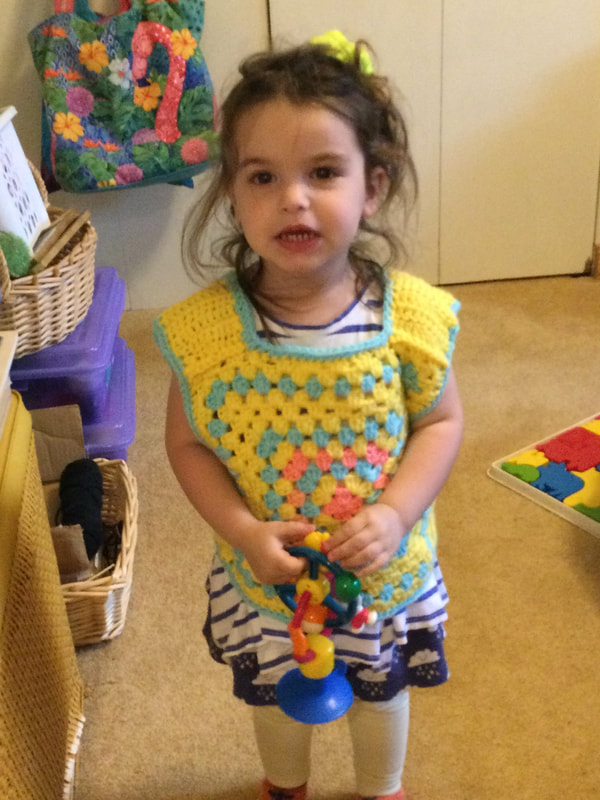
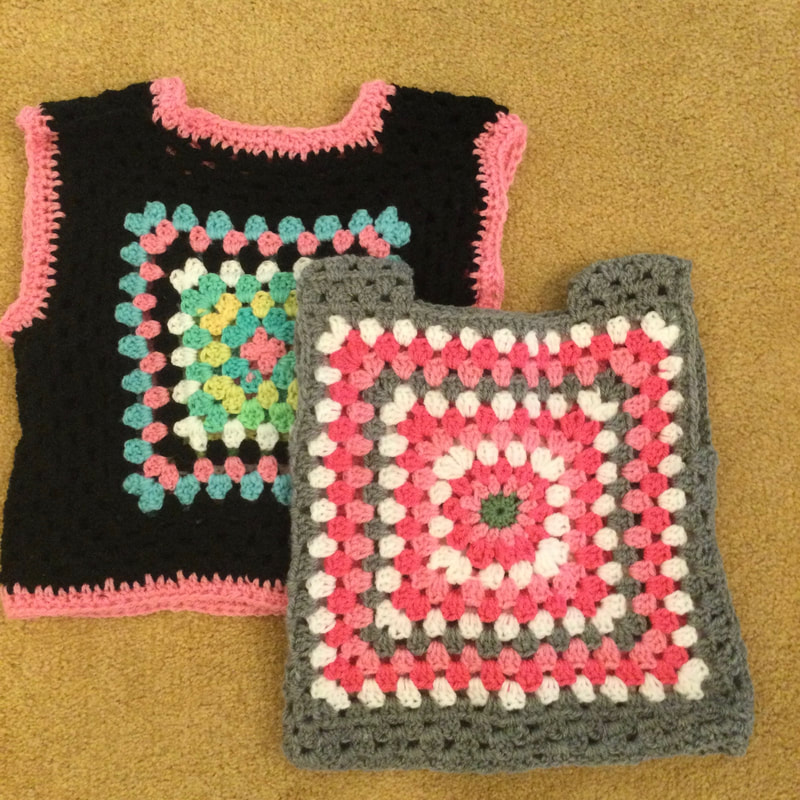
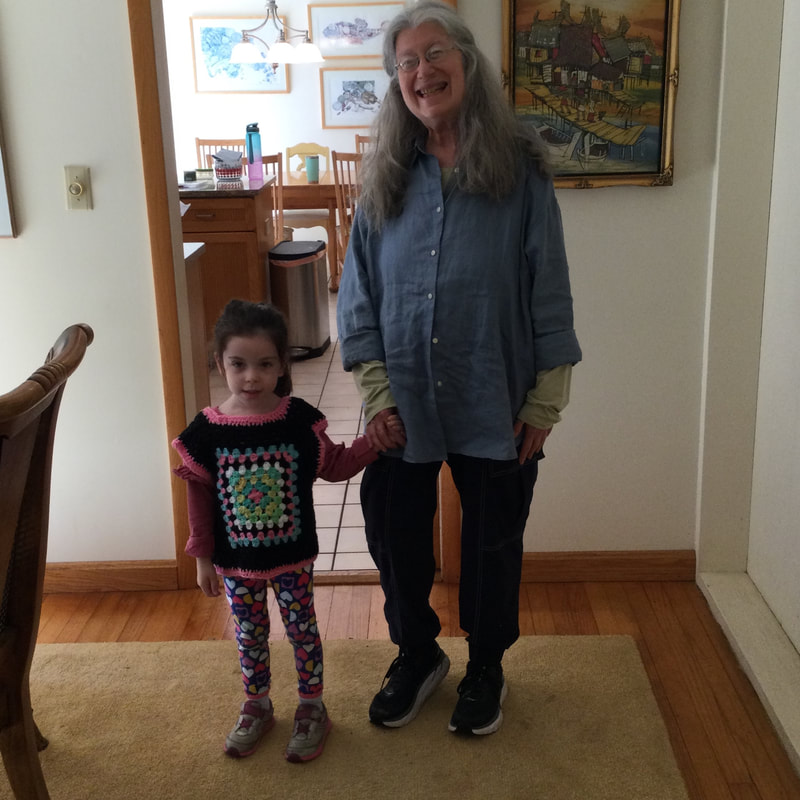
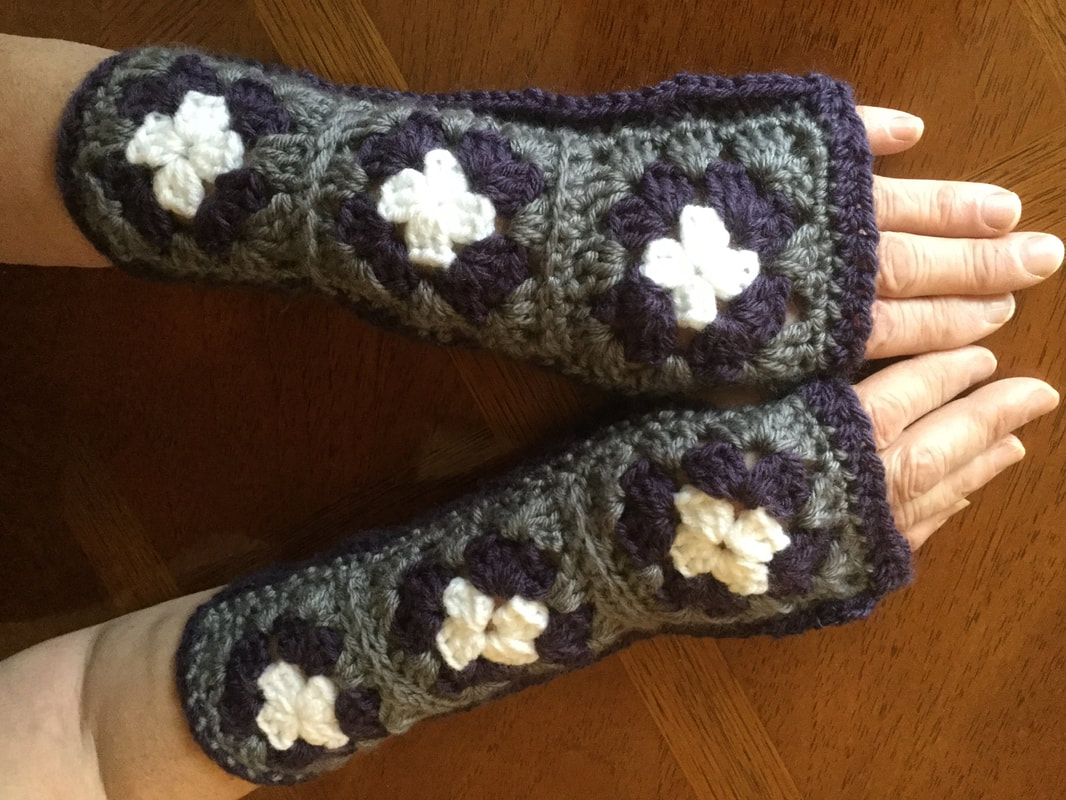
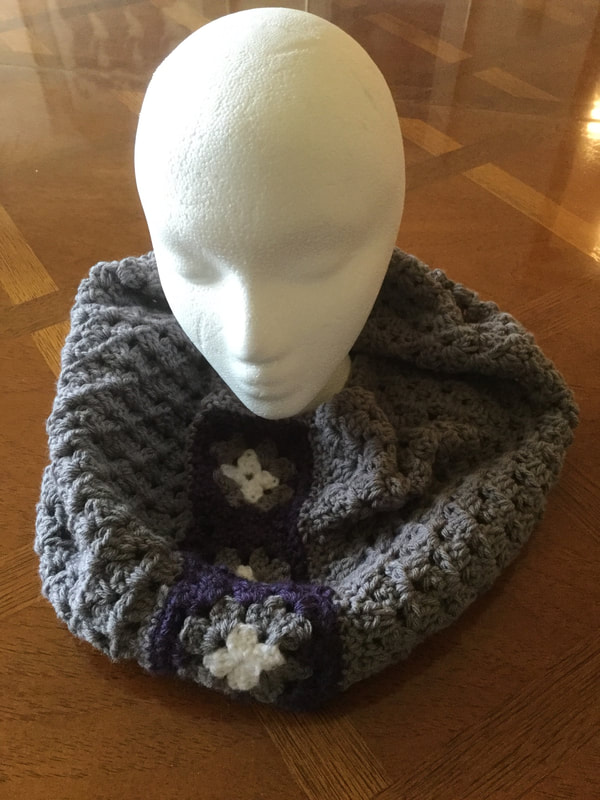
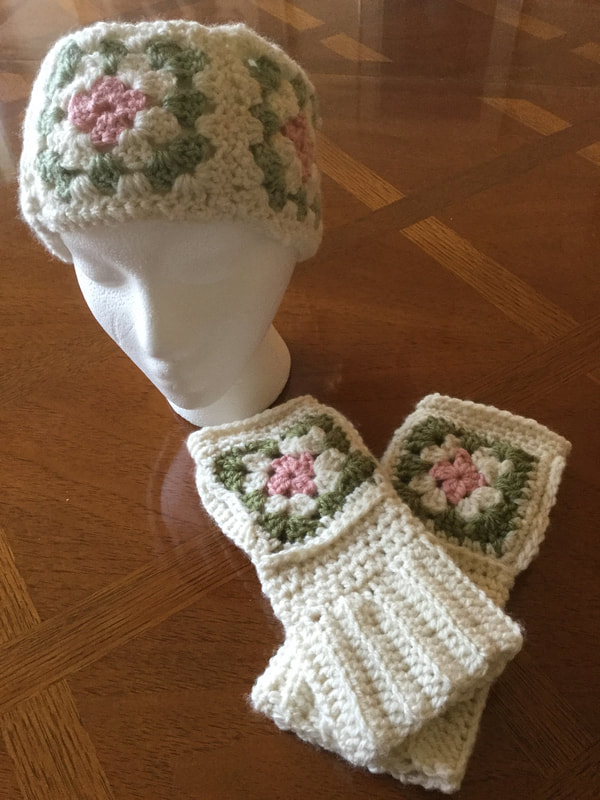
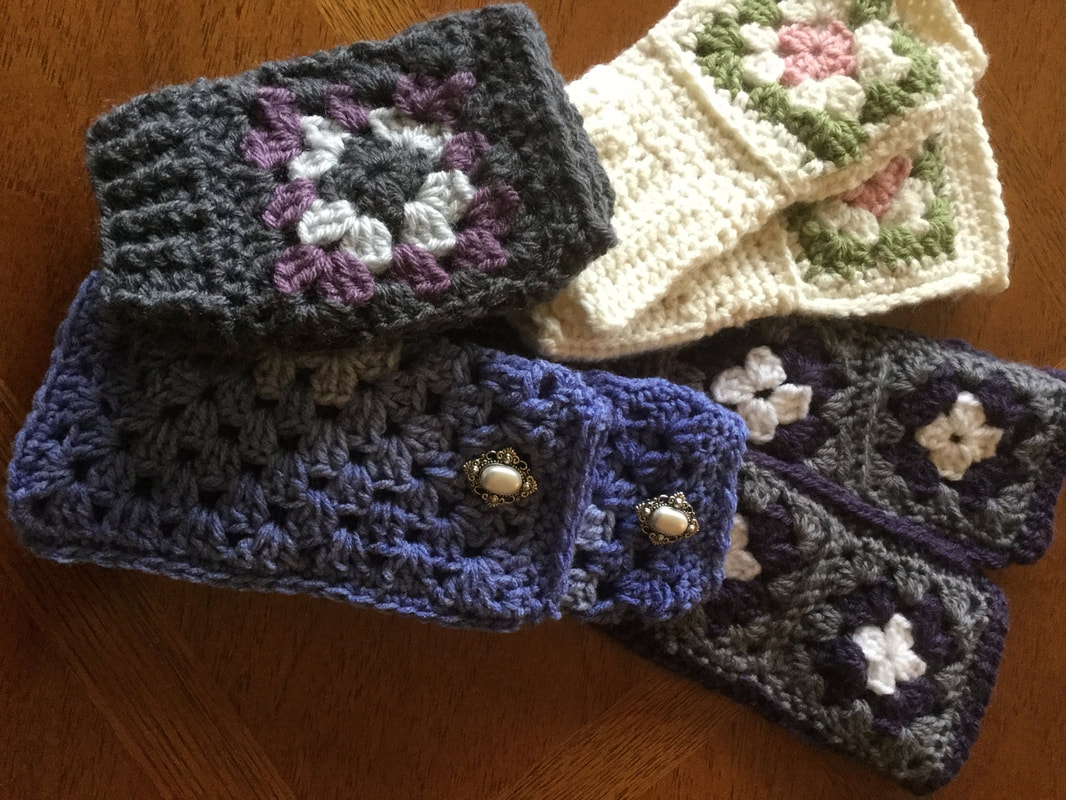
 While some folks consider Granny Squares quaint and old fashioned, they can actually make for a delightful and stylish fashion statements. In the past I have used Granny squares for cowls, fingerless gloves, hats, and headbands. This time I thought I would try my hand at sleeveless vests for my three granddaughters, aged 2 1/2. 4 1/2 and almost 6. The granny square can be an accent or form the body of an outfit. Color, line, and contrast create an artistic statement. Although many Granny Square Vests are composed entirely of small squares, I do not have the patience to work with many tiny pieces, join them together, and weave in the ends. Therefore I decided to accent only the bottom of this pastel pink tied vest with Granny Squares along the bottom the garment. By sewing a different pink button in the center of each square, I added detail and texture while using up 9 of my single leftover buttons from other projects. Vests are great for providing warmth without long sweater sleeves interfering with activity. I love the look of layered fashion. A granny Square can also be a pocket. The You Tube Video Crochet #4 How to Crochet A Round Yoke. enabled me to make a seamless one piece vest. This vest was made for my 4 1/2 year old granddaughter in blue with blue and white Granny Square pockets. I chose to place one of the pockets higher on one side and at the bottom on the left. My granddaughter selected the daisy buttons for the vest closing and the center of the squares .Although the yoke was made for a young girl, it is easy to make the vest smaller or larger by following the steps on the video. Her teachers enjoy seeing her come to school with her fanciful sweater vests. Squaring the Big Circle Tutorial from signalwithanowl.blogspot.com or from Pinterest mak=de it possible for meet tun a flower in a circle into a pieces that form the front and back of a 4 shade vest. I measured my granddaughter's chest, divided by 2 and 1/12 to get the correct size square for front and back.I made a shoulder piece by crocheting cluster stitches to 10 stitches to each side of the front piece. Then I crocheted the straps to the back piece. I marked the place where I wanted the armhole and added one row of cluster stitches to the body of each side of front and back. Then I matched the pieces and crocheted from the armhole to the bottom to attach on each side. To get a better proportion I added 3 rows of clusters all around at the bottom of the sweater. I picked up the gray in the Granny Squares for the straps, sides, and bottom rows. For my 2 /2 year old grand daughter, I wanted a vest that was bright and playful. The peach, yellow and aqua from my stash were just perfect. I was so glad that I had a vest ready for her because once she saw older sister pose, she wanted to wear a sweater in a picture, too. In this sweater, I made a square off armhole about halfway down the side of the sweater. Instead of crocheting clusters for the straps and sides,I made double crochet stitches. One row of aqua single crochet stitches at the neck, armholes, and bottom brought out all of the stitches in the Granny Square. What a darling model! As long as I have the correct measurement, I know that I can continue to crochet a garment from a photo of an adult sweater that I can modify for a child. As I scanned the internet I came across a photo of a Granny Square surrounded by a contrast in black. I knew that it would be just right for my four year old. i followed steps similar to those I use for some of my other vests. With the black extra rows, it was hard to tell where I made the additions, and everything fit together seamlessly. The finishing touch was two rows of HDC around the neckline, armholes, and bottoms, How dramatic. I have at least one more idea for a off-square mitered look, but I ran out of time and want to publish this article. I made a baby blanket with this base several years ago, and now I want try ti on a garment. This leaves me an idea for a future post.
How do you like use granny squares in creating fashion pieces. If you would like see some of my earlier creations, see: http://www.lilcreates.com/lillians-blog/what-can-you-do-with-a-granny-square
2 Comments
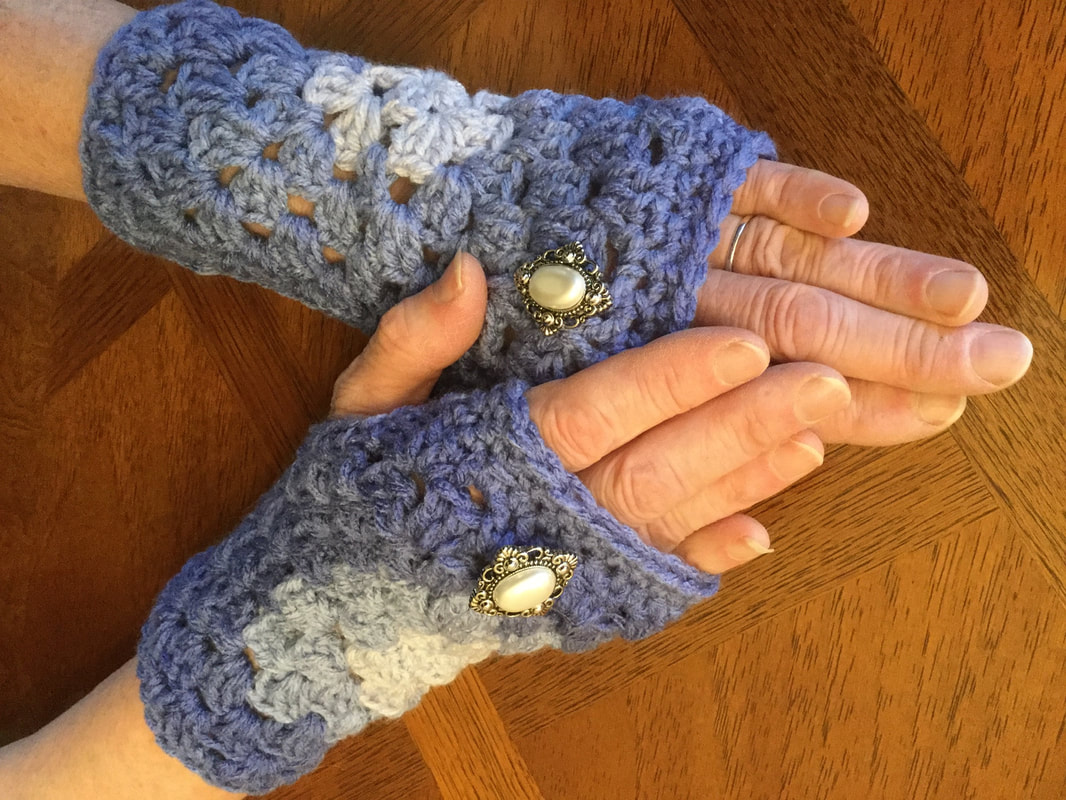
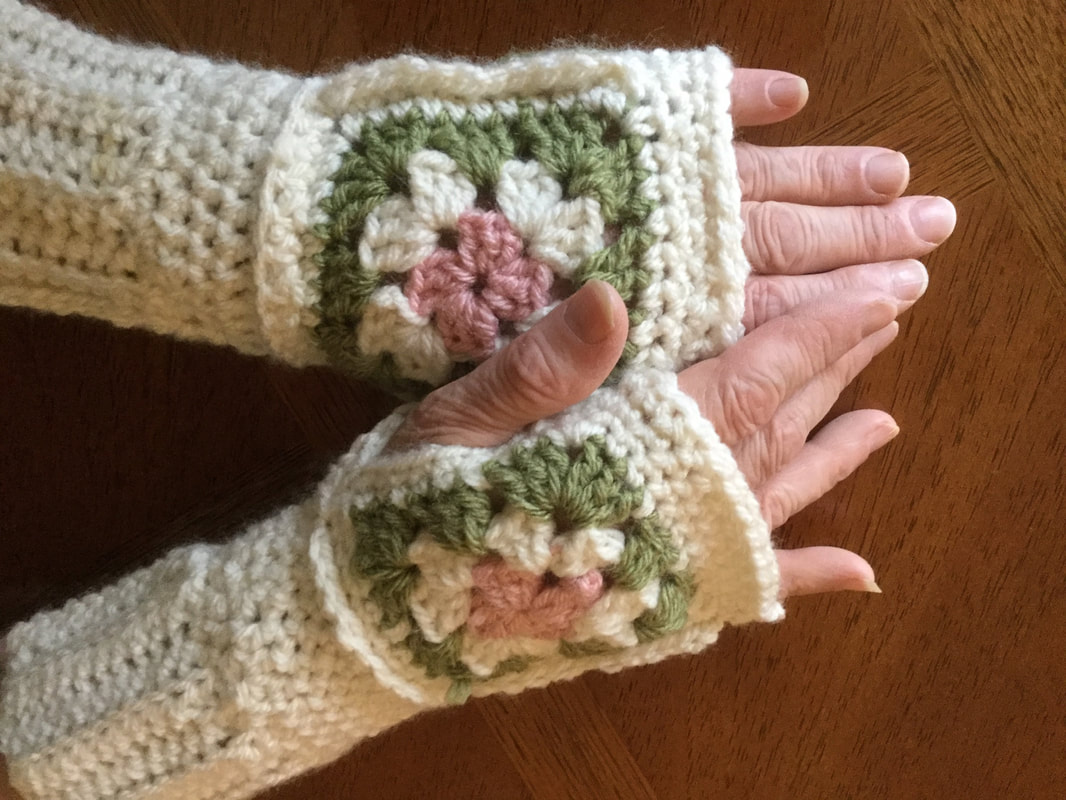
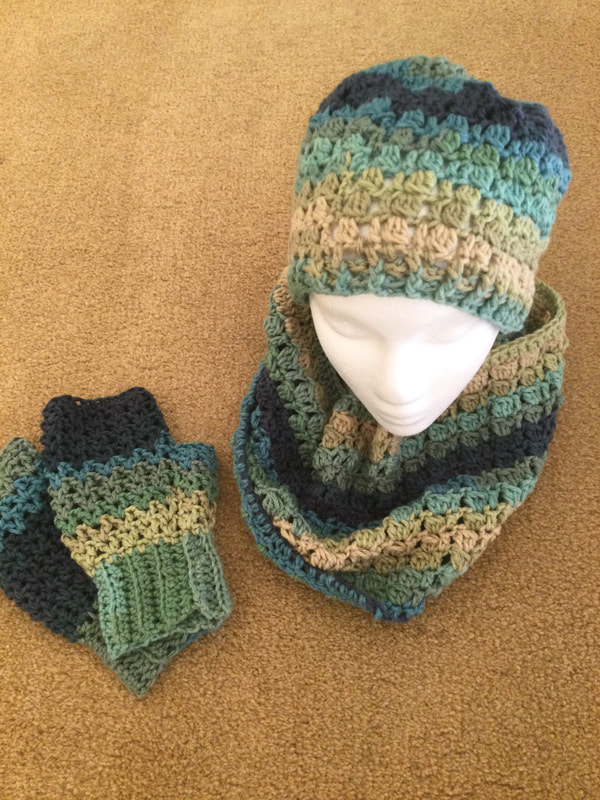
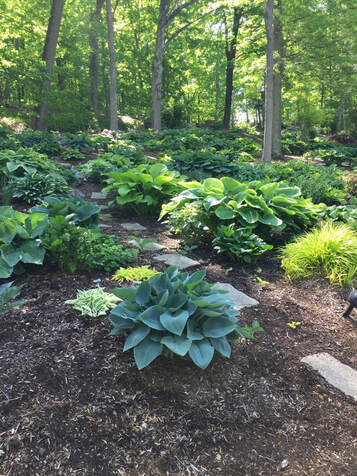
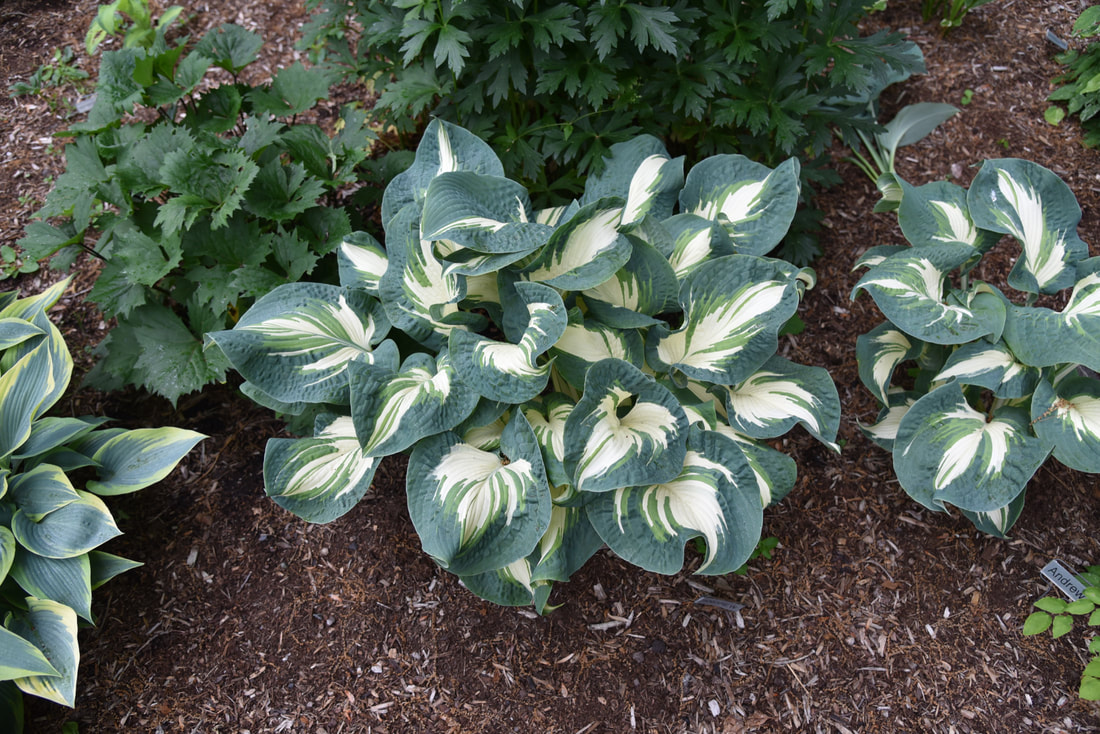
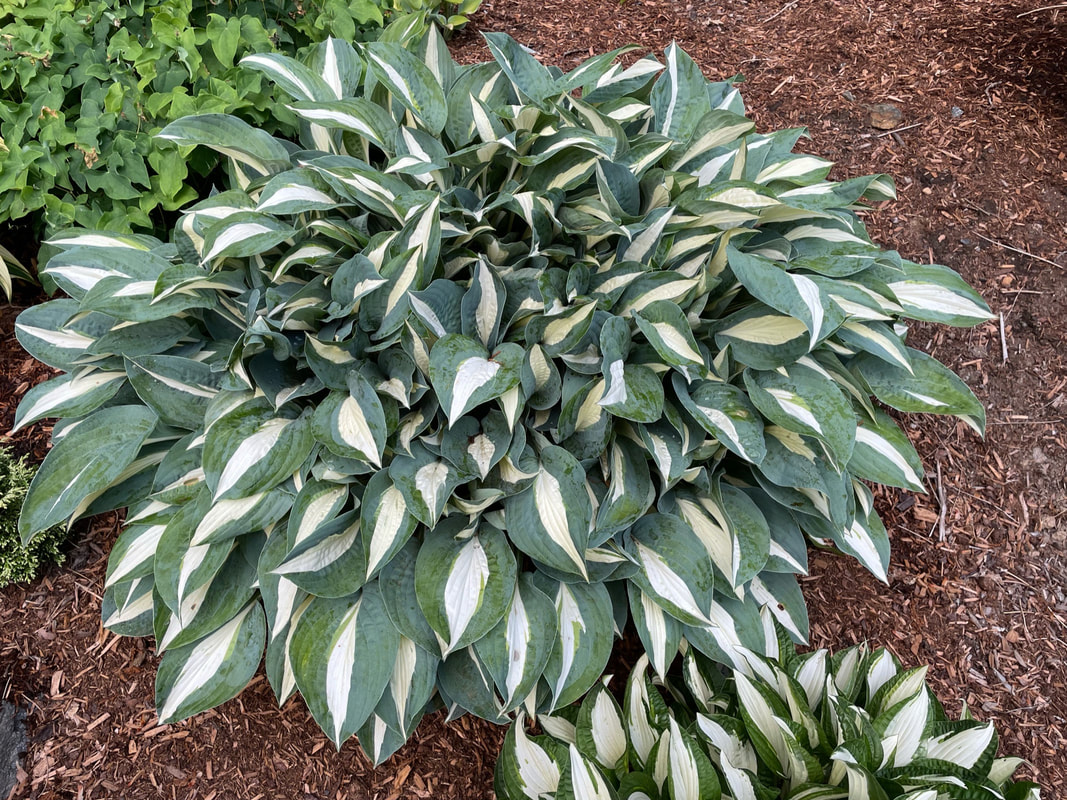
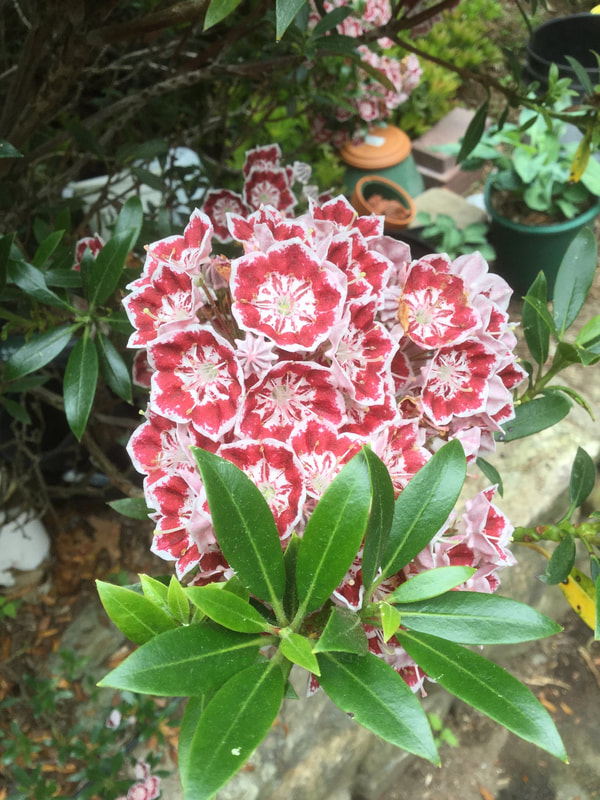
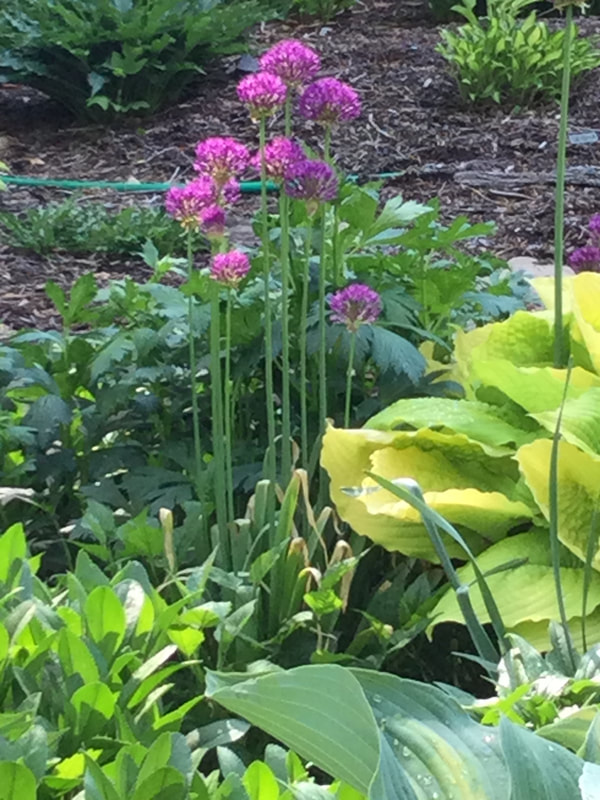
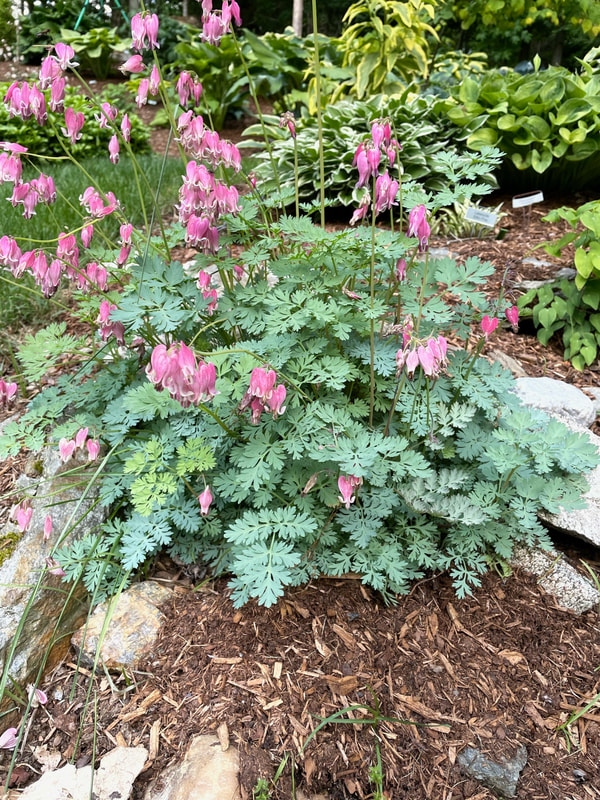
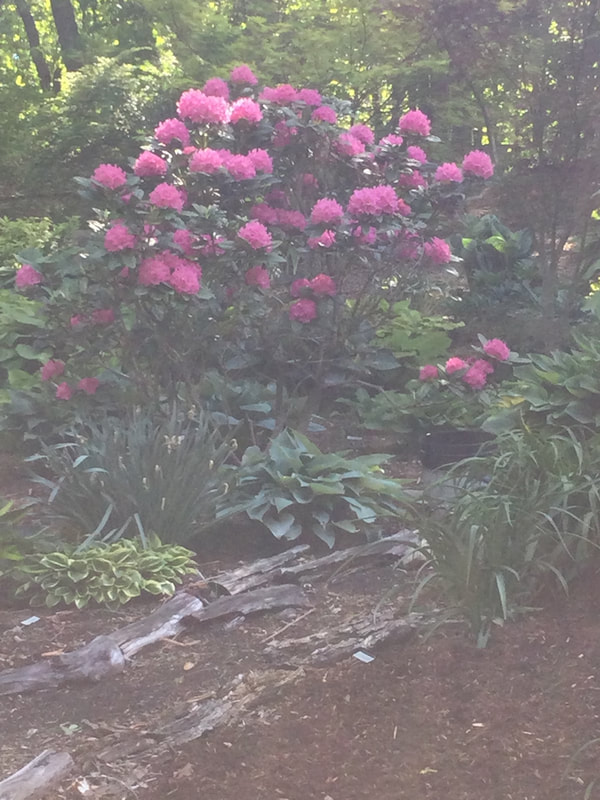
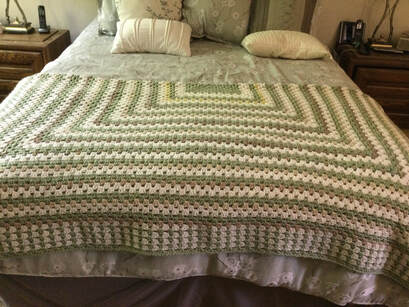
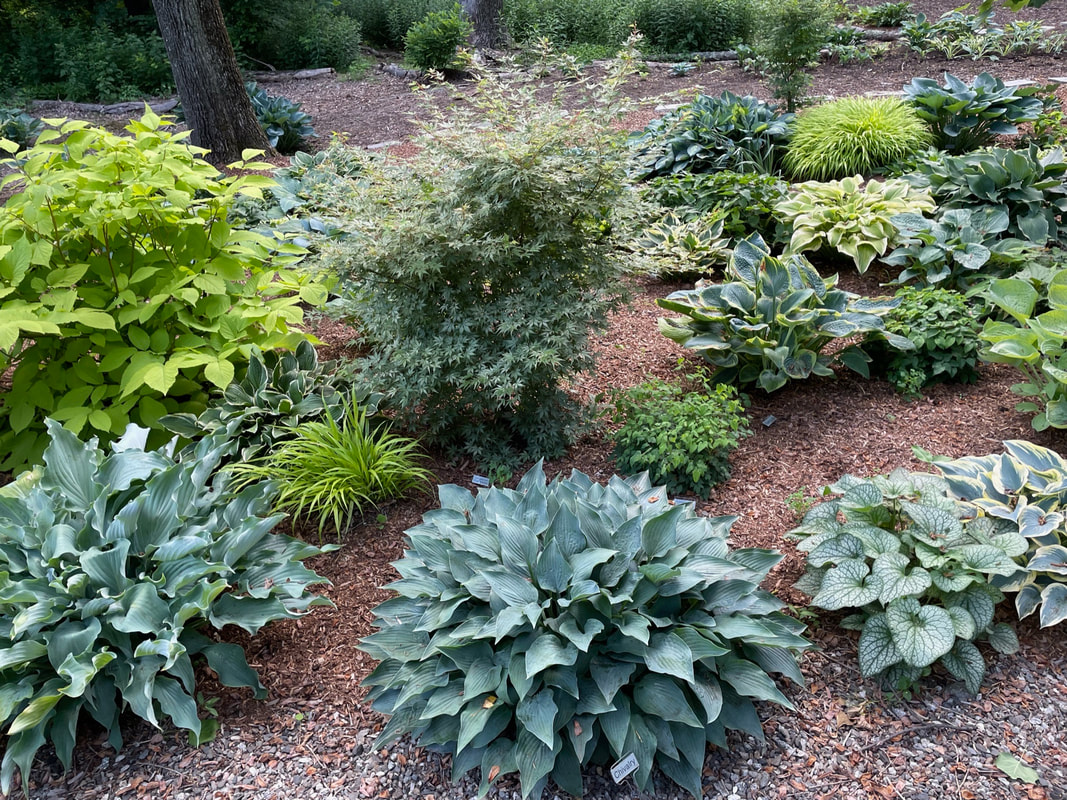
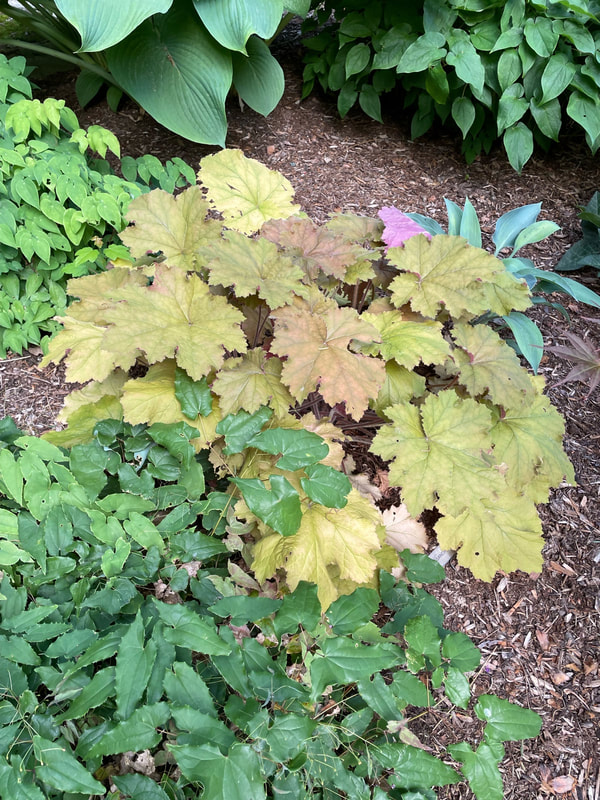
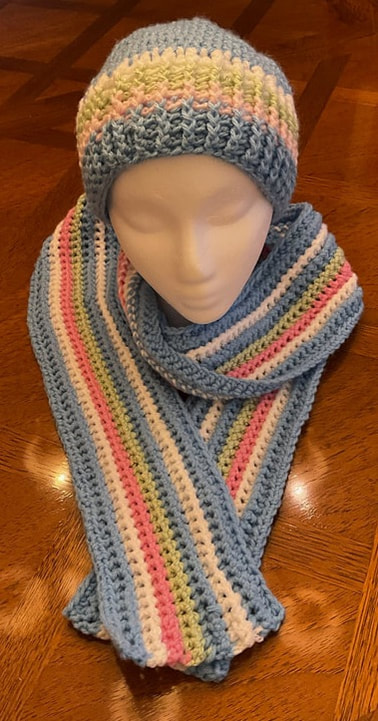
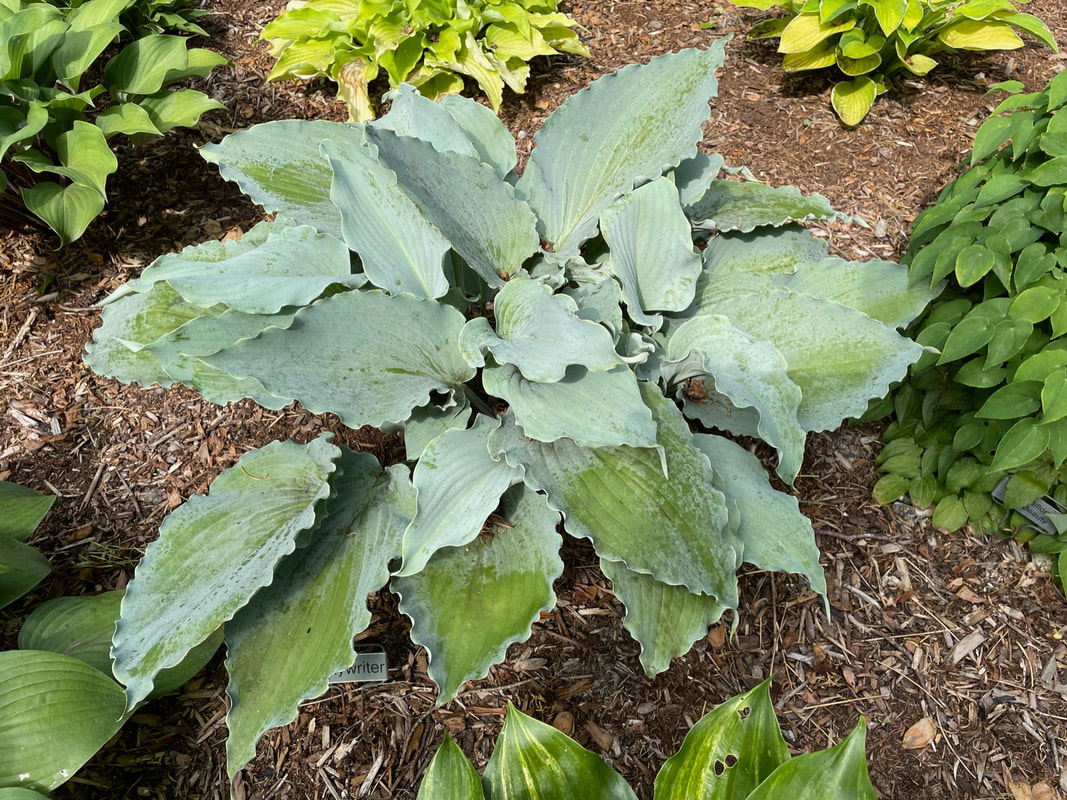
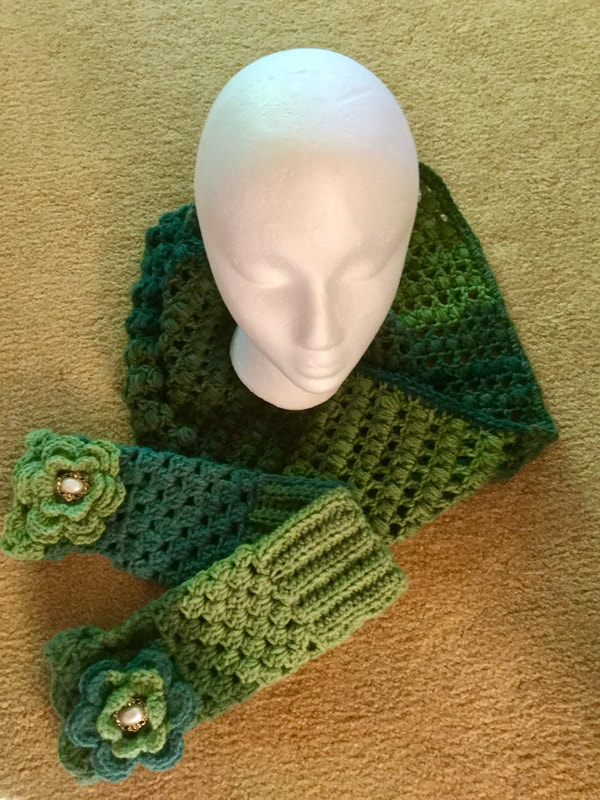
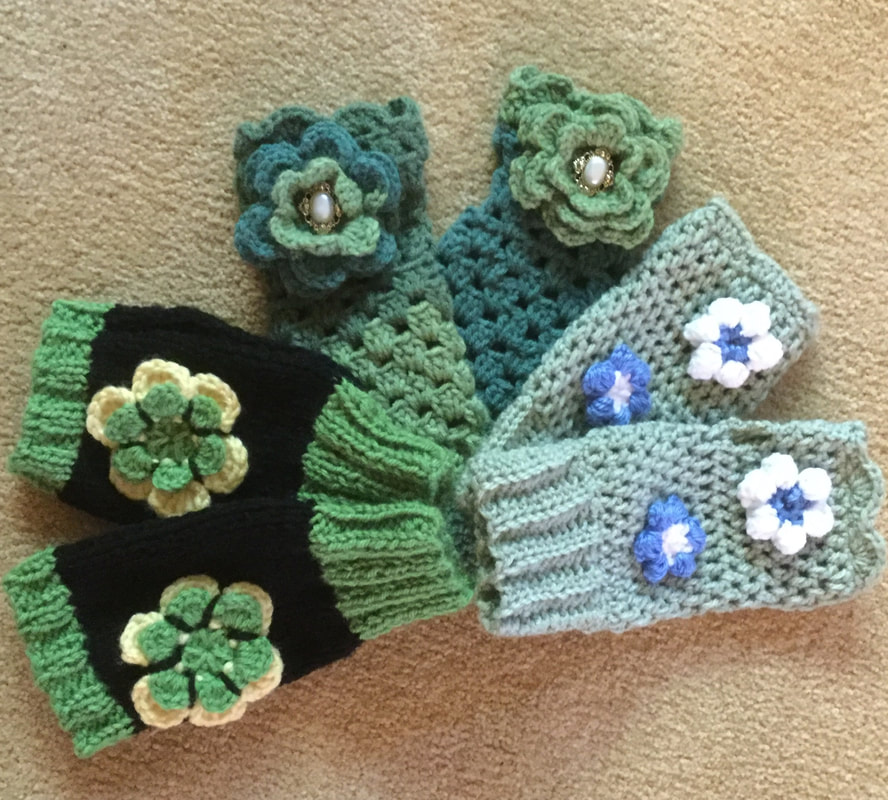
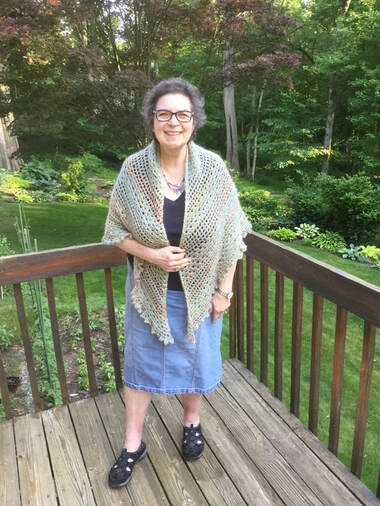
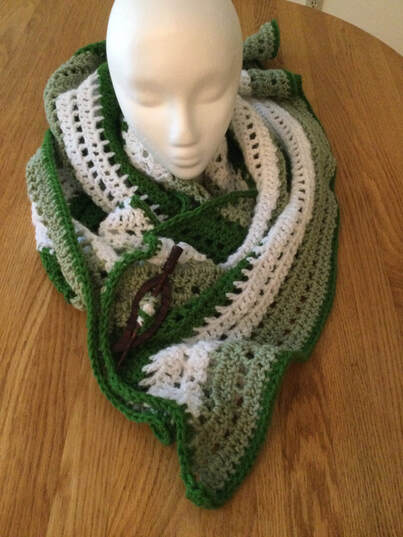 My husband calls himself a collector rather than a gardener, even though his garden is truly artistic. His primary focus is in Hostas. Throughout the garden you will find over 1400 different varieties that range in size from a few inches to over eight feet across. Coloring includes greens, blue greens, striped variegated, streaked, and color edged. My rendering of Ball of Ladders at jessieathome.com pays homage to the green and white displays. I was inspired by the hostas called Half n' Half and Simply Naked to crochet this triangle shawl. I like this pattern because their are only 2 rows in the repeat once you set up the initial rows. Although the pattern calls for the lighter yarn featured in Lion Brand Shawl in a Ball, I substituted worsted yarn in dark green sage green, and white with a J (6.00mm) hook. As you can see from the photos, these are just a few of the many hostas with this coloration. Since the pattern calls for a Double Crochet row (DC) followed by a mesh row, it is light enough to wear on a breezy, summer evening. 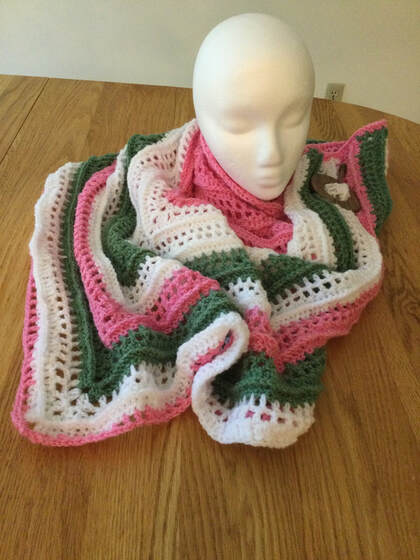 To bring in color to show contrast in the garden, Bert has interspersed such plants as Mountain Laurel, Allium, Rhododendrum, and Bleeding Heart. The white, pink, and green were perfect for Sunset Peaks - Crochet Shawl from mypoppet.com/au Instead of the Mandala #3 yarn, I substituted worsted white, pink, and green from my stash. The four line repeat calls for two rows of mesh, a single row of DC and a final row of Front Post Double Crochet (FPDC). The FPDC creates the ridge on the reverse side. The reverse side is actually the right side of the garment. 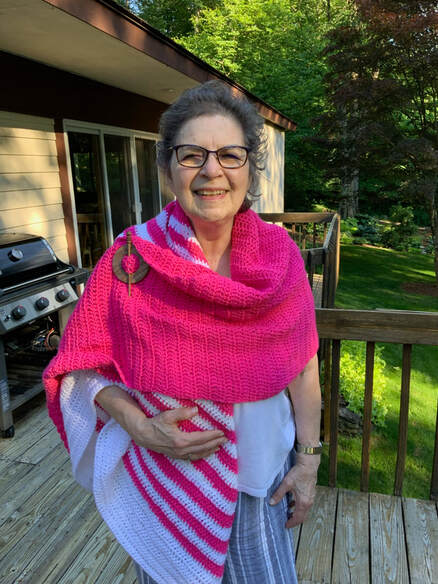 The third shawl was a draped asymmetrical striped shawl that was also inspired by the pink and white flowers in the garden. When I saw a photo in my internet explorations I decided to make my version in a diagram so that I could transform it into a shawl pattern. Both sides of the shawl were solid with a striped section in the middle. I started with a long chain on the bottom in white. As I made my way up the body of the shawl, I kept one side straight as a right angle and decreased on the other side until I came to a final point. The shawl drapes over the shoulder and is held in place with shawl pin. I do not have a pattern for this piece, as I was working it from diagram as I went along. I believe that I will make the beginning chain shorter if I repeat the design. The shawl has a pleasing drape, but it came out larger than I had anticipated. All three shawls were donated to Threads of Love to be distributed to cancer and other hospital patients at Yale New Haven Hospital, New Haven, Connecticut. 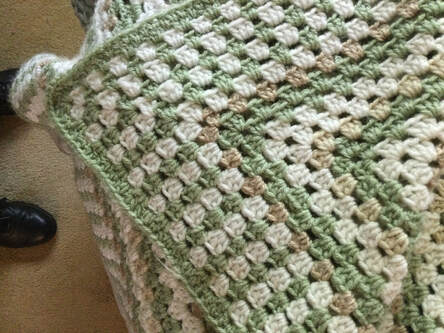 The fourth piece in my collection was a throw for my queensize bed. I had made throws for others, and now it was my turn. If I chose to lie down in the middle of the day, it did not want to undo the bed. The throw was just the right kind and size blanket to keep me warm and cozy. I chose sage, off white, and taupe to form the Expanded Granny Square blanket. The colors reminded me of the subtle coloration of many of the garden plants. After crocheting a beginning square, I alternated rows of color, two at a time. When I had reached almost the right size, I began the sage and off-white border that showed stripes that were perpendicular to th main body of the blanket. The effect was achieved by crocheting one row of green, changing to off-white and then back to green again. My border was seven rows. When I was done, I finished off the piece with a single row of HDC sage. 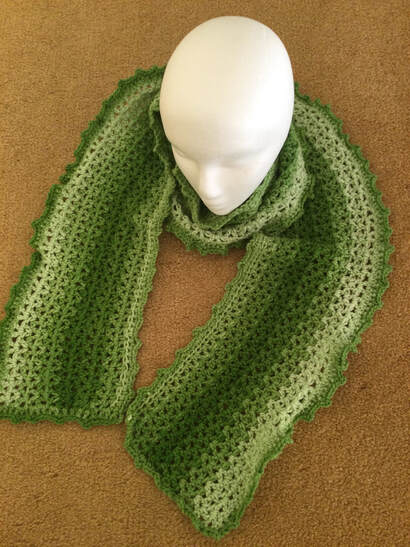 When I had completed the three shawls and the bed throw, I still wasn't satisfied with the pieces that I had picked to showcase the garden. A glowing green hosta called Appletini caught my eye on our garden walks. Therefore, I returned to my large craft store in search of a skein that would highlight the colors in this plant. Green Apple Ombre from Red Heart fit the bill. Since many of the organizations that I donate to ask for scarves, I decided to get a head start on my autumn shipment. I like working with the V-stitch, but I decided to change the look a bit. Usually I make a chain of about 30 to 40 stitches and work my way up the scarf until I am satisfied with the length or until I run out of yarn. This time I started to crochet on the long side. To get length of about 72 inches that would make for a double wrap around, I needed about 200 stitches. ThenI did a HDC stitch along the chain to make the base stable. In the next row, I chained 4 and skipped a stitch. In the next stitch, I crocheted a V stitch (DC-ch 1-DC) in the same stitch. I skipped a stitch and make a V as I continued across to the last 2 stitches. I skipped a stitch and made a sing DC. I chained 3 and turned my work. In the next row I continued to stack spaces and V stitches and continued untilI had a total of 12 rows. Then I crocheted a final row of HDC before I made the picot border. My picot consisted of three chains separated by four single crochet (sc). 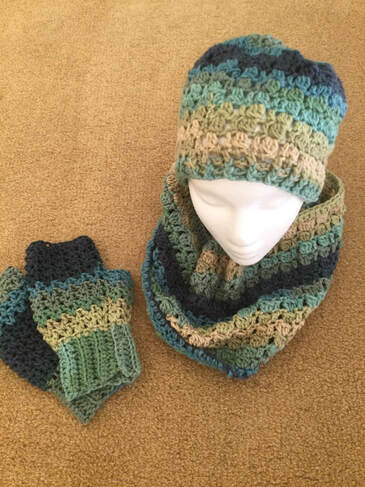 Some of my husband's favorite hostas have a dark green-blue tone. The Red Heart Super Saver Sutherland Stripes displayed many of these shades. The Mini Clusters Chemo Cap that I crocheted for my article, Crocheting Blue for HatNotHate was just the vehicle for for this yarn. The clusters looked liked leaves, and the yarn captured many of the garden shades, including the dark green and the green blue of Skywriter. With 2 skeins of 236 yards I was able to make a hat, a cowl, and a pair of fingerless gloves. For the gloves I combined a cuff with HDC on the BLO and the body of the hand with a V stitch. I am planing a future article on fingerless gloves that will include the patterns for a few of my originals. For past garden inspirations, see: http://www.lilcreates.com/lillians-blog/knitting-and-crochetinbg-a-view-from-the-gardens http://www.lilcreates.com/lillians-blog/the-garden-is-my-muse-crocheting-a-lacy-shawl Do scenes from your environment inspire your crochet? Take photos as you enjoy your own muse scenery. For some like me, it is the greenery of the garden. For others it is the sea shore, the mountains, or the desert. I would love see your pieces and your inspirations. Please join me on my stitching journey.
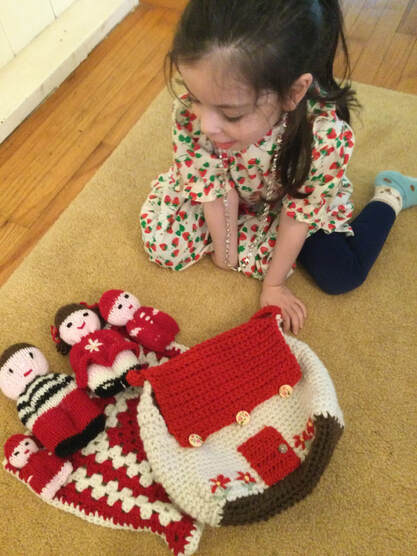
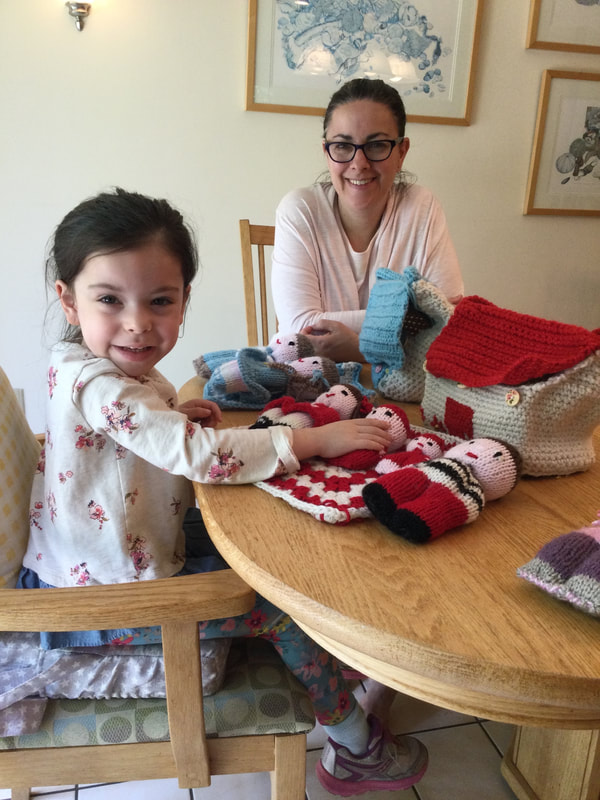
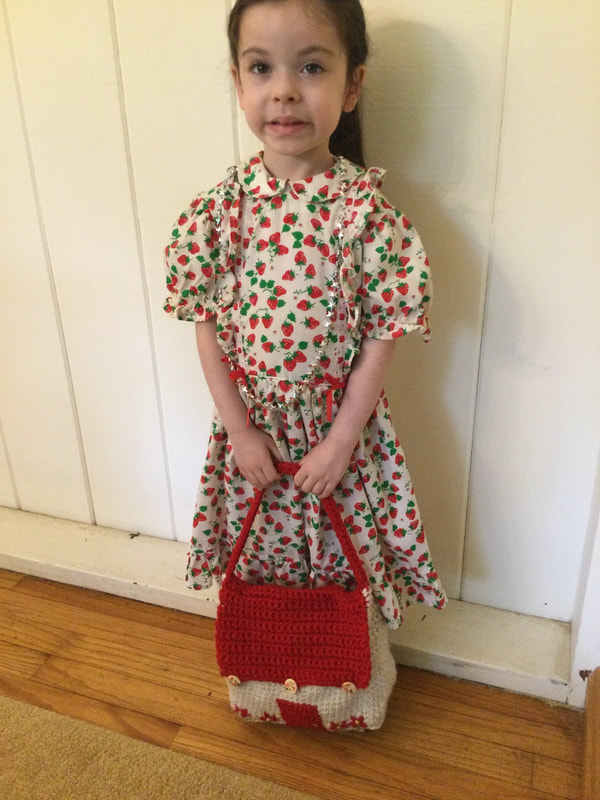
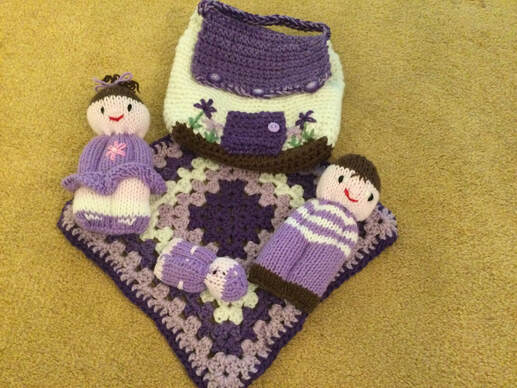
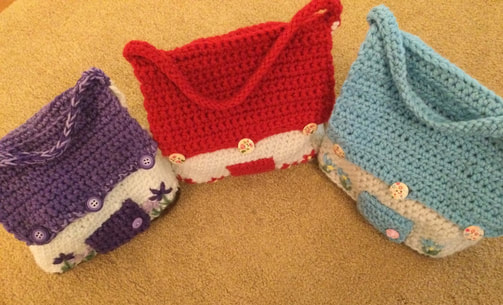
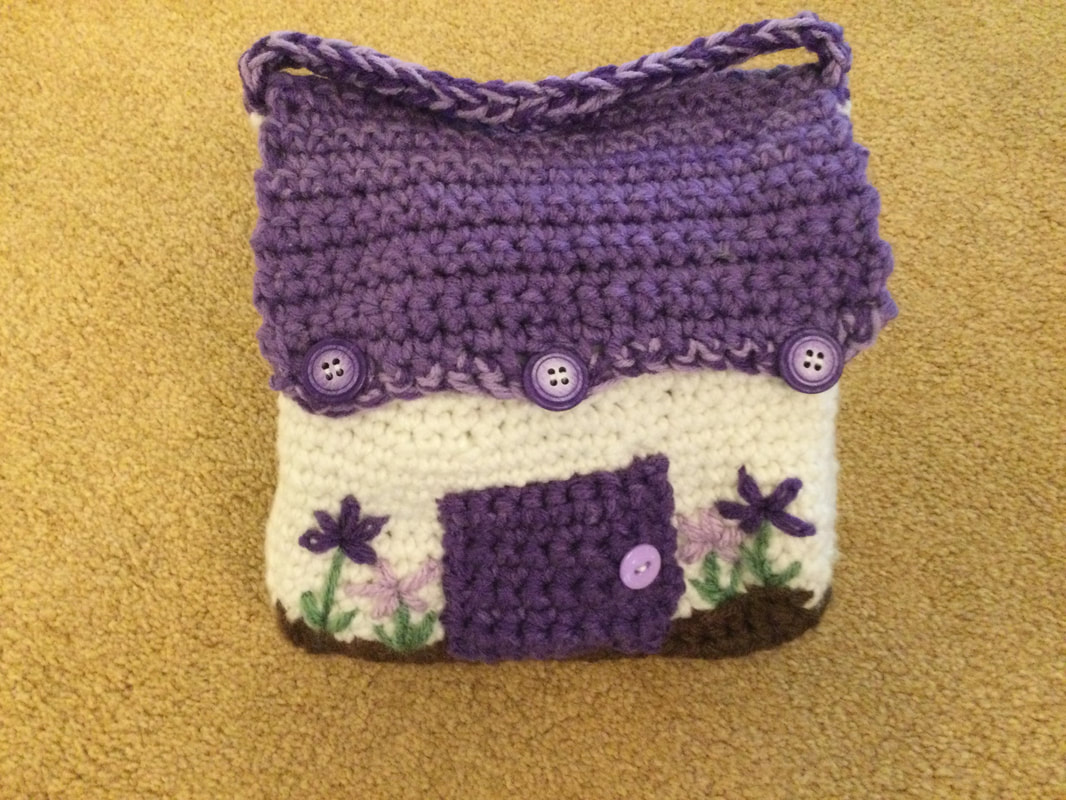
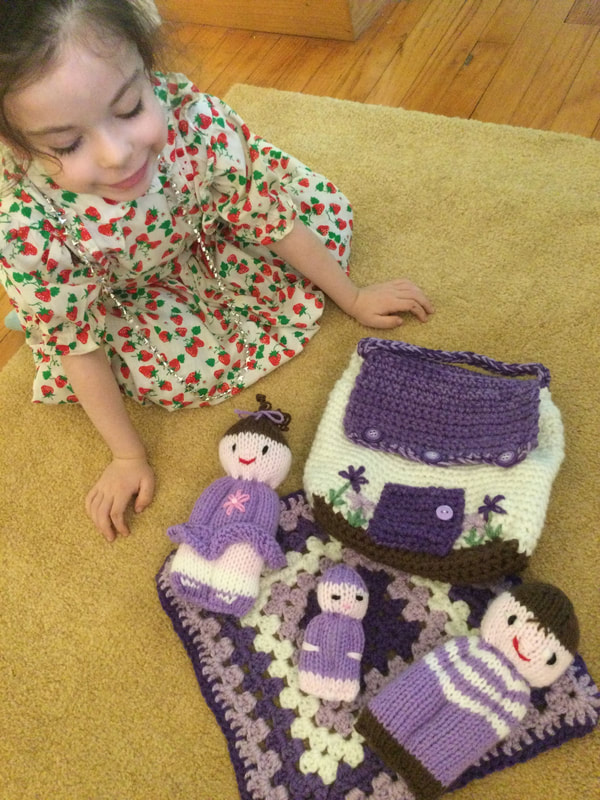
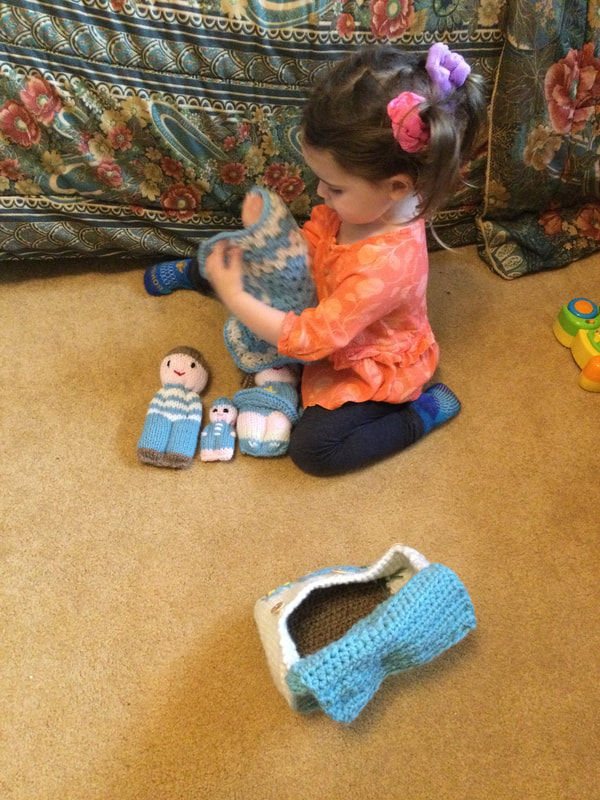
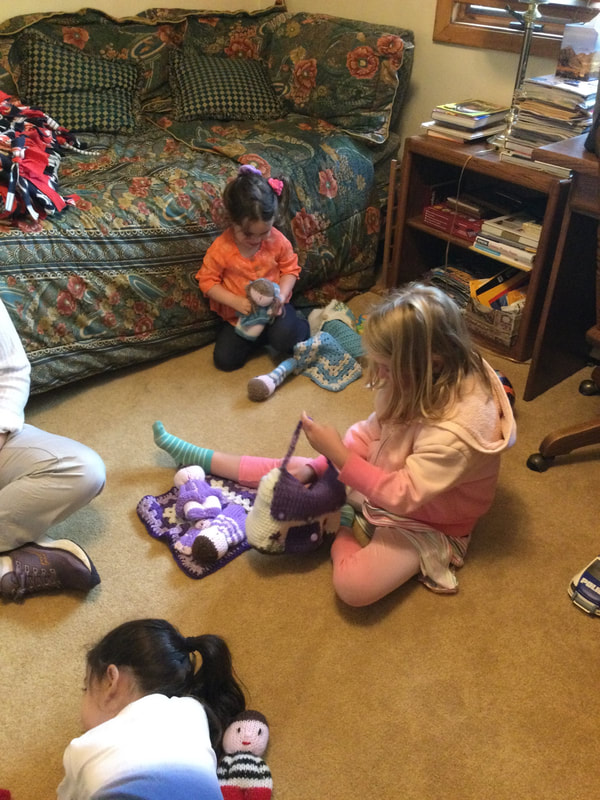
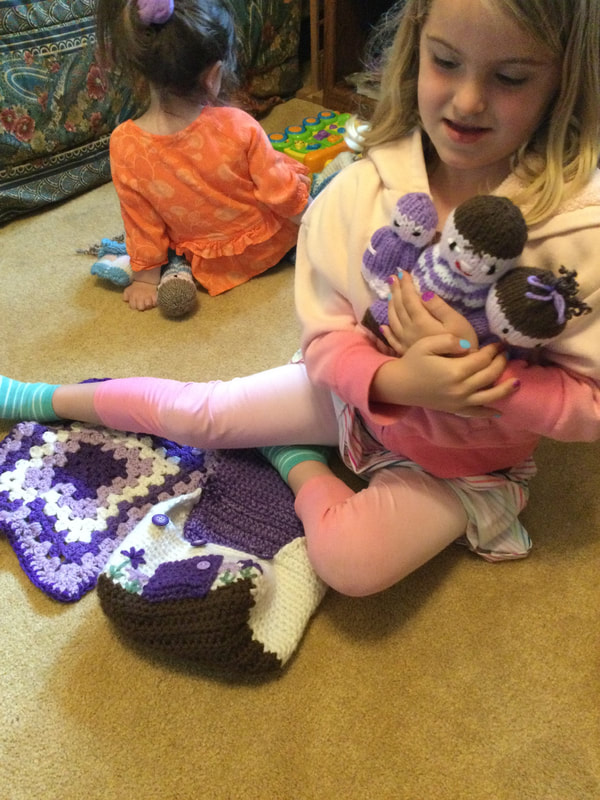
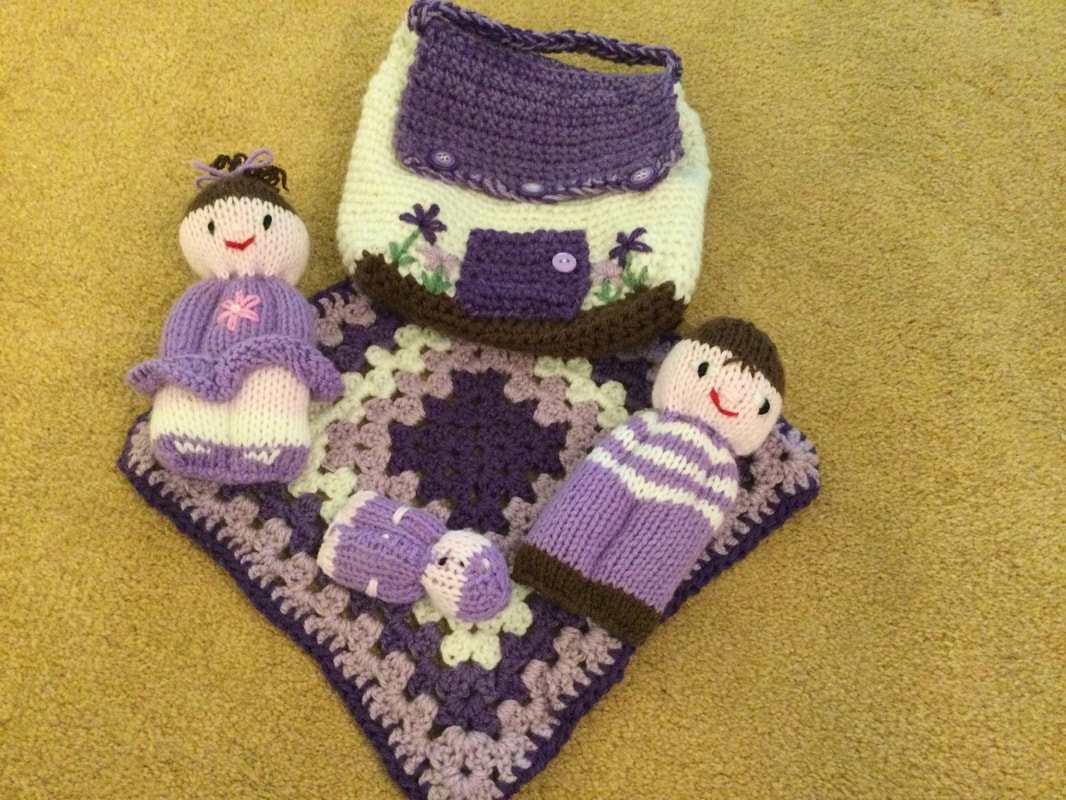
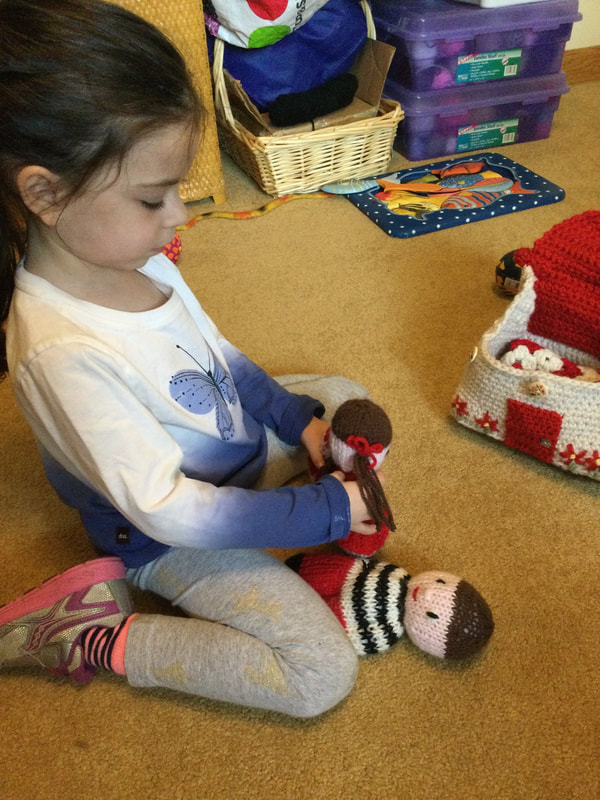
My crocheted doll house purses are truly a gift from the heart. From the time I first saw knitted and other crocheted pieces, I knew I had to create my own crocheted versions. I started with the house with the red roof that was crocheted to house a comfort doll family with coordinated red clothes. When my four year old granddaughter saw the display, her mouth opened awe and glee. "Is this for me? she inquired. Indeed, it was. However, I knew I had to create 2 more for her New York cousins. Each doll house purse takes about 14 hours to create with all of the decorations. This was going to be a big project. I said that she could play with the pieces that day since it was going to be a while before she could take her set home. She undertstood, and had great time with creative play that afternoon. Okay, this was a great idea, but I did not have a pattern. After the first house, my goal was to crochet two additional purses. One girl would get a doll house purse with a blue roof to match that comfort doll family. Her sister would get a doll house purse with a purple roof to match her family as well.. For each girl I also added an extended Granny Square for a blanket or carpet. Again all of the colors matched the dolls and the doll houses. I was truly winging it with the first doll house purse. I made a drawing to set out my measurements. Then I crocheted until my pieces matched the measurements of the diagram. To achieve the stiffness required to give the purse structure, I used 2 strands of worsted weight yarn (#4) with a J hook. I took notes as I went along so that I could replicate the pieces. First came the base at 8 inches by 5 inches in brown. I held both strands together as I crocheted in Half Double Crochet (HD). I started with a chain of 24 so that I would have 23 stitches when I began with the second chain from the hook. Next, I built up the sides in white or off white. By the time I got to the third purse (with one do over), I calculated that I wanted 23 stitches on the long sides and 13 stitches on the short sides. this meant I had to make 2 stitches in each corner. I found that I liked a Single Crochet (SC) for the sides. In the first model, I joined the rows with a slip stitch, but it became harder to align. Therefore, I worked in a spiral without a join for the remaining houses. I marked the beginning of the rows so that I had even sides. I crocheted 10 or 11 rows before started the gables. To make the gables on the short sides I started (Row 1) with a ch1 and a SC in the same stitch. Then I crocheted 12 more SC for a total of 13 stitches. In the next row (/Row 2) I decreased with a SC2tog on both sides so that the edges would be even (11 stitches). In Row3, I crocheted the same number of stitches as Row 2 (11). In the following rows I decreased on the even rows and crocheted the same number on the odd rows. I continued to complete the gable with one stitch remaining. I fastened off and cut the yarn.then I attached the yarn to the other short side to make the second gable. The colored roof was made to be slightly larger than the gables so that there would be a bit of overhang. I chained 24 stitches and crocheted a HDC in the second chain from the hook. After 10 rows I crocheted an extra row with HDC form the Back Loop Only (BLO). to make a ridge for the top of the roof. Then I crocheted an additional 10 rows for the other side of the roof. I fastened off and cut the yarn tail that would I would weave in with the rest of the tails. It is important to note that I only attached one half of the roof to one side of the gable and adjoining side of the door house purse. In that way the girls would be able to open the purse to insert the doll family and blanket. Before I attached the roof, I crocheted the strap with a Half Double Crochet Foundation Stitch (HDCF). Then I added an additional row of HDC. I sewed the strap under the peak of the roof on both sides.Then I proceeded to sew the roof in place, starting at the peak row and down the first gable, across the length of the house and up the second gable to the peak. Since I wanted to add buttons and button holes to close the purse cesucrely, I needed to add an additional row of SC to both long sides of the house. On the loose side, I would make 3 buttonholes, evenly distributed along the side of roof. I started with 2 SC, CH2, skip 3, SC5, CH2, skip 3, SC5, ch2, skip 3,SC2. On the other secured side, I simply SC across. To complete the doll house purse, I sewed the buttons directly under the button holes near the top row of these of the house. Then I crocheted a small door and attached a buttoner a handle.The door was purely for decoration and does not open Embroidered flowerswerejust the right touch. The coordinating Comfort Doll families that would make for hours of creative play were placed inside the houses and the buttons were closed. I eagerly awaited family gathering so that each girl could receive her own house and family. The Comfort Dolls were displayed in earlier LilCreates articles. Here are the links to get that information so that you can knit or crochet your own Comfort Doll families: http:/www./lilcreates.com/lillians-blog/comfort-dolls-made-with-love http://www.lilcreates.com/lillians-blog/comfort-dolls-a-new-look http:/www.lilcreates.com/lillians-blog/crocheters-can-make-comfort-dolls-too Needless to say, the girls were overjoyed with their Crocheted Doll House Purses another ComfortDoll families. They were all together for the Memorial Day cookout. They displayed their houses and matching families and engaged to creative play before returning home with their gifts. I was rewarded for the many hours of constructing the doll purses and doll families with smiles, hugs,and kisses. Friends and members of my craft group have asked met make purses so that they could purchase them for the special children in their lives, but I had to say that I am finished for now. I am sure that I can cut down on the construction time with more practice. However now I feel closure and am eager to start on new projects. We recently went on an fair garden tour, and I took many photos of the delightful creations. Perhaps their is a Crocheted Fairy House in my future. I hope that you enjoyed my general guidelines for the Crocheted Doll House Purses. I can't really call them a pattern yet as there may be steps that I have left out. If I do formalize the guidelines, I will include diagrams, and photos. My stitching journey continues. I welcome you to join me. If you do try your own version of my Crocheted Doll House Purse, I would love to see pictures of your work. Please add your reflections and feedback to the comments.
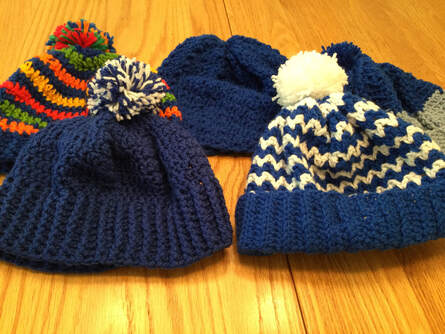
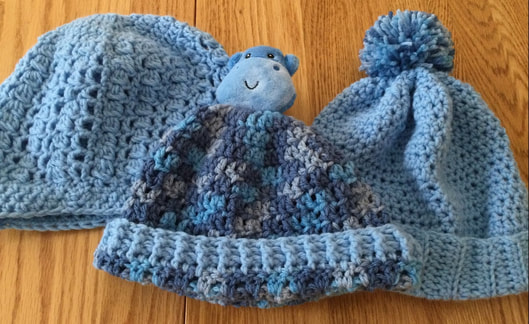
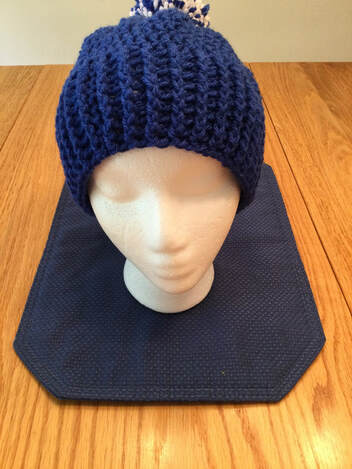
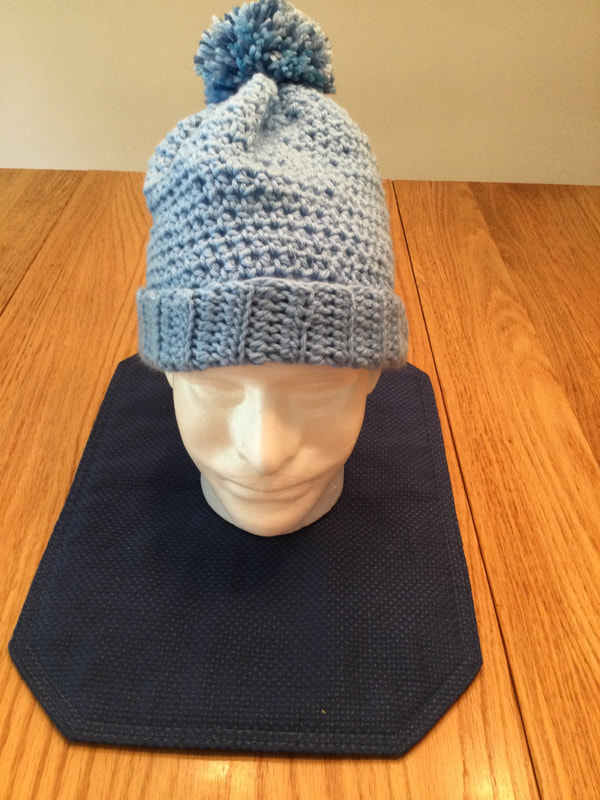
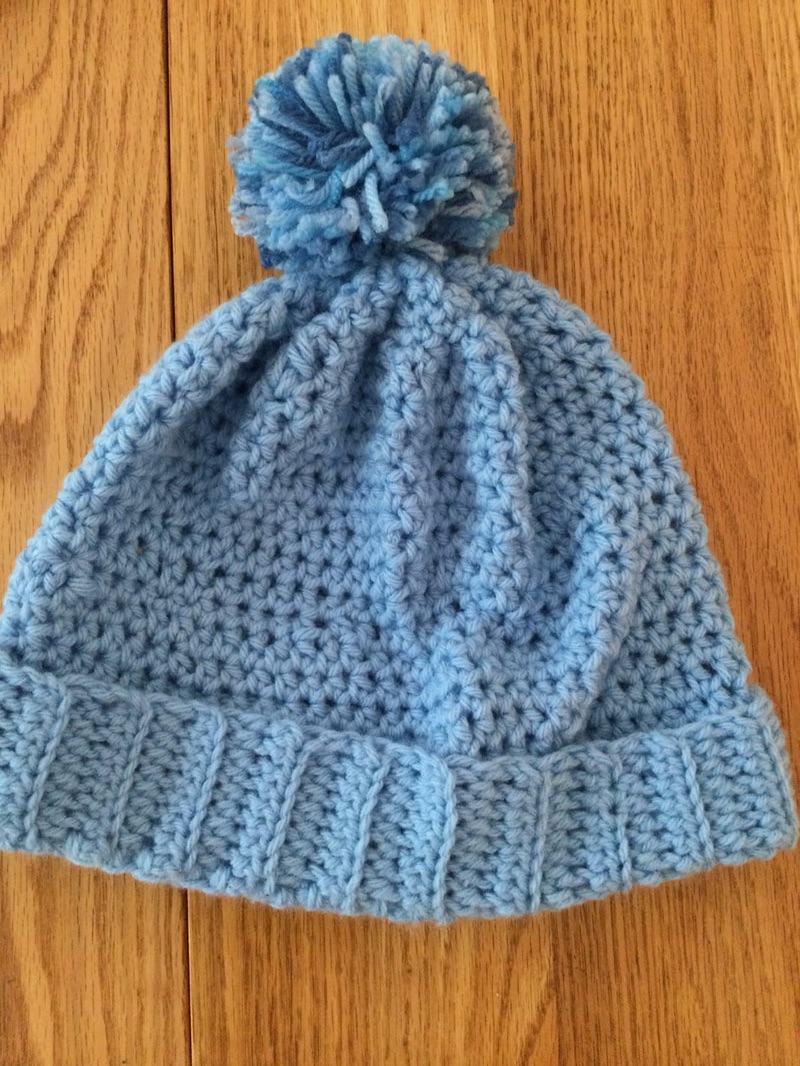
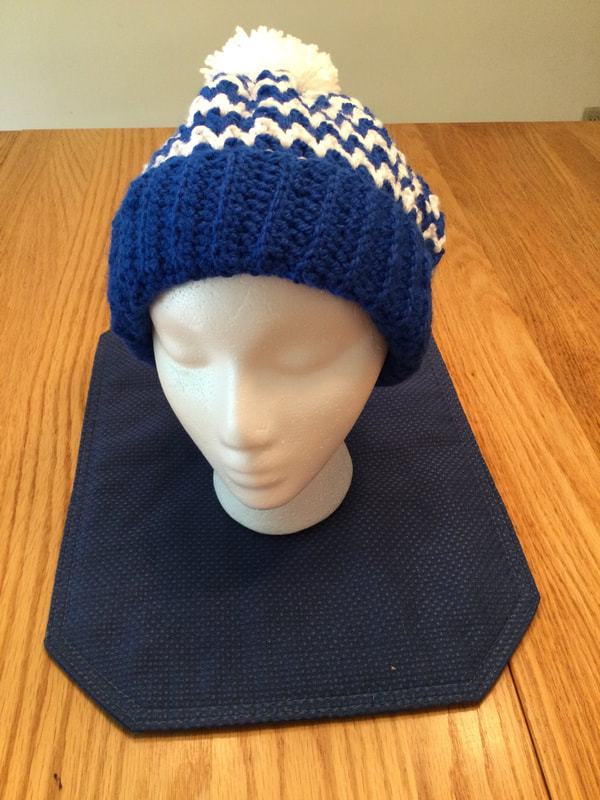
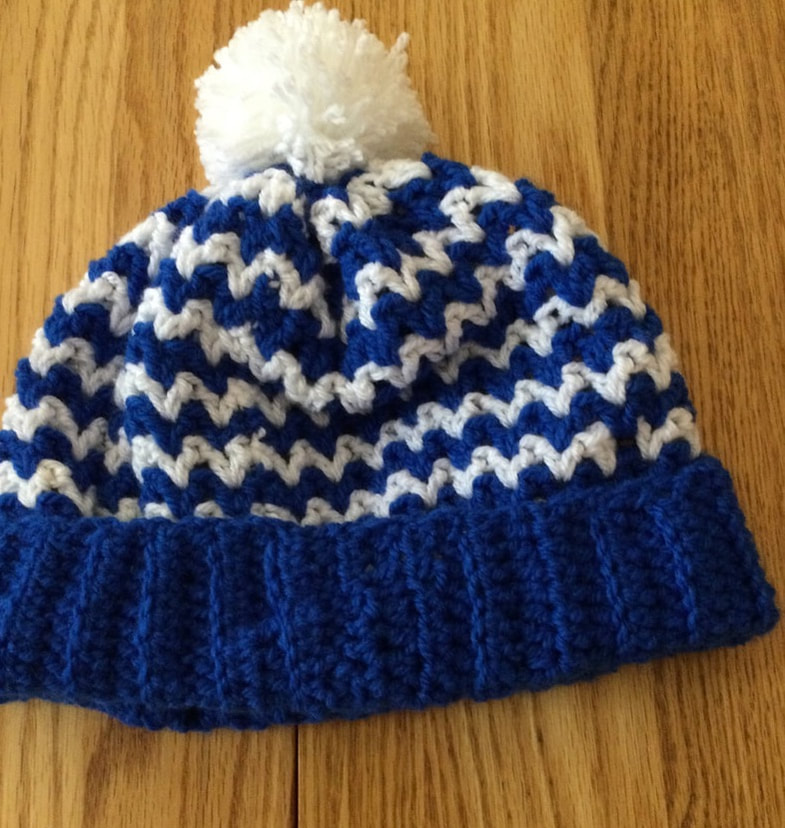
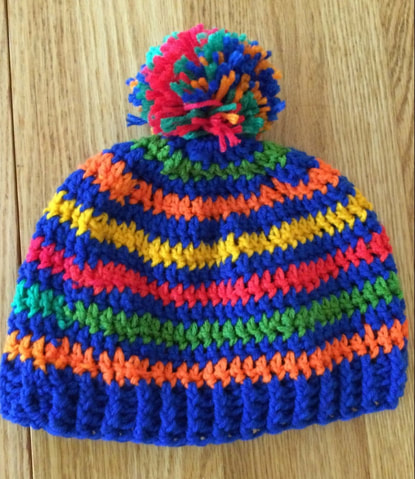
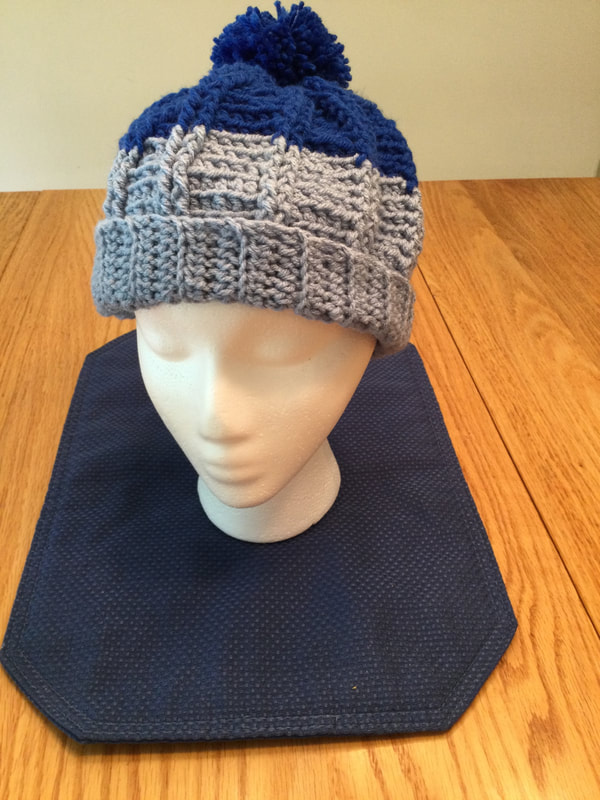
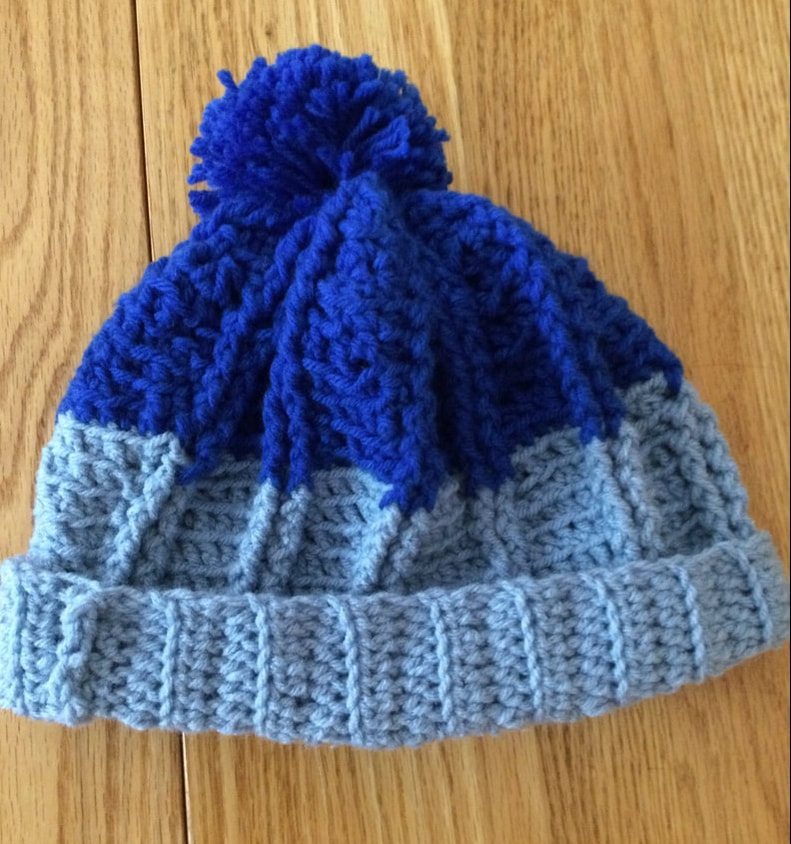
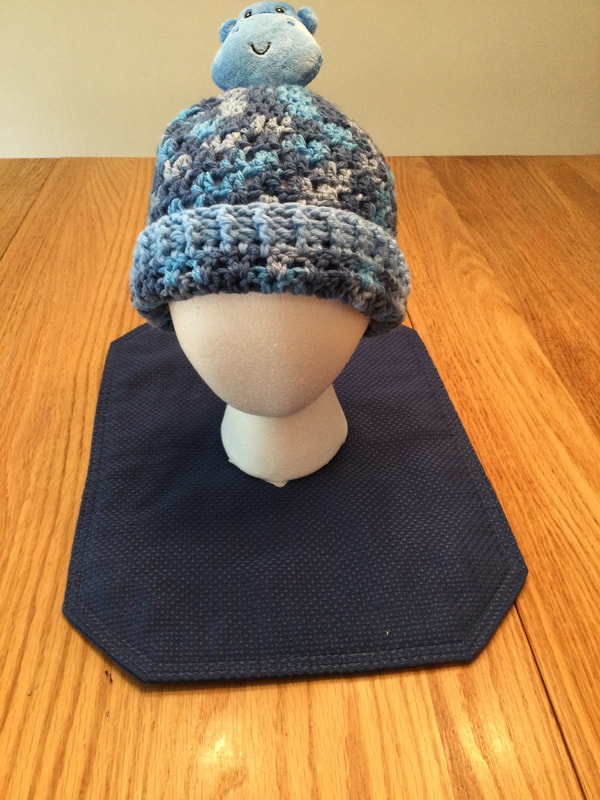
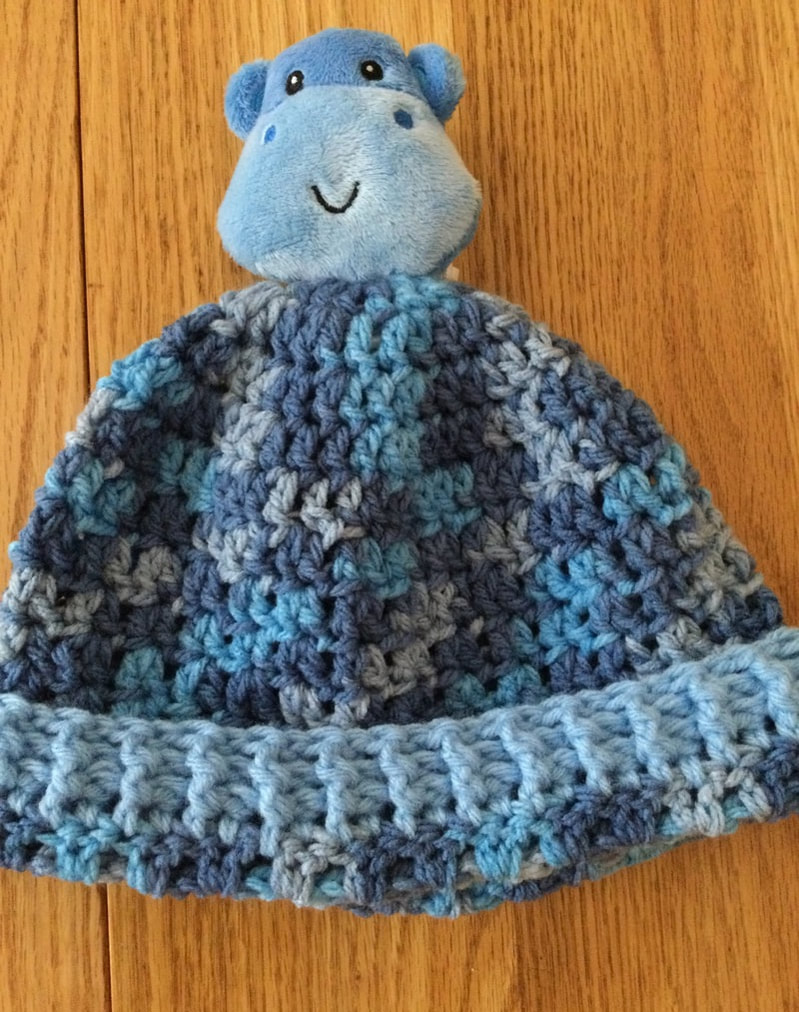
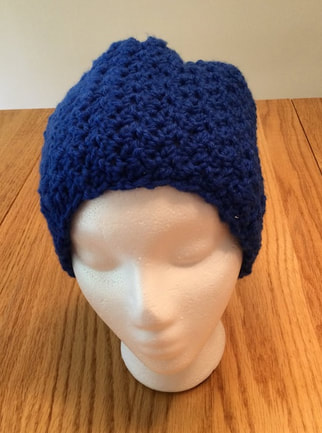
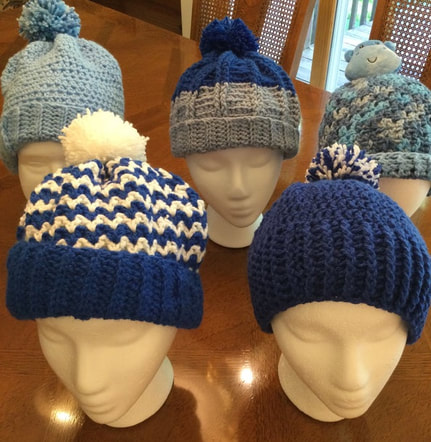 I am excited and ready for the national HATNOTHATE anti-bullying campaign to be launched on June 10 with a 24 hour streaming sponsored by Lion Brand Yarn. What is bullying and how can making and wearing a blue hat halt this noxious culture?Bullying may take on overt forms such as name-calling hitting, punching, or kicking. However it also includes more insidious forms such as social ostracizing. It involves the participation of others who enable the culture by failing to stand up to the perpetrator. In the age of social media, the victim is even bombarded at home. To fight the cancer of bullying, the social culture must change. This begins with awareness and solidarity. We wear our blue hats to show kids that they are not alone. We provide a platform for their stories and teach positive ways to improve the culture in their schools. Victums of bullying frequently suffer depression. There school work suffers, and they are more prone to self-harm and suicide. This year It Gets Better joined forces with HATNOTHATE to uplift LGBTQ youth. -If you enjoy crocheting and knitting , you can use your creativity to promote this important effort by sending hats to: #HATNOTHATE Lion Brand Yarn Co. 140 Kero Road Carlstadt, NewJersey 07072 Their goal is 100,000 hats, and every hat counts. Send your hats by August 21 for distribution schools nationwide. See the website hatnothate.org for more information about the program and for lists of local drop-off sites. The organizers are asking us to wear our hats on June 10 and post our photos on social media with the tag #HATNOTHate. The hats must be handmade with blue or mostly blue yarn. Circumference ranges from 16 inches to 20 twenty inches to fit elementary, middle school, and high school youth. Students wearing these hats support the antibullying campaign with the message of awareness and solidarity. -Lion Brand offers free patterns for crocheters and knitters on the #HATNOTHATE website. I have researched the internet through Pinterest, Ravelry, and other sources to select 8 others. All of the patterns are free and will work well with the campaign. Please note that I have included general descriptions of materials and directions. For specific, detailed information, you must refer to the patterns or websites listed in this blog post. My first hat is my favorite go to Lakeside Beanie by 5 Knots North. The beanie is crocheted in worsted yarn with an H (5.0mm) hook and is worked from the top of the crown down. The crown of the beanie is formed with an expanding circle of Double Crochet stitches. The sides begin with Double Crochet stitches and transition to alternating Front Post Double Crochet and Back Post Double Crochet to make a warm, cozy, comfortable beanie that covers the head and ears. The blue and white pompom completes the hat. The style is gender neutral and is suitable for all ages. The Slouchy Hat Pattern can be found at Crafty Crochet and Things-blogspot.com. It is crocheted from the bottom up with an I (5.5mm) hook from the bottom up. Chain about 9-12 stitches to make band of desired with. Crochet a Half Double Crochet into the Back Loop Only starting in the second chain from the hook. Chain 1 at thebegining of each row and continue until you have the desired conference. Join band short edges and pick up stitches for the hat. The body of the hat is formed by making HDC in a spiral without joining. Mark starting point with a place marker. When you have achieved the desired height for the pattern size, you will be alternating rows of sc and sc2tog with all sc. Use the long tail to make running stitch and to close the gap. The hat can be made with or without the pompom. I chose a yarn pom pom in matching blue. The hat is gender neutral, but I would go with a darker blue for males. The Easy V Stitch Hat, designed by Nanay Madel, can be found on Cool Creativity. com or on Daisy Cottage Designs.net. This hat is crocheted from the bottom up starting with a ribbed band. Once the bands joined, start to pick up V-stitches in the same color as the bottom band. Since I was using only two colors (dark blue and white) I was able to carry the color yarn that was not in use up the back side of the hat. In this way I could avoid having many pieces of yarn to weave in. The hat was worked in worsted with an H (5.0mm) hook. I added a white pompom, but a dark blue is also attractive. A Very Good Hat from Moogly.com is is crocheted from the bottom up with a J (6.0mm) hook. Starting with a foundation chain in the main color (dark blue), the ribbing is achieved by alternating Front Post Double Crochet with Back Post Double crochet. The pattern calls for Half Double Crochet stitches and changes color every two rounds. I spread out a multi-coloredself striping yarn and cut the yarn when it changed color. Then I selected the colors for the colored rows. In this way I could control the color distribution so that it did not stop or start in awkward places. I collected all fo my left over pieces to make a multi-colored pompom. The Winter Rays Ribbed Crochet Hat @ned and mimi.com uses an interesting stitch combination. This bottom-up pattern calls for a band using a slip stitch from the back Loop Only, but a changed it to Half Double Crochet because it was easier to make the stitches. The body of the hat is formed with rows of Five half Double Crochet from the Back Loop Only alternating with two Front Post Double Crochet. The sequence creates a ribs that reach from the ribbed base to the top of the hat. I like the way the yarn color changes from a solid brand of light blue at the bottom of the hat to a darker blue at the top. A dark blue Pom Pom works well with this style. I found a Topper kit with a stuffed mimihippo head in my stash. Although the enclosed pattern called for knitted style, I decided to crochet the hat with a combination of double crochet and V stitch. The pattern was crocheted from the top down. The blue topper and the matching blue ribbing worked well together. This hat would be suited for an elementary age child. The Mint Cluster Chemo Cap Pattern on Allcrafts blog.com starts at the crown with a Double Crochet. I used a H (5.0mm) hook with a softer yarn. After I crocheted a crown circle ending with 60 stitches I transitioned to cluster stitches separated by a single space. I changed the pattern to include a band of 4 rows of HDC to give shape to the hat. The Northern Exposure Pom Hat is demonstrated on You Tube. After a foundation chain of 30 stitches, you make a Single Crochet and a Double Crochet in the second stitch from the hook. Skip a stitch and crochet the repeat across. As you work the rows the stitch combo will look like it is stacked. You will end with a rectangle that is about 20 inches wide. Then you will sew the ends together with mattress or whipped stitch. The stitching sides are slightly different. Decide which you prefer before you stitch up your hat. Use a running stitch to cinch the top of the hat together. Reinforcewith additional stitches. You can attach a pom pom or leave it plain as I did. I am thrilled to join this worthwhile #HATNOTHATE campaign and to share my patterns with you. On June 10, I will wear one of my blue hats and post on Facebook and Instagram . I hope you enjoy crocheting these blue hats with these patterns. I would love to see pictures of your creations. Aga[n, please note that my comments and descriptions are general. You have to go to the specific pattern for complete directions.
As always, I welcome your feedback and reflections. Please join me on my stitching journey. |
Archives
November 2022
Categories
|


 RSS Feed