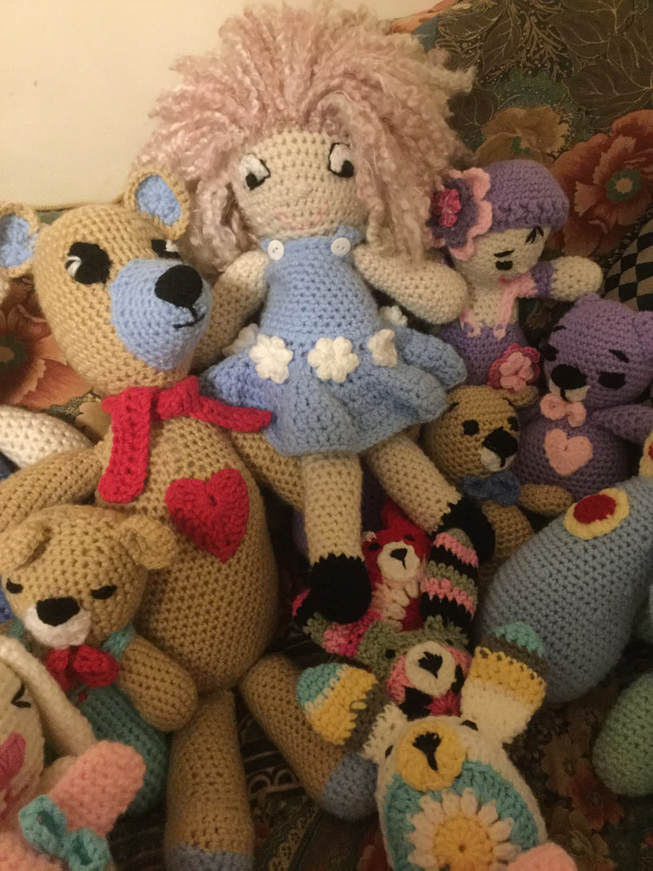
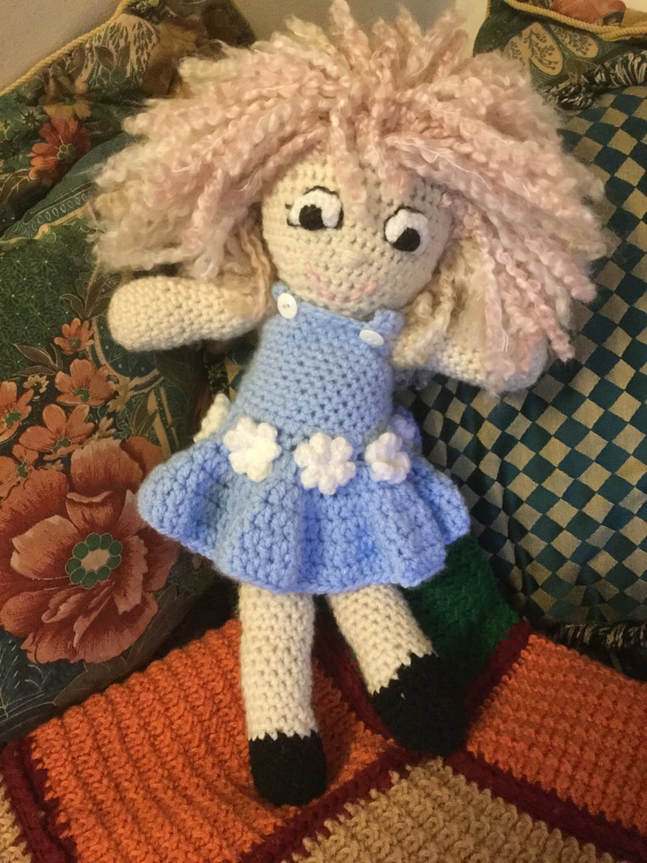
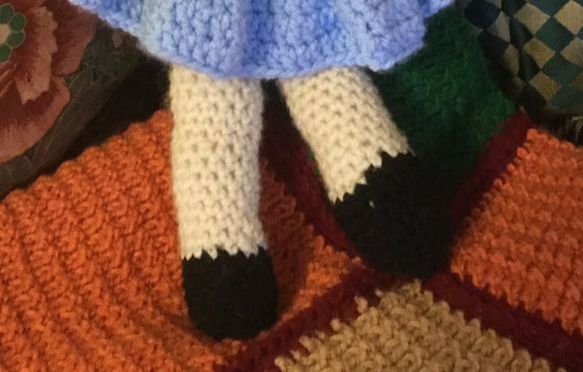
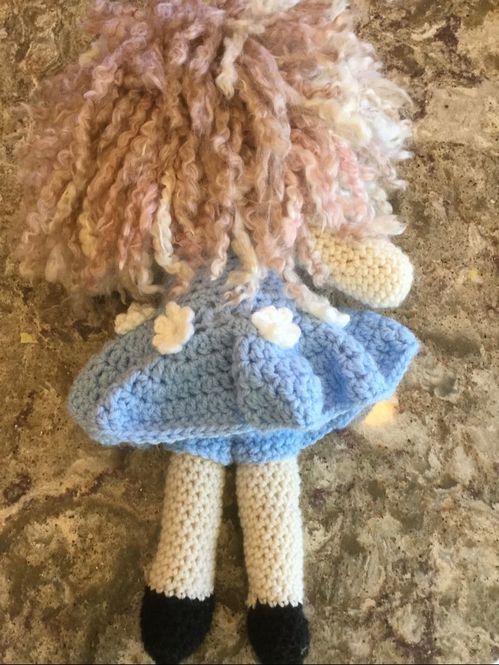
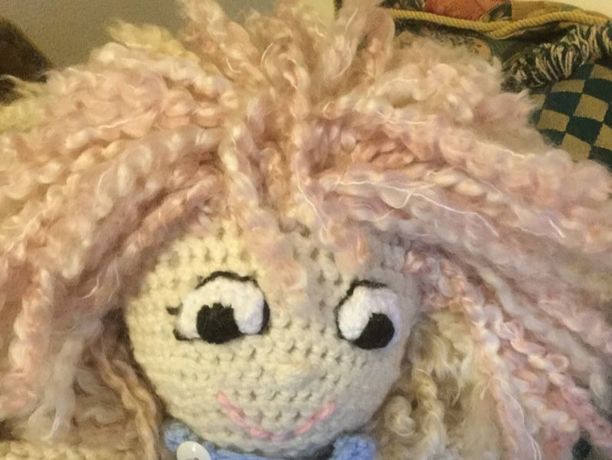
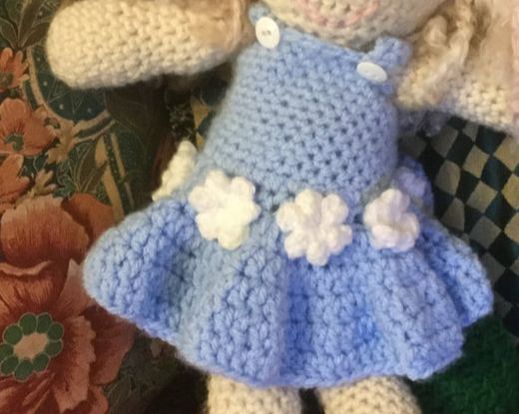
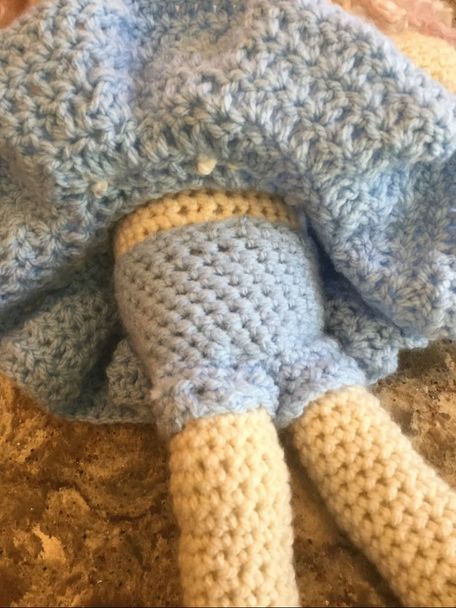
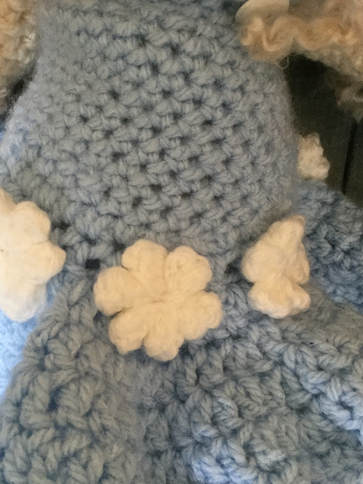
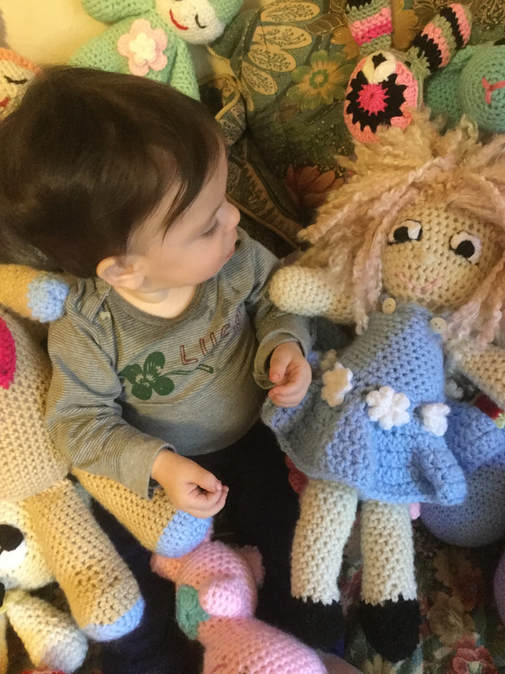
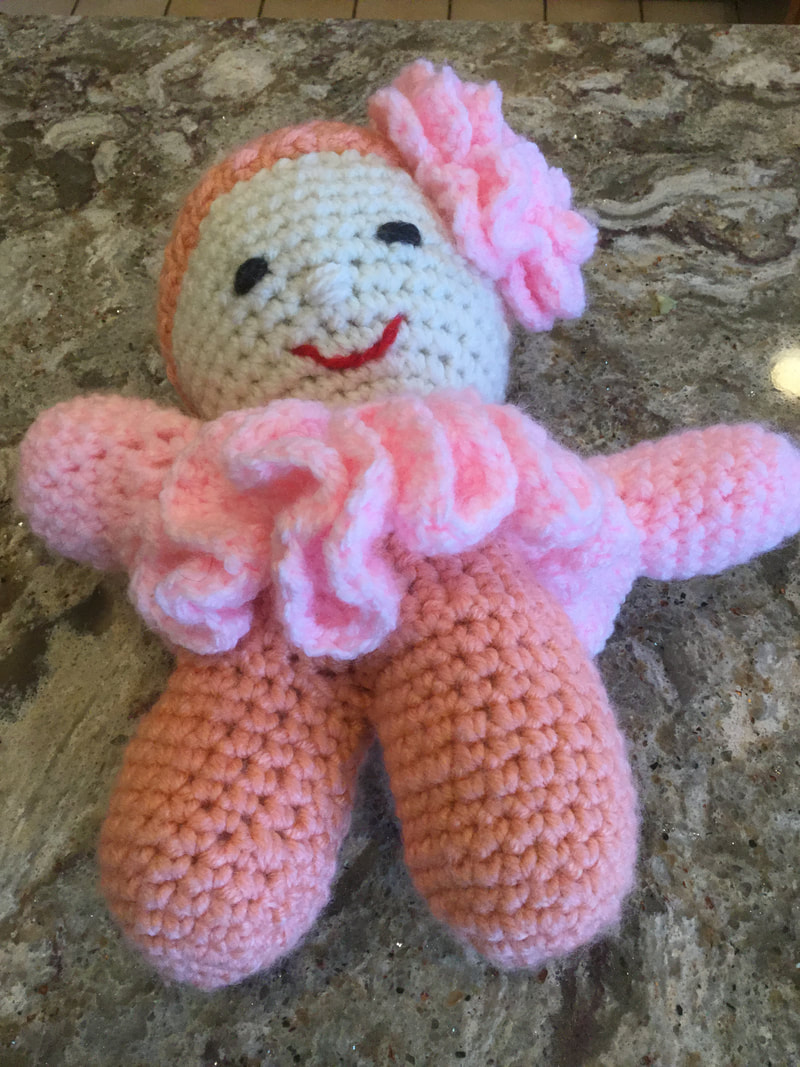
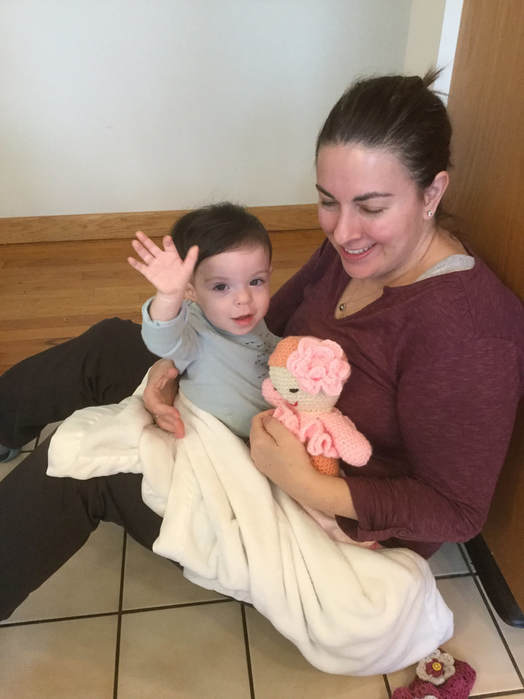
 What I love best about my new ANNA doll is her hair. Her mop-like thick locks of beige, bone, and pink curly strands were crocheted from the remnants of a shawl made from Lion brand Homespun. There is nothing like it to get those curly ringlets. As I designed and constructed this cutie, I did not follow any specific pattern, The doll head and body were similar to many of the various doll patterns that I found on the internet. The finished doll is 17 inches from head to toe. Her hair may make her appear taller. I used a heavier worsted to get a larger doll as I crocheted with a 4.5 mm G hook. The head and body were one piece. The arms and legs followed guidelines for many dolls. However, I had to add stitches and rows to get limbs that were in proportion to the head and body. I started with the head using standard directions for increasing to make a circle up to 48 stitches in circumference. It is helpful to pull a contrasting piece of yarn through on each beginning stitch so that you do not lose count. and keep coming back to the correct first stitch.The head for this doll is slightly larger in proportion to the body. Once I reached the desired number of stitches, I continued for several rows before decreasing. Again I used the standard decrease.until I reached 12 stitches. I wanted a neck that would stay firm when stuffed. I stuffed the head and repeated the 12 stitch count for the neck before I started the body, Both head and body are done in a continuous spiral without a specific join. The body is 36 stitches at its widest part. I crocheted approximately 20 rows before starting to decrease for the bottom of the body. The torso is approximately 6 1/2 inches long. Make two legs. Crochet the bottom part of the leg in black or other color desired to make the shoe. Start with a magic circle and crochet 6 stitches for row one. Single crochet 2 stitches in each stitch to get 12 stitches in row 2. In row 3 SC in first stitch. Then make 2 SC in the next stitch. Repeat pattern a total of 6 times to get 18 stitches. In row 4-6, continue with SC. Row 7 is a decrease row. Sc in first 2 stitches, SC 2stiches together 5 times for 15 stitches. Crochet one more row in dark shoe color. Change to body and face color for the rest of the leg. When changing color, leave 2 loops of the dark shoe color before slipping lighter leg color through the loops .Continue around for a total of 22 rows. Stuff the shoe and moderately up the leg. Do not stuff the top too tightly so that you can sew the leg closed easily. When you stitch the leg to the base of the doll,the doll should be able to sit. Make two arms. Begin with skin tone that you used for the head and body. You will not be changing color. Follow the same stitch pattern. I crocheted about 18 rows in total so that the tips of the hands reached the bottom of the torso. Again I went easy on the stuffing at the top of the arm so that the arm would lie flat when attached. Designers frequently suggest that the crochet make a cap in the same color as the doll's hair so that the scalp does not show through. In the case of my dolly the yarn was thick and had many strands similar in shade to the head of the doll. In stead of a cap, I stitched around the back of the doll's head and up across the forehead. Since I had many 12 inch strands from the shawl fringe, I cut them in half and used the 6 inch strand to make the hair. I folded the strand in half over the hook and inserted the hook into the doll's head before pulling the strands through the loop. I started at the back of the neck and worked alternating sides until I completed a row. As I got closer to the front hairline, I was relieved to see that I would have enough for the full head of hair. This doll was an experiment, and so I was really playing yarn chicken. In the back, the hair reached down to the bottom of the back. The rest of the hair layered beautifully for a glamorous punk rock look. If you go the friendly fox.com, the free mermaid pattern offers a tutorial for crocheting hair onto a doll. I tried on many faces before I settled on one that portrayed the doll's perky punk personality. This face was the third try. I was challenged to make the eyes right. The first pair were blue and black, but they were too small. The second pair were white and black , but they were too wide set. This pair was the best of the lot. Even though I am not entirely satisfied, I will try to perfect my skill in future dolls. This was the hardest design part of the doll. I know that it would be easier to use safety eyes, which would look more like a real little girl. However, the crocheted eyes are probably better for toddlers. Dollies must have clothes. Again, i worked without a pattern, crocheting the dress right on the doll. I crocheted a chain around the lower middle of the doll. After joining the chain, worked in SC around the ring. In the second row of the skirt, I double crocheted in each SC stitch. At the end of the circle, I joined the circle. and chained three. In the next stitch I made 2 DC. I made one DC in the next stitch and 2 DC in the following one, repeating the sequence around the skirt. Row 3 called for 2DC and then 2 DC in the next stitch all around the skirt. Row 4 Called for 3 DC and then 2 DC in the next stitch all around. Row 5 called for 4 DC and then 2 DC in the next stitch all around.. Then I fastened off and wove in my end. I slipped the skirt up the doll's legs so that the hem rested nicely a few rows from the top of the legs. This time I was working on the torso of the dress.I used SC in each stitch for several rows. When the doll's torso narrowed, I made one decrease on each side so that the dress fitted to the form of the doll. I kept the stitch count constant until I had to decrease one more time. A couple of rows below the neck I made a chain that crossed over the shoulder to the back of the doll.I SC into the back of the dress and then along the chain to anchor the strap. Then I repeated the procedure on the other side. The doll definitely needed panties, and again I crocheted them right on the doll. I crocheted a ring one stitch larger than the circumference of the leg and single crocheted for 3 rows before fastening off. I followed the same procedure for the second leg, but I did not fasten off. I joined the two rings and crocheted around for about 2 inches until the piece looked like a pair of panties. I fastened off and began sewing the panties onto the the doll so that they would stay put. The last bit was the floral decoration for the dress, I made a series of tiny blossoms and attached them to dress where the lowered torso met the skirt. I like that look better than a skirt that dropped from the waist. After 2 and1/2days my doll was finished and ready for her new home. Although the materials were not expensive, the labor involved in making my sweet dolly was considerable. Aside from my emotional attachment to the doll, there was no way I could price her with over 24 hours of crocheting and embroidery. Of course, my granddaughter will be waiting with open arms. ANNA is a little big for her now.
By the way I used to make dolls for her mother. At that time I sewed them on my sewing machine. Now crochet is my passion.
3 Comments
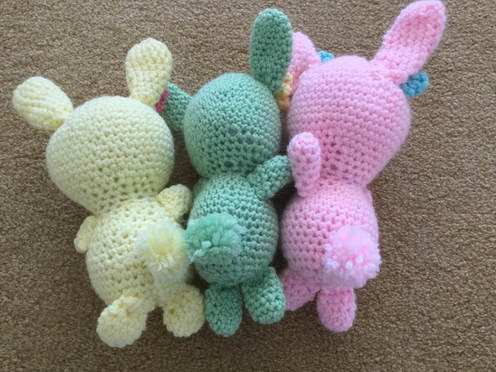
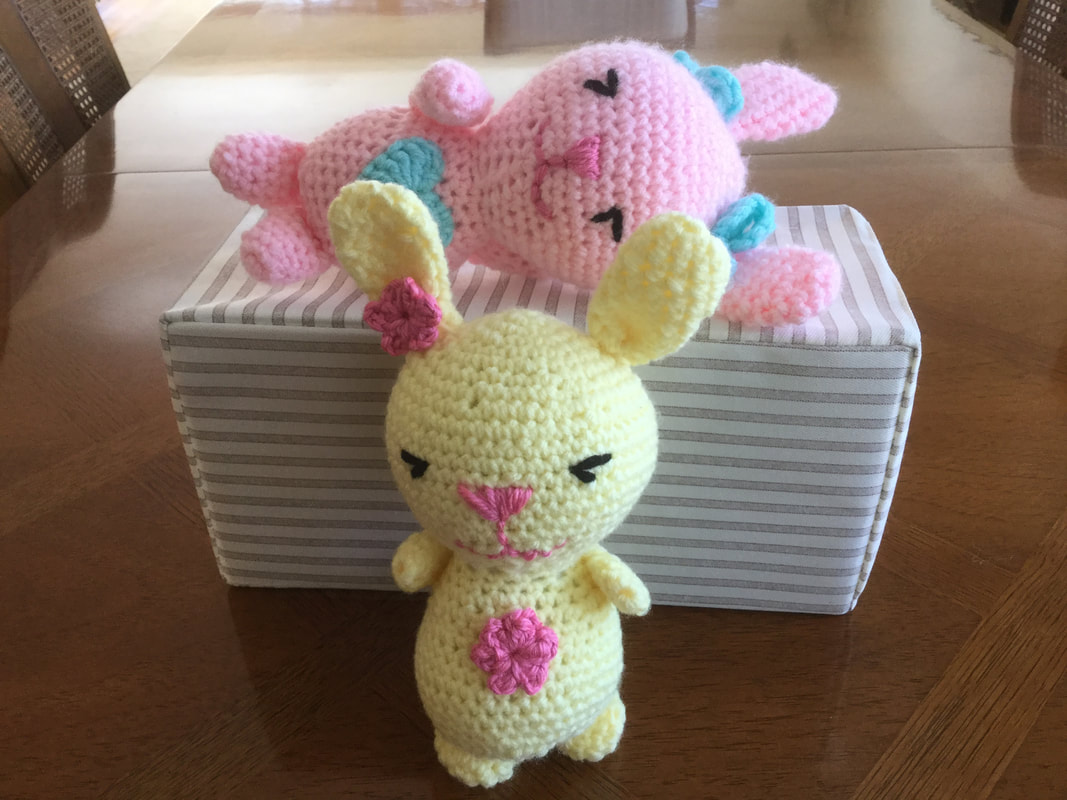
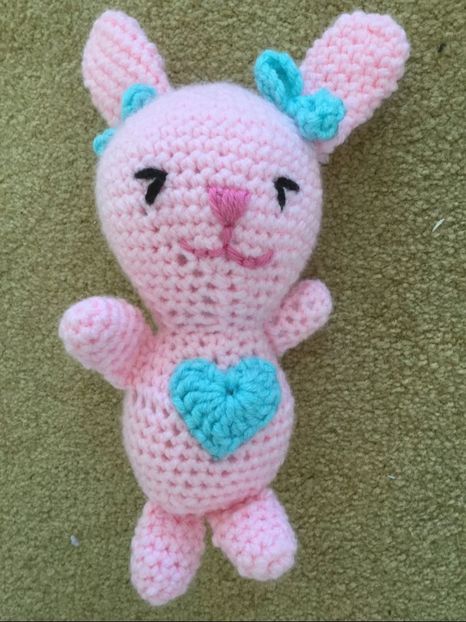
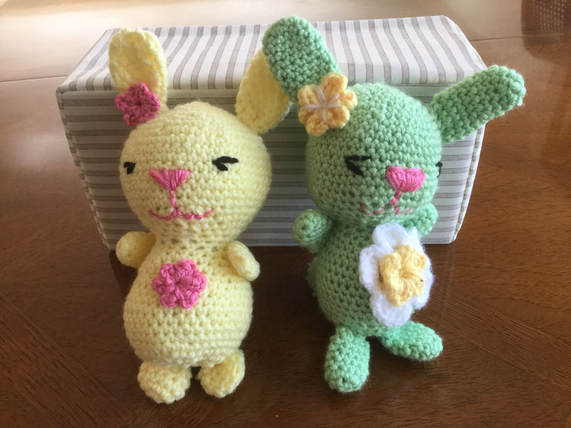
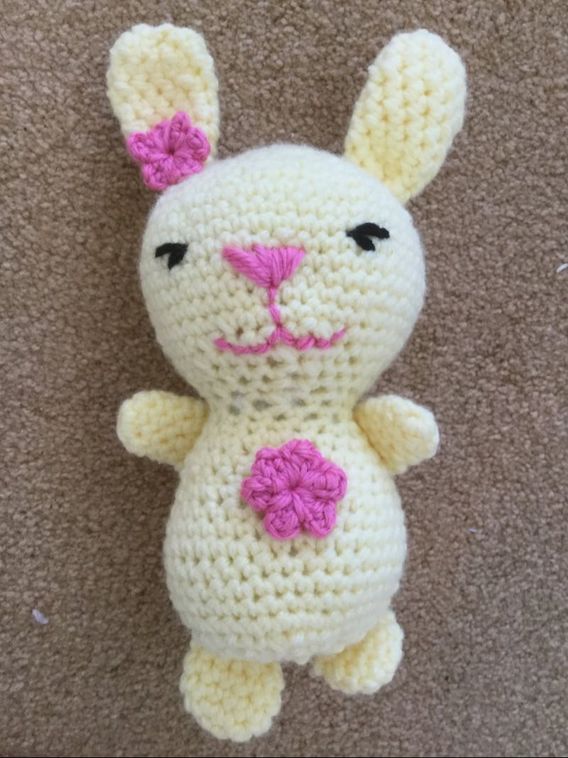
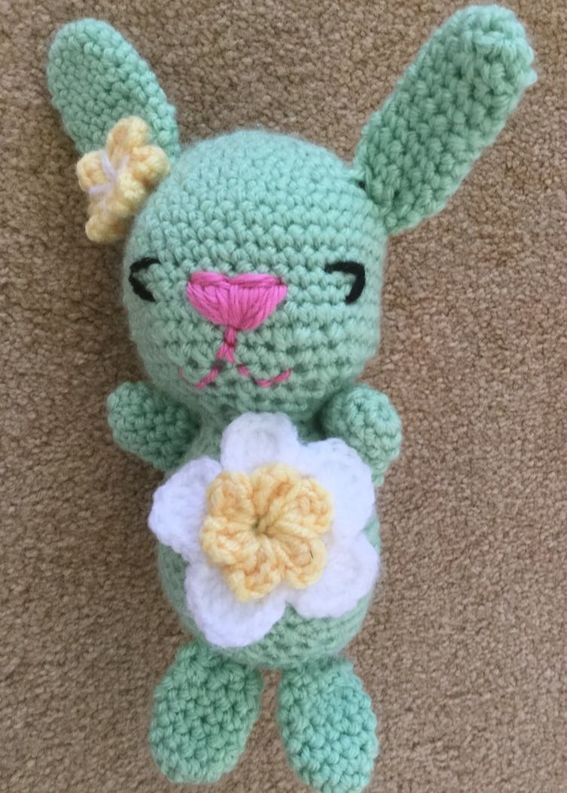
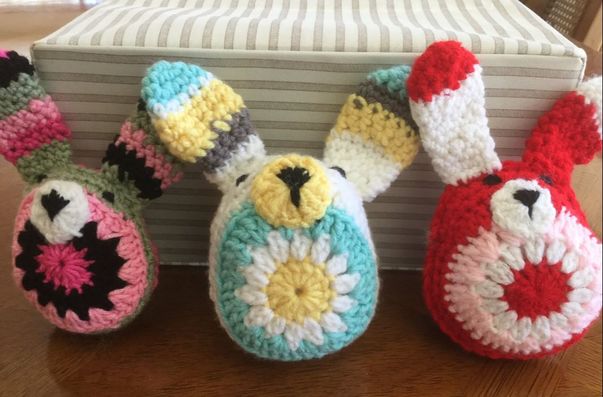
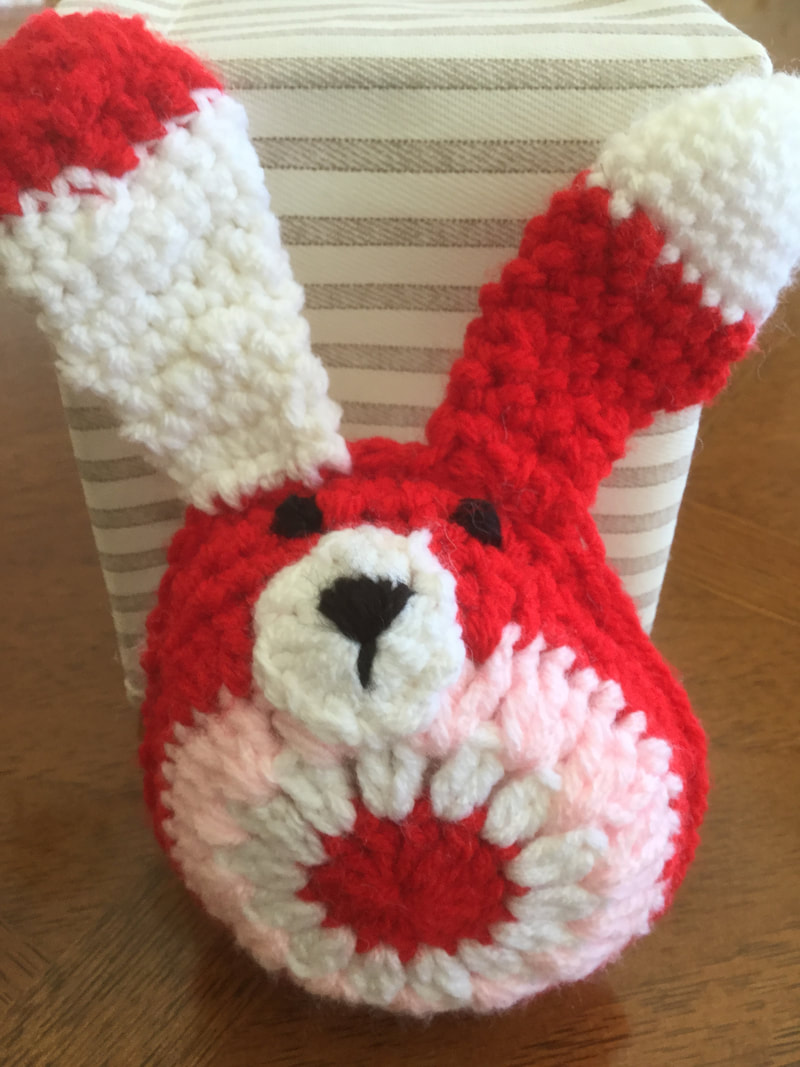
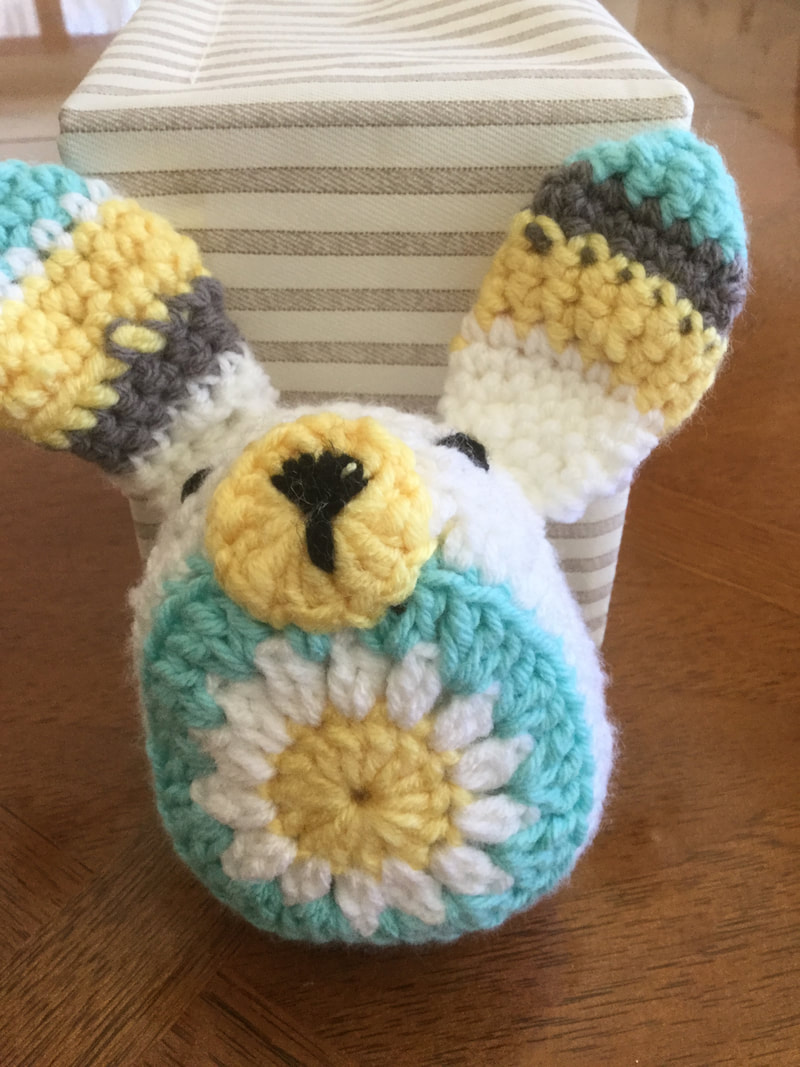
 As Spring approaches, I have been fascinated with the crocheted art of amigurumi. I started with the sleepyhead dolls which are my granddaughter's favorite. As I have noted in previous posts, the sleepy head doll, her baby, is a constant companion at home and at her day program. I mastered the basic style and experimented with stripes and decorations. From there, I moved on to teddy bears and other critters. I am amazed at the skill level and creativity of my fellow crocheters who have shared their projects and patterns with the crocheting community. With spring approaching, I decided to try my hand on a variety of rabbits. The English pattern that I completed after last week's post was interesting, but like several of the patterns in the book, it was long and lean, rather antique looking. For the length of time involved, I was minus the wow factor. When I came upon Easter Bunny Amigurumi by Craft Passion, I knew I would have to try it out http://www/craftpassion.com/easter-bunny-amigurumi/2/. The rounded baby bunny was designed to make mother and child smile. As with many patterns, I had to adapt the instructions to my style. Instead of the DK yarn (#3) and an E hook (3.0mm), I used my favorite worsted acrylic (#4) with a G hook (4.0 or 4.5). I prefer yarns on the thicker end of the #4 spectrum, and I achieved different looks with the the thinner or thicker worsted yarns. Each of my bunnies is slightly different as I worked on the measurements to get the look I wanted. The first bunny was pink. It had a larger, longer head and a thinner body. I crocheted an aqua bow for one ear and a heart for the chest. The pompom tail was made by weaving yarn about the tines of a fork. I maintained the same color as the body. My adapted bunny stands about 10 inches tall from the feet to the top of the ears. The second bunny was pale yellow, crocheted from a standard commercial weight yarn. She turned out shorter and plumper, and I was rather pleased with the result. Since my figure was larger than the bunny in the pattern, I added stitches and rows to the ears, arms, and legs. I changed the pattern to crochet the figure in one piece, Using standard increases for the head, i increased to create a circle of 48 stitches. I remained true to the pattern for the head until I got to the neck. I stopped decreasing at 12 stitches to create a more substantial neck than the 6 stitches in the pattern. The pattern has the crocheter making a separate body piece. I continued down from the neck with standard increases until I got to 36 or 40 stitches instead of the 24 in the pattern. I really like a plumper bunny. After a few rows at the same circumference, I decreased in succeeding rows until I fastened off at the bottom. I fashioned a small rosette for the ear that was the same color as the embroidered nose and mouth. The third mint green bunny used yarn I had on hand. The thinner yarn made for a thinner rabbit. I crocheted a white flower with a yellow rosette center for the chest and attached a yellow rosette to the ear. This little one was finished off with a mint green pompom tail that matched the body. The directions indicate that it takes about 4 hours to make one bunny. Once I get the procedure correct without having to frog because of my experimenting, I will come closer to that time frame.This basic style allows the crocheter a lot of flexibility in design and creativity. By changing the ear to a triangle and switching the pompom to a longer tail, the crocheter can easily make a kitten. A completely different rabbit figure was created by dragonfly.com. The starburst body is built up with concentric circles of granny -like stitches to yield a sunburst design. For the front and back of the bunny, the crocheter can change the order of the colors to make a unique design. When both sides are done, the pieces are crocheted together and stuffed. Then muzzle, nose, eyes, and ears are added. The pompom tail is made using a fork. This creature is great for using up scraps. Since you are changing colors and stitches, the little rabbit takes longer than one would think for a rabbit this size. There are no arms or feet. The basic circle is 4 inches in diameter, with an extra1/2 inch to give shape for the nose and eyes. The ears which are crocheted in the round and attached to the body are about 2 1/2 inches. These bunnies would make an excellent mobile for a baby's room. They can also be lined together to create a wall decoration. The folks at The Green Dragonfly have created an excellent step-by-step tutorial for building the bunny. The directions for making a pompom from a fork are included in this pattern. I have had so much fun crocheting and experimenting with these amigurumi. The only thing that stopped me was that it was time to stop crocheting and start writing this article for the blog. With spring fairs coming up, I hope that the moms, dads, grandparents, and kids know that they have to give a bunny a home. In addition to being a doting grandmother, I will soon be a step-grandma to an adorable, engaging 2 year old. One of my bunnies will be perfect for the holiday season.
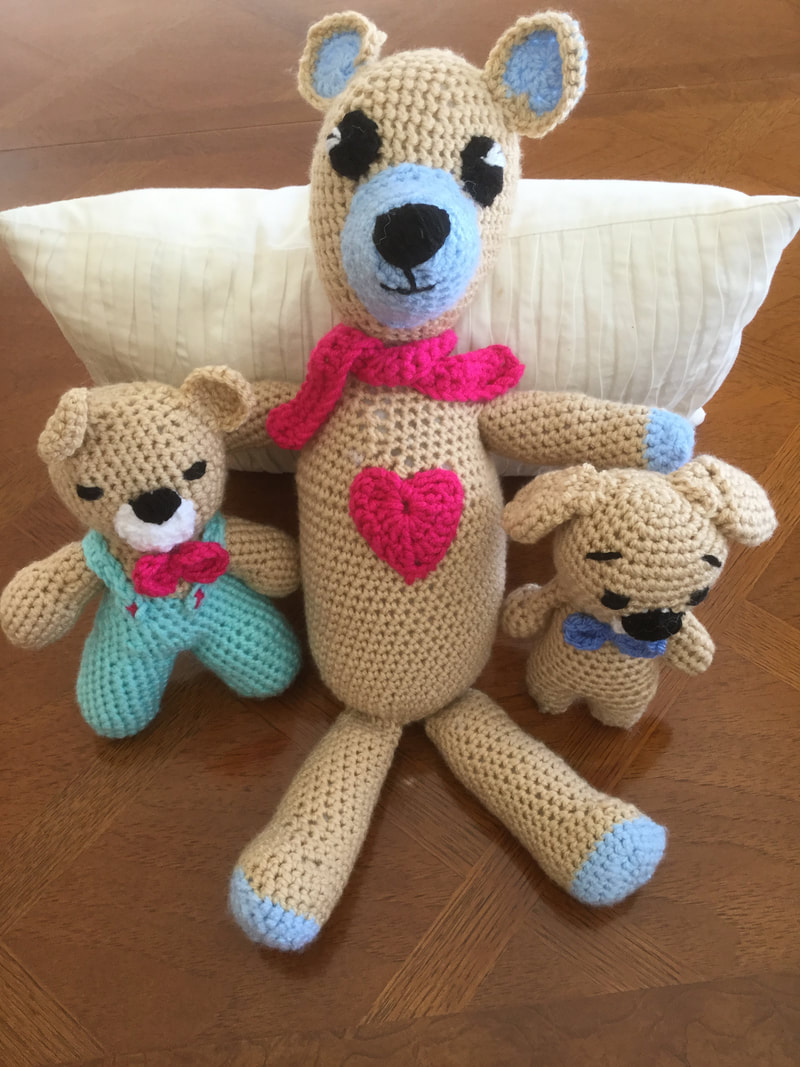
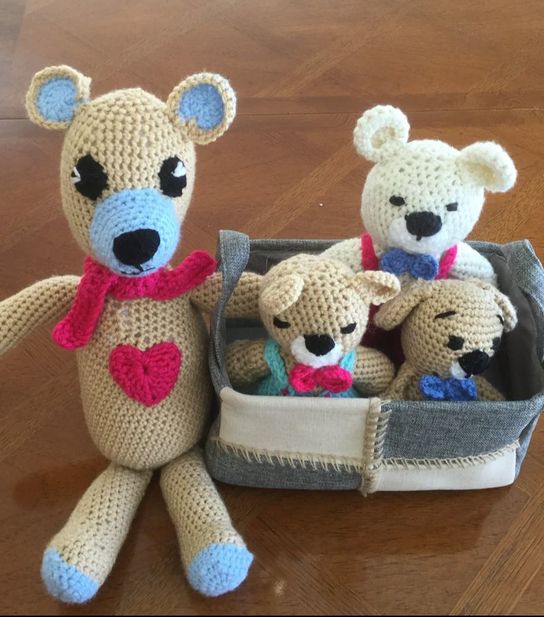
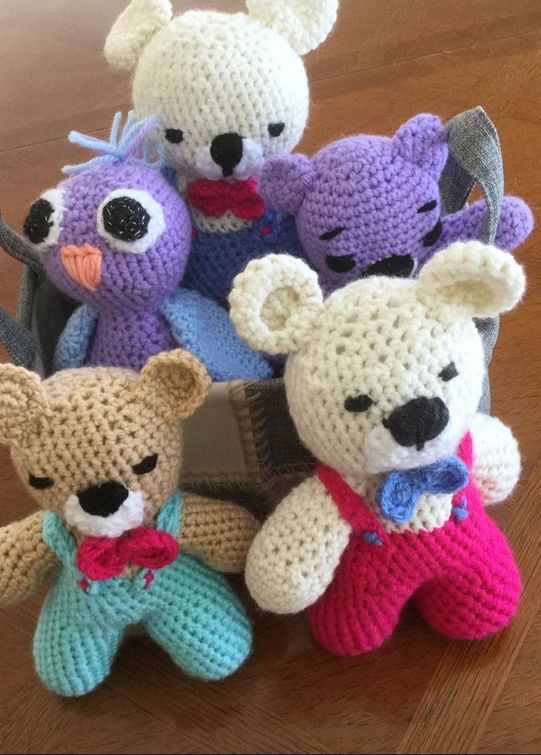 I call these adorable huggables stuffed animals, but more experienced crocheters call them amigurumi. Once I started adapting the sleepyhead doll for sale and gifts, I decided to branch out to create teddy bears, and other animals. The possibiliites are endless . My cuties tend to be more rustic, but I am in awe of the fiber artists who create and execute beautiful and technically perfect pieces. For me to move my skill level up a few notches, I have to research and practice, practice, practice. Last week, I made a sleepy head doll for the grandson of a dear friend. She was quite happy with the doll for the 8 month old until she saw one of my chubby teddies. So there she sat at the desert table, hugging them both. I have known her daughter since she was a preteen, and the sleepy doll was gift to her young son. However, my friend was not about to let the chubby teddy go. She offered to pay for him, but I decided to make the teddy s gift as well. I told her that she could pay me for the next one or commission a gift when needed. I was glad that I had thought to take a photo of the little fellow before I showed him to my dinner guests. With spring craft fairs coming up, I need to offer pieces that would be tempting for warmer weather. The teddies and other stuffed animals seem to call out to shoppers, "Take me. Give me a home." The chubby teddy was crocheted from the legs up to the neck and completed with the larger head in one piece. Then the arms, ears, and face were added. Many crocheted animals call for thinner yarn, cottons, or lighter worsted. I prefer the heavier weight worsted, but I use a G (4.0 or 4.5) hook so that the stitches remain close and the stuffing does not poke out. When I first tried this teddy, I was able to download and print out a collection from Amigurumi Crochet Patterns: Baby and Animal Friends, collated by Veronica Kay. Unfortunately, while I can locate the pictures on Pinterest, the link is no longer operating. The pictures are helpful in designing my own figure from other sites. A similar body type can also be located on Ravelry using the term Big Head Baby Doll. This pattern is also out of print. The search goes on. In my search for suitable teddies, I found the following sites which may be helpful. Please note some of the patterns can be read electronically, but the printed version must be purchased.
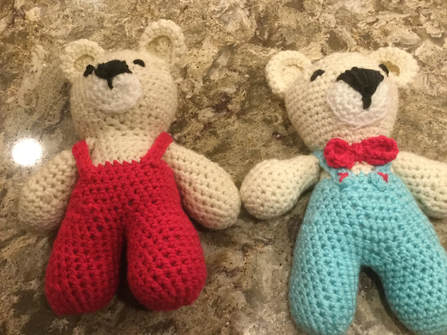
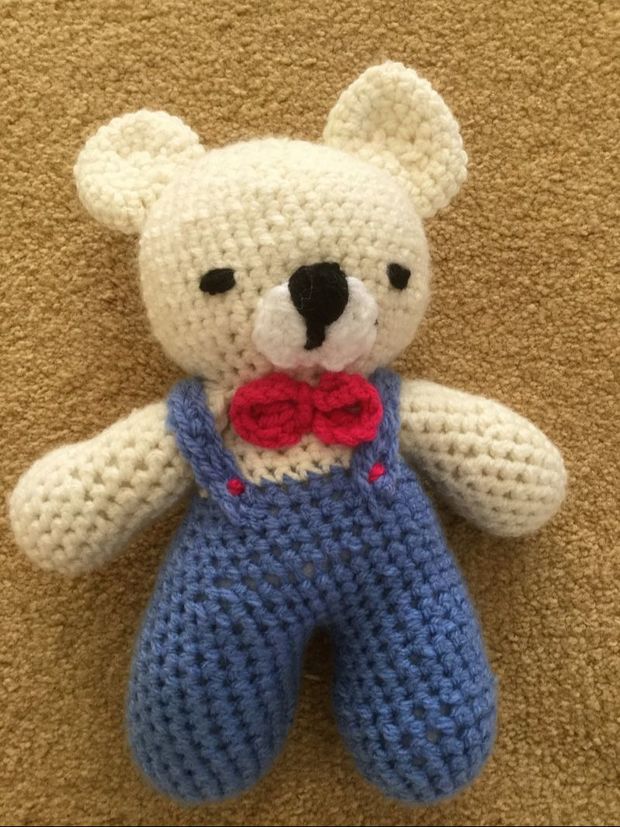
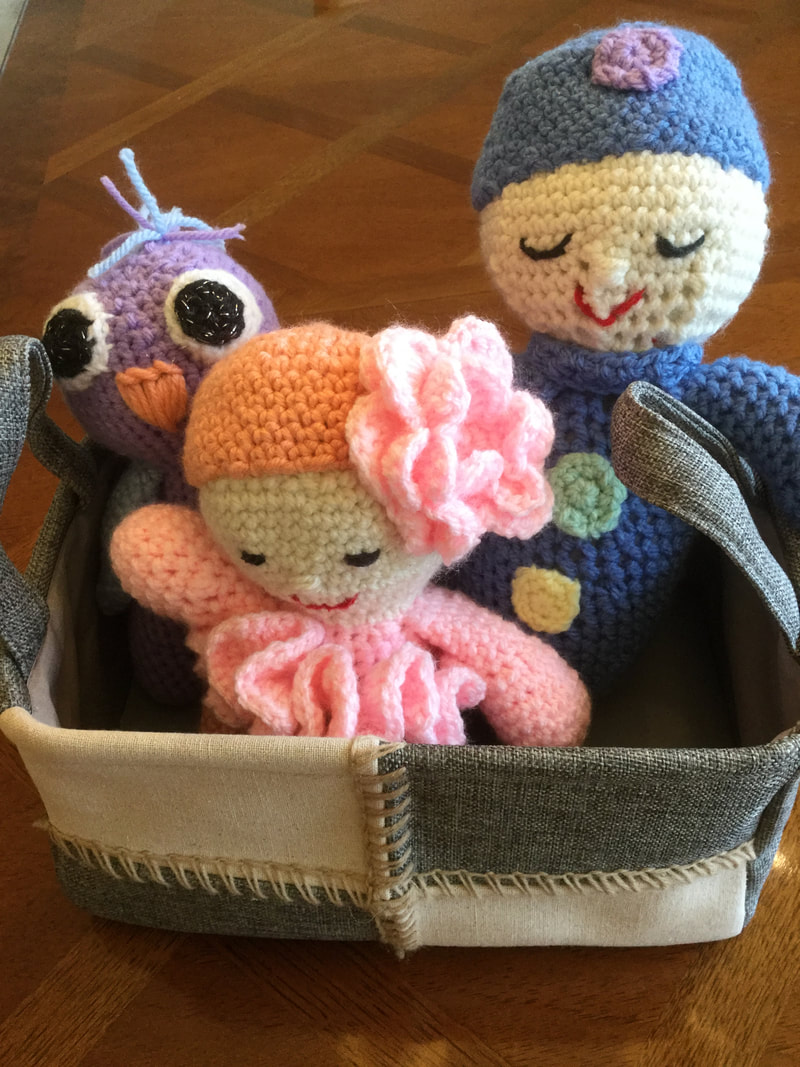
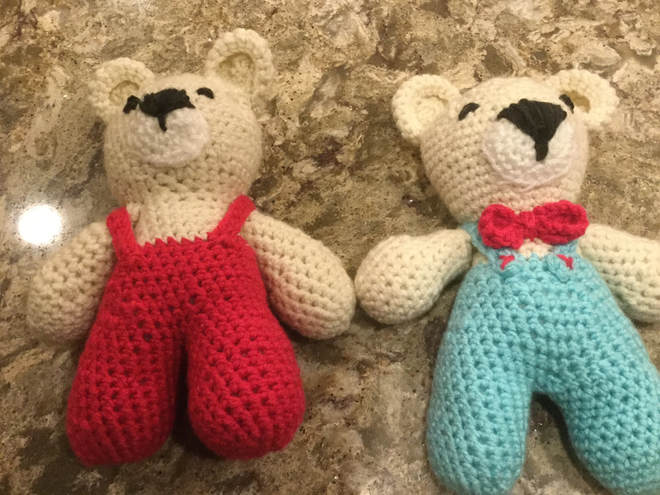
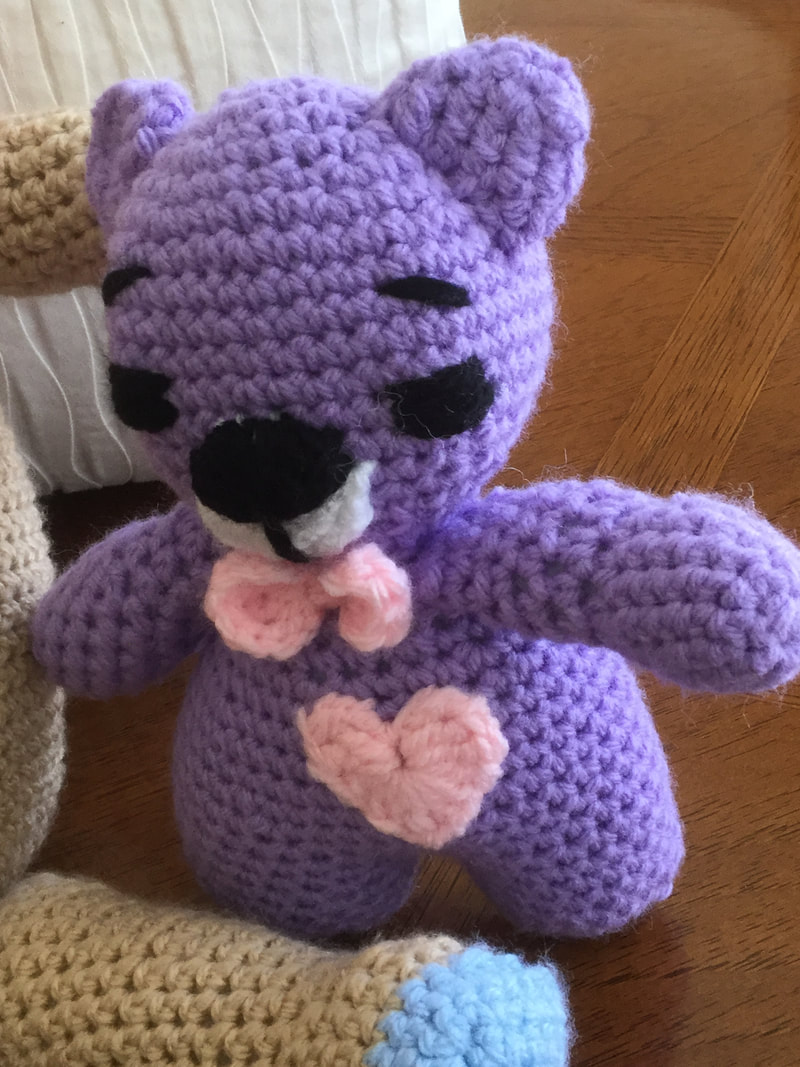
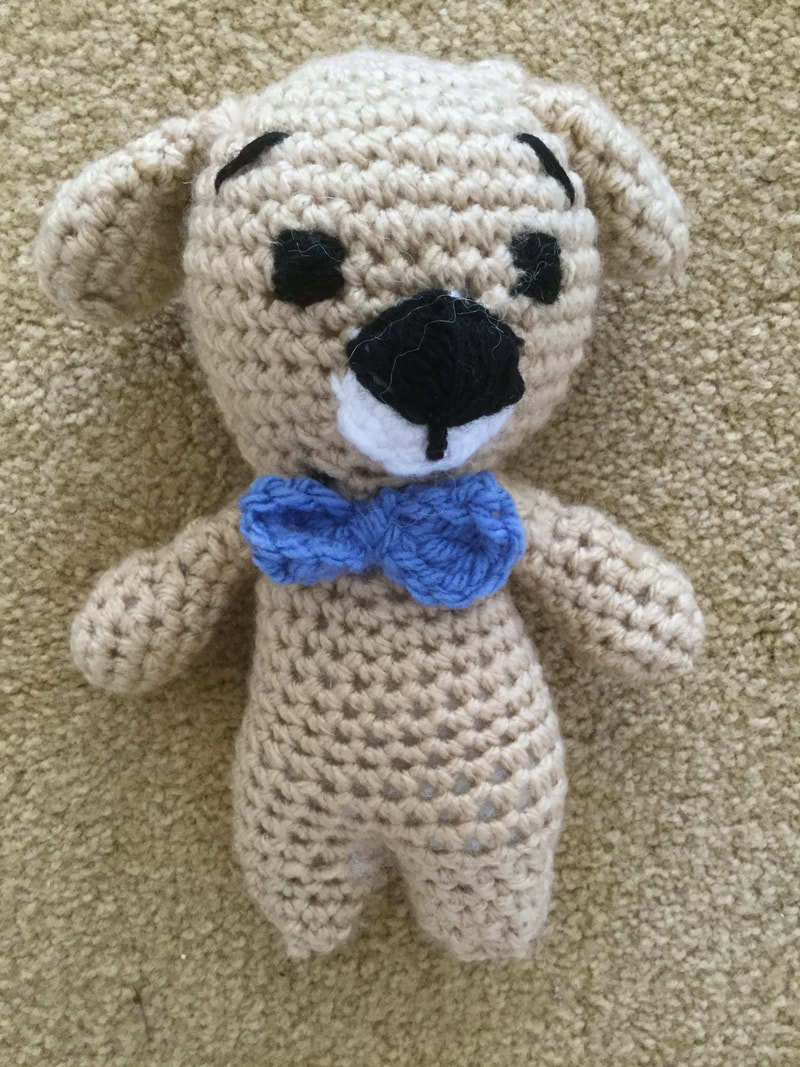
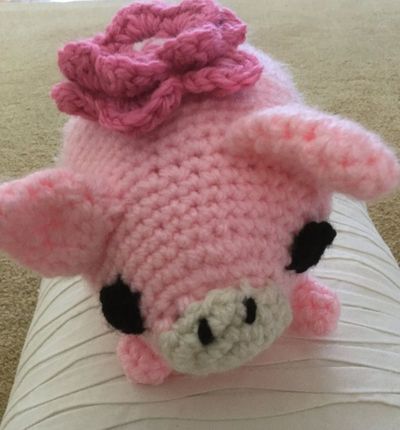
With the original pattern I tried a ballerina with a flowered cap. My granddaughter immediately adopted her. I also had fun with a purple owl with blue wings. Once my teddy with the turquoise overalls was gone, I knew I had to replace him. When I worked with a thinner yarn, the resulting bear was smaller. On a second try with thicker wool, I made a larger more cuddly bear. This time he had blue denim overalls. I added his bowtie and stitches on the suspenders. I also made these corrections on the bear with red overalls. The Cuddle Me Collection offers designs for many animals. This kitten starts from the head down and tends to be thinner. The dog has 24 stitches across the chest. I like the plumper purple kitten better. This one as 36stitches across the chest and 18 stitches in each leg. Like many of my readers, I like free on-line patterns. However, sometimes a printed collection strikes my fancy. Crocheted Bears and Other Animals by Emma Brown (Cico Books, London, 2017) offers such a collection of unique designs, clear directions, attractive photos, and all in a story-like setting.For my first project I chose a tall take-charge bear, "Ronnie, the Ranger." He is wonderful company for his shorter plumper brothers and sisters from other sources. I am finishing up a rabbit, "Hodge," in a striped sweater. If I waited until I finished this spring bunny, it would take me forever to finish and post this article. I will probably complete this rabbit tonight. With her, turquoise, pink, and white colors, I think I will add some blossoms for a feminine edge. I also pickerd up Zoomigurumi 6 from Amigurumipatterns.net. This volume is the most recent of a playful series of amigurumi collections, I couldn't resis "Txerri,' the piglet.Ican't wait to try "Bo," the panda. With my sleepy head dolls and my 'crocheted critters" I should have plenty of stock for a couple of spring to summer fairs. I just have to keep my husband from giving away my inventory.he just found another baby who just must be gifted with one of my pieces.Amigurumi is fun, creative, and can be artistic as well. Best yet, all those that seethe creatures leave with a smile on their faces even if they don't have a creature in hand.
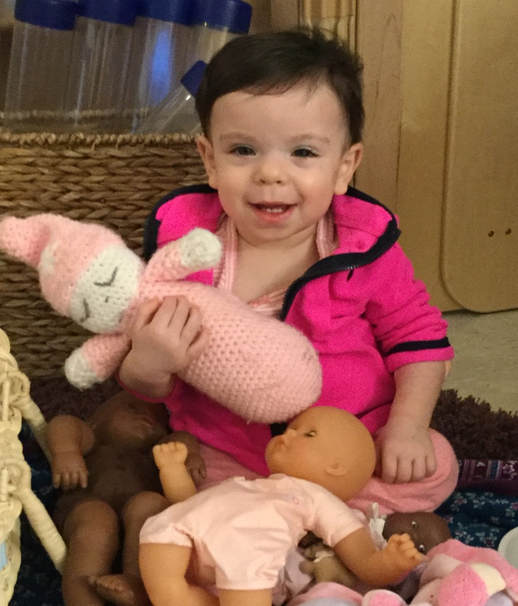
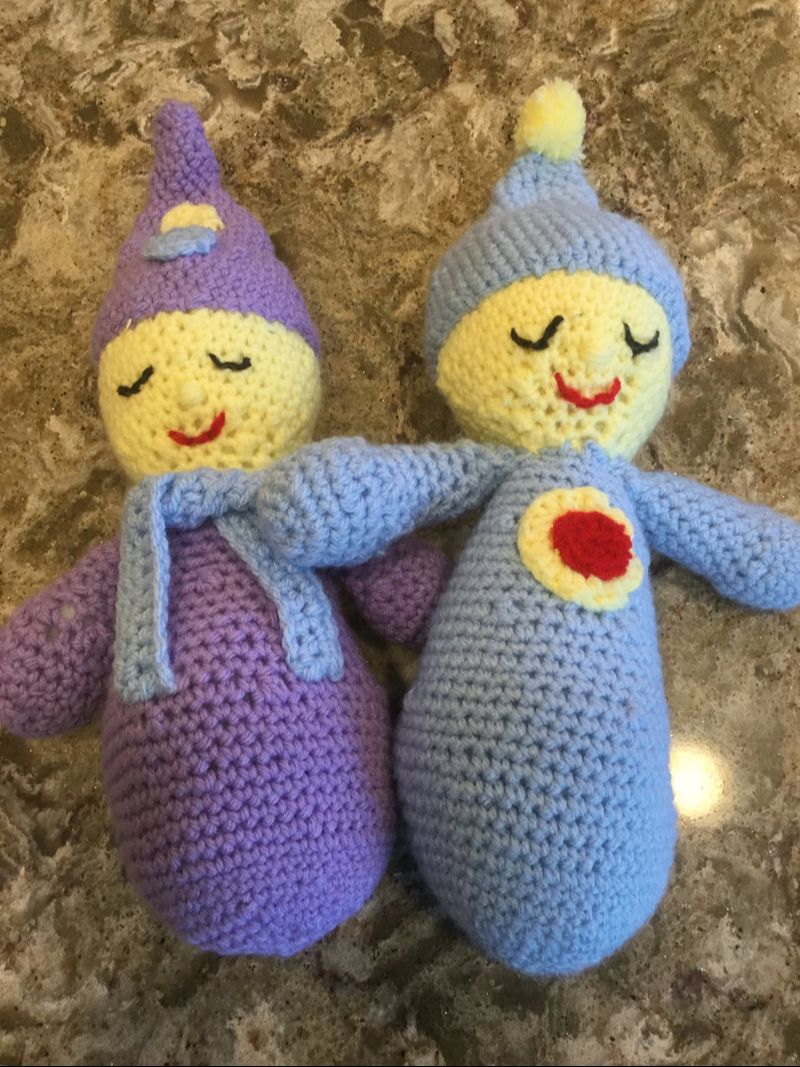
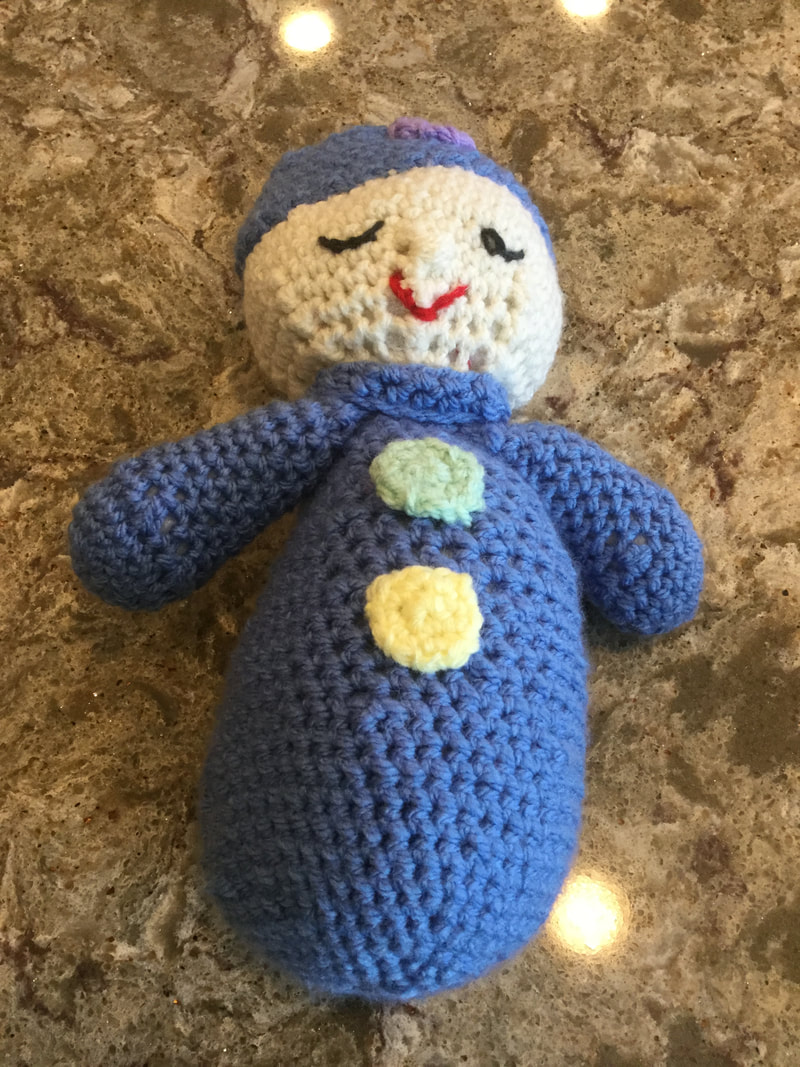
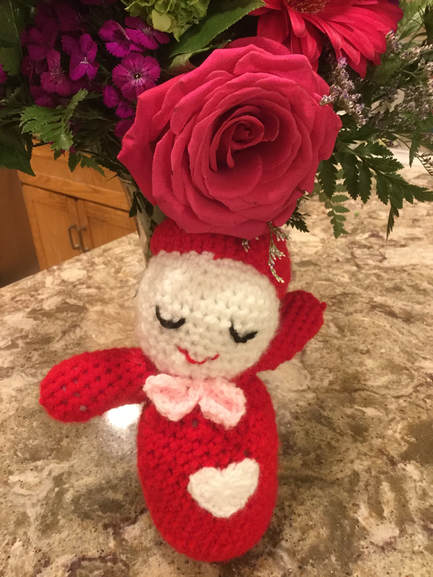
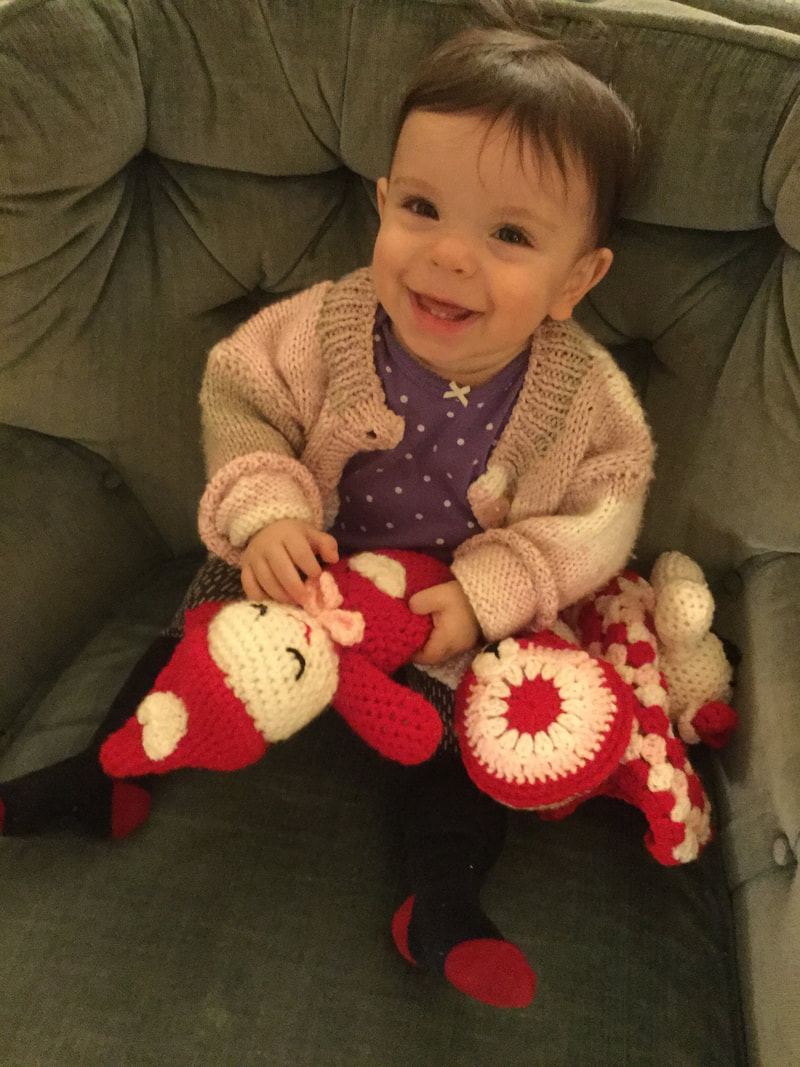
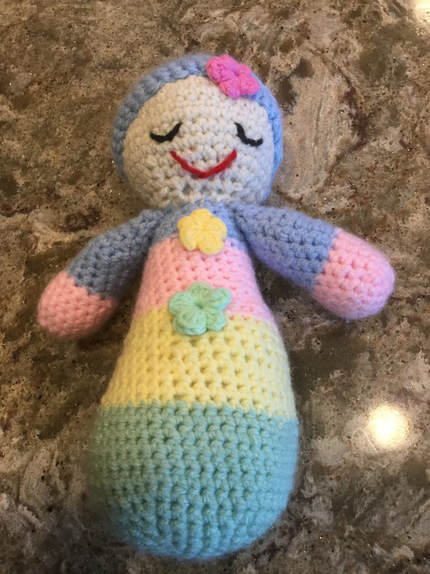
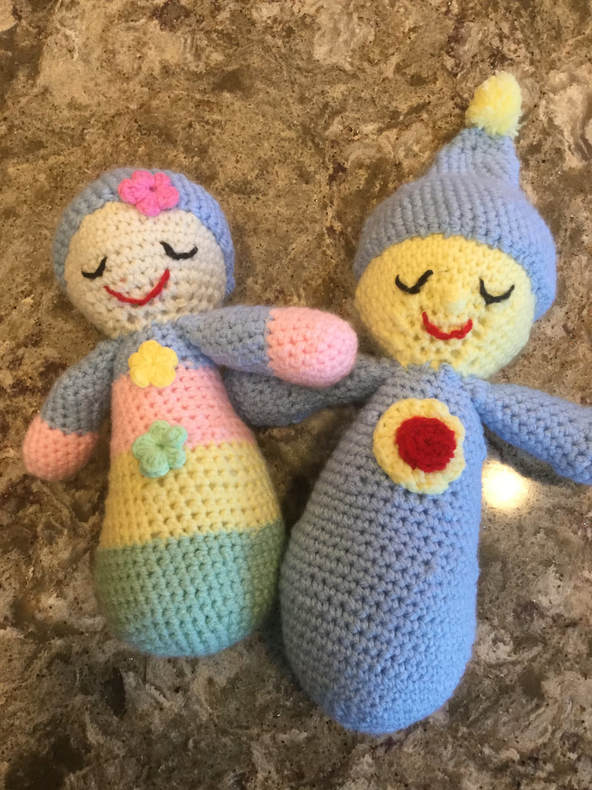 My family of sleepyhead crocheted baby dolls is growing. As I explore new color combinations and decorations, I am excited by the infinite possibilities this doll provides. Actually, when I gifted the first pink babydoll to my granddaughter months ago, I had no idea how attached she would become to it. At first it joined her many other dolls and loveys that she played with on her play area mat at home. However, increasingly she would select the doll and carry it off to nap time. By the time she entered her 3 day a week nursery and day program, pink "baby" was her constant companion. My daughter requested a new red baby for school, but my granddaughter held on to her precious one. On the first day, she presented the "baby" to the other children and adults, but clearly chirped "mine" to establish ownership in no uncertain terms. At first, she kept one hand on her doll with the other on new toys. Now she uses the doll in the morning to transition in and for naps since she feels secure enough to explore more of this new environment and all it holds. The sleepyhead doll is ideal for the beginner, but the more advanced crocheter can embellish the simple design with decorations, appliques, and even hair. Some may even choose to personalize their doll with the baby's first initial. The doll basically consists of a pear shaped rounded bottom section, a head, and two arms. The hat may be the long sleep hat or a cap. Closed eyes, nose, and mot, are embroidered on. The following link provides a reliable and easy-to follow-set of directions as well as a video for building your dolls. Many other crocheters and bloggers show their own dolls, but most of these refer back to this post: Type in http://www.lanasyovillos.com/en/amigurumis/sleepyhead. Some versions are in Spanish, but you should be able to find the English pattern here. The video tutorial is helpful to a beginner, learning how to make amigurumi parts. I like to add flowers,hearts, stars, bows, and other decoration to my dolls to make them individual and to add interest. The pompom at the send of the sleep cap is such a playful bit. Yesterday, I decided to make a sleepyhead doll with a striped body. This is an excellent way to use up those scraps of yarn we all moan and groan over. Besides you are being extra creative. These rustic dolls are inviting to cuddle and do not require much care. When dirty, toss in a mesh bag or old pantyhose and throw in the washing machine on delicate or actionwear. You can put them in the dryer to get rid of the extra water, remove them while damp, and then leave them to air dry. I am not finished making baby dolls for the spring season. There are a few real babies, I would like to present with a baby doll. Also each time my granddaughter sees me making a new doll, she anno0unces "mine." I think I will have to hold her off a bit if I am to have anything to sell by fair time. I also found a pattern for a two legged babydoll that offers other possibilities. I will be following this post up with that article.I will be posting this article and photos on Facebook, Pinterest, and Instagram. I hope you will follow metherere andleave your photos, ideas, and feedback. In the meantime, "Happy Crocheting!" I would love to see your unique interpretations of this basic pattern.
|
Archives
November 2022
Categories
|



 RSS Feed