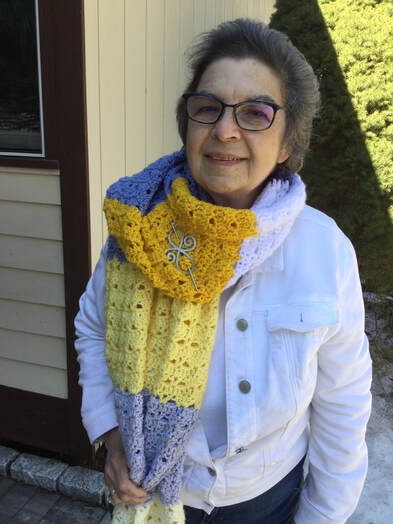
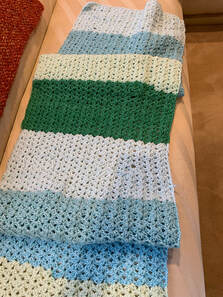
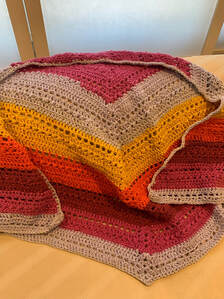
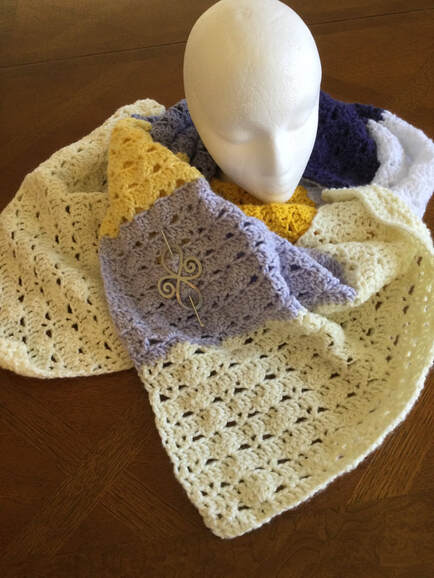
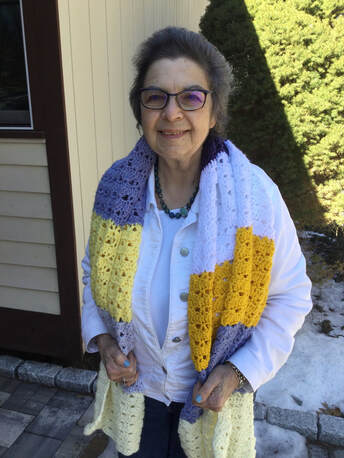
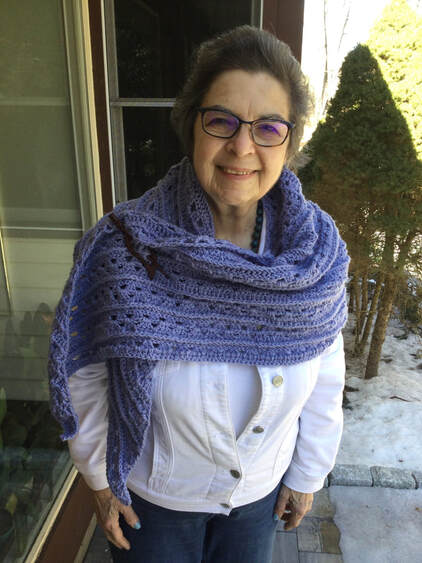
 Since my local chapter of Threads of Love organized in 2009, members and participants have produced more than 900 pieces. The shawls, lapgahns, and children's blankets are donated to Yale New haven Hospital and to the St. Raphael Campus so that cancer and other seriously ill patients can receive a warm hug and caring wish This chapter was orgainized by Sarah Blum, a former chaplain of St, Raphael Hospital and has been administered by Elaine Klein for members of the Or Shalom synagogue and interested participants in the general New Haven area. We passed our 500 mark in 2016 and hope to reach 1000 in 2022. Shawls and blankets for men, women, and children have also been sent throughout New England and across the country when we hear of friends and friends of friends who would benefit. Before COVID, our in person meetings were larger, but we continue to drop off pieces on collection dates 3-4 times a year for wrapping and distribution. Each piece includes a caring message for the recipient during times of health problems. At our last meeting we reached 911, but I was later called on to leave a newly crocheted piece for an elderly lady in physical rehab. With the addition of these two shawls our group total was now 913. Our group typically generates 18-21 pieces at each collection date. Therefore with a bit more effort we can reach our 2022 goal of 1000 pieces by the end of the year. The shawls featured in this article were made from Yarnspirations Caron Big Donut Yarn. Usually this yarn sells for about $10-$11 per skein. While the yield is 502 yards per skein, I have been reluctant to indulge even though I was attracted to the yarn. However when the price was reduced bu 50% at a local large craft store, I picked up a bunch. Once it is opened the tangle free quick start O'Go worsted yarn is easy to use. It unwinds without any difficulty and you do not have to search for an inner or outer thread. This is not a self striping yarn. Instead, there are 5 blocks of interesting color combinations. 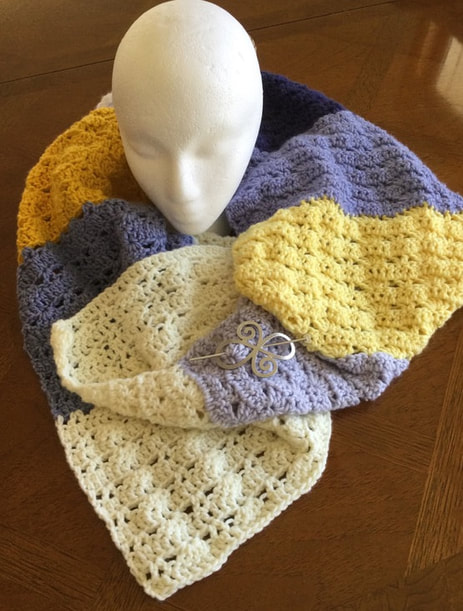 My first shawl was a rectangle piece in Sea Foam colors, crocheted with anI (5.5mm)hook. I used most of two skeins. However, one of the sections was a bright teal. While the color worked well for the center of the piece, it would be awkward to continue and place another teal black at the end. I cut off the bright block and am using it for other projects. While the Autumn Symphony pattern is usually worked in bulky yarn increased the chain stitches from 43 to 63 to achieve multiple of 4 +3. After the initial set up the double V stitch was repeated throughout the shawl. I also crocheted a triangle shawl with alternating Double crochet and open mesh sequences. The Autumn Symphony Shawl is a free download from fiberfluxblog.com. On a subsequent shopping trip I found another donut in light yellow, pale blue, gold, light periwinkle, and navy. Since there was not enough yarn on the wheel to complete an entire shawl, I bought a compatible skein of Impeccable in Ivory for 285 yards, My plan was to crochet the Quinley Sideways shawl with ivory sections at both ends. The Quinley Sidesways Shawl has a 2 row repeating pattern. In the first row you double crochet across the row. In row 2, V stitches are separated by 3 skipped stitches to alternate with shells. .Since the color block arrangement on the donut wouldn't work in its original form, I unwound, cut and rewound each section into separate balls. I rearranged the color blocks so that the light yellow would not be next to the ivory, and the navy would be in the middle of the shawl. At this point I realized that I needed blue to balance out the shawl and took some yardage from a Frostberry wheel. The finished piece is 21 inches deep and 63 inches long. It is an ample cover up that is quite cozy. The Quinley Sideways Shawl is a free download for AllFreeCrochet.com 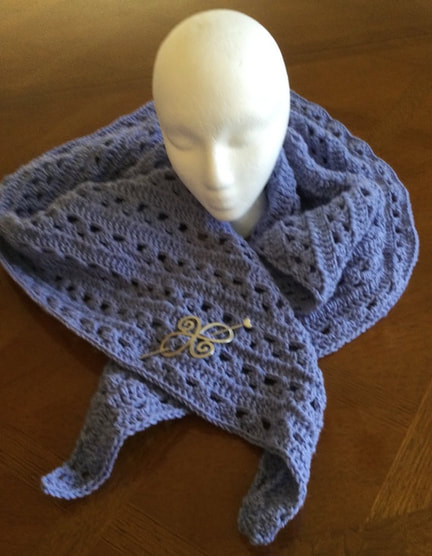 The final piece for this project was a triangular Amorous Shawl by Katja Loffler. This pattern is a free Ravelry download, I used the remainder of the Frostberry wheel from the previous shawl and part of a secondwheel to create a piece that was 29 inches deep and 68 inches from tip to tip. The piece is worked with an I hook (5.5 mm) from the top to the bottom. Increases are made in the center and both sides. Once the 9 row set up is established, 6 rows are repeated until you are saitisfied with the size. There is combination of closed and open work to create an interesting texture. An attractive feature of this piece is the front post double crochet stitch. By turning the shawl over to the reverse side, this stitch creates a raised ridge. This detail makes for a creative and attractive shawl.. A shawl pin enables the wearer to style the shawl in many ways. I am proud of my shawls, but I need to take rest for a bit to develop other projects. My goal for 2022 is to donate a total of 20 pieces. I put in 3 in January. I added another 2 in February. Have 2 completed another 1 in planning stages for March and April.. That makes 8. That means that I will take on12 more pieces from April through December. It is unambitious plan, but I can do it even though I will be working on other projects and skills in between my shawl and blanket making.
I welcome you to join me on my stitching journey. I appreciate your reflections and feedback.
2 Comments
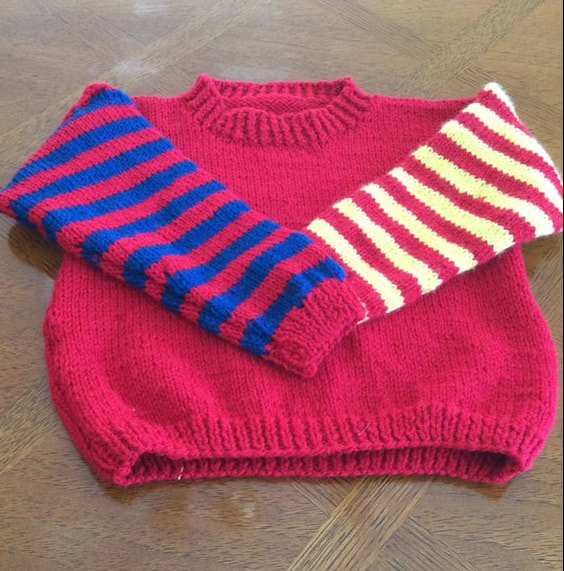
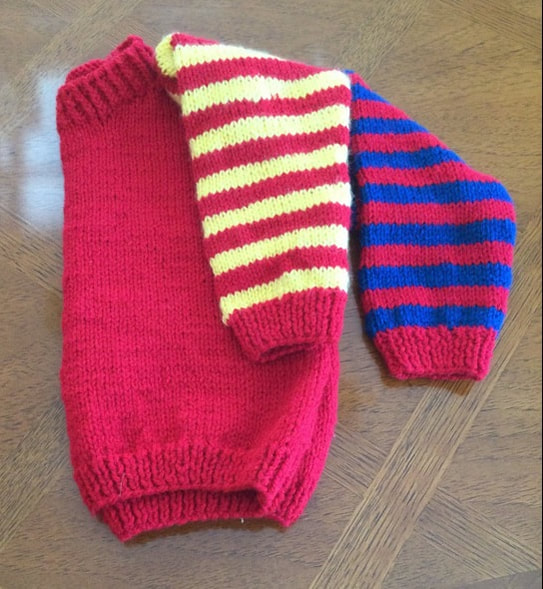
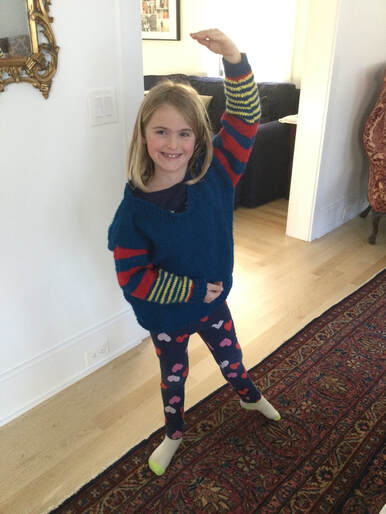
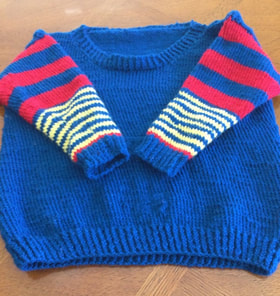
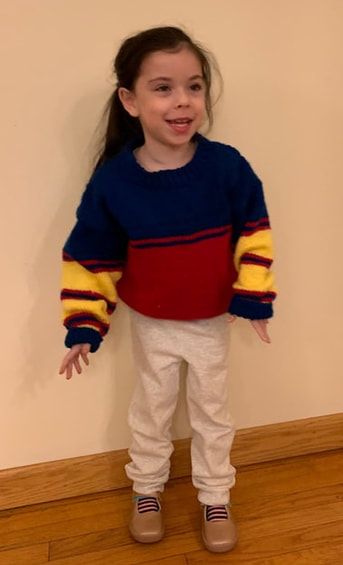
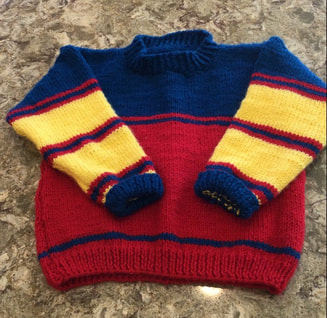
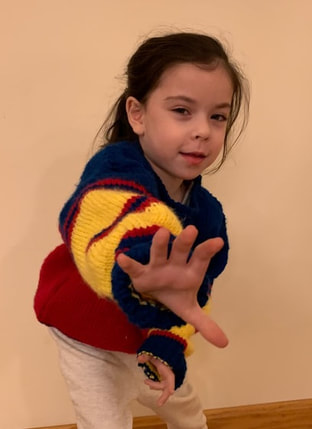
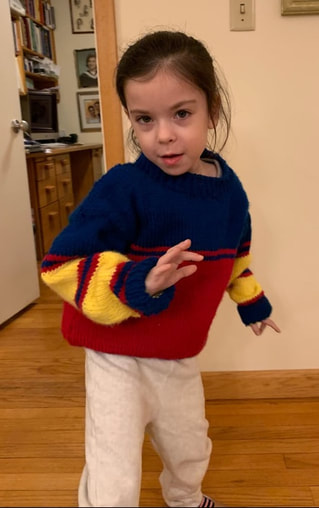 With so many interesting pictures of commercial sweaters to buy and patterns for making my own sweaters I was determined to try my hand at creating interesting sweaters with bold sleeve striping as the featured accent. Since my three granddaughters like primary colors, I decided to discover the many ways I could use red, blue, and yellow to produce varied results. By knitting with the same three colors to make three different sweaters, I hoped to have a cohesive body of work as I played with striping effects. My yarn choice was Read Heart With Love, a #4 Worsted. Needles were #6 for the cuffs and neckband and #8 for the body of the sweater. Pattern sizes 4 and 6 were worked with the Cascade Yarns Pattern Cherub Aran Zebra Pullover (W464). The size 8 sweater was worked with the pullover sweater from Bellish, a computer app that is no longer available. In retrospect, I wish that I had just enlarged the size 6 pattern to increase fro chest, body length, and sleeves. The size 4 pattern for the simple roomy crew neck pullover was worked with a red body, cuffs, and neck band. The pattern called for flat knitting of the separate front and back which would later be stitched together. While the pattern showed broad stripes of the same colors, I decided to knit one sleeve with red and blue stripes and the second sleeve in red and yellow stripes. Instead of knitting the sleeves separately and stitching them to the body, I took the final stitch count and picked up stitches on the designated armhole and reversed the process. Instead of increasing stitches from the cuff up, I decreased stitches from the top of the sleeve to the cuff. in this way my sleeve seam is smoother and I can easily adjust for sleeve length. I was pleased with the striped effect and eager to try a new combination on my second sweater. The second sweater in size 8 was worked with a blue body, cuff, and neck band. This pattern called for knitting the body in the round from the bottom up. After separating for the armholes, I knitted the upper back and front. Directions were given to produce the front and back necklines. Then I sewed the sweater together at the shoulders. I picked up the number of stitches for the top of the sleeves and knitted the sleeves in the round through to the cuff. This process enabled me to create as I knitted along. I used 5 broad stripes in red and blue for the upper part of the sweater. Then I transitioned to yellow and blue for the narrow stripes at the lower part of the arm. I carried the yarn along as I changed colors when appropriate. Note I added a narrow strip of red near the blue cuff to tie the colors together and to make a more dramatic effect. By the time I got to the third sweater (size 6), I really had to force myself to go on mes. Again, I was back with Cherub Aran Zebra Pullover, As with the first sweater, I omitted the zebra pockets on the front of the sweater. Now, I had to challenge myself to produce a new stripe combination, still with the same three colors. While each of the first two sweaters had a solid color on the body, for the third sweater I split the body to knit in red to the armhole and then change to blue to the neck. To create interest i added a thin stripe of the contrasting color just above the bottom ribbing and just below the armhole. I was looking for a bold result. As with the other two sweaters, I connected the shoulders and picked up the stitches at the armhole. By starting with the same blue as the chest, the sleeve and body looked seamless and continuous. The thin stripes of red, blue, red started just below the blue upper part of the sleeve broke up the yellow portion in the middle and at the bottom near the blue cuff. I have to admit and that I reconstructed the sleeve a few times before I got the desired effect. To create these or your own original striped effects, you can use the pattern featured in this blog or any pullover sweater. I think that a roomier style works best with the worsted wools I knitted with, but that can be your personal choice. Let your imagination go wild and enjoy your stripes. I am proud to have completed the three sweater project with creativity and style, I am relieved that I can deliver the pieces, and take my pictures for my blog and website. The subject of striped effects still intrigues me, but I will lay it to rest for a while. After crocheting the 3 ballet barre sweaters for my last blog post and knitting these sweaters with the interesting striped sleeves, I think I have learned a lesson. Creating three coordinated pieces for one article requires several weeks of work. Since I like to write as well as knit or crochet, I may need to discipline myself to produce fewer pieces on a theme when I consider what I will write about. However,I have said the same words before only to cast caution to the winds before launching a new vision.
As always, I welcome your reflections and feedback. If you have knitted pieces with interesting stripe work, please share your photos. Please join me on my stitching journey. I continue eo enjoy my evolution as a fiber artist. |
Archives
November 2022
Categories
|

 RSS Feed