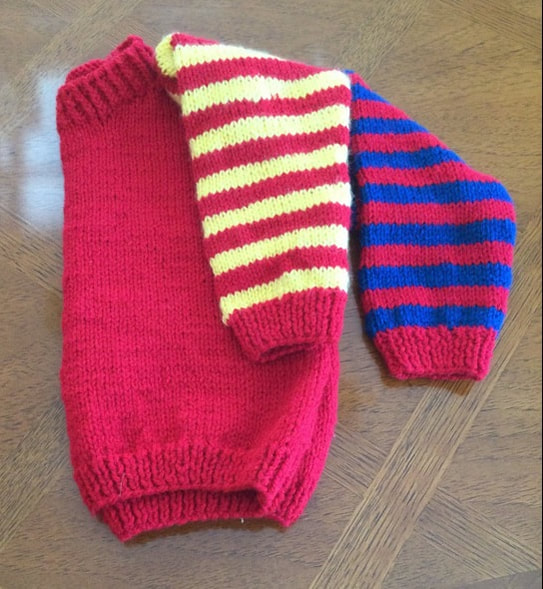
 With so many interesting pictures of commercial sweaters to buy and patterns for making my own sweaters I was determined to try my hand at creating interesting sweaters with bold sleeve striping as the featured accent. Since my three granddaughters like primary colors, I decided to discover the many ways I could use red, blue, and yellow to produce varied results. By knitting with the same three colors to make three different sweaters, I hoped to have a cohesive body of work as I played with striping effects. My yarn choice was Read Heart With Love, a #4 Worsted. Needles were #6 for the cuffs and neckband and #8 for the body of the sweater. Pattern sizes 4 and 6 were worked with the Cascade Yarns Pattern Cherub Aran Zebra Pullover (W464). The size 8 sweater was worked with the pullover sweater from Bellish, a computer app that is no longer available. In retrospect, I wish that I had just enlarged the size 6 pattern to increase fro chest, body length, and sleeves.
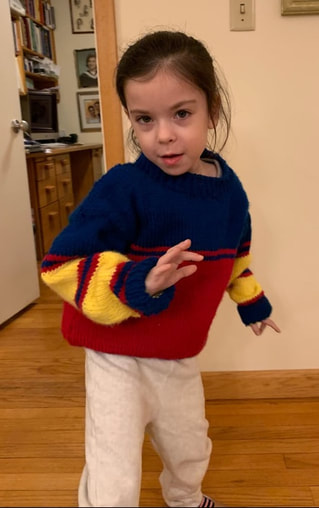
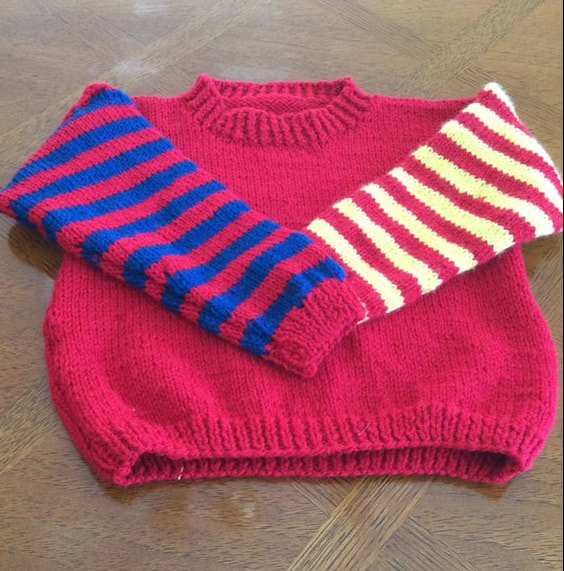
The size 4 pattern for the simple roomy crew neck pullover was worked with a red body, cuffs, and neck band. The pattern called for flat knitting of the separate front and back which would later be stitched together. While the pattern showed broad stripes of the same colors, I decided to knit one sleeve with red and blue stripes and the second sleeve in red and yellow stripes. Instead of knitting the sleeves separately and stitching them to the body, I took the final stitch count and picked up stitches on the designated armhole and reversed the process. Instead of increasing stitches from the cuff up, I decreased stitches from the top of the sleeve to the cuff. in this way my sleeve seam is smoother and I can easily adjust for sleeve length. I was pleased with the striped effect and eager to try a new combination on my second sweater. 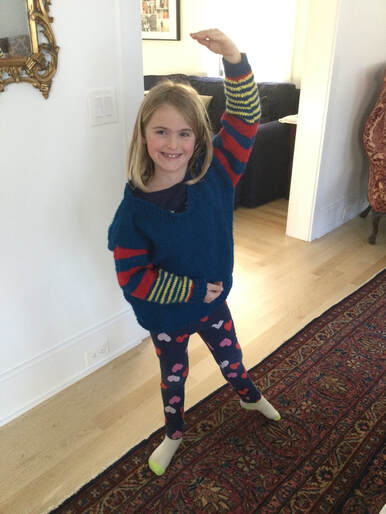 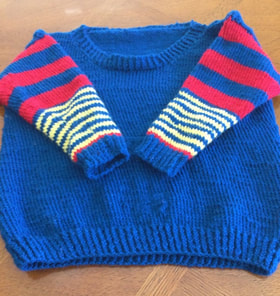 The second sweater in size 8 was worked with a blue body, cuff, and neck band. This pattern called for knitting the body in the round from the bottom up. After separating for the armholes, I knitted the upper back and front. Directions were given to produce the front and back necklines. Then I sewed the sweater together at the shoulders. I picked up the number of stitches for the top of the sleeves and knitted the sleeves in the round through to the cuff. This process enabled me to create as I knitted along. I used 5 broad stripes in red and blue for the upper part of the sweater. Then I transitioned to yellow and blue for the narrow stripes at the lower part of the arm. I carried the yarn along as I changed colors when appropriate. Note I added a narrow strip of red near the blue cuff to tie the colors together and to make a more dramatic effect.  By the time I got to the third sweater (size 6), I really had to force myself to go on mes. Again, I was back with Cherub Aran Zebra Pullover, As with the first sweater, I omitted the zebra pockets on the front of the sweater. Now, I had to challenge myself to produce a new stripe combination, still with the same three colors. While each of the first two sweaters had a solid color on the body, for the third sweater I split the body to knit in red to the armhole and then change to blue to the neck. To create interest i added a thin stripe of the contrasting color just above the bottom ribbing and just below the armhole. I was looking for a bold result. As with the other two sweaters, I connected the shoulders and picked up the stitches at the armhole. By starting with the same blue as the chest, the sleeve and body looked seamless and continuous. The thin stripes of red, blue, red started just below the blue upper part of the sleeve broke up the yellow portion in the middle and at the bottom near the blue cuff. I have to admit and that I reconstructed the sleeve a few times before I got the desired effect.  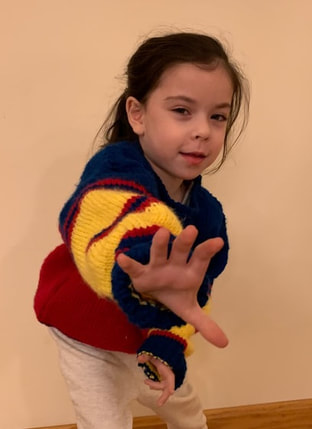 To create these or your own original striped effects, you can use the pattern featured in this blog or any pullover sweater. I think that a roomier style works best with the worsted wools I knitted with, but that can be your personal choice. Let your imagination go wild and enjoy your stripes. I am proud to have completed the three sweater project with creativity and style, I am relieved that I can deliver the pieces, and take my pictures for my blog and website. The subject of striped effects still intrigues me, but I will lay it to rest for a while. After crocheting the 3 ballet barre sweaters for my last blog post and knitting these sweaters with the interesting striped sleeves, I think I have learned a lesson. Creating three coordinated pieces for one article requires several weeks of work. Since I like to write as well as knit or crochet, I may need to discipline myself to produce fewer pieces on a theme when I consider what I will write about. However,I have said the same words before only to cast caution to the winds before launching a new vision.
As always, I welcome your reflections and feedback. If you have knitted pieces with interesting stripe work, please share your photos. Please join me on my stitching journey. I continue eo enjoy my evolution as a fiber artist. 
0 Comments
Leave a Reply. |
Archives
November 2022
Categories
|

 RSS Feed