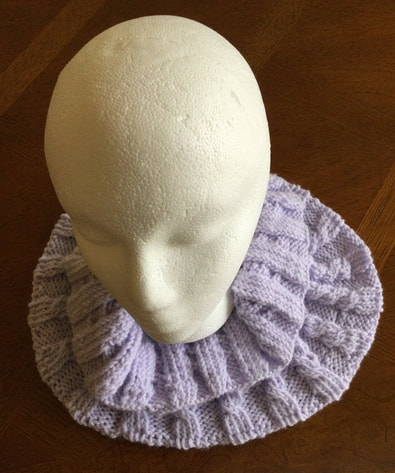
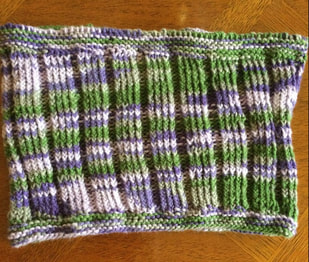
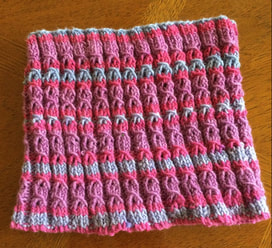
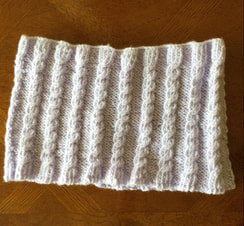
 Fellow knitters, as promised I am sharing my experiments with knitted cowls that you can use to add style to the simplest outfit. By experiments, I mean that none of the cowls featured in this article came from a single specific pattern. My process included reading through many knitted cowl patterns to establish realistic size and stitch counts for completed cowls. Then I combined stitch patterns that I have used successfully to produce other garments. Now that I have taken notes and have examined the finished pieces I can move on to make changes in size and pattern. I have had a lot of fun and am eager to share my work with you. 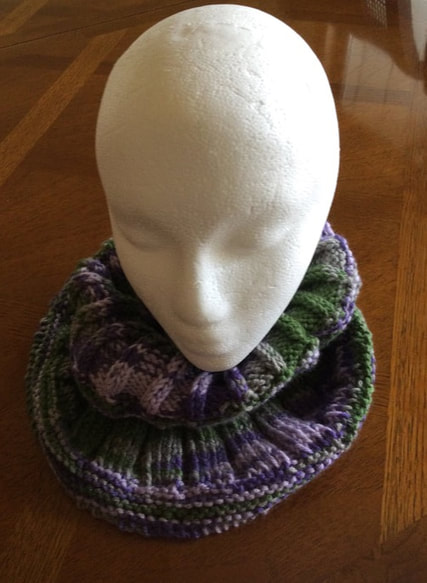 My ribbed cowl was knitted in the round with a self striping worsted weight yarn on #8 cable needles. The piece measures 9 inches high and has a circumference of 22 inches. Cast on 130 stitches. To produce the cowl, begin with 6 rows garter stitch (knitted) The stitch pattern is a rib with a 4 knit 2 purl repeat. To increase the circumference add in multiples of 6 for the 4 knit stitches and the 2 purl stitches. Since the piece is knitted in the round, you just continue with the same stitch pattern until you have the desired height. Complete the cowl with 6 rows of garter stitch. 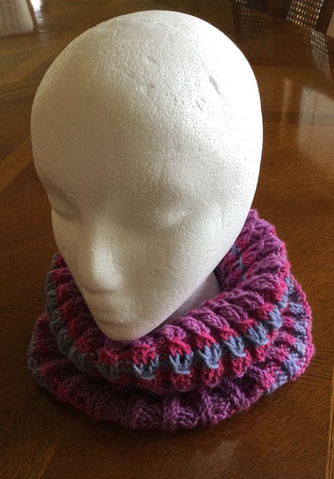 1 love the texture of the bamboo stitch cowl. I have used this stitch to make fingerless gloves and scarves. The cowl is 8 1/2 inches high with a circumference of 20 inches. However the stitch is quite stretchy which makes it very comfortable. The piece was knitted with a #3 merino self striping yarn on #* cable k=needles. Place marker at beginning of row, The 4 row repeat pattern continues as follows: Row 1: *Slip 1, knit 2 Pass the slip stitch over the two knitted stitches. Purl 2.* Continue to end of row. Row 2: *Knit 1. Add 1 stitch before the next knitted stitch. Knit 1. This addition replaces the stitch lost be slipping a stitch over the two knitted stitches in row 1. Purl 2.*Continue to marker. Row 3: Knit. Row 4: Knit. Cast on 130 stitches. There is a 5 stitch multiple to add or decrease stitches.The first 6 rows will establish the rib. Knit 3 stitches Purl 2 stitches. Starting in row 7 begin with the stitch repeat. I knitted 9 4 row pattern repeats. Complete cowl as you began with a 6 row rib of 3 Kinit 2 Purl. The finished cowl was cozy and soft. If I were to repeat the pattern, I would probably add ten to twenty stitches for a looser fit.  The final cowl was probably my favorite. The pale lavender Impeccable worsted from Micheals was knitted on a #8 cable needle in the round. The design feature for this cowl was aC4 cable stitch. To produce this stitch, slip 2 stitches on a cable needle.in front of work. Knit the next two stitches. Knit the two stitches from the cable needle. How to Knit the 4 Stitch Cable is a helpful You Tube Video that can guide you through the process. Cast on in multiples of 8. I cast on 160 stitches for my piece. Place a marker before the first stitch. To establish rib, I knitted 4 purled 4 around to end for 4 rows. Pattern sequence is as follows: Row 1: *Follow steps for C4F or cable stitch with 4 stitches in which you hold the cable needle to the front. Purl 4* and continue around. Rows 2-4 Knit. Continue with sequence until you have the desired height. Endwith 4 rows of knit 4, purl 4 ribbing. I enjoyed this simple cabling. In future cowls I may wish to work on more complicated combinations. Creating a cowl is so satisfying as the project can be completed quickly and the creative possibilities are endless. After my initial experiments I am encouraged to try new designs during the autumn or winter months.
As always I appreciate your reflections and feedback. Thank you for joining me on my stitching journey.
0 Comments
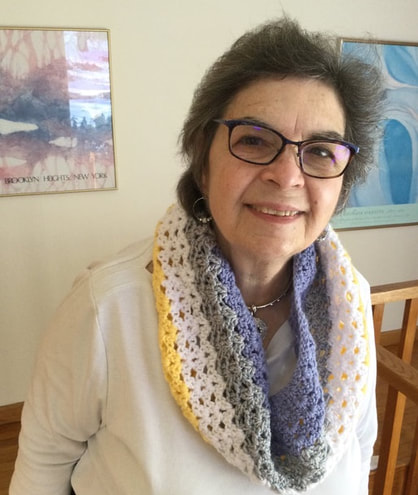
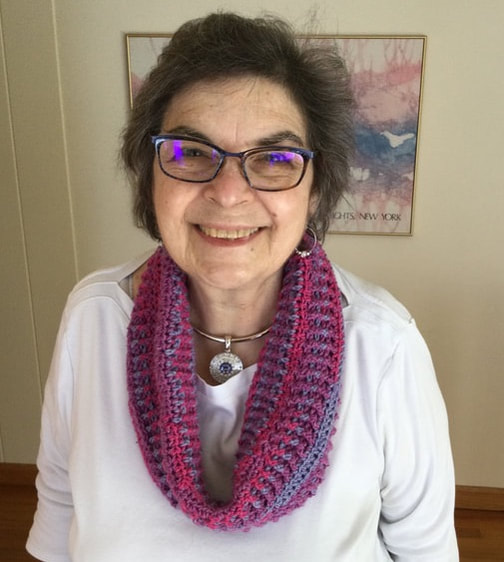
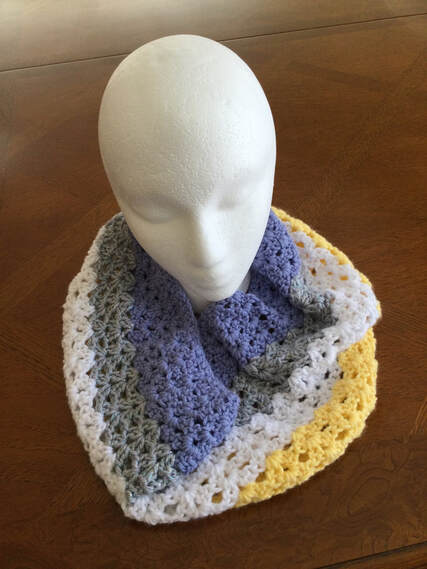 With spring just around the corner, we still have time to accessorize an outfit with the textures and colors of a crocheted cowl. I have considered crocheting cowls for awhile, but suddenly I had a window of time between projects. Since each of the cowls in the article can be completed in a day or two of full time crocheting or a week of sparetime crafting, these pieces fit right into my schedule. I began by surfing the internet or scrolling through Pinterest or Ravelry for pictures of pieces that were attractive, relatively easy to execute, and which would use only the wool and hooks that I already had on hand. The first photo that caught my eye was the Frosty Forest Cowl, a free pattern from 5 Little Monsters (https://www.5littlemonsters.com/2019/01/frpsty-forest-cowl.html). The pattern instructions call for 4 shades of yarn in the same color family from dark to light and an I hook (5.5mm). The texture of the double V stitch was appealing. I followed the basic design, but made a few changes. I did not have 4 shades of one color on hand, but I decided to dig into my large piece scrap pile for 4 colors that would compliment each other. I ended up with 4 rows of Frostberry from left over from a shawl, 3 rows of Sparkly Silver left over from a child's ballet shrug, 3 rows of white, and 4 rows of yellow. While I made the initial chain with 90 stitches using the I hook, I switched to the H hook for the body of the cowl. I did try using the I hook throughout, but I did not like the presentation of the stitches. Using a slightly larger hook for the initial chain kept the piece from being too tight at the bottom. If you prefer crocheting a flat piece, you can crochet a rectangle and then sew the short sides together. In this case, chain 90 +4. Row 1:Make the first double crochet in the fourth chain fromm the hook. Crochet another DC in the same chain. Skip 2 chains. In the next chain stitch, crochet 2 DC, Chi 1, 2 DC in the same stitch.( This stitch is called a Double V Cluster.) Skip 2 chain stitches.* When you are 3 stitches from the end, skip 2 chain stitches and crochet 2 DC in the last stitch. Turn your work. Row 2: Chain 3. Dc in the same space. Crochet your first Double V cluster in the chain 1 space of the cluster from the previous row. Continue across the until you get to the las 3 stitches. Crochet 2 DC in the same last space. Rows 3-14 Follow instructions for row 2. If you wish to change colors, you will make the change by stopping the final DC of the row when there 2 loops on the hook. Lay the contrasting yarn across the hook and pull through the loops to complete the DC. Turn your work Chain 3 with the new color and proceed with instructions for row 2. Leave tails of about 4-5 inches of old and new yarns and tie together. Then you will weave in ends when the piece is finished. 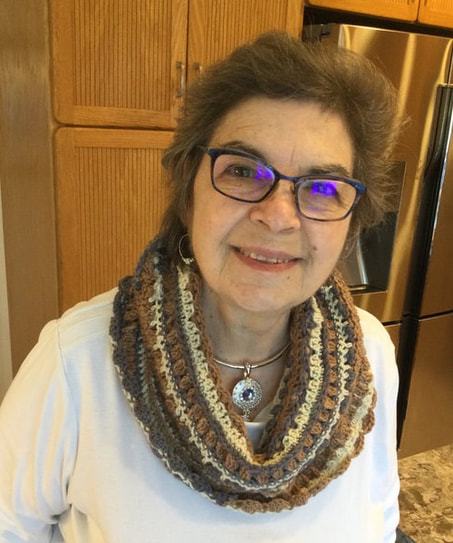 My second piece was the "Layer Cake" Lace Cowl from Kirsten Halloway Designs. I chose a multi-tone self striping Cozy Merino Wool(Driftwood Multi) with an H hook (5.0 mm) . The cowl comes in many sizes, but I chose to start with a 120 stitch chain to crochet the piece in the round. The set up sequence includes 8 rows of different stitch patterns that achieve the lace effect. Then you repeat rows 3-8 four more times before ending with the scalloped row 3. The piece was interesting to crochet end not too difficult to follow. If I were to use the pattern again, I would like to try a solid or a tweed so that the stitches instead of the color would be the focus of attention. 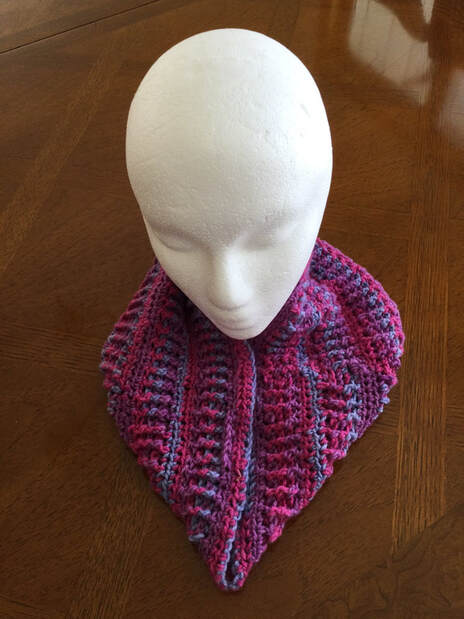 I saw the photo for the final piece before I located the pattern. I really liked the style and use of sttiches and texture. This was another cowl crocheted in the round on an H (5.0 mm) hook. I decided to wing it and figure out the stitch and row combinations as I went along. My yarn was another skein of Cozy Wool Merino but with shades red, plum, and lavender. My basic attempt included a 120 stitch beginning chain, followed by 3 rows of HDC and then 4 rows of Front Post Double Crochet alternating with Back Post Double Crochet. By changing off sections, I had 4 sections of HDC and 3 sections of the vertical stripes of the Front Post Double Crochet/Back Post Double Crochet. Eventually I found the pattern from the photos. Brooklyn Cowl by Demi Sharpe is a paid pattern found on Ravelry. It includes sizes toddler through adult and is accompanied by a matching headband. This cowl is larger than my version as it begins and ends with the Front Post Double Crochet/ Back Post Double Crochet sections. Although I am wearing a white long-sleeved t in the photos, I can easily enhance the look with a black or colored t shirt or sweater. The project was engaging and called on me to be creative. While working with these crocheted cowls, I was encouraged by the positive remarks of my friends to work on knitted versions. Please look for my knitted cowls in a future post.
As always, I appreciate your feedback and reflections. I welcome you in doing me on my stitching journey. |
Archives
November 2022
Categories
|

 RSS Feed