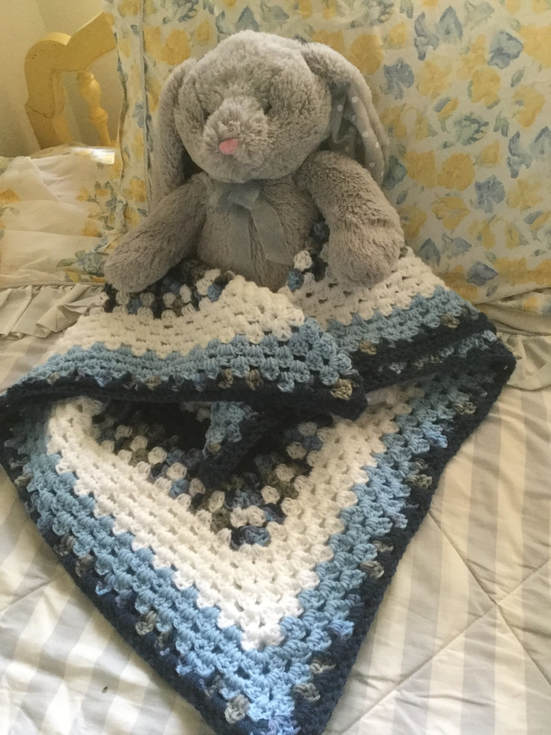
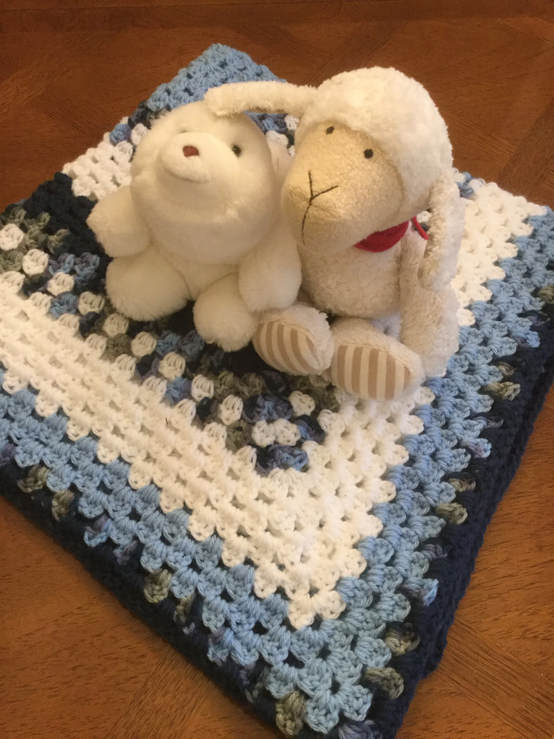
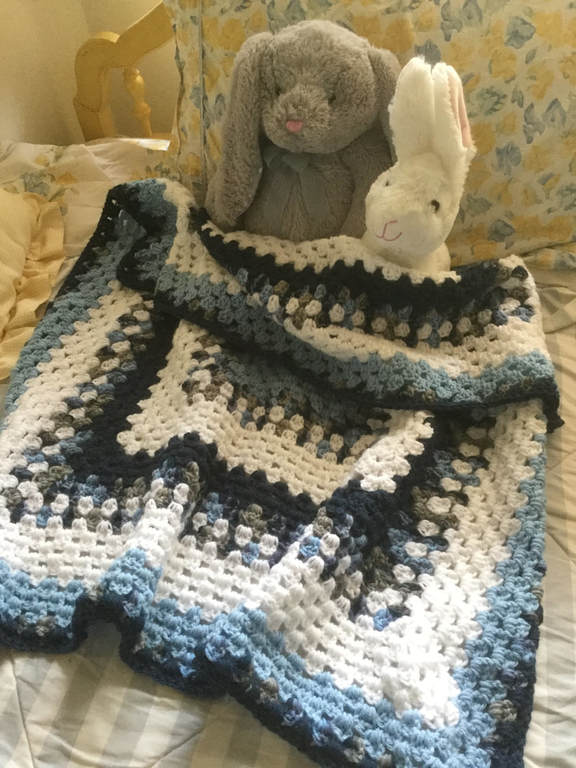
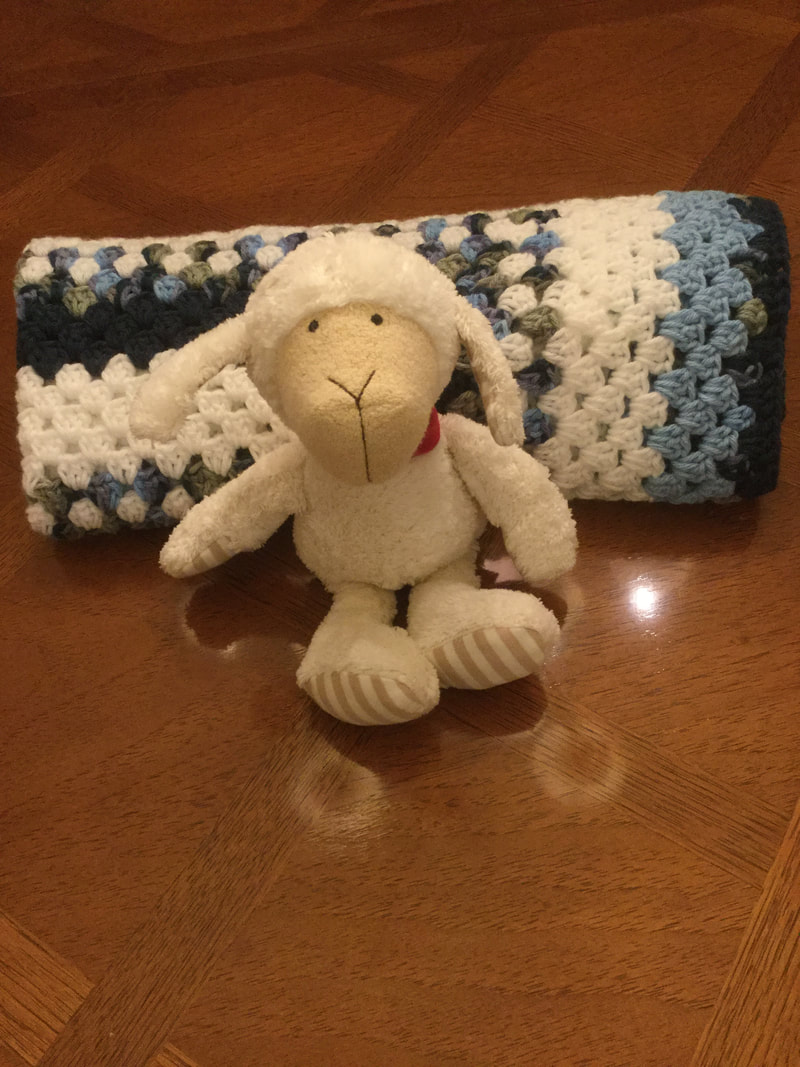
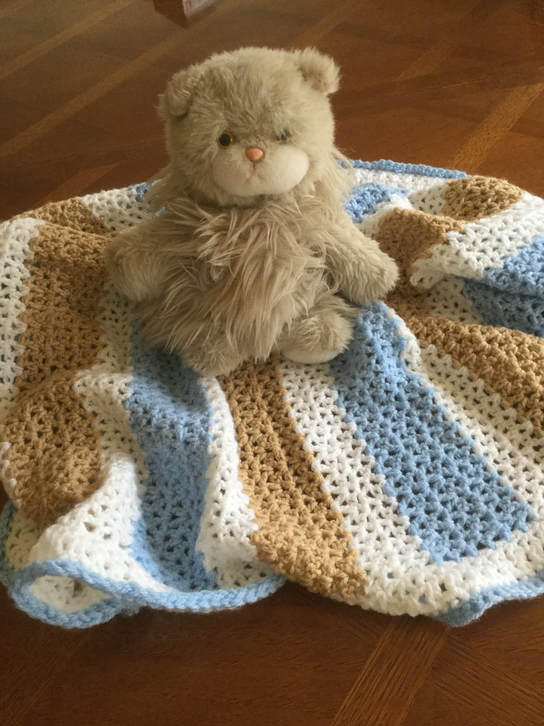
 I had just enough time to photograph my latest "blanket with holes" before wrapping it and mailing the order to California as a new baby present. When my BFF ordered the gift she gave me carte blanche to use any color combos or style for the present. If you are a frequent reader, you will remember the 3 color rose, purple and white blanket I finished a few weeks ago. I enjoyed changing the line patterns to create a new style using the familiar Extended Granny Square Design. (http://www.lilcreates.com/lillians-blog/crocheting-blankets-with-holes-playing-with-color-and-line-patterns). Many crocheters like to change from solid color blocks, but do not want to risk making a mistake with color and line placement. Since I was so delighted with my finished blanket, I wrote out the sequence to share with you. Now I set myself another challenge: integrating four colors into a pleasing and exciting blanket for a male infant. I created with the same materials and hook as I had for the previous blanket. My hook was a J (6.00mm). I used worsted yarns that were on the thicker end of the #4 spectrum. The yarns used in this blanket were Big Twist Yarns, the house yarns form Joanne's Fabric and Crafts. I also like Studio Classic by Nicole,the house yarn from A.C.Moore. Baby Hugs from Red Heart works well. However, you should feel free to crochet with any yarn than will yield a soft, plushy blanket with your selected colors. As with my last blanket, I chose 2 solids and a white for contrast. The light blue,navy, and white were set off with a multi-colored yarn (light blue, grey,and navy) that added dimension to the design. Of course, you may select any four colors for male, female, and neutral that fit your baby's color scheme. I wanted the finished blanket to be a square with a size measurement between 32inches to 36 inches. Using my last blanket as a guide, i knew that I would have to narrow the bands if I were include all four colors. With a general design in mind, I began, hoping that my sequence would be eye-catching and have the right proportions. If I miscalculated, I was prepared to frog. Luckily, I made the correct estimates, and the final blanket was 34 inches square. In fact, this dynamic blanket was my best yet. Colors: A= Light Blue B= Multicolored Light Blue, Gray, and Navy C= White D= Navy Sequence: Rows 1-6: A Rows 7-8: B Row 9: C Row 10: B Rows 11-15: C Rows 16-18: D Rows 19-0: B Row 21: C Row 22: B Row 23-27: C Row 28-30 D Row 31: B Row 32: D Trim Row in D. Crochet a row of Half Double Crochet (HDC) around the blanket. Make sure to crochet 3 stitches in each corner so that the corners lay smooth. I really liked using one color that was so much deeper than the others (navy) in this 4 color blanket to create such a dramatic effect. With these two designs under my belt, I am confident that I will bring in additional orders. I would love to see how you interpret these designs with colors of your choosing. Please post your finished projects or leave a comment with your color choices. Happy crocheting!
3 Comments
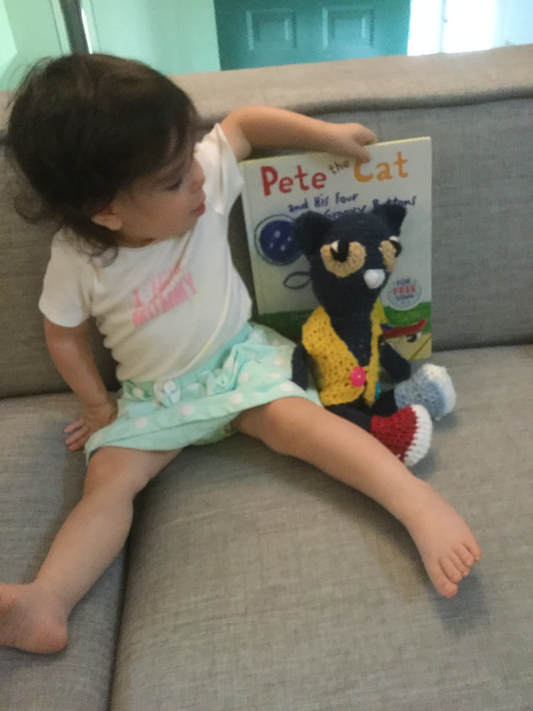
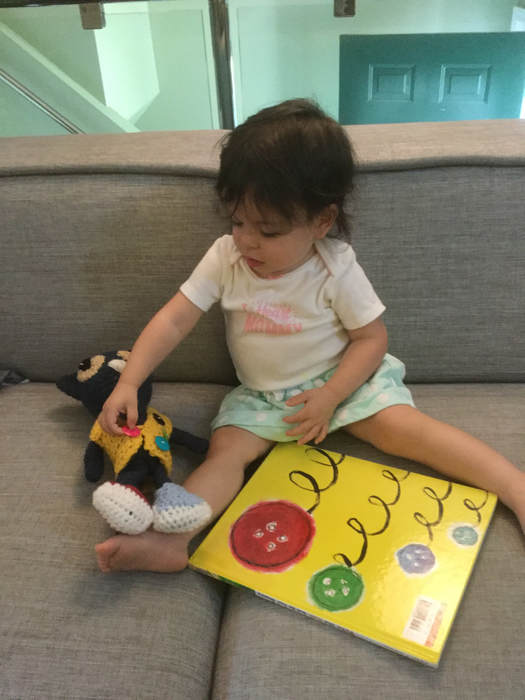
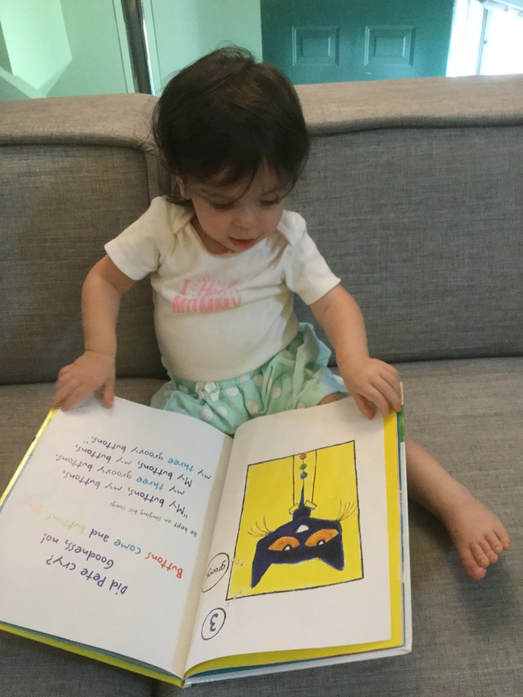
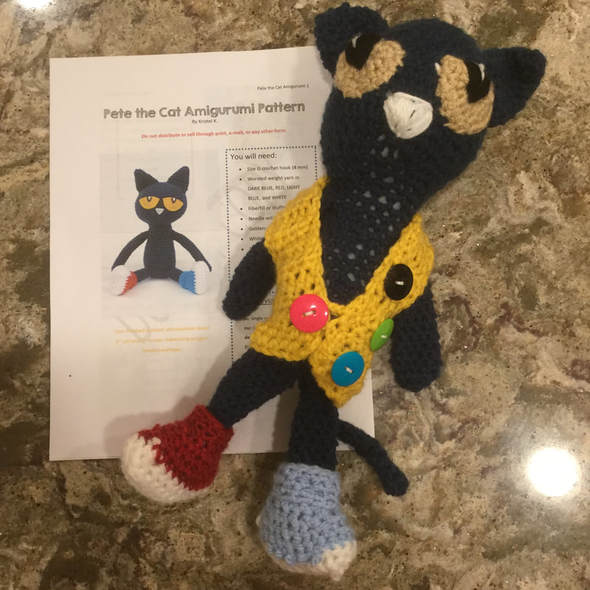
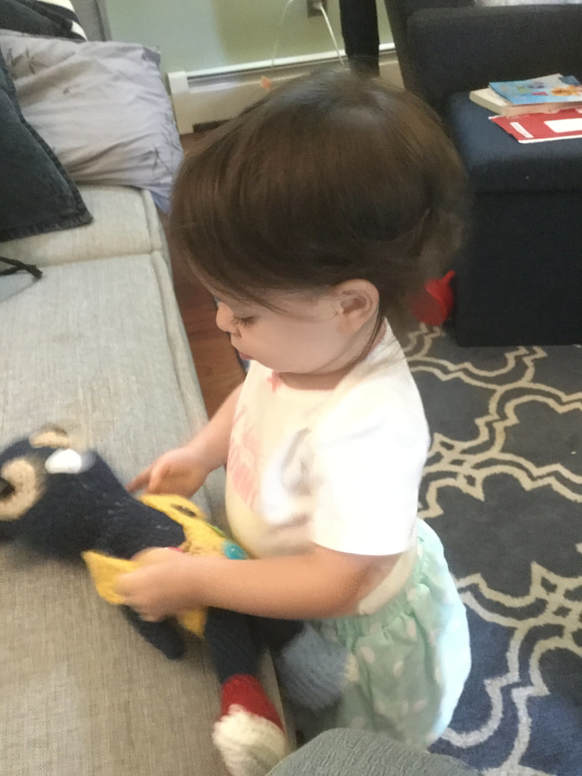
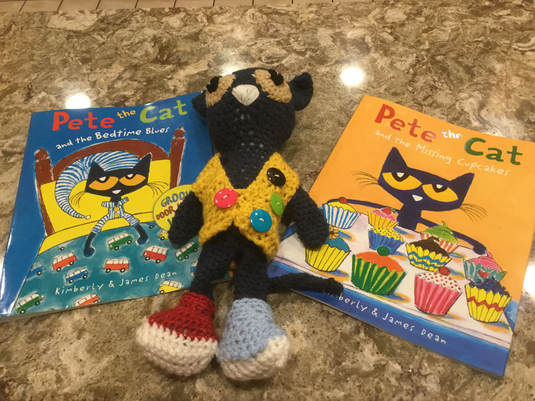 The Pete The Cat series by James Dean is a favorite with the preschool and pre-preschool set, and my granddaughter just loves the books. When I was introduced to Pete the Cat and His Four Groovy Buttons I became an instant groupie. I can't seem to get the refrain out of my head: "My Buttons, My buttons, my four groovy buttons...".. We follow Pete who just loves the buttons on his sweater as they pop off one by one. Pete keeps his spirits up as he does simple subtraction while he loses all of the buttons on his sweater. However, there is one button that he will never lose: his belly button. Pete the Cat and the Missing Cupcakes builds on math skills and supports character decisions involving friendship and forgiveness. I plan to get Pete the Cat: I Love My white Shoes. This book was the first of the series and walks Pete through many colors with another delightful song. Pete the Cat is interesting and special, and I was lucky to find,a pattern for making a doll for my granddaughter that would go along with her books. Pete the Cat Amigurumi Pattern by Kristel K can be found on Ravelry. You can also go to the website: https://www.ravelry.com/patterns/library/pete-the-cat-amigurumi-pattern. Pete is made with dark blue worsted yarn and a g (4.00mm) hook. The designer uses felt for the eyes and nose. However, I crocheted mine. Pete wears one red sneaker with a white sole and one blue sneaker with a white sole. I added a yellow vest instead of the long sleeved shirt for more contrast and sewed on 4 one inch groovy buttons. There is no pattern for my vest. I just eye-balled it and crocheted and measured against the cat as I went along. The downloaded pattern directions and photos guide the crocheter and are easy to understand. I was happy with the finished project, and my granddaughter found him to be quite appealing. At 19 months, her language skills are blossoming. When she announced "Read Cat!" what else could I do? Another source for Pete the Cat doll patterns can be found from Sarah on the Repeat Crafter Me Website. The designer was thrilled that the books helped her son with his language skills and was motivated to design her own version of Pete the Cat. See: www.repeatcrafterme.com/2012/06/pete-cat-crochet-doll-html.
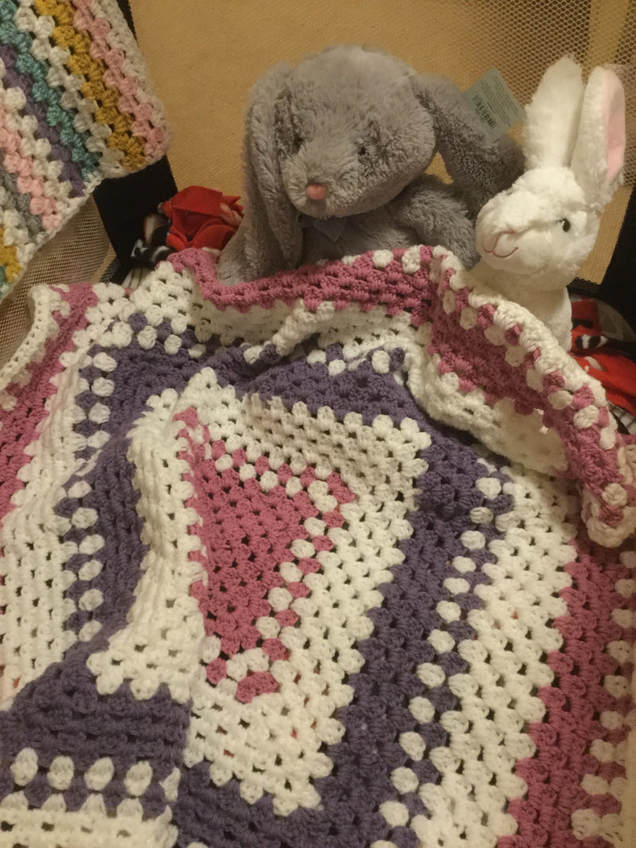
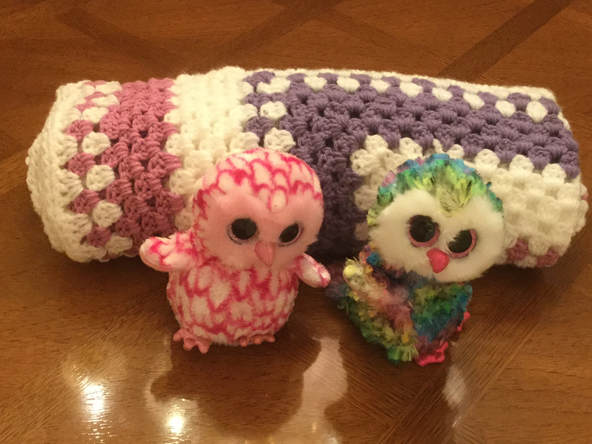
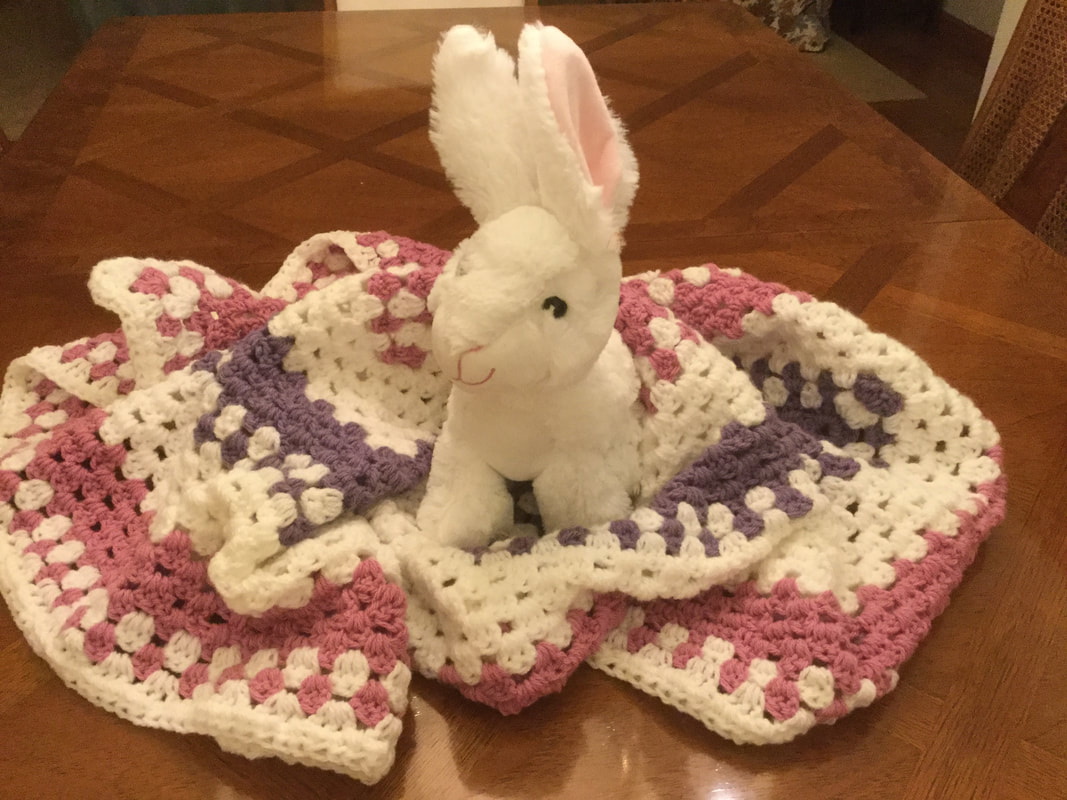
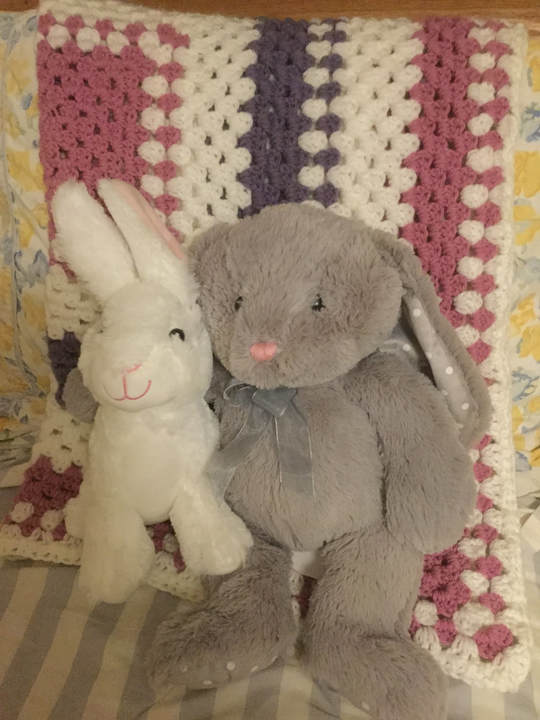
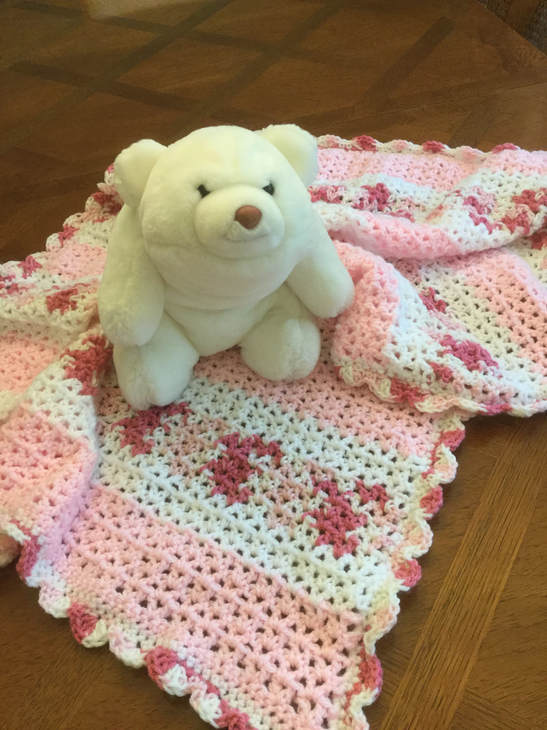
I am on the lookout for another interesting character that will bring the reading process alive for my granddaughter. Pete was easy to crochet had a dynamite personality for a doll. Readers, do you have any suggestions? 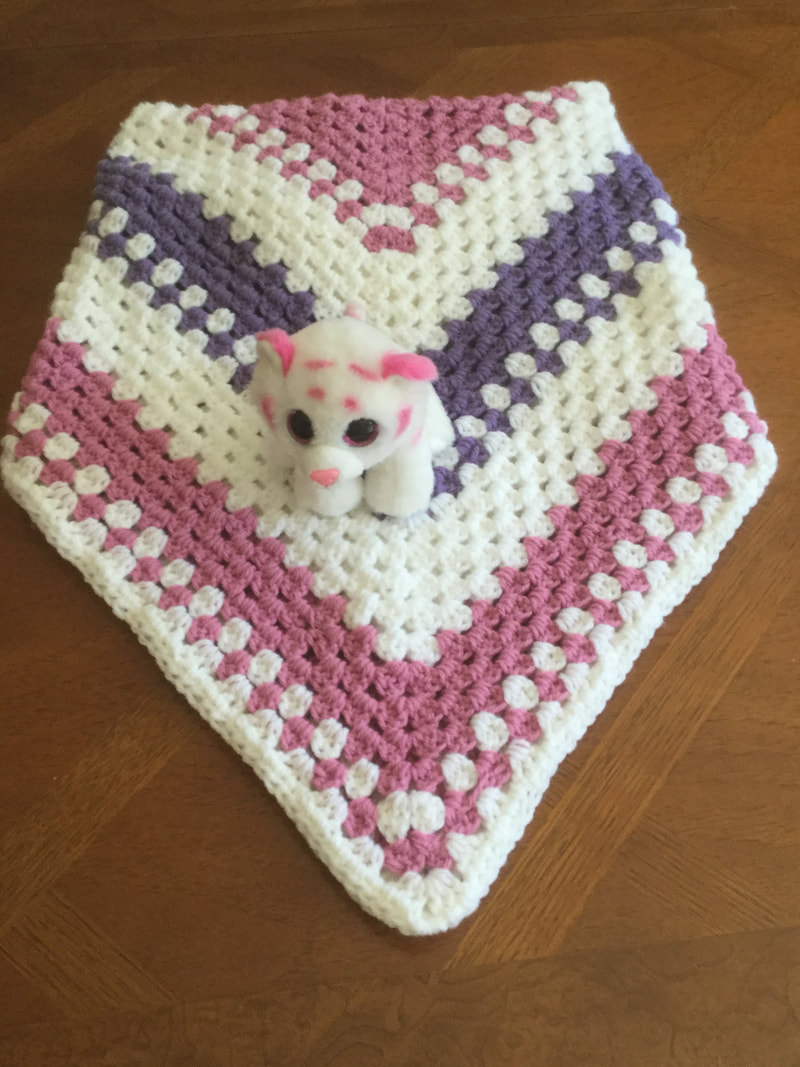 Crocheting a baby afghan with a familiar and easy pattern allows me the freedom to play with different combinations of color and line. I crocheted my first "blanket with holes" in March, 2017 as a baby gift for a friend of my husband's. The mother was delighted to receive the blanket as the crocheted piece allowed for breathing holes while keeping her son warm. As a matter of fact we met the same family at a recent recent party,. She told me that she still packs the blanket everywhere her family travels, even on their long distance visit from Israel. To find the original pattern with directions, please see http://www.lilcreates.com/lillians-blog/blankets-with-holes. Since that first crocheted blanket I have made several others, including diagonal granny stripe, mitered box, and V-stitched designs. Some of my blankets have scalloped edges, others have picot trim, but most have a simple row of half-double crochet to neaten the lines. With all of the changes, I still return to my basic pattern, the extended Granny Square, that incorporated the charm of the granny square, without all of that joining and weaving in of ends. Since I don't have to concentrate on complicated stitch sequences, I feel free to concentrate on changing the colors for pleasing contrasts and patterns. I generally crochet my baby afghans with thicker worsted yarn and a J Hook. The house yarn from Joanne's (The Big Twist) and A.C. Moore(Studio Classic by Nicole) are soft yarns at a reasonable cost. I also like to add in Red Heart's Baby Hugs or Caron's Baby Cakes when they are on sale. I want to achieve a colorful and huggable blanket that is pleasing to the eye and a delight to touch. The blanket pictured in this article is 34'x 34". It works works well in a crib, but is not overly bulky for a car seat or stroller. At 19 months, my petite granddaughter, is still covered by her blankets. To produce the extended Granny Square Afghan, you will be crocheting from the center out. To recreate the design in this blanket, follow the following sequence listed below. When you change colors leave a 4-5 inch tail for weaving in end and clip off extra yarn. For my blanket, I used the following colors: A: Rose, B: White, C: Heather Purple Rows 1-6: Color A Row 7: Color B Row 8: Color A Rows 9-13: Color B Rows 14-17: Color C Row 18: Color B Row 19: Color C Rows 20-24: Color B Rows: 25-28: Color A Row 29: Color B Row 30: Color A Row 31: Color B Fasten off, but do not cut off yarn. Continue with same color to Row 32. Row 32: Crochet a round of Half Double Crochet around the blanket. Make sure to make 3 stitches in each corner space. As I received the rose and purple yarn from my Threads of Love group, I will be donating this blanket to a child who has been hospitalized at Yale New-Have Hospital, in New Haven-Connecticut. I have truly enjoyed making this piece, and am glad that it will bring comfort to an unknown young girl.
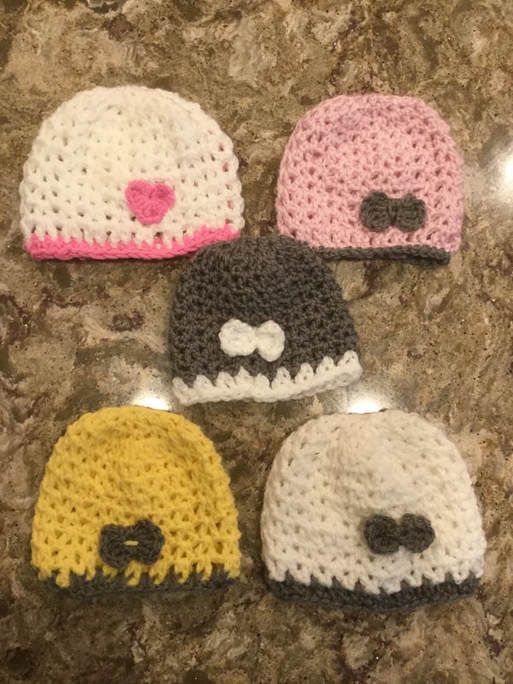
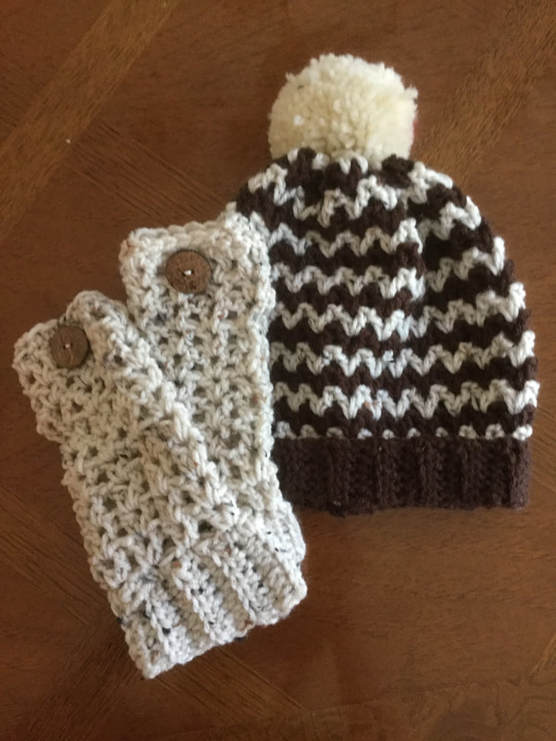
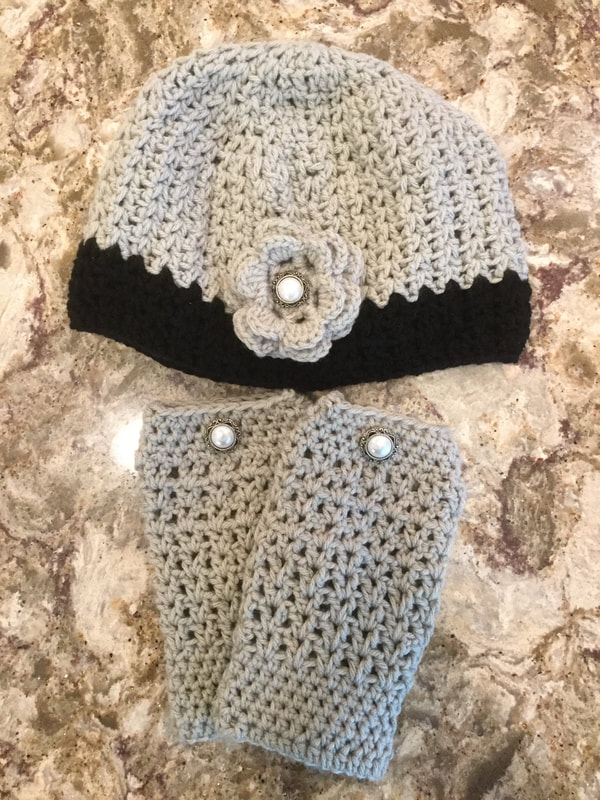
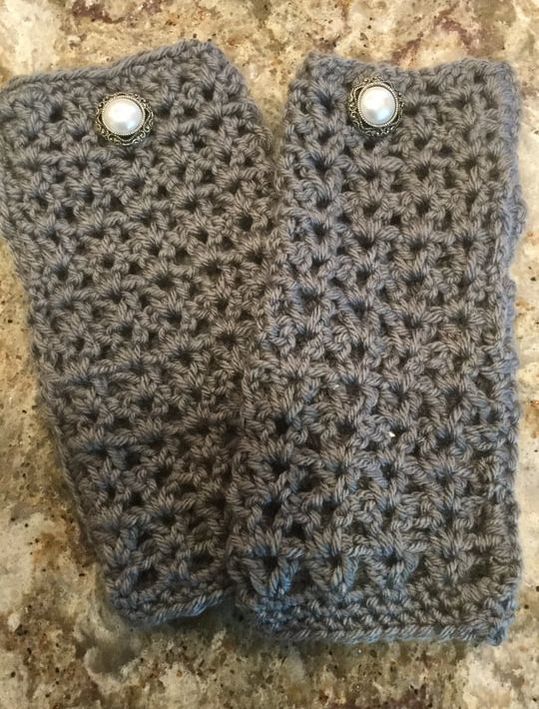
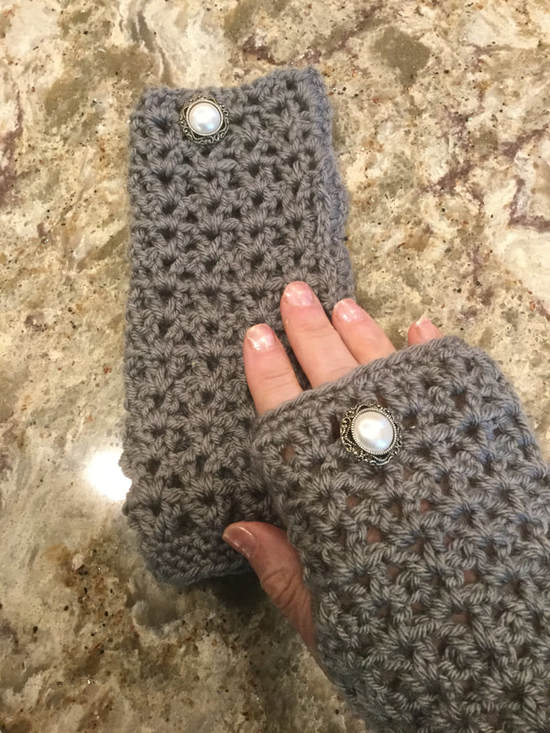
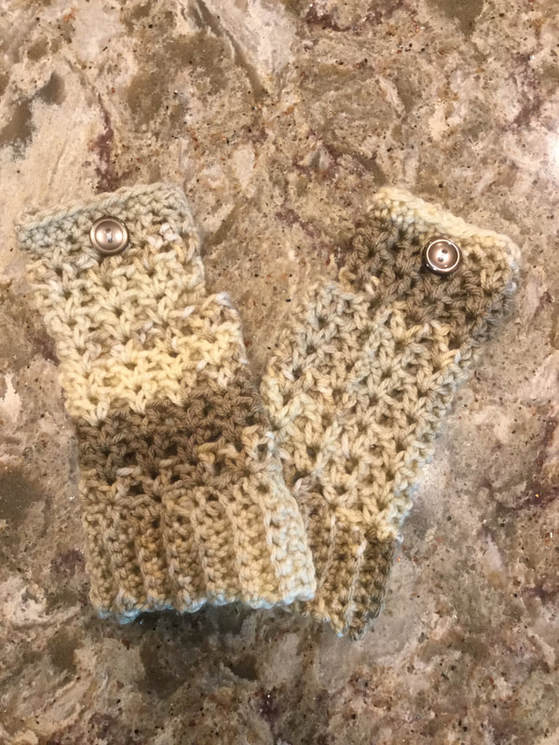
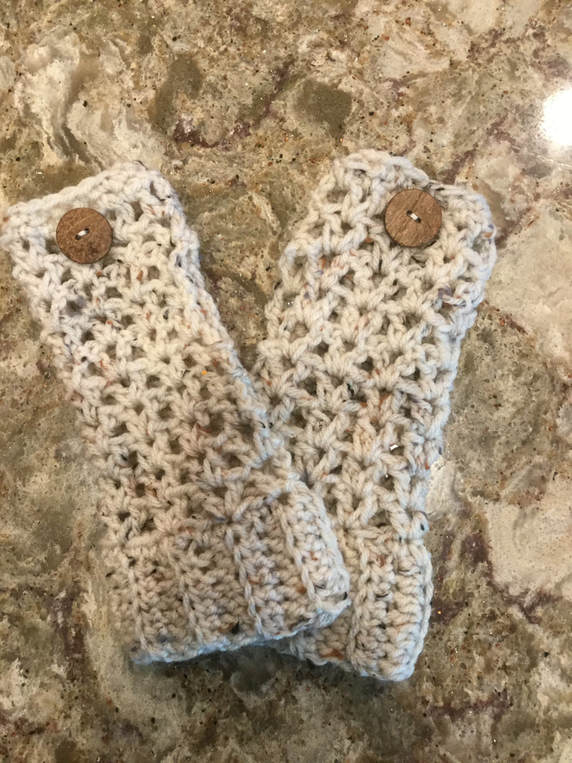
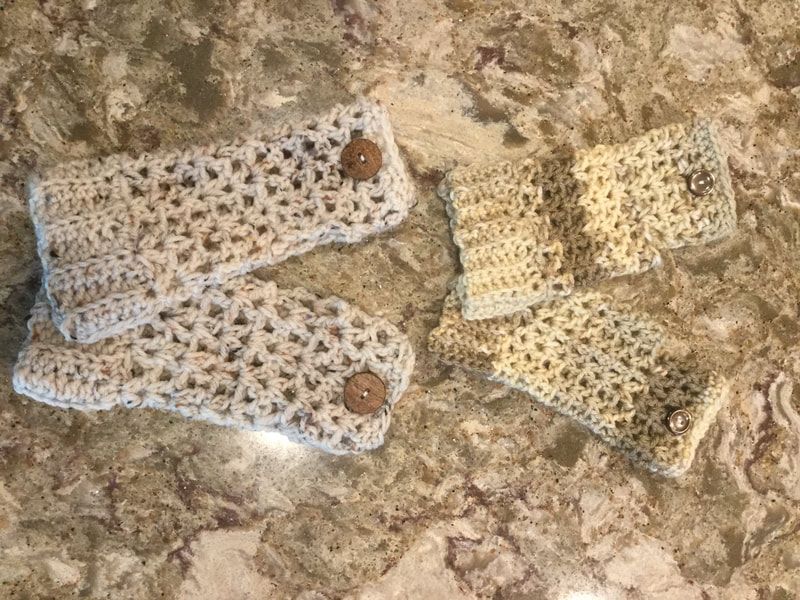
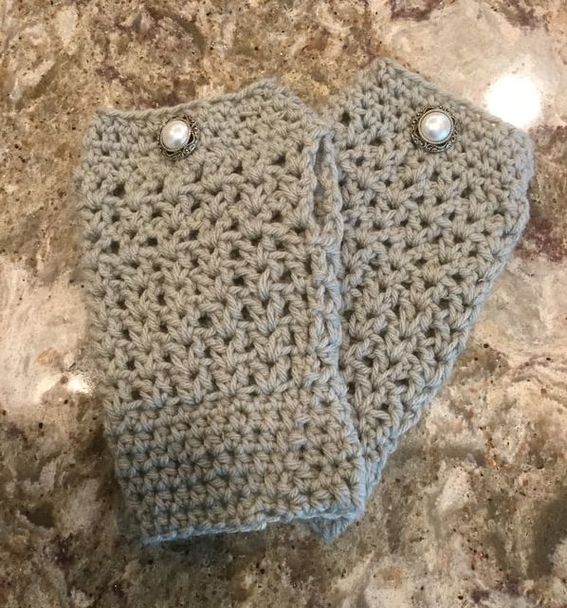
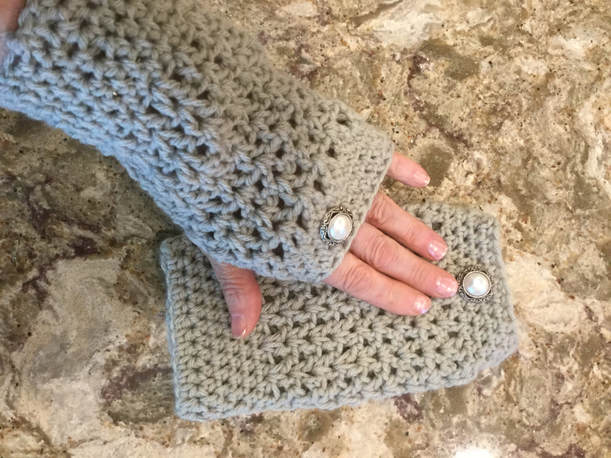
I just received an order from my BFF who wants to give one of my afghans to the grandson of one of her friends. I have not decided on the pattern and number sequence yet. However, I do know that I will be working with Light Blue, Dark Blue, White, and Varigated Blue and Gray. With four colors, there are even more combinations for line count and sequence. What a challenge! I promise to post my creation when finished. 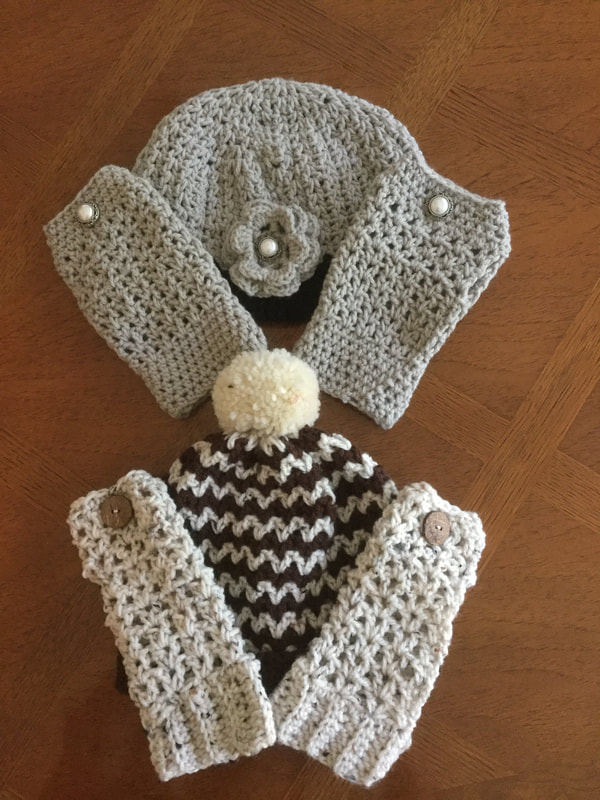 Most of my posts are inspired by particular projects (sweater, baby blanket, shawl, etc), nature, passion for a particular color, holidays, gifts for loved ones, favorite fashions, amigurumi and dolls, or attractive designs. However, this time I was drawn to exploring the creative pieces that I could develop with a particular stitch, namely-the V-stitch. The V-stitch is a simple pattern stitch that creates a fabric of interlocking V stitches. While is is great for creating a lacy afghan, scarf or shawl, the crocheter can produce many interesting hats and fingerless gloves as well. The V-Stitch is usually worked with a DC-CH1-DC. However some of the patterns may be worked with 2 DC's in one stitch without crocheting a chain between them. Projects using with the V-stitch may worked in solid colors, varigated yarns, or alternating rows of different colors. There are many sources for directions to produce the v stitch. I found "V Double Crochet Stitch Tutorial" from Dream a Little Bigger to be clear and helpful. The V-stitch is ideal for chrocheting an open-weave beanie for a newborn baby or young infant. I just mailed off my first batch of 25 hats to Yale New Haven Childlife Program. Many of the hats in my package followed the "V-Stitch Newborn Beanie" by Olga Poltava that can be located as a free pattern download through Ravelry. The beanie is crocheted from the crown down. As you proceed to develop the beanie, crochet the V-Stitch into the Ch1 space or in the space between stitches. Crochet a circle for a 3.5 inch crown. Then stop increasing and crochet the rest of the beanie. A beanie for a newborn will measure 13 inches in circumference and 5 inches in height. Sometimes I like to add a contrast row of single crochet around the bottom. You can also add a crocheted bow, flower, or heart. For specific directions. please consult the pattern. The BubbleGum Beanie Crochet Pattern from Daisy Cottage Designs really showcases the V-Stitch design. By using different colors the V-Stitch shines.The pattern comes in 3 sizes including baby, child,and teen/adult. This hat is started with a crochected band that fits the circumference of the head. After you sew the short ends together, pickup and crochet a row of single crochet in the same color as the band. There are many color design possibilities. For my hat in a child size pattern, I chose to alternate dark brown rows with single rows of flecked worsted. I chose a wheat colored store bought pom-pom for my decoration. The designer displayed one hat with alternating rwo of white and gold and a lower band of sherbert pink. A white faux pompom graced the top of the beanie. Another attractive beanie showed four different colored striped alternating with white. The band was the same color as one of the stripe colors. Again, the designer topped off the beanie with a faux-fur pompom. See: https://daisycottagedesigns.net/slouchy-beanie-crochet-pattern. The V-Stitch Winter Beanie can be cozy as well as sophisticated. My color choices were limited by the fact that I wanted to make a hat to match a pair of fingerless gloves that I will present later in this article. I fell in love with the design that was featured in light frosty blue with a band of white at the bottom of the hat. A white flower with a jewellike button was the perfect accent. Another color scheme used by the designer featured a black cap with a grey lower band.The flower was grey like the band. My hat was made with a heathery light sage worsted with a black lower band. I did not have enough black for the flower, and so I made mine from the sage. A pearl button with a silver filegree border brought out the colors in the hat. I really like the way the light heathery sage brought out the V-stotch pattern. The hat is started from the crown and crocheted down For specific directions, search http://overtheappletree.blogspot.com/2015/11/v-stitch-winter-beanie.html Fingerless gloves have always been a favorite fashion accessory for me. The V-stitch is perfect for making a comforfortable as well as an attractive glove. These gloves are crocheted in a flat panel that is sewed together at the end. The pattern calls for a multiple of 2 plus 3 more stitches for the first double crochet. Although the pattern calls for an initial chain of 25, I found 27 or 29 to be more comfortable for my larger hand. The V-stitches are made so that stitches for each succeeding row falls in the center of the preceding row. When the glove is long enough. Fold in half and crochet from the top down about one inch to sew together the top part of the glove. Continue crocheting on one side to make the thumb hole before joining both sides again. Then single crochet 2 rows around the top and bottom of the glove for a neater appearance. Make two gloves. Make sure that the thumb hole of each glove is facing the thumb hole of the other glove. This especially important if you sew a button accent to the top of each glove. To locate the pattern, search on Ravelry for V-Stitch Fingerless Gloves by Tea Time Crochet. This is a free pattern download. The second pattern, Valerie's Fingerless Gloves by the Lavender Chair, begins with a crocheted band of half double crocheted stitches. Once the band is complete, sew the short ends together. Stitch into the circular band to made a row of single crochet stitches. Several rows of V-Stitches make up the hand. A horizontal thumb hole is constructed by skipping 8 stitches in the row before completing the row with V stitches. Another V stitch row and 2 rows of single crochet complete the glove. For specific directions, see http://thelavenderchair.com/valeries-fingerless-gloves-crochet-pattern. The glove shown in the picture below was crocheted from a worsted weight yarn , Deborah Norville, Everyday by Premier Yarns. This is a lighter weight worsted, and so the glove appears to be more lacy and delicate I remade the glove with a heavier worsted, Red heart Super Saver, to get a sturdier and slightly larger glove. I also made a change to the thumb hole. Instead of a horizontal opening, I made a vertical slit after the fifth row of V-stitches by reversing my crochet to go in the opposite direction to make a thumb hole with three rows. Then I joined the row and made two more rows of V-Stitch. I completed the glove with two rows of single crochet. I leave it to you my readers as to which glove you like best. The final glove is my own design. I created the glove as I went along, and so the directions in this article will be general guidelines. As soon as I perfect the the pattern, I will post it in my blog and on Ravelry. For this design, I began with the cuff by chaining 28 and joining with a slip stich. Then I croched 6 rows with half double crochet stitches. The first line of the hand contained 13 V-stitches separated by one skip stitch. After 4 rows I reversed stitching to begin the thumb hole and worked with an open panel without joining for 3 rows. Then I joined to create the upper cuff with 5 rows of half double crochet. I decreased one stitch at the joining spot so that the glove curved in slightly at the fingers for a more exact fit. I am still playing with this pattern and may add another v stitch row before the upper cuff in the finished pattern.This pattern is ideal for adding additional colors in alternate rows. The V-Stitch is an ideal stitch for crocheters to create accessories, it is playful, easy to execute, and shows up contrasting colors. It is great for a beginner who wants to vary his/ her crocheted designs. I still have a multicolored col and multicolored fingerless gloves in the works. In a previous article, I adapted a V-Stitched Baby Afghan Pattern by Maria
from Dinki Dots. For more information refer back to : http://www.lilcreates.com/lillians-blog/v-stitched-crocheted-baby-blanket What are your experiences with the V-stitch. Please share your work and suggestions. |
Archives
November 2022
Categories
|

 RSS Feed