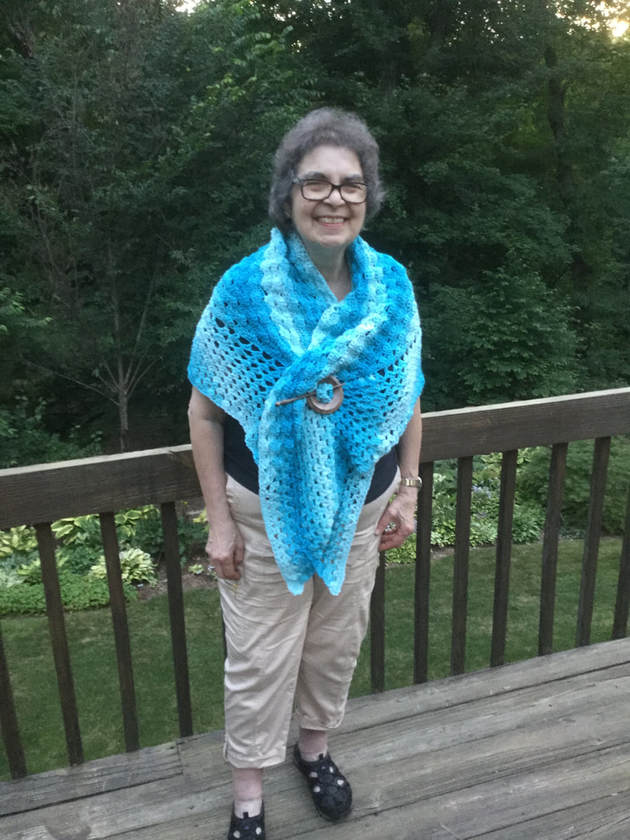
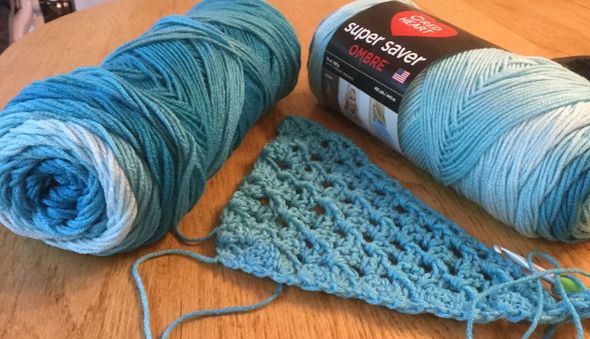
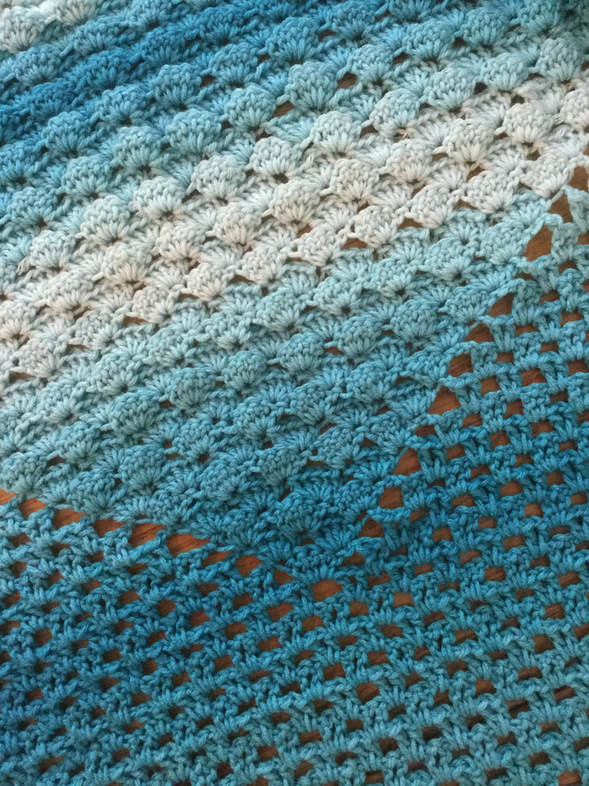
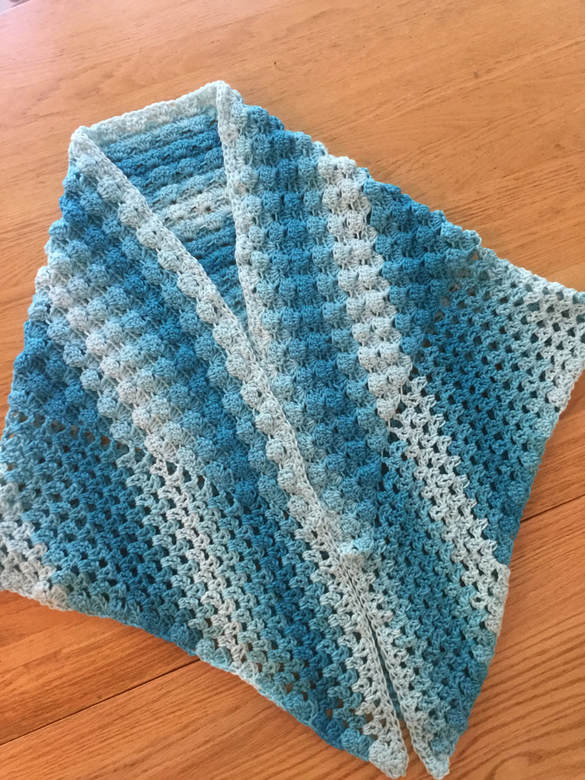
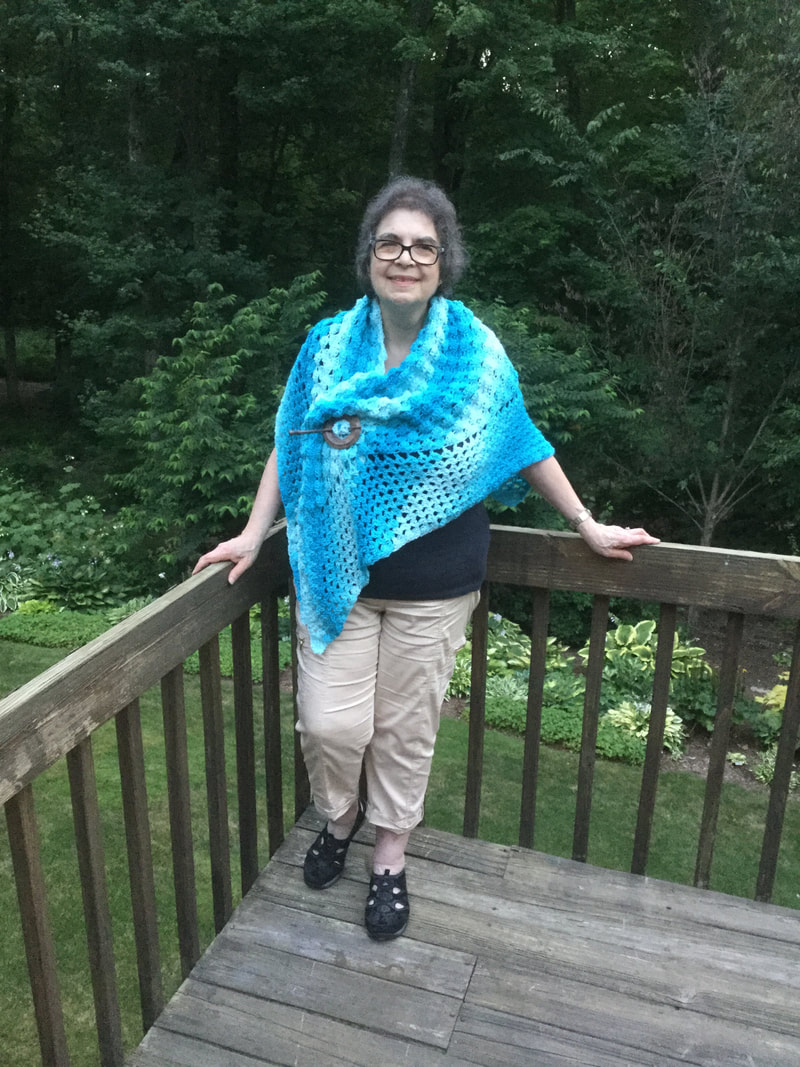
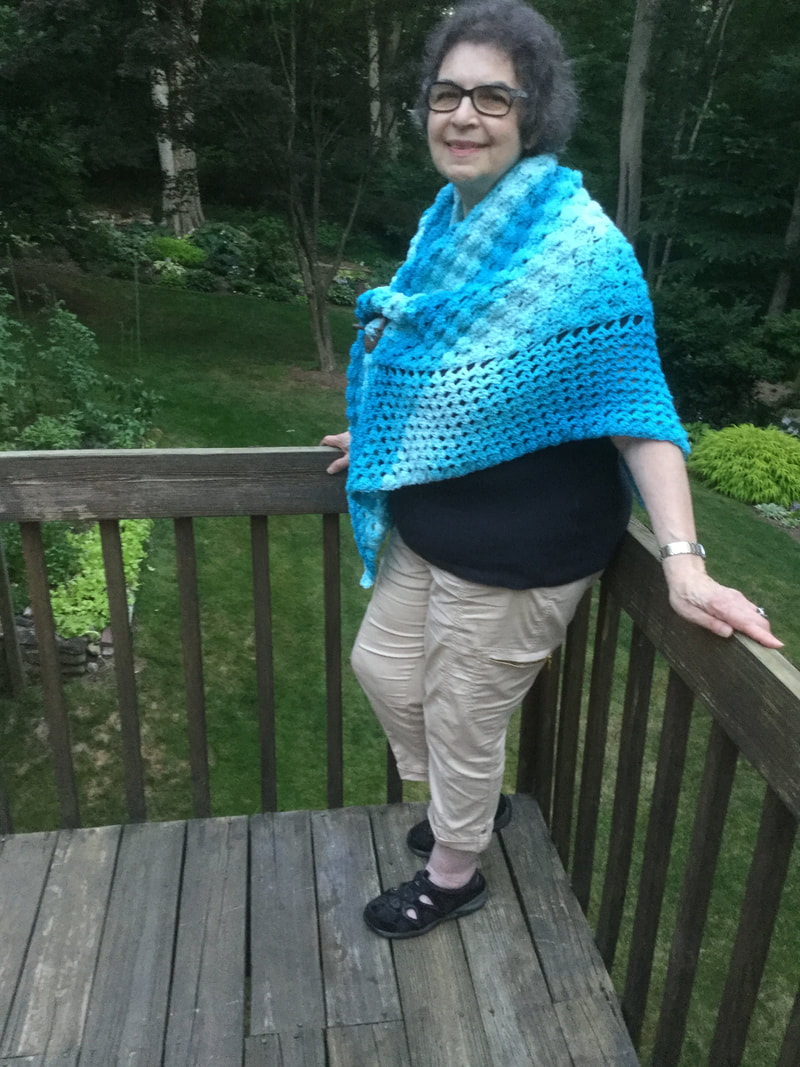
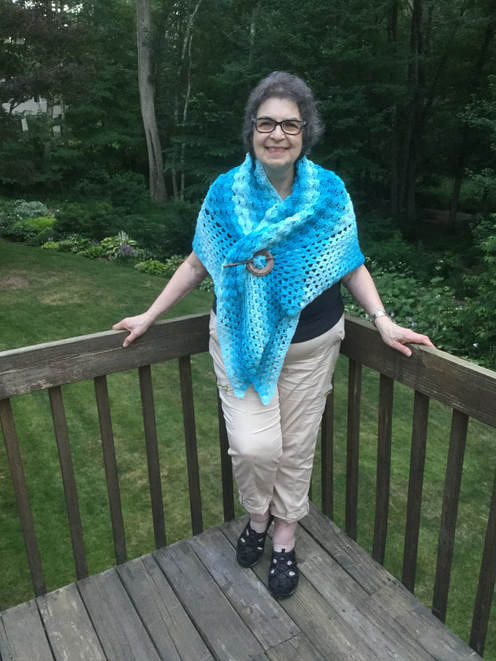
 ,I left home 9 days ago with enough bags of yarn to last me my entire vacation. I did not want to run out like I did on our previous trip, necessitating an emergency trip to Michaels, the nearest craft store to my hotel. With three major projects in hand, I was content that I would keep my hands busy until I returned home to my extensive stash. As with any of my road trip projects, the design had to fulfill several important criteria: engaging design, clear directions with repeats that were easily mastered without continued reference to the printed pattern, few or no yarn changes. Here was a situation where pattern and yarn intersected--well mostly. I had two large skeins of Red Heart Super Saver Ombre in Scuba that I had bought on sale and which were taking space in my bins. I liked the light to darker turquoise shades, and the yardage (482 yards per skein) would allow me to take on an extensive piece. In my scrolling through Pinterest I found the Wave Shawl Pattern by Rachel from Desert Blossom Crafts. (http://desertblossomcrafts.com/2018/05/07/wave-shawl) The mesh and shell design was striking and different from the other patterns I had crocheted without being too complex. However, Rachel's beautiful pattern called for a fingering weight yarn with color bands from blue through to purple. It was #2 in a superwash merino wool(460 yards), while my yarn was a worsted weight. Instead of a lightweight spring shawl, I would end up with a much heavier garment for autumn. While the original pattern called for an F hook (3.75mm), I had to move up to a J hook to get the open mesh in the outer part of the design. The piece was worked from the bottom tip up in one large triangular piece. Although I started with a V-stitch, to produce the open mesh, after several inches, I began to incorporate the shell stitch. The denser shell produced a v shaped segment in the middle of the shawl that was surrounded by the mesh. The visual effect was stunning. By the time we had reached our destination in Chautauqua, New York (7 hours), I had added the second skein and was at least half way done. There was a lot of down time on this vacation with extensive porch sitting and lectures. I was able to add enough inches to my shawl to get a pleasing drape. My finished piece measured 32 inches deep with a wingspan of 76 inches. I was thrilled that I had made the translation to the heavier worsted yarn. The piece truly conveyed the the "wave" feeling. As I played with many ways for wearing, tying, and draping my shawl, I knew that I needed a shawl pin if I hoped to create some more sophisticated designs. I was delighted to find a hand tooled wooden piece at a craft fair that was in Chautauqua for the week-end. The pin was a lovely reminder of my week at this wonderful cultural enclave. When I started the Wave Shawl, I was not sure whether I would keep the piece or give it away. When I was done I was sure that it would be the perfect accent to my fall wardrobe. A simple black sweater and skirt would be dressed up with this amazing geometric fashion statement.
1 Comment
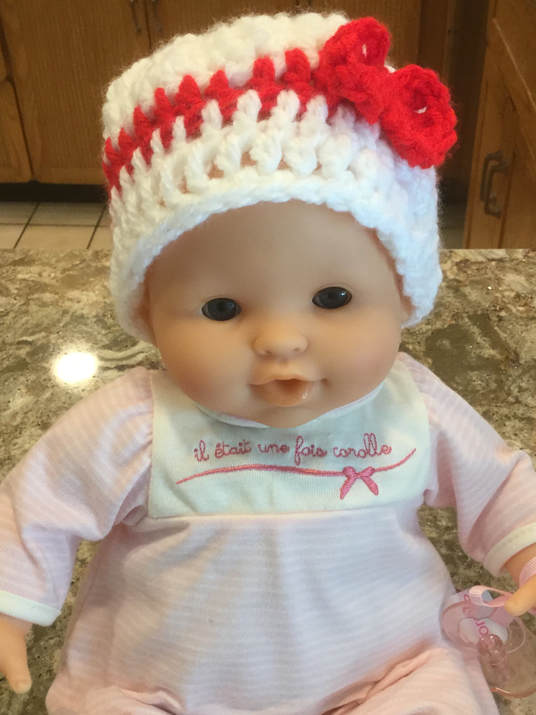
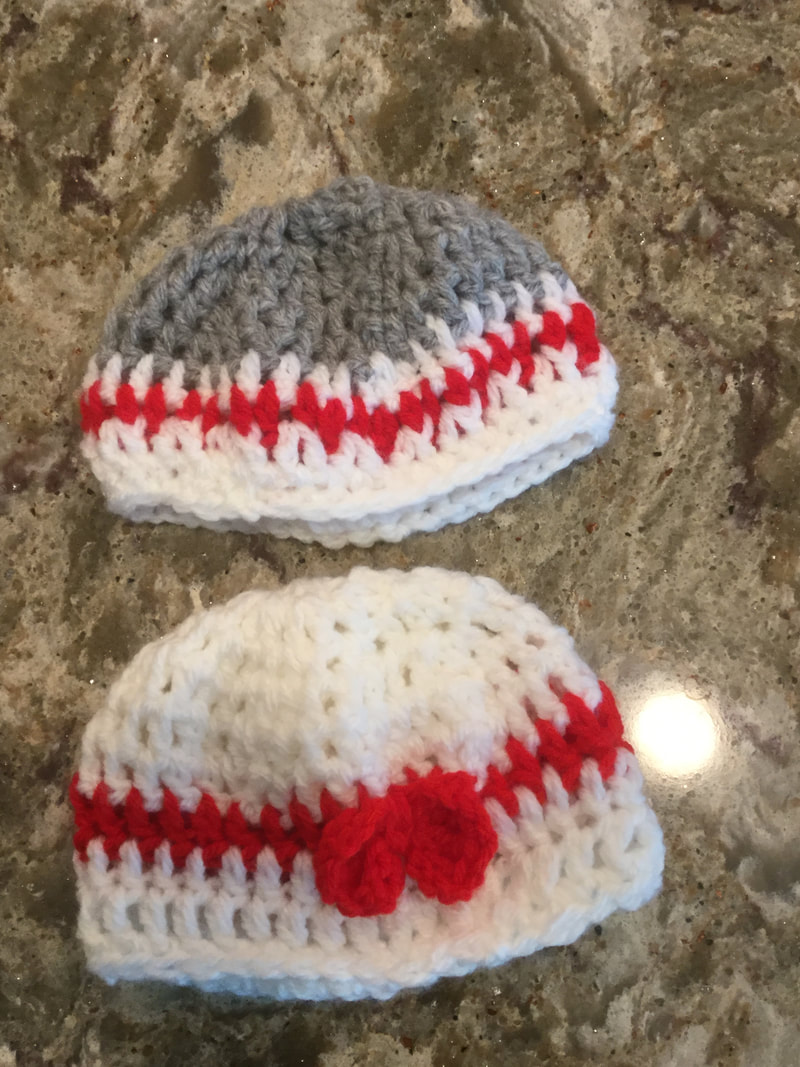
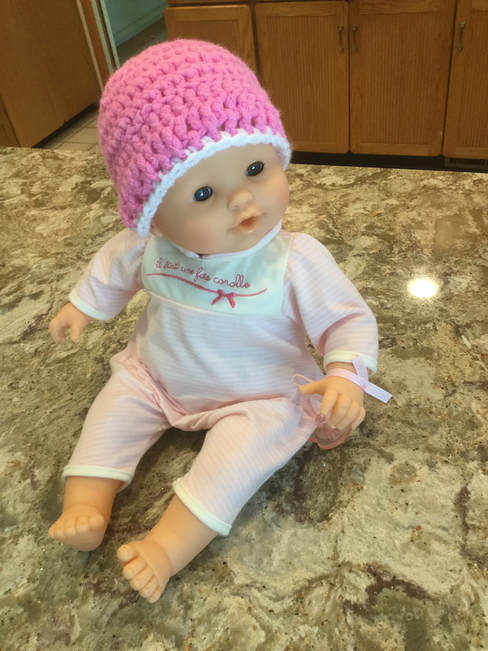
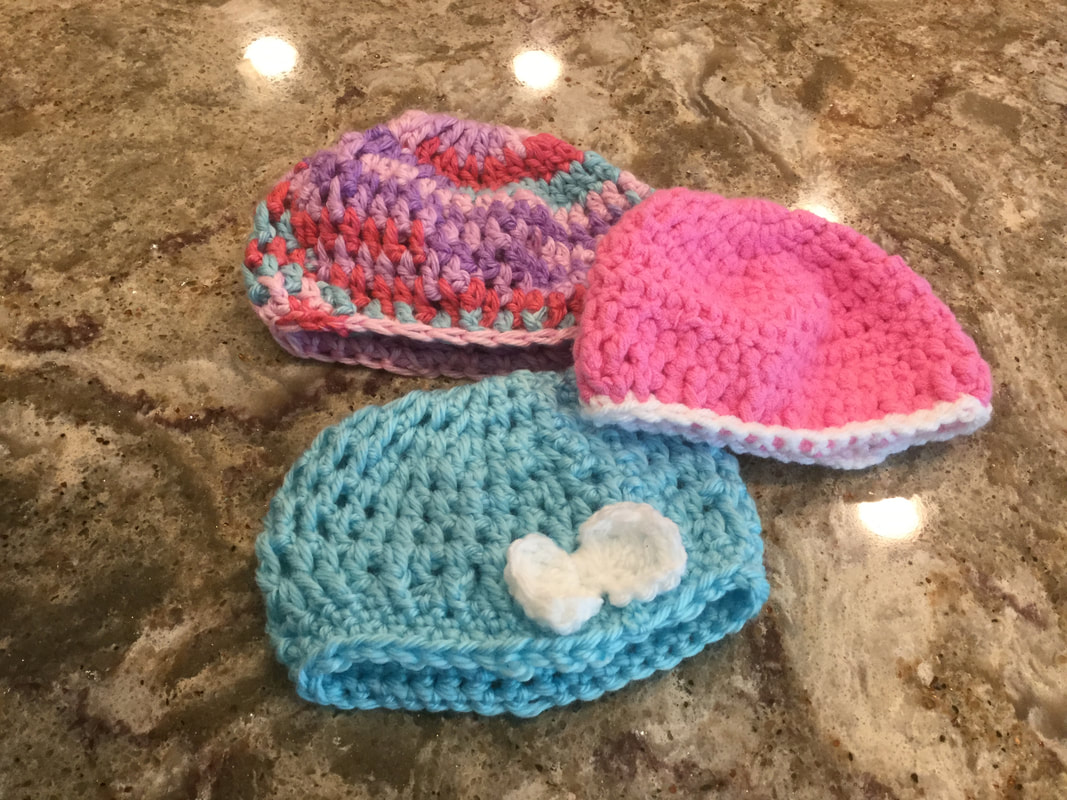
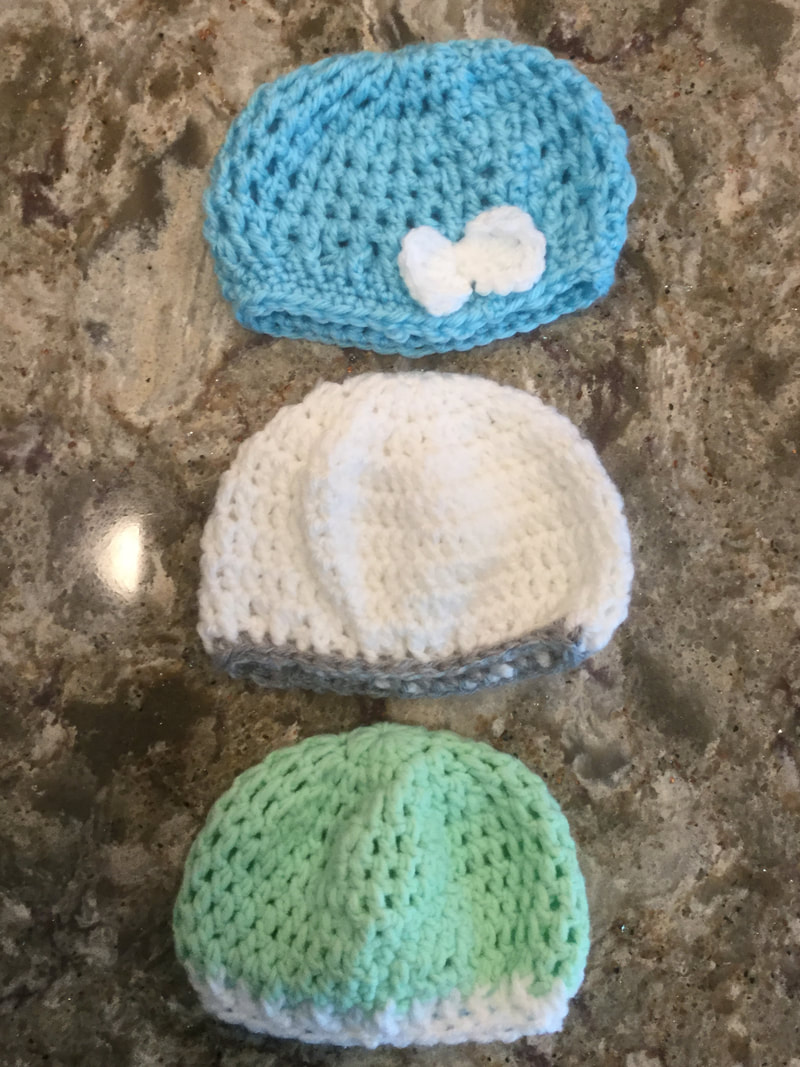
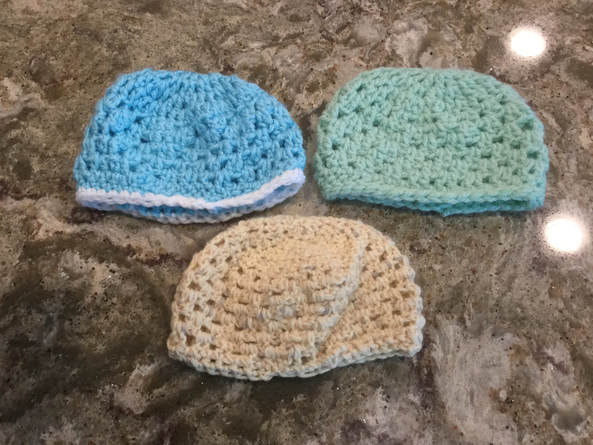
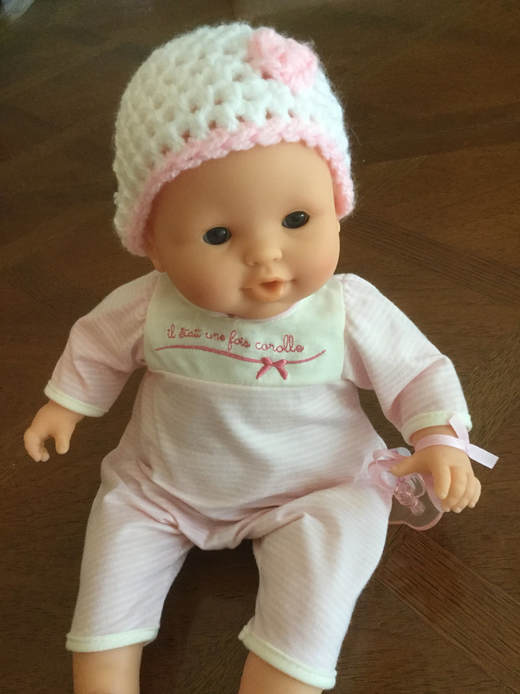
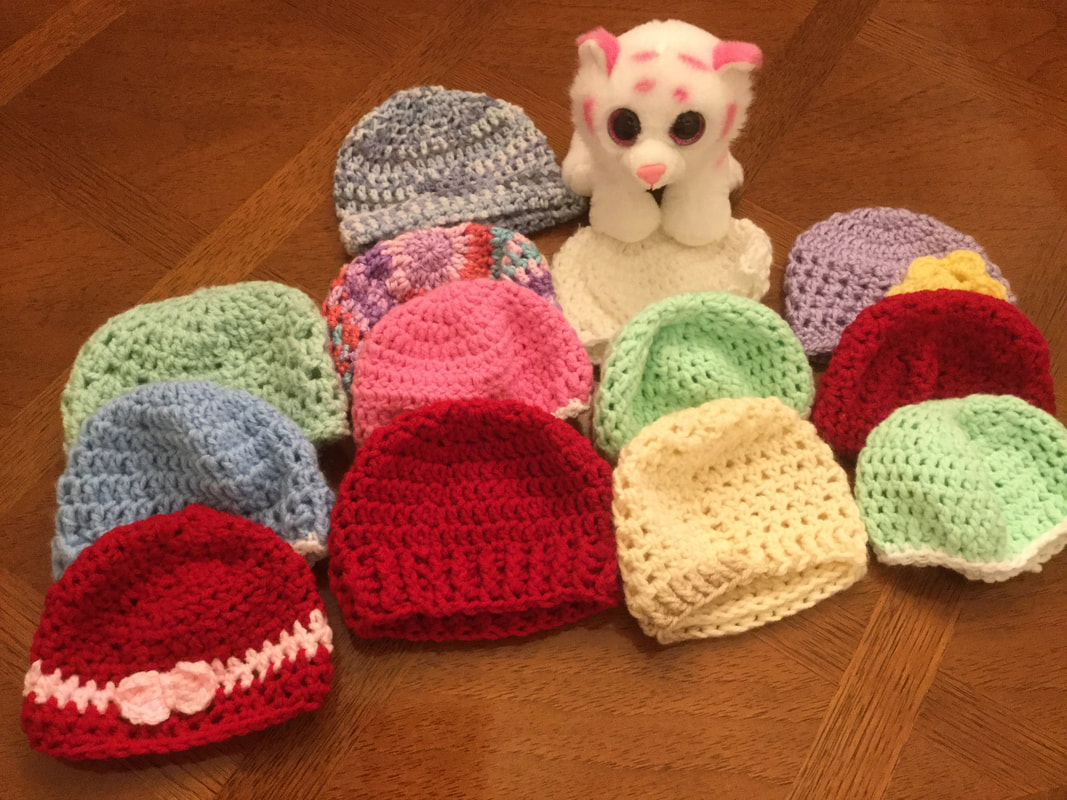
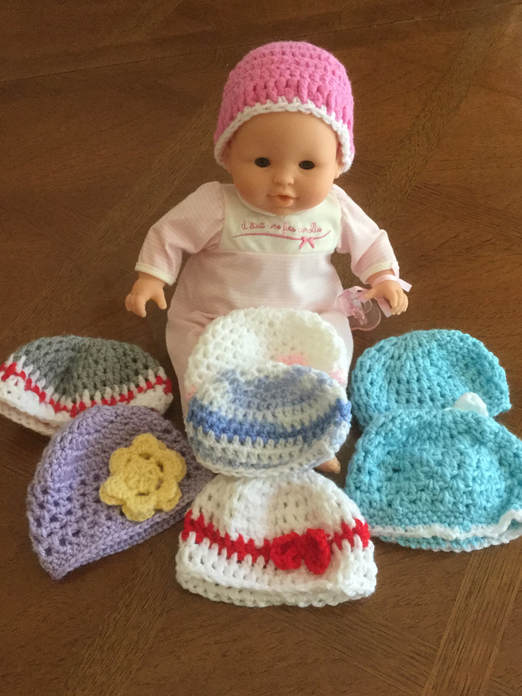 I finally made contact with the Children's Life Program at Yale New Haven Hospital and arranged for a dozen caps to be mailed. When my granddaughter was born 18 months ago she was only 4lbs 11 ounces and dropped down to 4 lbs 4 ounces before she left the hospital. The wonderful care that that our little one and the whole family received still continues to inspire me to share my talents with those who are in need or who are less fortunate than our loving family. Although I had made several beanies for my granddaughter,, the nurses always made sure that her head was covered so that she did not lose body heat. Many caring individuals had knitted and crocheted these tiny hats so that babies like my granddaughter would have that extra love and warmth. It was always a pleasant surprise to see which little cap she would would be wearing when we came to visit. I had long wanted to return the favor, and now I have the address. The spokesperson for the department was helpful and encouraging. In the future, I might even include some of the comfort dolls or make an octopus for preemie hands to hold. For now, I have made more than a dozen hats for newborns.and am ready to send off my first batch. Each time I start one of these projects, I am hopeful that I will make a big dent in my scrap pile. I made about 30 comfort dolls, but the heap still remains. These little jewels might be the answer. I found that I can dash one of in about 30 minutes. Many are one color, but I like to put on a contrast stripe trim to perk them up. After a considerable amount of scrolling and reading, I found 4 patterns that worked well for these little crocheted hats. The first style was written by Tia Davis and published in Crochet Rochelle. The pattern is based on the double crochet stitch that is built out from a magic circle. After reaching the correct diameter for the crown, stop increasing and crochet enough rounds to get the crown to mid-ear measurement. If you choose, add an additional row of single crochet in contrasting color. The pattern can be found on Ravelry as a free download. I have also seen this pattern on Pinterest in sizes newborn though adult. The Parker Crochet Newborn Hat was developed by Sewrella. Instructions are available in paper and video format. This hat also starts with double crochet stitches that come out from a magic circle. After the crown circle is formed, stop increasing and crochet enough rows to make the size of the hat. There is an added ribbed row followed by single crochet that make this hat quite attractive. The url for the pattern is http://www.sewrella.com/the-parker-crochet-newborn-hat/ A free pattern for booties is also available. The pattern is available through Pinterest and Ravelry. The Layla-Lu Beanie (from the Sunshine and Sewing Basket) adds a whimsical touch that is suitable for the tiny little miss. For this pattern use a thicker DK or a thinner Worsted yarn. After making the circle for the crown. The next row calls for 2 DC in the same space that followed by a skipped stitch. Succeeding rows are crocheted in the open spaces. The effect is more open and lacy. the cap is finished with a couple of rows of single crochet. For specific directions, see Pinterest. You can also find the pattern if you go to Sunshine and a Sewing Basket and look for past popular posts. The author made the beanie for her Mandela 67 project. The fourth style, "Little Heart Crochet Preemie Hat, " is made with a Half Double Crochet Stitch, using an I (5.5mm) hook. I had tried some patterns which used an H hook, but I found that the final product was too dense and not inviting for a little preemie baby. The tiny heart applique offers a physical reminder that the hat was made with heart and love. See: hjttp://www.crochetforyoublog.com/2018/02/little-heart-crochet-preemie-hat. I will be taking a bag of small batches of yarn with me on my next field trip. On this trip, I am determined not to run out of yarn. The big question is how many beanies can I make in a week of driving and meetings. With the four patterns and many colors, I will keep busy and engaged.
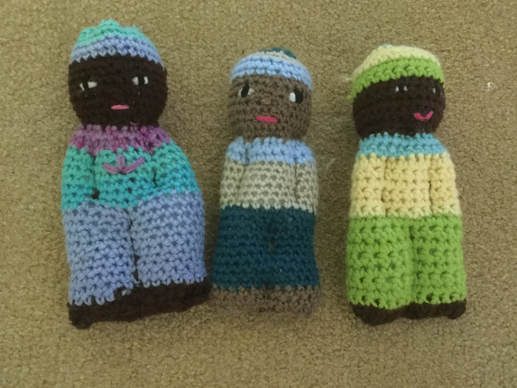
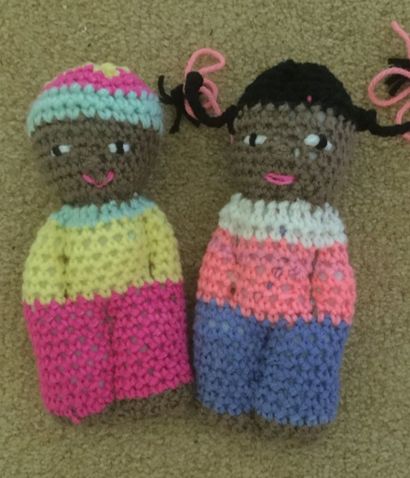
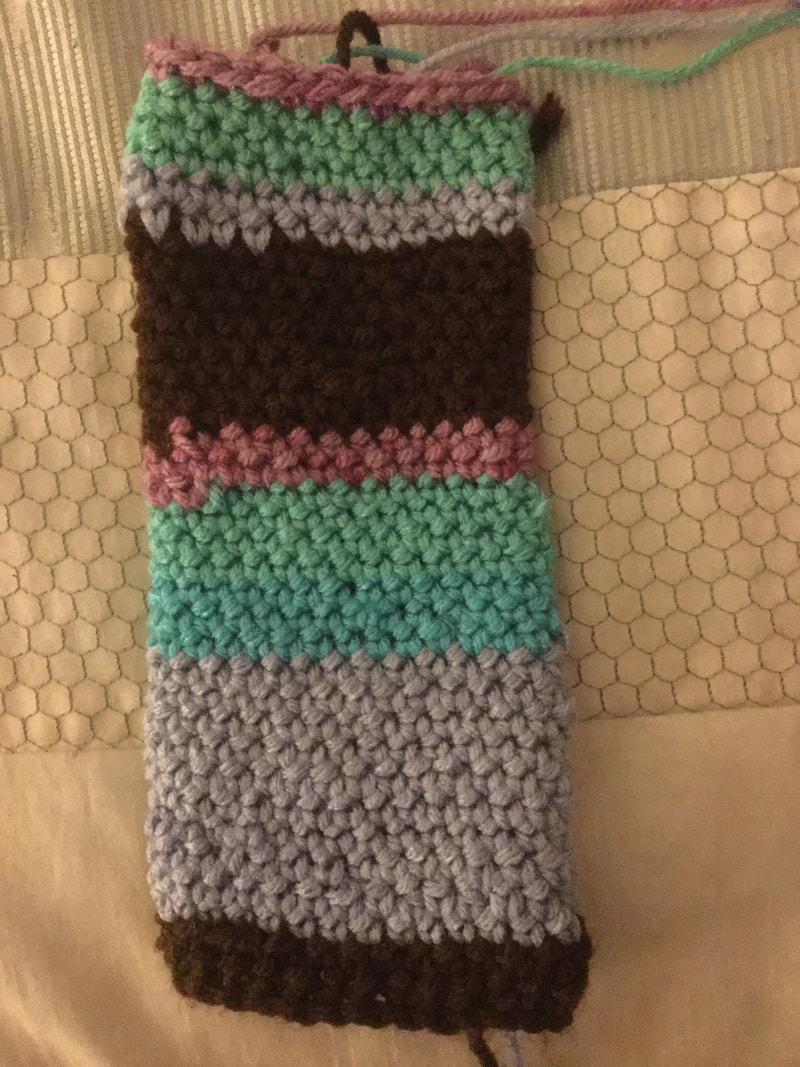
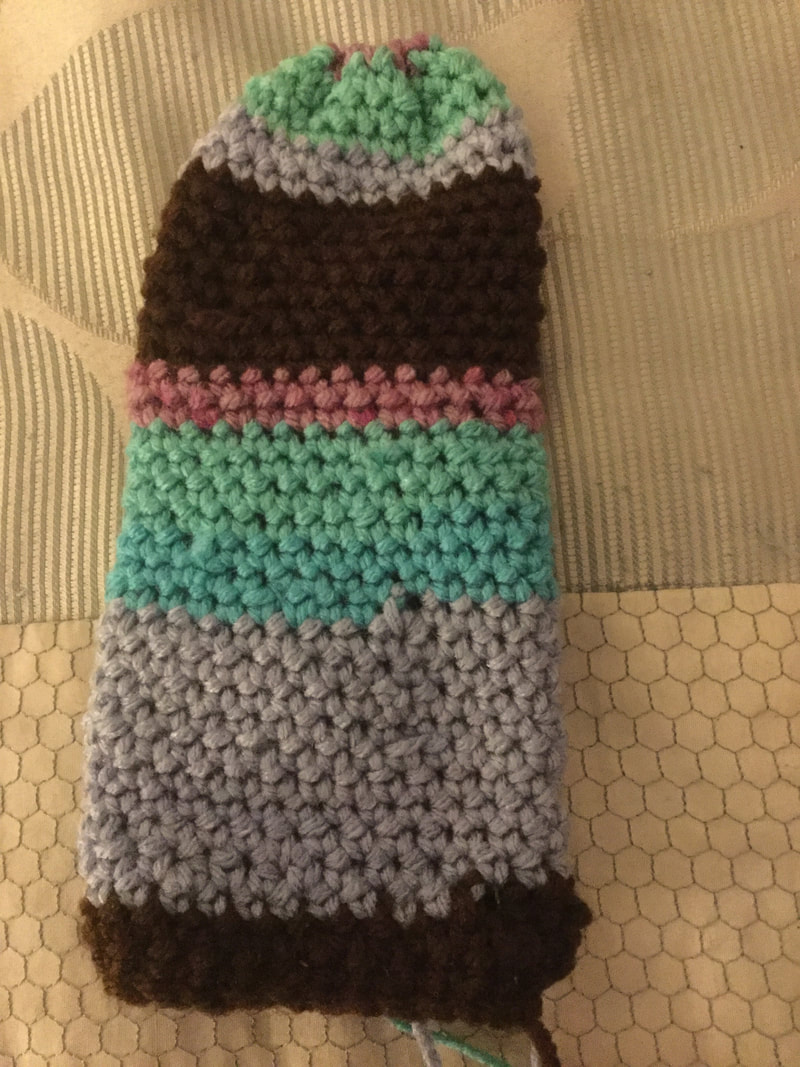
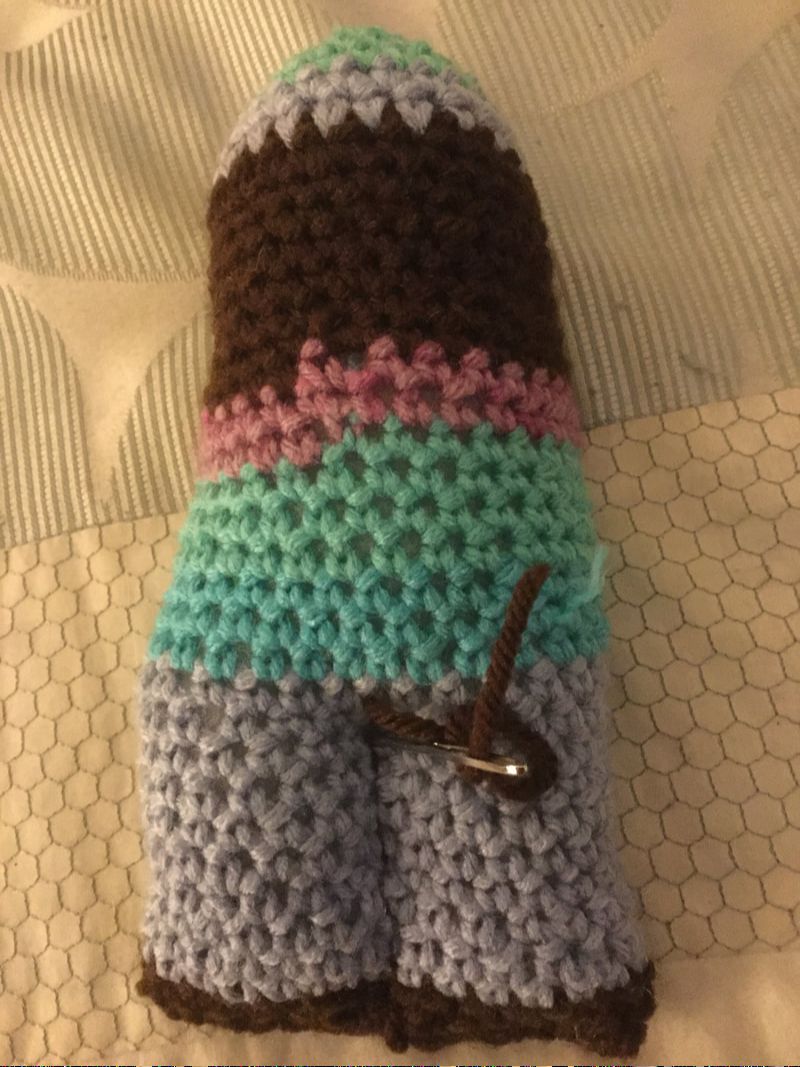
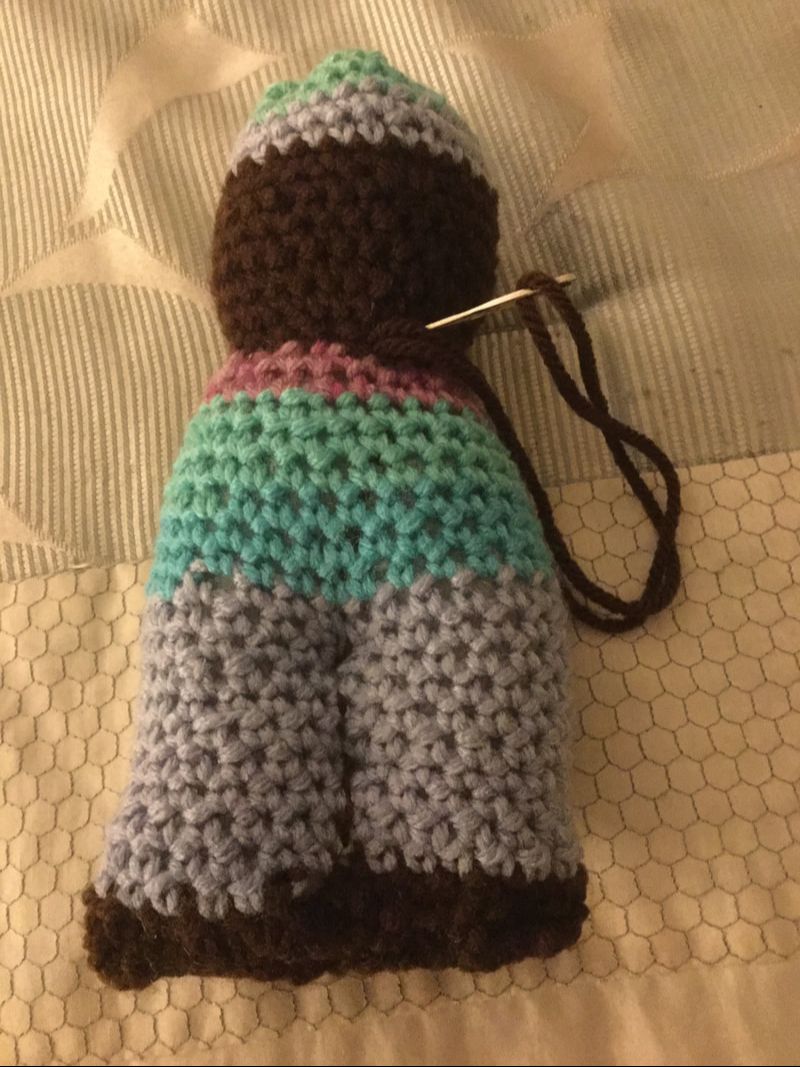
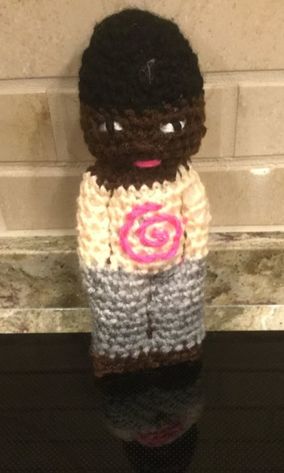
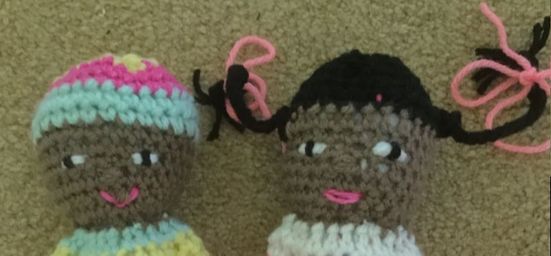
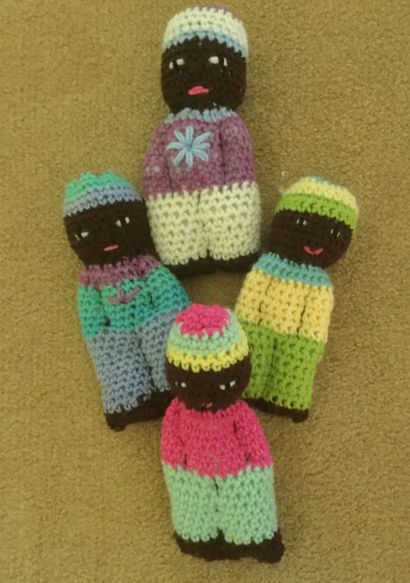
Which of the patterns do you like best? I love seeing the dedication of devoted crocheters who contribute so many of these little love hats to our youngest children. Please share examples of your work and tell me about your experiences. 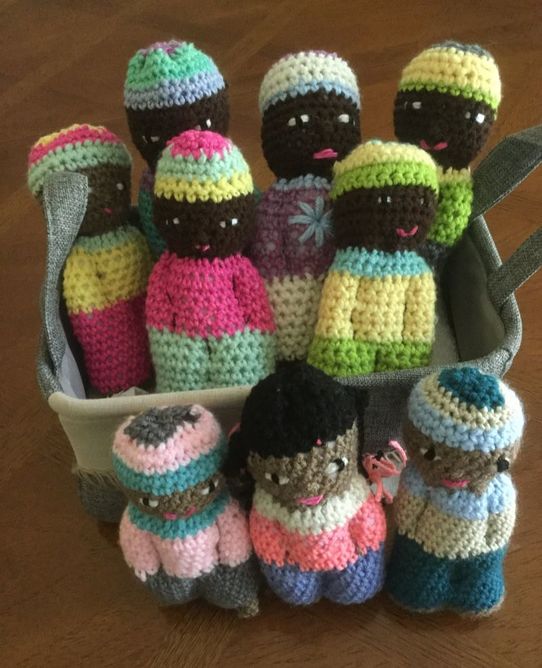 After the wonderful response I got from my knitting friends, I knew that I had to provide my fellow crocheters with patters and contact links for a crocheted version of the Comfort Doll. As I noted in my knitting version of my artical, these small dolls are distributed in wartorn countires and disaster sites where children have few possessions, let alone a doll to hug and give comfort. One of the original campaigns to provide "Izzy Dolls" was started in memory of a Canadian solier, Master Corporal Mark Isfeld. His mother Carold made these dolls so that her solider son would have something to give children he met while serving as a peacekeeper. After my article was posted I learned from a wonderful reader that the organization that distributes these dolls is still in existence and going strong. Canada's Health Partners International packs humanitarian kits of essentail medicines and supplies for primary care that Doctors and Healthcare professionals take to these sites. Instead of packing materials, wach box contains 122 dolls that cushion the medical supplies. The dolls are given to the young patients. The Izzy Dollis frequently that child's first toy. My first experiences were with the knitted versions. Using different bands of color that marked off the features of the doll, I knitted a square. I made a closed end tube , stuffed it, closed the tube, and used strategic stitching to separated the arms, legs, and head of the doll. Complete directions are available on the website (hpicanada.ca) What I did not know at that time was that crocheted versions are also available. Another organizaiton that distributes these comfort dolls is Knitting4Peace. This group distributes shawels, sleeping mats, hats, and mittens, but the dolls are the most requested items. Individuals and groups called Peace Pods made the dolls. Creative possibilities are limitless. After reading patterns from these organizations and from other online sources, I realized that there are several ways to make your crocheted doll. As with the knitted version, you will crochet a striped square with bands of different widths to denote the different parts of the body. Chain 27 stitches and sc into the send stitch from the hook. Continue to sc 26 stitches. Most directions call for a G hook. When you have completed the square fasten off, and fold the square in half and make a running stitch along the hat/hair rows at the top of the doll. Pull your yarn tight and run through several times to secure the stitching. Close a seam down the back of the doll. The seam should be at the the mid back of the doll. After you stuff the doll with fiberfill, you will close the bottom. If you have placed the seams correctly, you will see how to stitch perpendicularly to the bottom (shoes) to make the legs. See photos for stitching stitching arms and neck. A second version has you crocheting in the round so that you avoid the bulky seam. Follw directions as noted above for constructing the doll. A third version (from Knitting for Peace Pattern) has the crocheter make a small dark cap at the top of the doll. The instructions suggest that you use textured or eyelas yaarn to look like hair. I found this difficult and just used black yarn. The pattern provides specific directions for the face, clothes and shoes. As with the other dolls, stuff when complete and sew up bottom so that the feet are placed next to one another. Follow directions to make legs, arms, and neck. This was the last doll that I tried to execute to see which method worked best. Of the three dolls, I prefer to make a tube in the round and sew up the top. This alternative allows me to make hair or a cap before I secure it closed. Please make your dolls with medium brown or dark brown faces as many of these dolls go to Central and South America, Haiti, and various countries in Africa. My first comfort dolls had black eyes with no additional features. I did find some black yarn that had a thread of silver running through. I sewed several times over a crocheted stitch to make the eye. Then I noticed that I could make an eye by using 2 stands of white yarn, stitched 4 times across 2 stitches. I followed this with 2 strands of black yarn stitched vertically. This eye was more expressive. I added a simple nose and mouth. You can even embroider a motif on the shirt. Please note that other than the face color, the dolls should have three colors. Whether you create dolls as an individual or in a group, you can mail your creative comfort dollies to collection points for the two organizations. The dolls should not be longer than 7 inches so that they can easily be sent on to their destinations. Please include your name and email so that the organizations can acknowledge the receipt of the dolls.
KNITTING 4PEACE 2600 Leyden Street Denver, CO 80207 Izzy Dolls HPICANADA 2907 Portland Drive Oakville, ON LGH5S4 Your good wishes, hopes, and prayers go with your doll that you created with love into the open arms needy child. |
Archives
November 2022
Categories
|

 RSS Feed