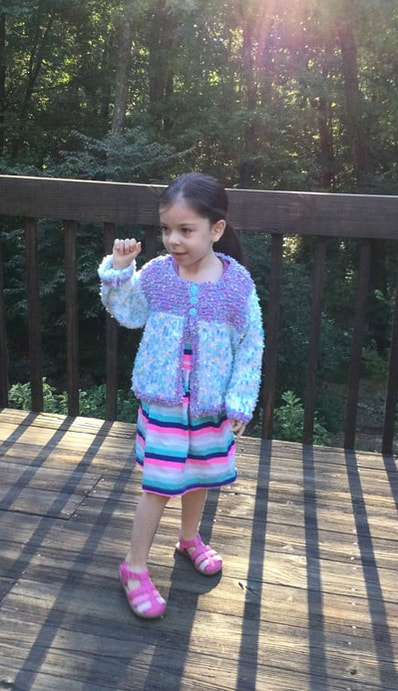
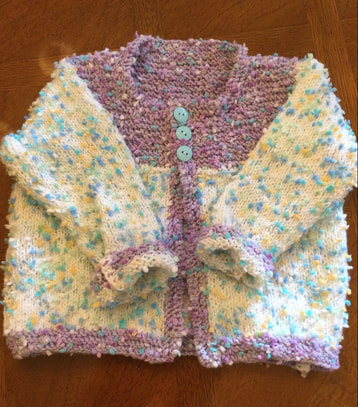
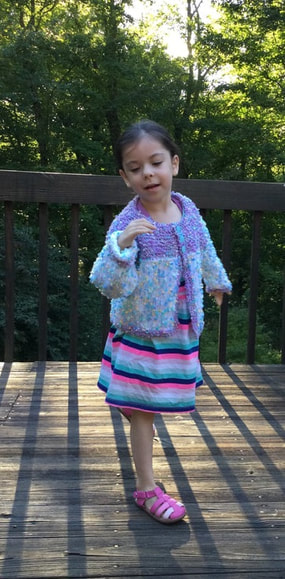
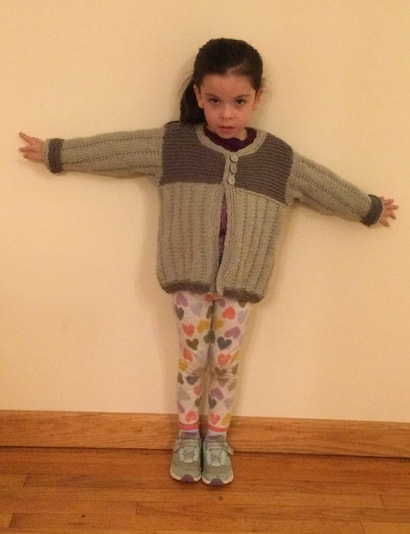
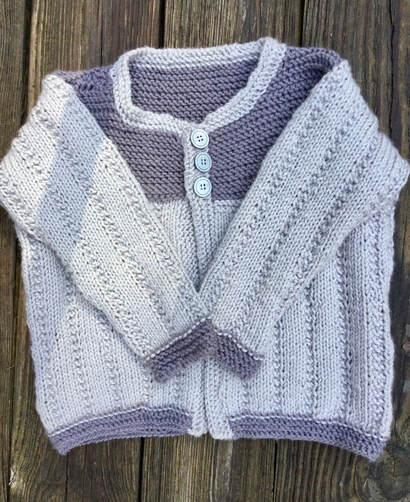
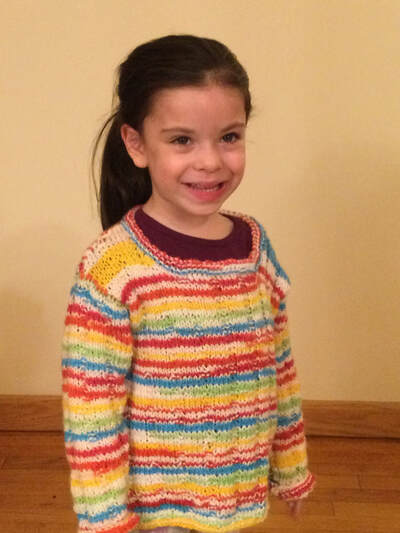
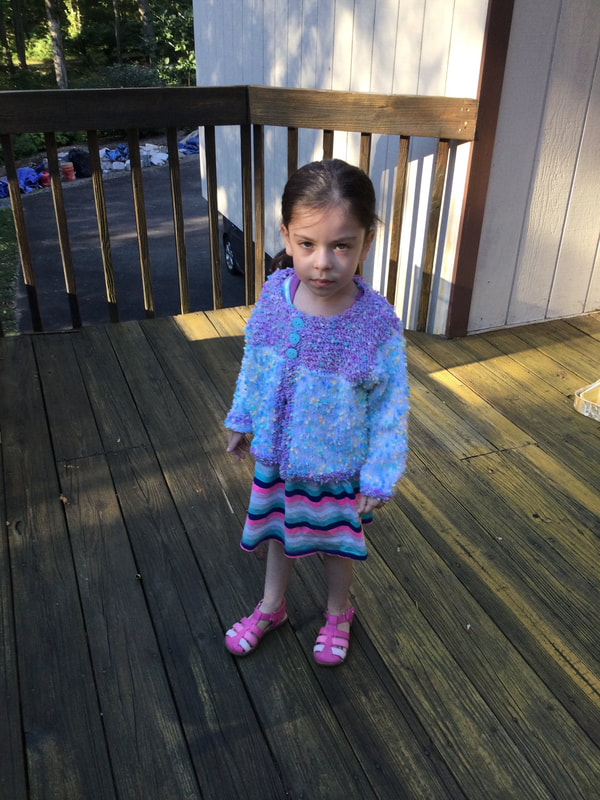
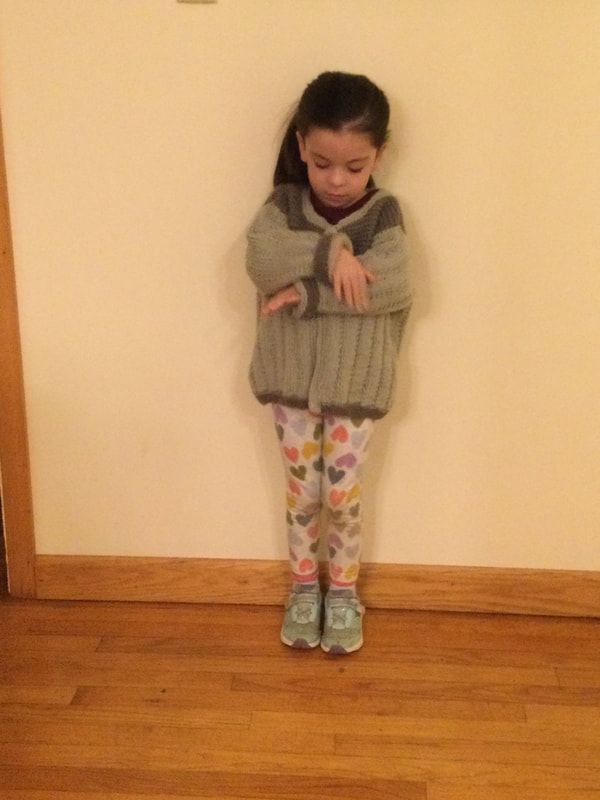
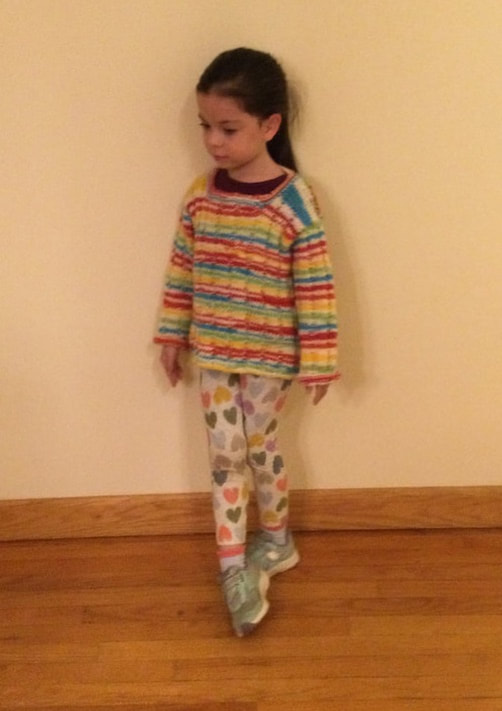
 While many crafters insist on working from free patterns, I find a great deal of stimulation when I visit my local independent yarn shop. The proprietors display many knitted and crocheted designs as well as an enormous and varied inventory of books and binders of patterns. They stimulate my imagination and call for me to try my hand at many new creative projects. When I can pair the pattern with the yarn, I am ready to go. While the yarns are typically more expensive than those found in large craft stores or from on-line sources, they are frequently high quality fibers that are colorful, soft, luxurious, and interesting. I usually reserve these purchases for family members or close friends when I give myself that special treat. Plus, I really want to support these dedicated vendors so that they are there for me when I want to make something special. Sometimes, I start with a pattern that I find on their shelves of binders. At other times, the yarn (especially if it is on sale) is the source for my inspiration. My favorite independent yarn store is The Yarn Barn in Woodbridge, Connecticut. When I purchase a pattern, I typically like to find one with multiple looks from the same set of directions. The Child's Pullover and Cardigan, #P601, written by Jelli Beenz, published by Plymouth Design Studio was able to deliver. Although the pattern originally called for a Jelly Bean Yarn that is no longer produced, I was able to find two coordinating Paintbox yarns. The first worsted weight yarn was light purple with aqua and yellow speckles. The coordinating yarn was white with aqua and yellow speckles. The border and bottom, and neckline were knitted in garter stitch with a #6 knitting needle. The body and sleeves were knit with a #8 knitting needle. I made this first piece in size 4 for my petite 4 year old and daughter. I love the contrast between the yoke, borders and main part of the sweater. While the pattern called for a ribbed texture on the body of the sweater and a garter stitch on the yoke, the uneven texture of the yarn made it difficult to showcase the ribbing. Therefore, I knitted garter stitch on the borders and the yoke, but I used a simpler stock and net stitch for the body. I was thrilled that I had the perfect 3 aqua buttons for the closing in my stash. This sweet young lady loves wearing this cardigan to Pre-K and frequently is complimented by her teachers. Then I tried the same pattern with two shades of grey in size 6 for her six year old cousin. However, while she is slim, she is big for her age, and the sophisticated interpretation of the sweater did not fit her. As you can see from the picture, the four year old can wear it now, but there is plenty of rom to grow. The sophisticated coloring yielded a completely differently different look. While the yarn for the first sweater was purchased from yarn shop, the yarn for the second sweater was in my stash, originally purchased from a large craft store. Again, the garter stitch was used for the neck, borders, and yoke. The two row repeat four-two broken rib is just right for the main body and sleeves. The three grey buttons for the closing came from my collection. Although I usually knit cardigans, the third sweater was a pullover with a wider neckline that makes it easiler to pull off and on. I bought the multicolor rainbow yarn on the same day that I got the speckled yarn. My granddaughter saw the rainbow yarn peaking out of my bag and inquired whether the yarn was for her. How could I deny her? The Paintbox yarn was a lighter worsted weight. While I used the same #8 needles, I think I would have been better off with a #7. The cardigan was knitted entirely with the broken ribbed pattern, and there is no change for the yoke. This sweater was also knitted in a size 6. While it is roomy. the sweater works well as an oversized pullover. I knitted the three sweaters over the course of a few months with other projects in between. Once I figured out the quirks in each of the designs the sweaters were relaxing to create.
I appreciated your feedback and comebacks. I welcome you to join me on my stitching journey.
0 Comments
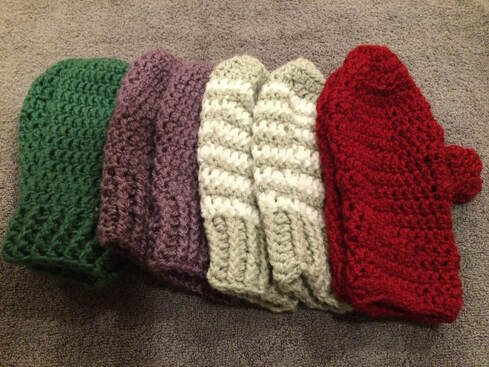
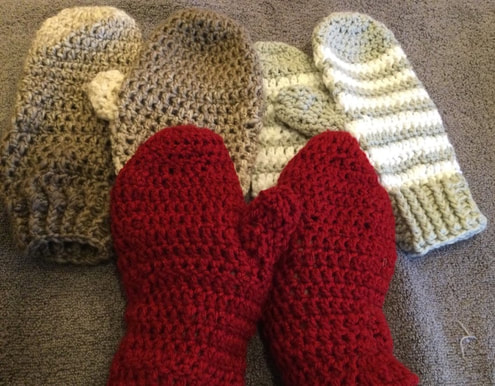
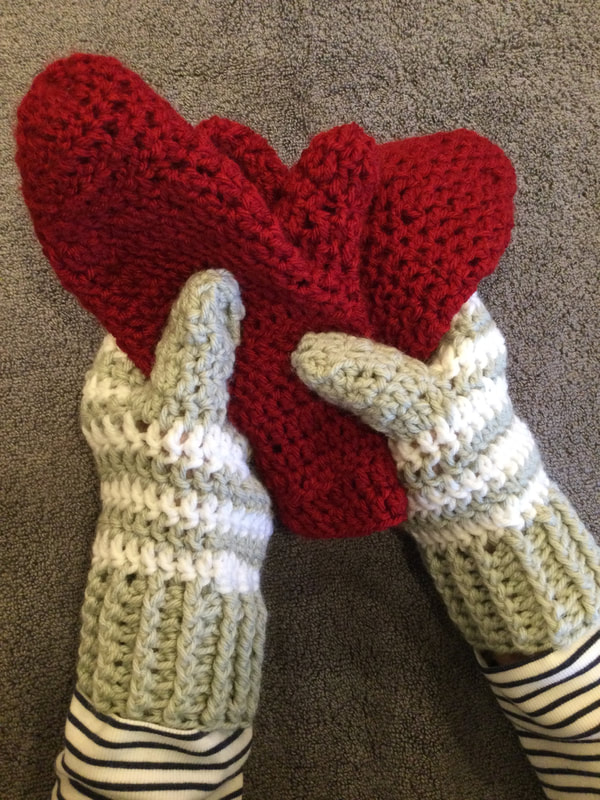
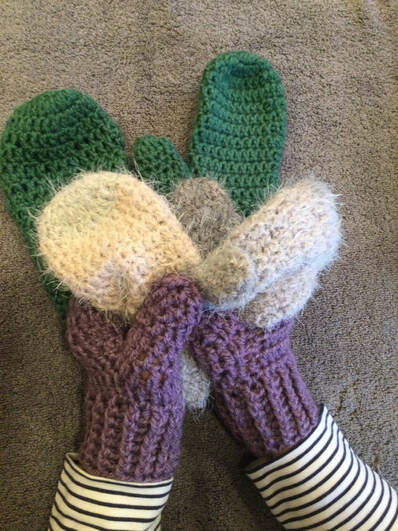
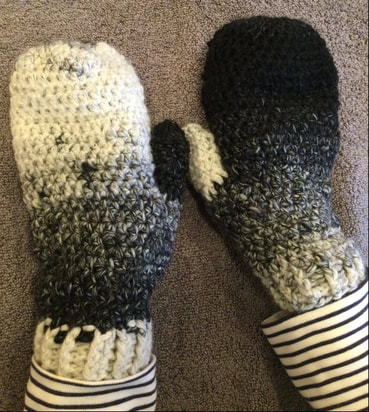
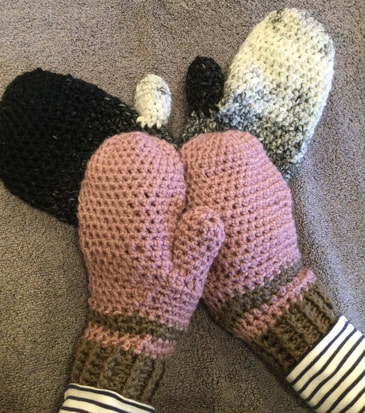
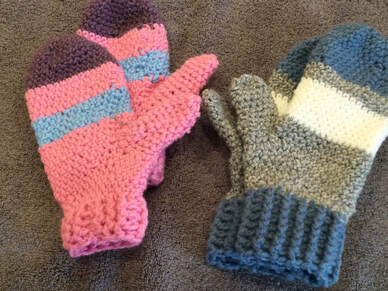
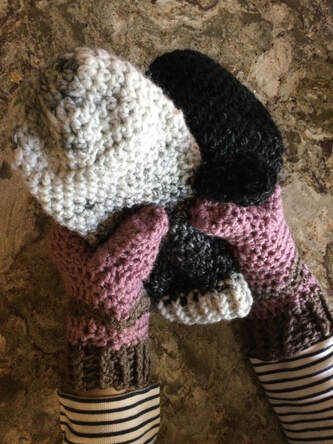 Creating mittens has really stirred up my creative spirit. i started with knitted mittens and transitioned to crocheted mittens. If you read my last post, you would have noted that my designs started with the cuff and went up to the fingers. However, as I did my research, i was excited to explore the exciting patterns that started with the fingertips and work down to the cuff. Then the thumb was added, and voila, a lovely mitten. My first pattern for top down mittens was published by Ticklish Fingers.(http://ticklishfingers.blogspot.com/2013/2014/crochet-mittens-innstructions-oncluded.htm).The pattern starts with a magic circle and incorporates the double crochet stitch. I started with mittens with alternating colored rows. The mittens were easy to make, and the resulting product was attractive and comfortable. Since I was working in double crochet, using worsted weight yarn, and an H (5.0mm) hook, I was able to complete the pair in a matter of hours. The solid burgundy and the self striping acrylic/wool Lion Brand Scarfie blend went even faster. These mittens guard against the chill,, but for a warmer mitten I would try a denser stitch. Quick Crocheted Charity Mittens by Random Randi's Ramblings (https://www.rave;y.com/patterns/libary/quick-chairty-mittens) also started with a magic circle and worked well with double crochet stitches. The pattern calls for an H (5.0mm) hook for the body of the mitten with a G (4.0) hook for the cuff. I did not make the switch and used the H hook throughout the project. The purple and green worsted remnants from my stash were put to good use. Another remnant from Caron Latte Cakes made for warm, fuzzy, and cozy mittens. These mittens were a bit more form fitting and seemed a bit warmer. The pattern called for the thumb to be crocheted separately and then joined to the body of the mitten at the thumb hold. I reversed the directions and crocheted the thumb directly out from the thumb hole.The cuff was produced by alternating front and back double crochet post stitches.The length of the cuff actually depended on the amount of yarn I had left in the remnant. The pattern is available as a free Ravelry download and can be used for charity or personal use. The Perfect Fit Mittens from Left in Knots (https://leftinknots.com/home/crochet-perfect-fit-mitten) differs from the first two sets of mittens, as directions call for a half double crochet stitch in the body of the mitten. The directions do not require a separate cuff, but I chose to add the alternating front and back post stitches. Since this stitch is a bit tighter, the mitten feels warmer. I plan to keep the black/gray Lion Brand Scarfie yarn mittens for myself. Since there is about 20% wool in the yarn, I really like the feel of these mittens. The heather rose and brown striped mittens were made from small discount skeins which are perfect for donating. The Mixed Stripe Mittens Crochet Pattern (https://stitch11/com/mixed-strip-mittens-crpchet-pattern) was densest of all as it used the single crochet stitch. When I followed the directions with the plum, pink, and blue mittens, I felt that the mittens were a bit tight. Then I moved up to an I (5.5mm) hook. However, the gloves were still snug for an adult hand, and were best used for a youth or young teen. I would even consider going up to a J (6.0mm) hook to get a looser feel. While most of these mittens will be donated to local charity groups, I will probably keep the black and white Scarfie Yarn mittens for my winter accessory wardrobe.. If I make a crocheted hat, the set will work well with my black trench coat . Of the three textures, I like the half double crochet from Left in Knots the best. At this point, having knitted and crocheted countless mittens,I am all mittened-out for a while. I have a couple of requests to make up before the winter holidays, but I am ready to start some other projects.
I hope that you have enjoyed the results of my research and will undertake some mittens of your own. I appreciate your remarks. feedback, and photos. I welcome you to join me on my stitching journey. |
Archives
November 2022
Categories
|

 RSS Feed