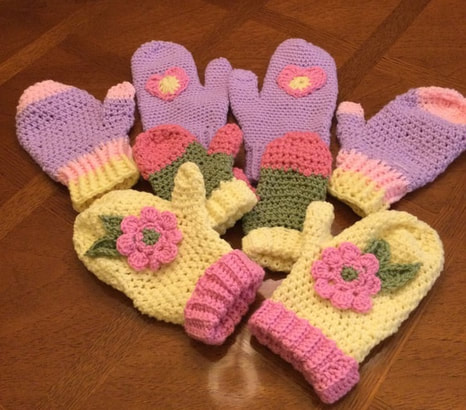
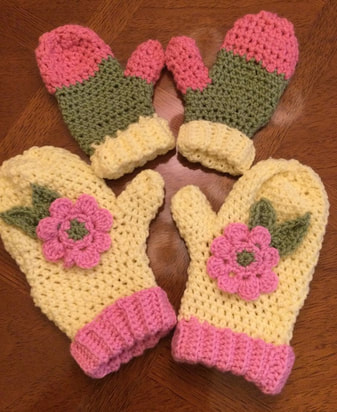
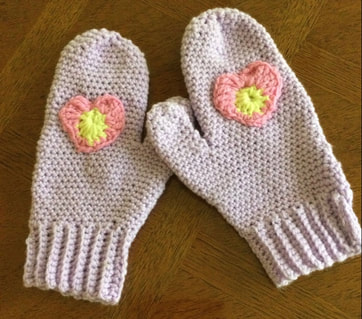
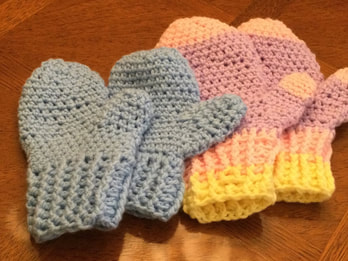
 My mittens journey continues with a several crocheted versions starting with the hand or cuff and moving up to the fingers. My previous article showcased knitted mittens, but I was eager to try my hand at crocheting. For me the knitted mittens have a smoother texture and are easier to show detail. However, I can still include blocks or stripes when I crochet. Appliques break up the expanse of plain stitching and even hide uneven surfaces. Plus, the crocheted mittens feel warmer. My mainstay mittens are the fingerless versions that I have interpreted with many designs and various yarns. Now I am adding the thumb and completing the top as my non-profit clients have requested mittens that present warmth as well as style. After considerable research, I found 3 patterns that were easy to follow, included a range of sizes, and fit well. In order to share the patterns with my readers, I have crocheted one or more pairs of mittens for each set of directions to make sure that I shared information as a fellow crocheter. All of the patterns in this article are crocheted with worsted weight yarn. My first pattern is Caron Hands Full Crochet Mittens by Yarnspirations. Sizes include 2/4 years, 8/10 years, and adult. (Caron Hands Full Crochet Mittens,Blue. Item #CAC0315-004045V) The authors recommend Caron 1 pound yarn as the mittens are recommended for charitable donations. you can get 8 pairs of toddler, 6 pair of child, and 4 pairs of adult mittens from a single skein. A US 7 crochet hook is recommended, but I find it hard to crochet with small hook and went up to the 8(H hook, 5.0 mm). I use the 7 for flowers and appliqués. The ridged cuff is made to look like a knitted version. By crocheting with a single crochet stitch from the back loop only (BLO), you will make strip that achieves this effect. The strip is crocheted together from the short ends. Then you crochet around 1 row with single crochet before starting the Half Double Crochet that forms the basis for the rest of the mitten. Instructions are given to form the gusset. The thumbholes are left open as you crochet the rest of the hand and the closing portion of the fingers. Then the thumbs are added to the mitten. Both mittens are identical, and you do not have to differentiate for right and left mitten. My photos show the child and adult sizes. The color blocked child size is a great way to use up large ends from your stash. The adult version features a floral appliqué that adds playful touch. The Free Crochet Pattern: Mrs>Murdock's Mittens offers pre-school, child, and women's sizes. (https://www.ravelry.com/patterns/library/mrs-murdocks-mittens) The instructions call for a G 4.0mm hook, but again I used an H 5.0mmhook. As the pattern was done entirely in single crochet, I found that the sizing was comfortable, and the mittens were attractive. I crocheted the women's mitten for this pattern. I have a medium to large hand, and I was quite happy with the fit. The appliquéd two toned heart broke up the plain surface. Be sure to attach appliqués or floral designs to the tops of both gloves. Place your thumbs together as if you are playing the piano so that the attached pieces match. The third pattern that I chose to share with you is Crochet Basic Mittens Pattern for Adults https://www.crochetforyoublog.com/2021/03/crochet-basic-mittens-pattern-for-adults Patterns come in small, medium,. and large sizes. I think that the smallest would fit a child or teen. Although there are specific directions for each size, the authors show you how to personalize the mitten that fits you exactly. The hand and thumb are crocheted in Half Double Crochet stitch. (HDC The mitten directions start at the bottom of the hand just at the thumb gusset. You crochet the thumb hole, and finish the hand and mitten top. Then you add the thumb. Finally you add the cuff. The directions for the cuff are given before the directions for the specific sizes. These directions were different than most mitten cuffs, and I substituted, the procedure that uses the alternating Front Post DoubleCrochet (FPDC) and the Back Post Double Crochet (BPDC). I have used this technique in many of my hats and fingerless gloves to achieve an attractive ribbing. My ribbing was only a few inches long, but you can make it twice as long so that you can fold up the ribbing. I found that these mittens were wider than most. rMost of my mittens will be donated to non-profit organizations for keeping their clients warm duringthe winter months.I have been looking for local sites as I want to help my local Connecticut communities. An added benefit is that I avoid the exorbitant mailing costs that I encounter when I send my work across the country.
You may have noticed that I stipulated in the title that these mittens were crocheted from the cuff up to the fingers. Much to my surprise, I found a different construction as I was doing my research on crocheting mittens. That design is crocheting from the fingers down to the cuff. I have made several mittens featuring this type of construction and will feature them in a future article. Then you can take your pick. As always, I welcome you to join me on my stitching journey. Please provide you questions and feedback. I hope you enjoy these patterns and projects. Whether you crochet for yourself or others, I hope that you take joy in the creations. Please include photos of finished mittens if possible.
0 Comments
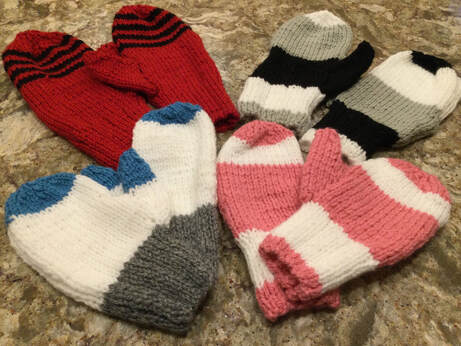
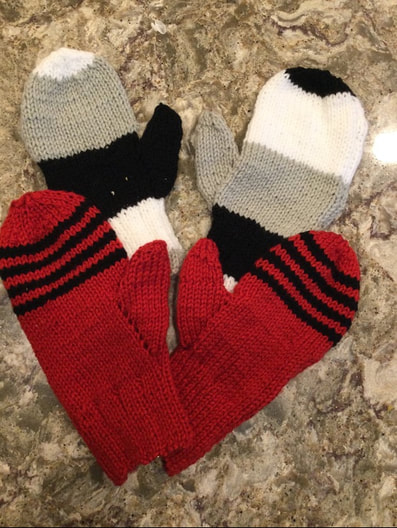
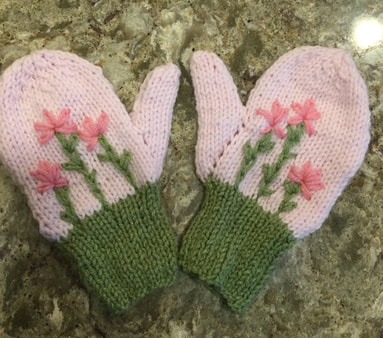
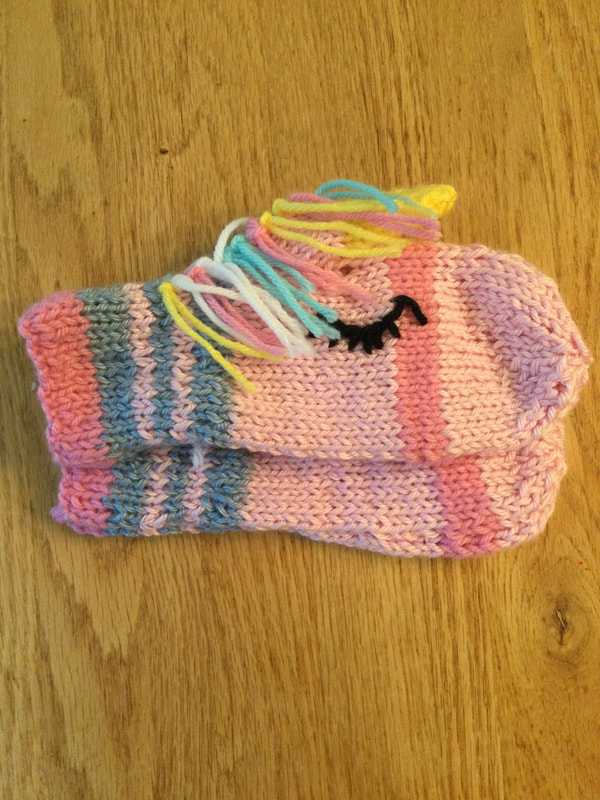
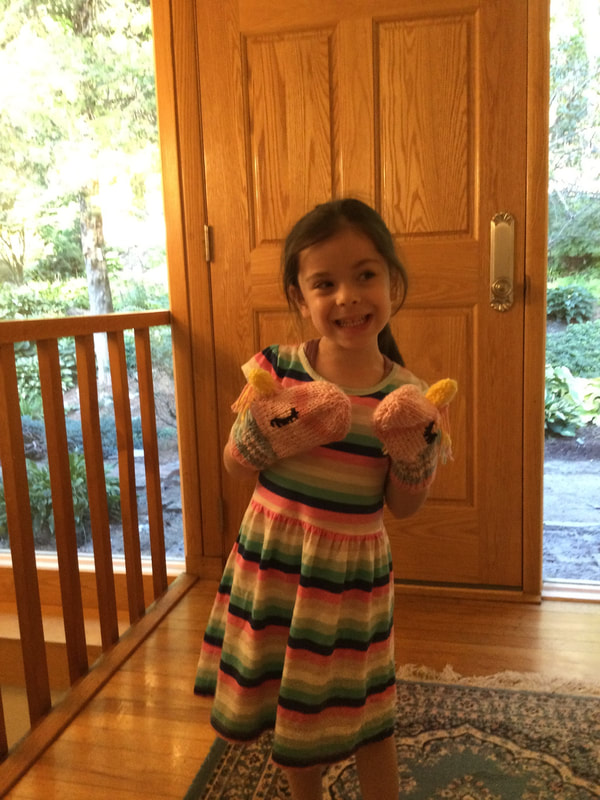
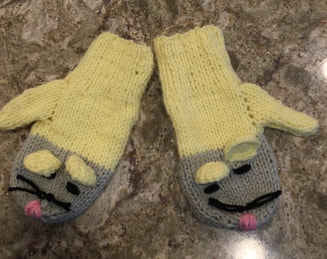
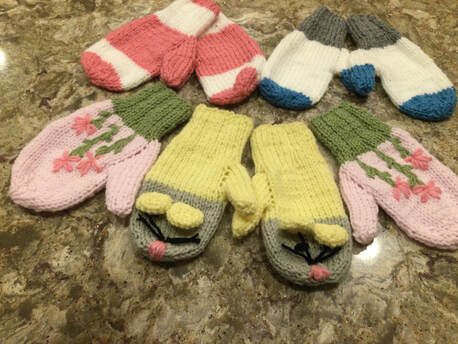 This year I promised myself that I would tackle the thumb gusset and knit a mitten with a covered top. Fingerless mittens have been a favorite project of mine that I have knitted and crocheted for several years. I have gifted them to family and friends, sold them at fairs, and have worn them as an atractive accessory. However, with my fair activity dramatically paused with CoVid, I wanted increase my donation of my products to charitable groups. However, these organizations preferred the closed mitten as their clients really needed to keep their hands warm in the cold winter months. Although I know how to knit on double pointed needles that most mitten patterns require, I do not enjoy that activity. I usually use them to close off knitted beanies, but I rather not knit on the dp needles for an entire project. When a friend in my knitting and crocheting group introduced me to the two needle method I was hooked. Her pattern was a bit complicated, and so I searched for a pattern that I could execute in any environment. My favorite pattern was designed by Arna Caplan for Knitting4Peace. I have knitted hundreds of Peace Pal dolls and countless hats and scarves for this wonderful organization that sends pieces filled with love to at risk communities throughout the USA and Internationally. I also have several other organizations on my giving list. Now I wanted to try my hand at mittens. In contrast to other patterns, the right and left mitten are identical. They are knitted with worsted weight yarn with number 5 and 8 needles. Pattern sizes are youth's, women's, and men's sizes. The mittens are knitted flat, starting with the cuff. After a few rows, you start the thumb gusset. When the desired number stitches is reached, place the stitches on a holder. The knit across top of the row to fort the the hand. Follow directions for decreases to finish off the top of the fingers. Leave a long tail to sew the mitten together. Join yarn at the thumb stitches and knit the correct number of rows before completing thumb. Sew hand and thumb seams. I prefer blanket stitch, although others may prefer to crochet the edges or use a mattress stitch. Their are countless ways to decorate your mittens. Two of my favorites are stripes and color blocking. You can knit both mittens the same or you cn change the arrangement of the colors for an intriguing mismatched look. These embroidered flower mittens are just the first of many. A friend asked me to knit a pair of unicorn gloves for her granddaughter and a pair of dinosaur gloves for her grandson. My granddaughter is modeling the unicorn mittens, but I will have to make her a warmer pair for her to wear. There are all kinds of animals that one can knit. Even if the design is for the four dp needles, you can adapt the picture to the two needle method. For the mittens below, I embroided a mouse face and crocheted the ears. Rita's Family Knit Mittens from Yarnspirations is an intermediate skill mitten that features Red Heart Super Saver Yarns in sizes from 2/4 years to men. Knitting needles are size 6 and 7. The directions for the right and left mitten are different so that the thumb placement is more accurate. I found the pattern harder to follow and went back to my first set of directions. As always I appreciate your feedback and reflections. I welcome you to accompany me only stitching journey. As I craft I am always learning. Now that I knit a mitten with a thumb. My next goal is to learn how to crochet a mitten with a thumb.
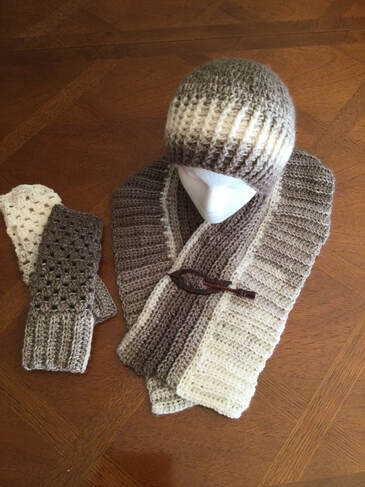
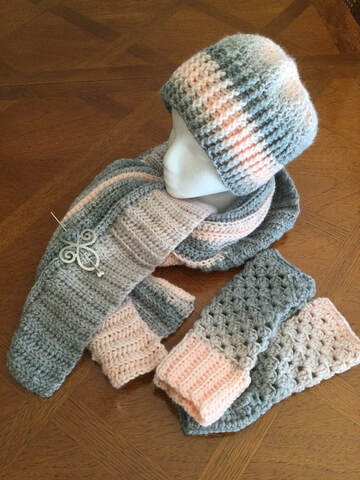
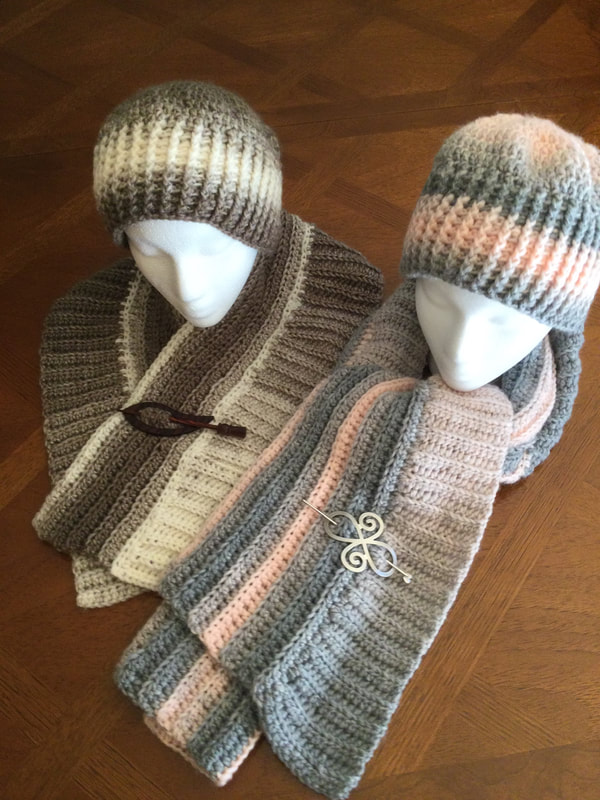
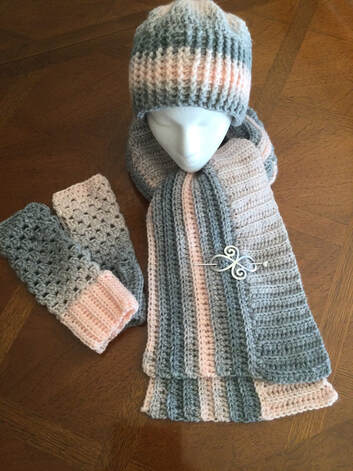 With the colder weather in autumn and winter, I decided to create pieces to coordinate with the my inventory of fingerless gloves. (http://www.lilcreates.com/lillians-blog/crocheting-the-last-skein. My first instinct was to crochet a hat with the stock left- over skeins I had used to make the chunky weight gloves However, I knew that a scarf would finish off some of the sets. The taupe remaining yardage crocheted from my Lion Brand Scarfie evolved into my favorite beanie from Lakeshore. With an additional skein, I would have a regular length scarf about 45 inches long. When I applied a shawl pin, the scarf worked well at the neckline of my beige trench coat. After my first creation, wanted a longer model and bought an additional skein to crochet a 60 inch scarf. The second scarf was created with with light grey and pale pink tones. I was able to make a simple looped tie closed the scarf with a silver pewter scarf pin to that the layers would lie flat. What makes this scarf different from others that I have crocheted is that I have crocheted in two different directions. Pattern: Two Directional Crocheted Scarf Materials: Approximately 1 skein of Lion Brand Scarffie (#5) for a scarf 45inches long x 7 1/2 inches wide (312 yards) 1 2/3 skeins of Lion Brand Scarfie (#5) for a scarf 60 inches long. x 8 1/2 inches wide (approximately 500 + yards) An equivalent heavier weight Worsted or Aran of 225 grams or approximately 500 yards would also work for the longer scarf. An Ombre Yarn, such as Red Heart Super Saver would also produce the desired effect. Crochet Hook: I or 5.5mm Directions: Part 1: Chain 15 stitches. You will be making short rows in this section. Row 1: Half Double Crochet in the second stitch from the hook. (14 stitches) Row 2: Chain 1. Half Double Crochet (HDC) in the backlog only (BLO) across the row. (14) Repeat Row 2 until you reach the desired length. Your panel will be about ___ inches wide and about 3 1/2 inches long. A single turning chain is used so that there will not be a gap at the beginning or ends of the rows. By crocheting in the BLO you will be forming ridges across the short rows. DO NOT FASTEN OFF. Part 2: Turn Row 1: HDC [picking up stitches as you work your way along the length of the scarf. Row 2: HDC on the BLO as you crochet along the length of the scarf. Ch 1. Turn to begin the new row. Repeat these long rows until you have crocheted about 5 inches. My width of the long row section of my taupe scarf run 4 inches as I ran out of yarn, but it worked well for the shorter piece. A wooden or pewter scarf pin is the perfect accent to anchor the layers. As always I appreciate, your reflections and feedback. Please share your interpretations and phots of your work. I welcome you to join me on my stitching journey.
|
Archives
November 2022
Categories
|

 RSS Feed