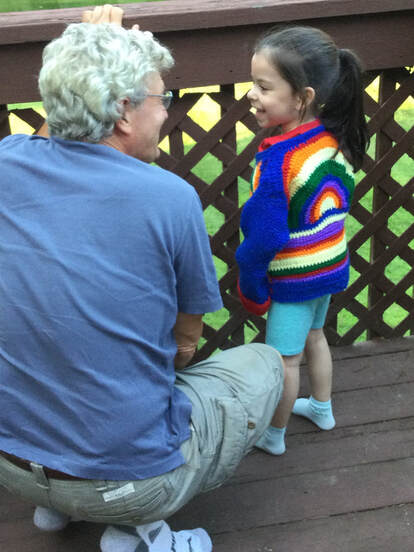
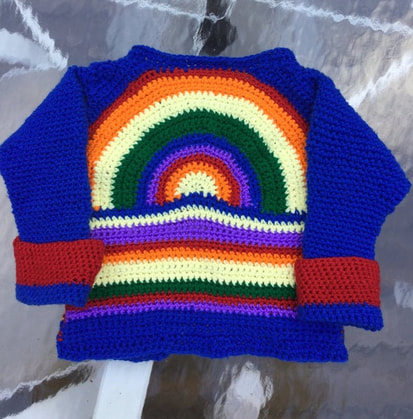
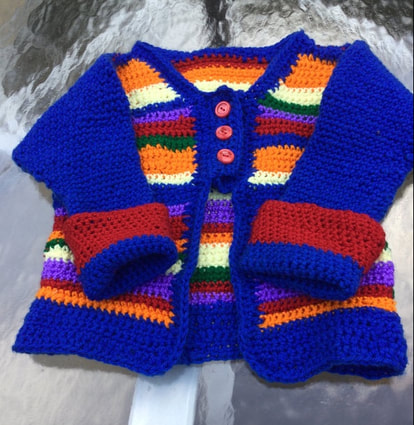
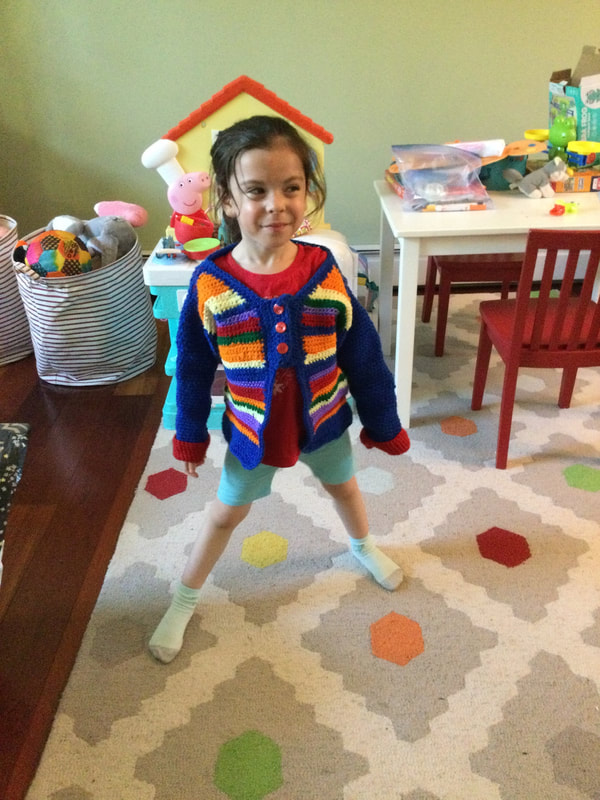
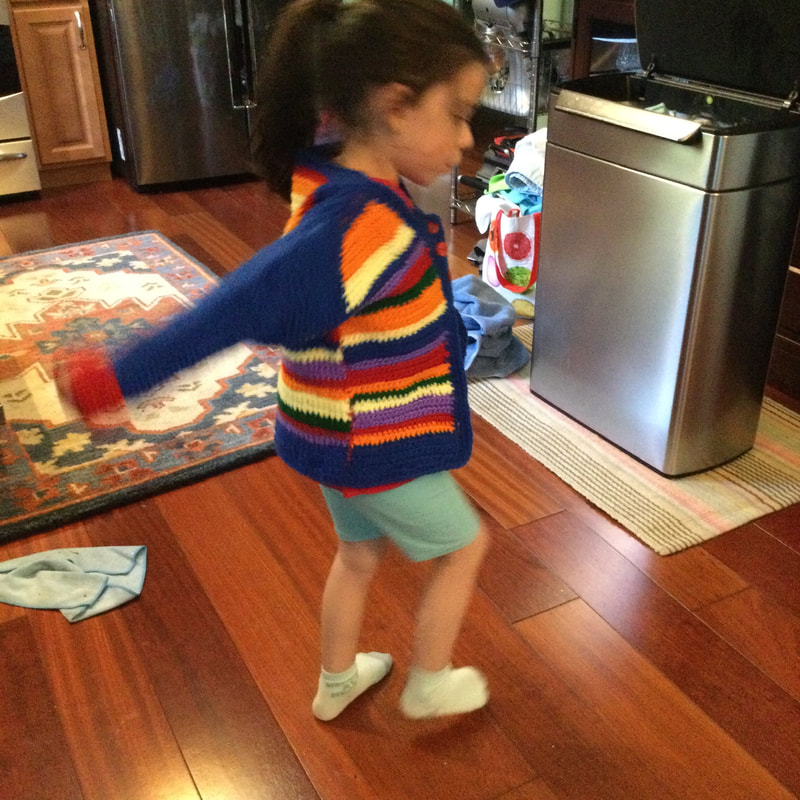
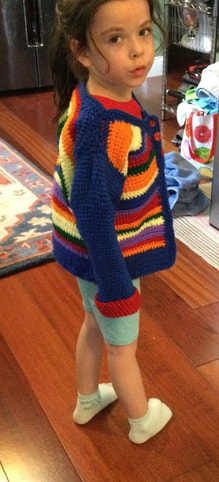
 This Double Rainbow Crocheted Cardigan brings a smile to all of those who see it. My inspiration for the sweater was The Over the Rainbow Toddler Sweater by Yarnspirations.com/bernat. This multicolored treat ranges in sizes from 2T to 6 and uses 7 shades of worsted weight yarn with a J (6.0mm) hook. When I saw the photo of the sweater, I knew I wanted to make it, but I needed to make several changes to express my vision for the piece. The Double Rainbow Crocheted Cardigan starts with half-double-crocheting the double rainbows on the back section. Then the bottom layer is added. The original pattern instructions include detailed information for creating the rainbow and for crocheting the color sequences. However, instead of the 7 shades of worsted weight yarn, I substituted 6 colors that were truer to the rainbow hues. Another significant change that I made was to eliminate the aqua in the basic design. With this transition, first I had to make changes in the color sequences and number of rows for each color in the rainbow itself. Then, I changed the number or rows and color sequence for the bottom section. I noted that the authors of the pattern included different numbers of rows for the various colors. The random arrangement was attractive and easy to improvise. Since I was working with my own vision, I had to be guided by my granddaughter's measurements as I executed instructions for size 4T. After the back is completed, directions are given to square off the rainbow for the back part of the shoulders. The front of the sweater is worked from the shoulders down through the v-shaped neckline and straight down to make each front of the sweater. Since I was substituting my own color sequence, I just had to make sure that I varied the number of rows in a pleasing matter. Once I completed the first front, I wanted to doublecheck that the opposite side matched exactly. I also had to confirm that the front pieces matched the back in length. The pattern called for the sleeves to be crocheted top down and then sewn into the sweater. I selected a different strategy. Once I sewed the shoulders and the side pieces, I took the stitch count for the top of the sleeve and crocheted the same number in single crochet into the rounded armhole. I followed the directions for decreasing the number of stitches as I moved from the shoulder to the wrist. I eliminated the extra colored stripe and stayed with blue and red for the sleeve. The sleeves are longer than the child's arm and are designed to be folded up to form a contrasting cuff. To finish off the sweater., I stitched two rows in half-double crochet along the bottom, fronts, and neck of the garment. Now, instead of the three sets of ties, I chose a sleeker version, by adding a 4 row single crochet placket of 18 stitches for 3 buttons and buttonholes. My granddaughter tried valiently to follow my directions to make poses that would show off the best features of the front and back of the cardigan. She looked adorable, but it wasn't until she was called onto the deck to observe the bunnies in her backyard, that we really got a wonderful natural smile. Many thanks to my sweet granddaughter who puts up with her Nana's requests even when she doesn't quite understand why I am putting her through these paces. The completed Double Rainbow Cardigan was an exciting piece to execute and photograph. The original sweater was attractive, but I am very pleased with the color and design changes that I made. Many thanks to the designers at Yarnspiration who wrote the pattern for this sweater so that I could put my own stamp on it. Readers, have you ever found a pattern that was interesting, but you were still inspired to work with it to develop your vision? As I continue on my stitching journey, I find that with increased confidence, I am able to combine elements from different designs that express me as an individual. In future blog posts, I will be gleaning from the many free patterns and as well as purchased pattern books to create pieces that use the best features of two or more patterns. This new venture promises to be exciting!
As always, I appreciate your feedback and reflections. I welcome you to join me on my stitching journey.
0 Comments
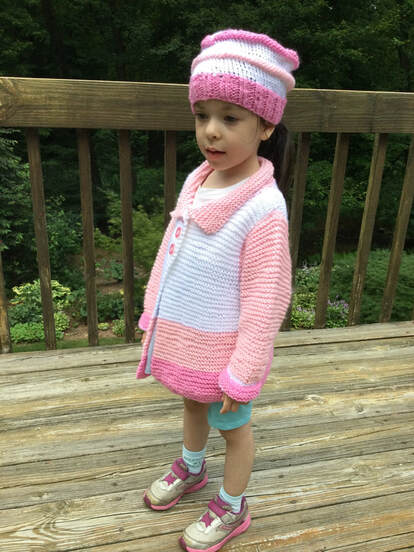
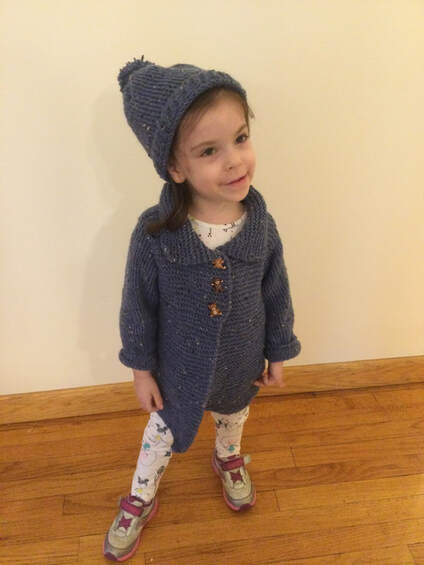
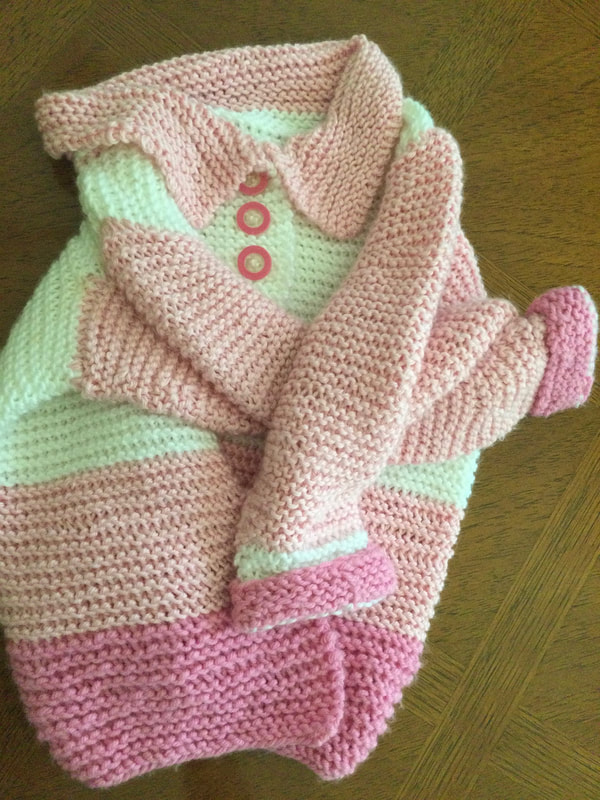
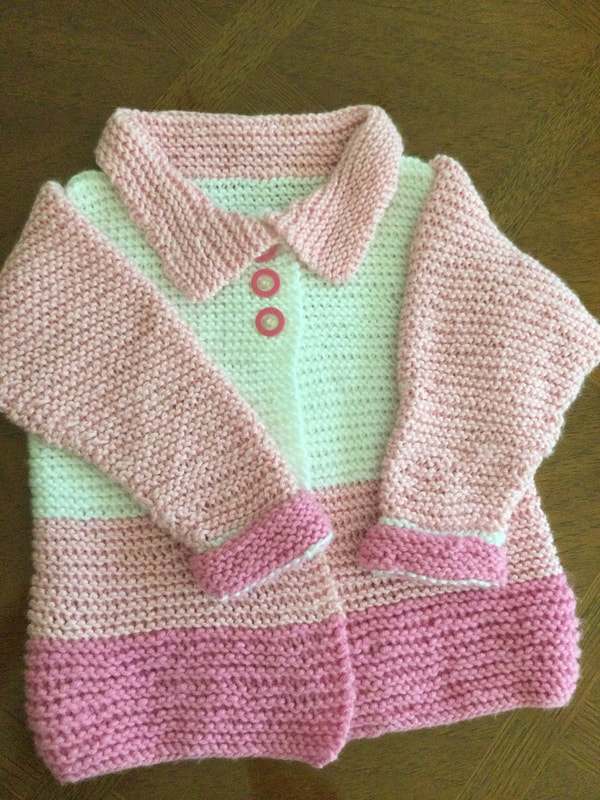
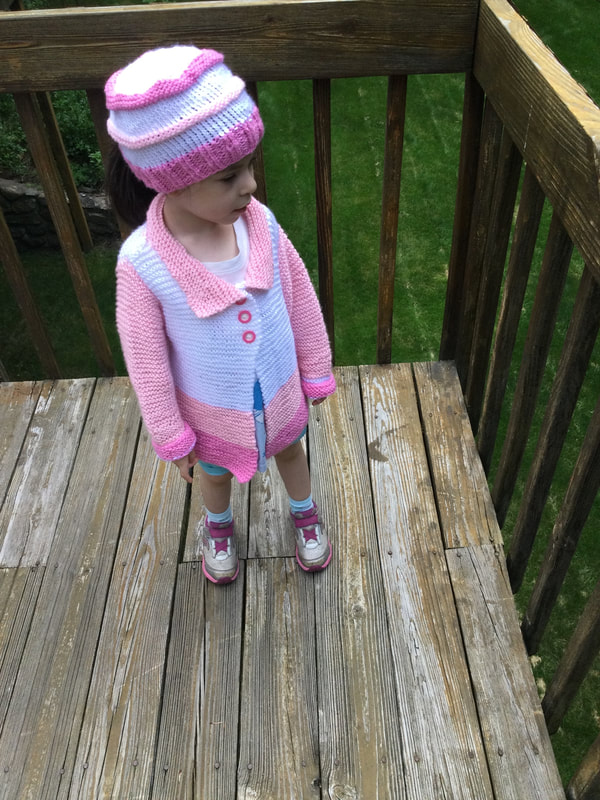
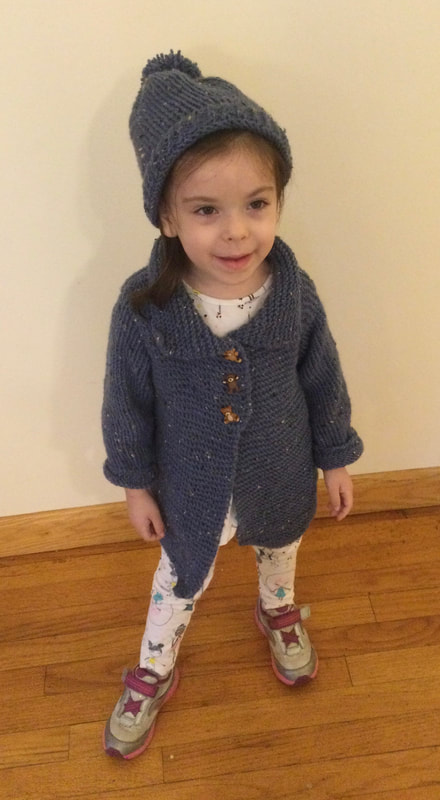
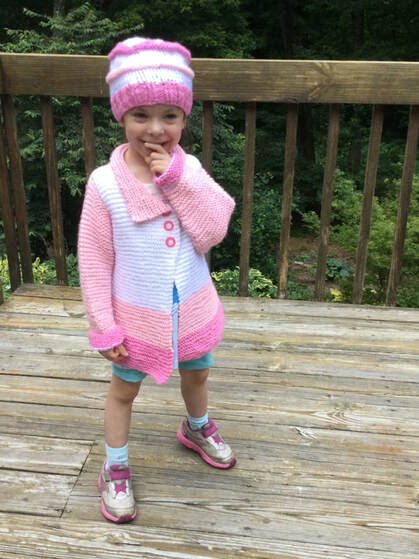 For those knitters who enjoy the simplicity of the garter stitch, this delightful sweater jacket pattern is just right for you. While the original pattern calls for a broad color block at the bottom, I have made the piece in both a solid blue tweed and in a three way color block with two shades of pink and a band of white. Both sweaters were knitted in worsted weight yarn with a #8 needle. Pattern sizes run from 4 to 12. The Sawtelle Cardigan pattern was designed by Amanda Keep Williams. To get free pattern register at annies catalog.com. I had retrieved the pattern from an earlier source, and so I just went through the procedure and it works. The original piece was made in a size 4T and ran true to size. As my granddaughter has several sweaters in 4T, I wanted to make the next size to plan growth during the winter season.The pink and white sweater is roomy as she is only wearing a t-shirt and shorts under the outer garment. When she puts on a couple of pounds and is wearing warmer winter garments, she will fill out the sweater. My sweetheart put up with all of our modeling directions. The pose I like best has her giggling as she gazed up at her daddy making silly faces. The sweater is almost seamless since you cast on enough stitches to cover the back and both fronts. A garter stitch is used thorough the sweater. After you knit the body up to the armholes on circular needles, you divide for the the back and armholes. There is no extra trim for this sweater. The garter stitch comes right to the edge. The buttonholes are made right into the garter fabric. After the sections are completed, you seam the shoulders together. The armholes are knit in the round. In order to achieve this look when knitting in the round, you have to alternate knit and purl rows. When you knit flat, you knit all the rows. This part was the only tricky part to the sweater, but after I got the hang of the procedure, my knitting went smoothly. When I knit the sweater in a solid color, I followed the directions and began picking up the collar stitches with the right side facing. This step left the join on the inside of the sweater where you could not see it. However, when I chose to use a contrasting color for the collar, I had to start with the wrong side facing so that the join would be concealed as the collar lay over it. This sweater jacket provides a basic canvas for trying out different combinations of yarn colors. Just remember to end your last row of a color section with a knitted row so that you get a smooth transition. Otherwise, you will have a line dashes when you turn your piece to knit on the reverse side. If you choose to use a self striping yarn you can avoid this situation. I am sure that I will knit this sweater again for other children in different colors and sizes. It has become part of my basic knitting repertoire. As always I appreciate your reflections and feedback. I welcome you to join meonmny stitching journey.
|
Archives
November 2022
Categories
|

 RSS Feed