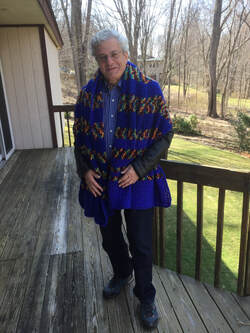
 The Double V Fan Stitch consists of 2 DC, Ch I, 2DC in the same stitch . There are 3 skipped stitches between the fans. The fans are stacked on top of each other in following rows. 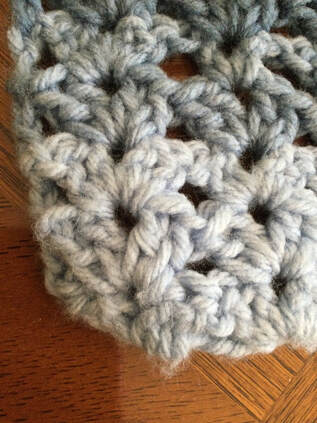 For specific directions and a video tutorial, see: Autumn Symphony Shawl by Jennifer Dickerson on Ravelry. I also located the pattern by searching for Free Pattern Autumn Symphony. It popped up on the Fiber Flux website. 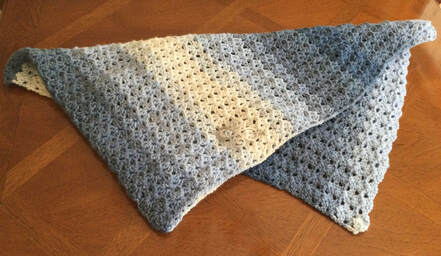 I did not want to work with chunky yarn . I chose Caron Jumbo in a worsted weight Ombre called Faded Jersey. The skeins weight 12 oz and yield 595 yards. I needed about 1 and 2/3 skein to complete the project with 20" x 60 inches. You will still need the second skein if you want only a 18 inch wide shawl. My initial chain was 63 stitches (15x4 +3). Since I planned to donate my shawl to Threads of Love, an organization that provides shawls and blankets to cancer patients, I wanted a deeper, cozy garment. Our group provides our pieces to Yale-New Haven Hospital, New Haven, Connecticut. To date we have created and dispersed about 850 pieces since we formed our group. Thank you to my daughter, Robin for agreeing to model my work. 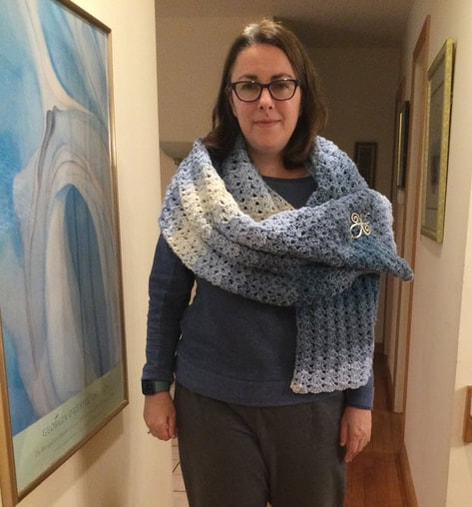 Given the repetitive nature of the stitching, this piece is the ideal project for crocheting in front of the television or for keeping busy on a long road trip. I just have to check at the end of each row to make sure that I did not skip a part of a stitch as I am working. As noted, the original pattern used chunky yarn with a K (6.6mm) hook. My worsted adaptation used a J (6.0)hook. However, I imagine that you could use an Mandala or other self striping yarn in DK or #3 weight with an I (5.5mm) hook. Just make the initial chain as long as you need while you maintain the multyiple of 4 + 3. It is easy to customize this shawl for a shorter or taller person by chaining the number rows. For a more slender person, I would probably make the shawl 18 inches while instead of 20 inches. I usually incorporate several pieces in my blog articles. While the written work is not challenging, creating so many pieces takes a great deal of time and effort. When I think of a theme, I usually want to display the idea in several ways. Earlier in my blog history, I exhausted myself and reluctantly stopped blogging for many months. This Crocheted Shawl with a Double V Fan Stitch took several days to complete. However, the stitches worked up rather quickly. I have several shawls planned before my group does it is quarterly collection. I am really pleased with myself when I can focus on one piece to illustrate one idea. Alas, some of my future articles will not reflect such self control. As always, I welcome your reflections and feedback. Please join me on my stitching journey.
0 Comments
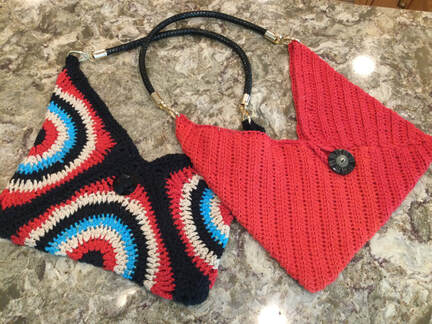 Anyone who can crochet a rectangle can create a stylish purse. The trick is 3 simple folds, two seams, and a strap of your choice. Actually, once you decide how large you want to make your bag, take the shortest dimension of your rectangle and multiply by 3 for the length. For example, the red ridged purse measured approximately 11 inches by 33 inches before I made the folds. I used Sugar and Creme Red in worsted weight (#4) with an H (5.0) hook. I chained 33 stitches and began my Half Double Crochet (HDC) from the second chain from the hook for the first row. In the second row I continued with the HDC but crocheted from the back loop only (BLO) . I continued with the HDC in the BLO for the rest of the rectangle.
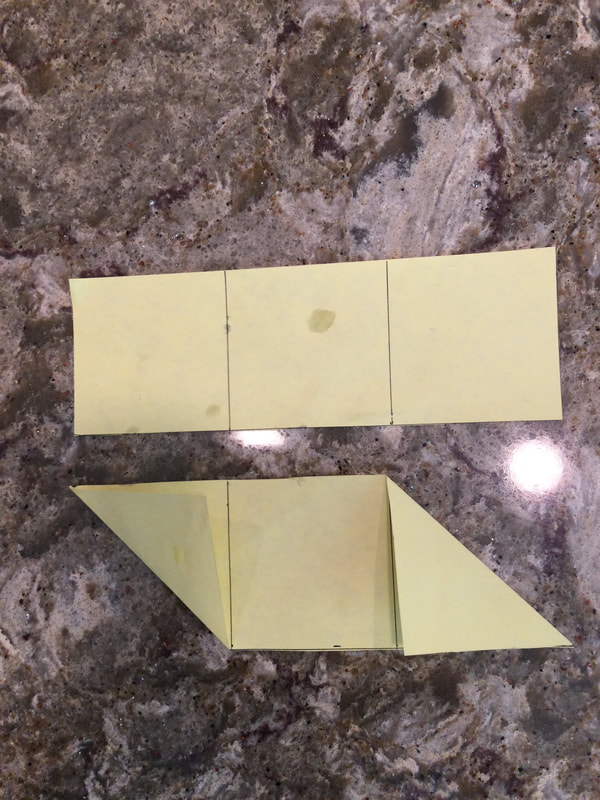
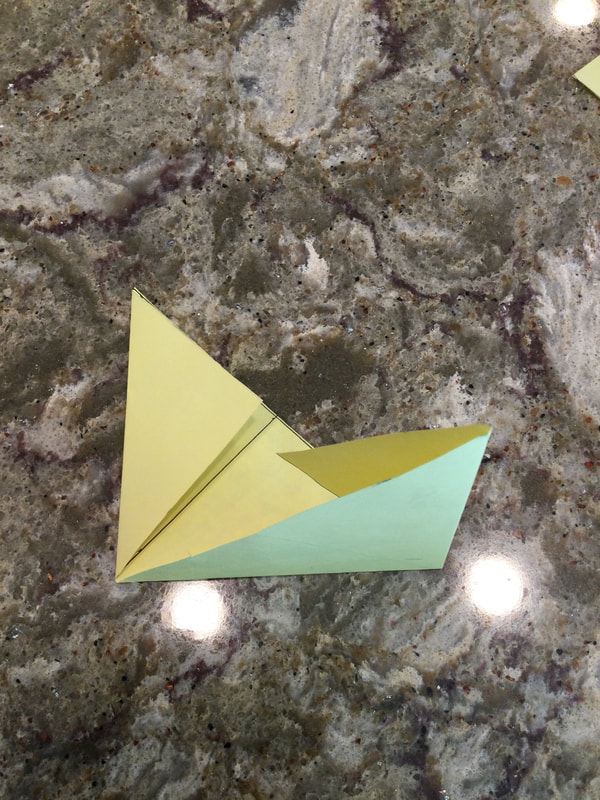
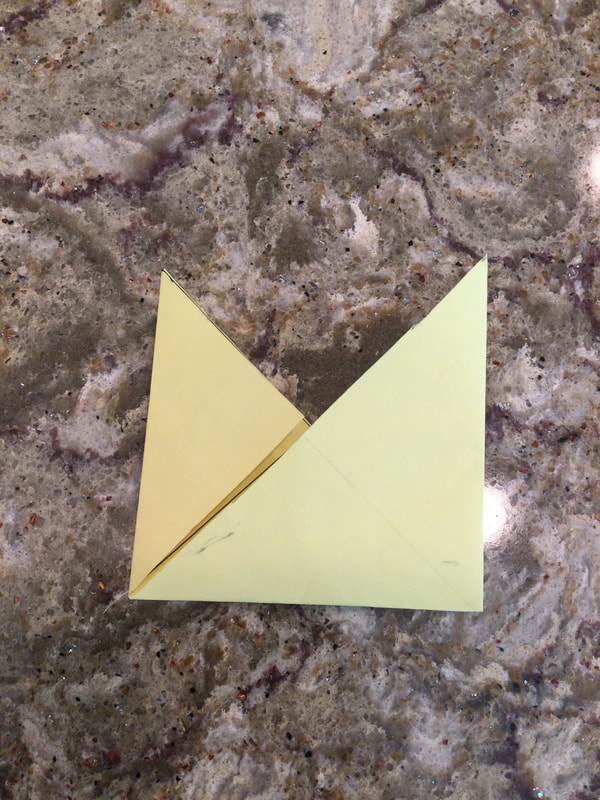
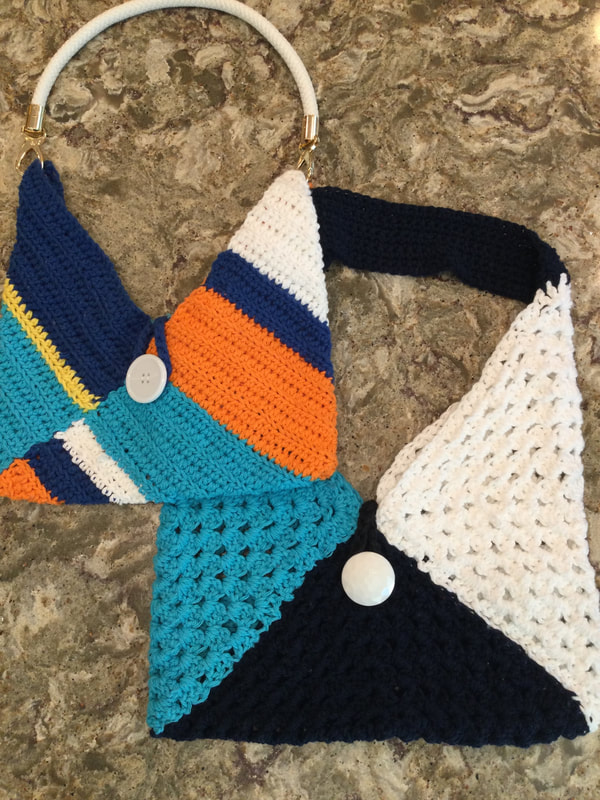
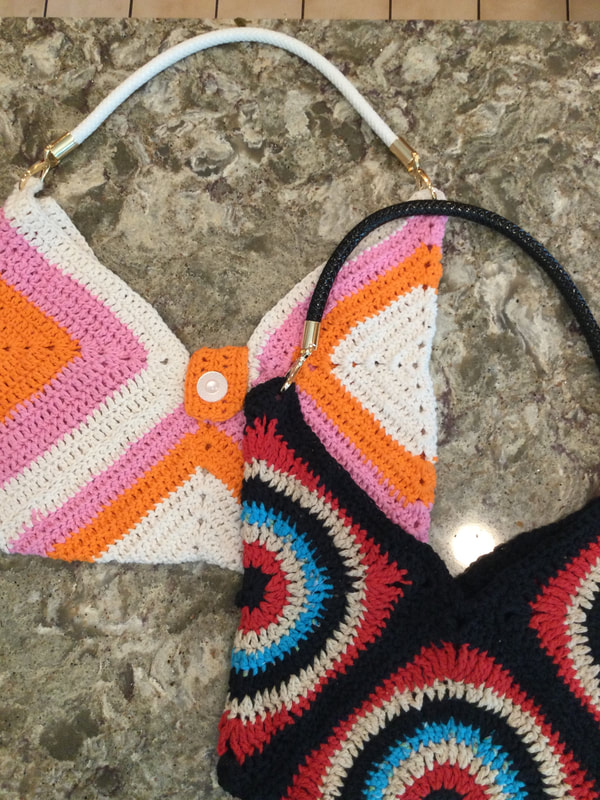
Before I folded the crocheted piece, I tried out the folds with a piece of paper to make sure I got it right. When the folds were made I was careful to make sure that the ridges lined up. The HDC with BLO has a special feature of a raised ridge. The lined texture works quite well in designing the Bento Purse. Pin the folds so that the pieces lie flat. Seam together using the Mattress Stitch. I consulted a You Tube video to do the stitch correctly the crocheted version of the mattress stitch is slightly different than the knitted version. A large black button and a red loop was added for interest and security. The black leather strap with metal clips complete the look. The clips are secure, but the strap can be transferred to other purses if you do not want to purchase a separate strap for each purse. 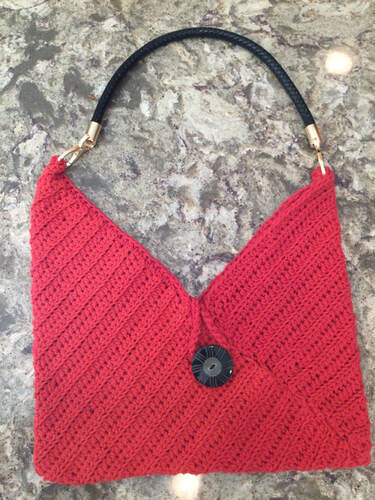 I also tried a color blocking technique to get a unique abstracted effect. Again I used a commercial handle for a white accent. 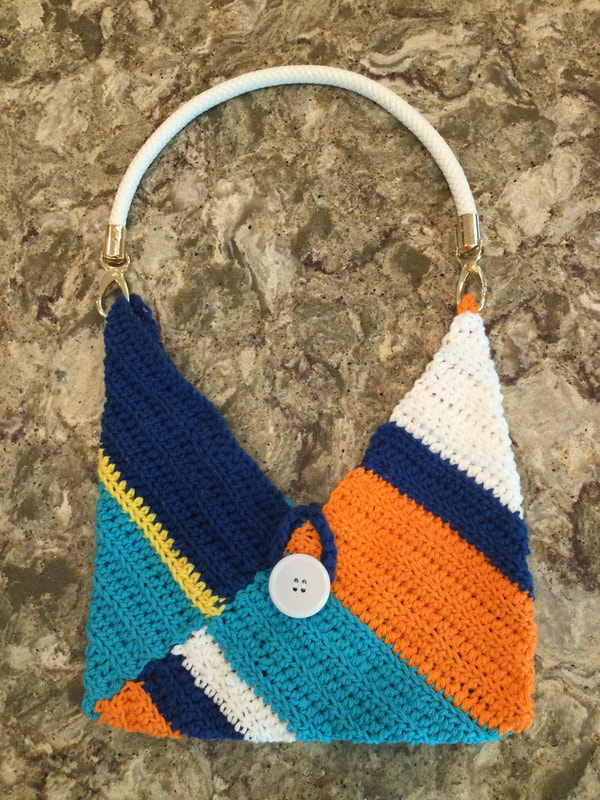 Another way to create a Bento Purse is to crochet 3 Granny Squares. Sew the side seams together to make the rectangle. Since each of the Granny Squares has the same dimensions, it is easy to get a rectangle with 1:3 proportions. The navy, white, and turquoise purse includes traditional 3 Double Crochet clusters to create a square in each of the three colors. I crocheted the strap in navy yarn and attached it to the purse. 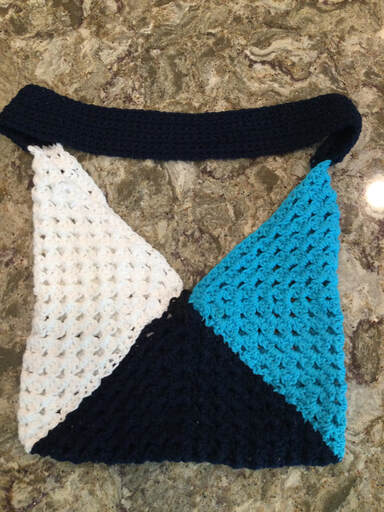 To achieve a firmer purse fabric with the Granny Square, I used a more solid rendition. Based on what I had in my cotton yarn stash, I selected white, pink and orange for the different colored square rings. Two of the squares were identical. The middle square had the same colors, but the color array was changed up a bit. I was winging it as I worked, and I was curious to see how the finished product would line up. I was quite pleased with the cheerful, spring accessory.  The final Bento Purse was based on the granny square, Circle Dance by Carolyn Christmas Designs. The first part of the construction was to create 3 circles with different colored concentric rings. Then each circle was converted to a square using different sizes of crochet stitches from triple crochet, to double crochet, to half double crochet to single crochet. Extra rows of single crochet were added to get a neater square look. See www.carolyn christmas designs/blogspot.com for directions to make different sized squares. A black button was added for accent and security. Again I used a black commercial strap for convenience. The effect is quirky and bold. It will certainly brighten up my black or white outfits. 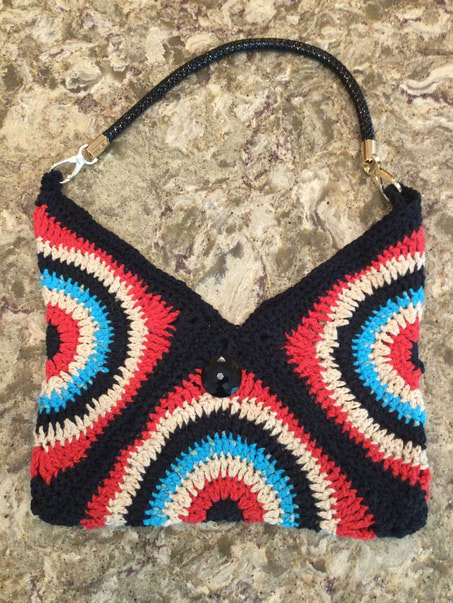 When I add my Bento Purses to my Crocheted Knotted Japanese Purses, I have quite a collection. I will probably keep a few, gift a few, and donate a few to my local Woodbridge Senior Center sale. I have one more set of purses planned to explore different closings and handles. I still have several full and partial skeins of cotton yarn and a lot more experimenting to do.
As always, I welcome your feedback and reflections. Thank you for joining me on my stitching journey.
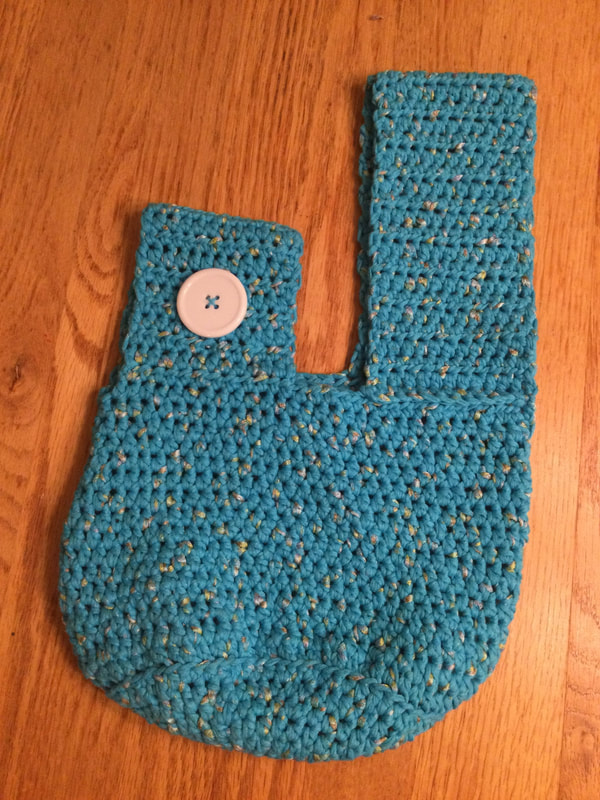
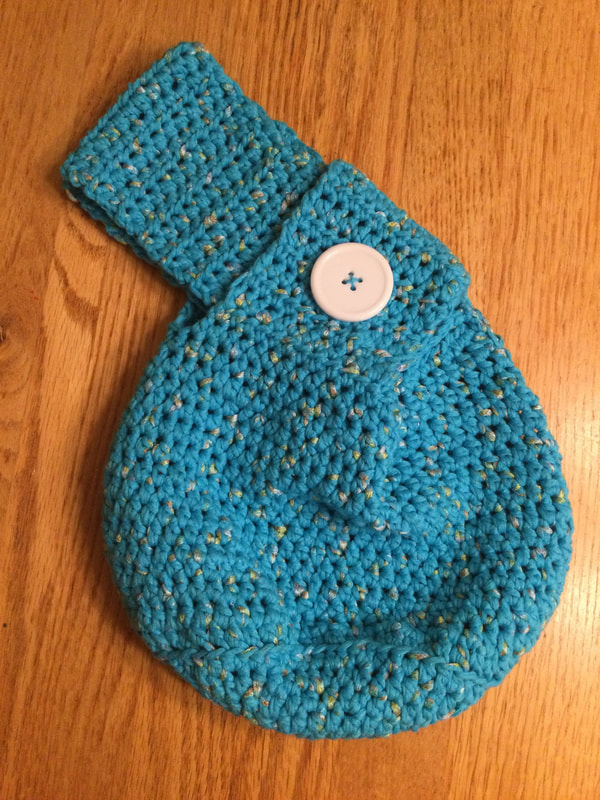
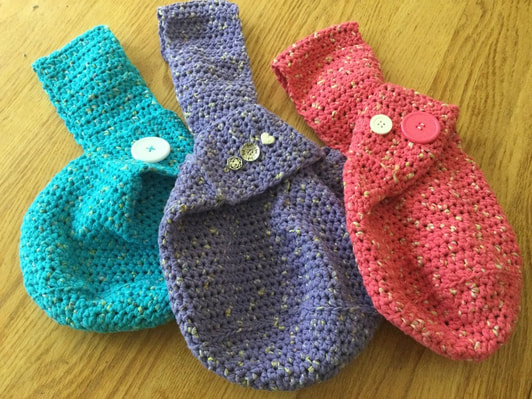 While many patterns are available, paid and free, I found the following link from Knitting Universe to be an excellent option. The written directions are clear, and the diagrams help you along. See: www.knittinguniverse.com/japaneseknotbag. The pattern calls for medium weight yarn to be crocheted in a Half Double Crochet Stitch with an H (5.0) hook. You will need 240 yards for the solid bag. Basically, you start with an expanding crocheted circle. When you reach the desired diameter, keep the same number of stitches and build up the sides. At the top, you divide the number of stitches in half and crochet several rows on each side. Then you crochet the first strap. while the body of my purses were done in HDC, you may wish to switch to SC for the the straps. Your first strap will be 12 stitches wide by 39 rows long The diagrams show you how to attach the strap to the other side of the purse. The closure will be 12 stitches wide by 19 rows long. Again, you attach the shorter crocheted piece to the other side of the bag. The finished bag is shown below.
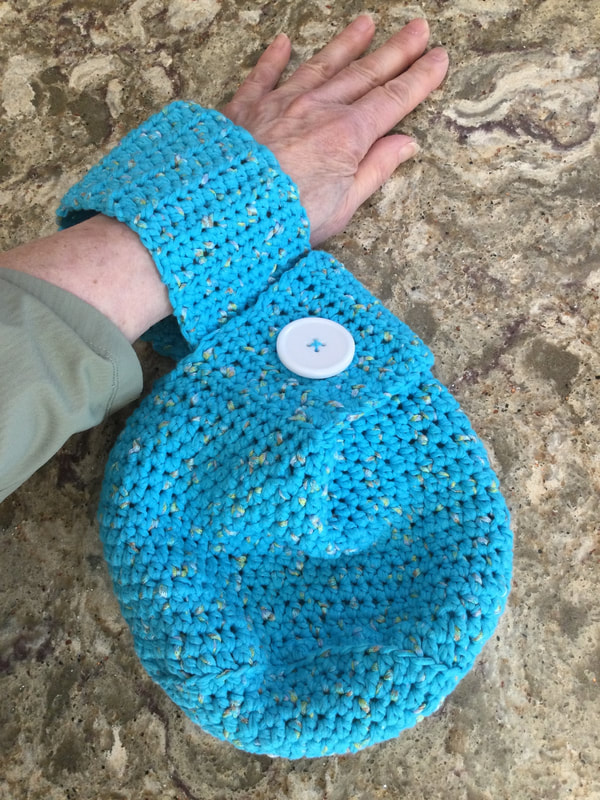
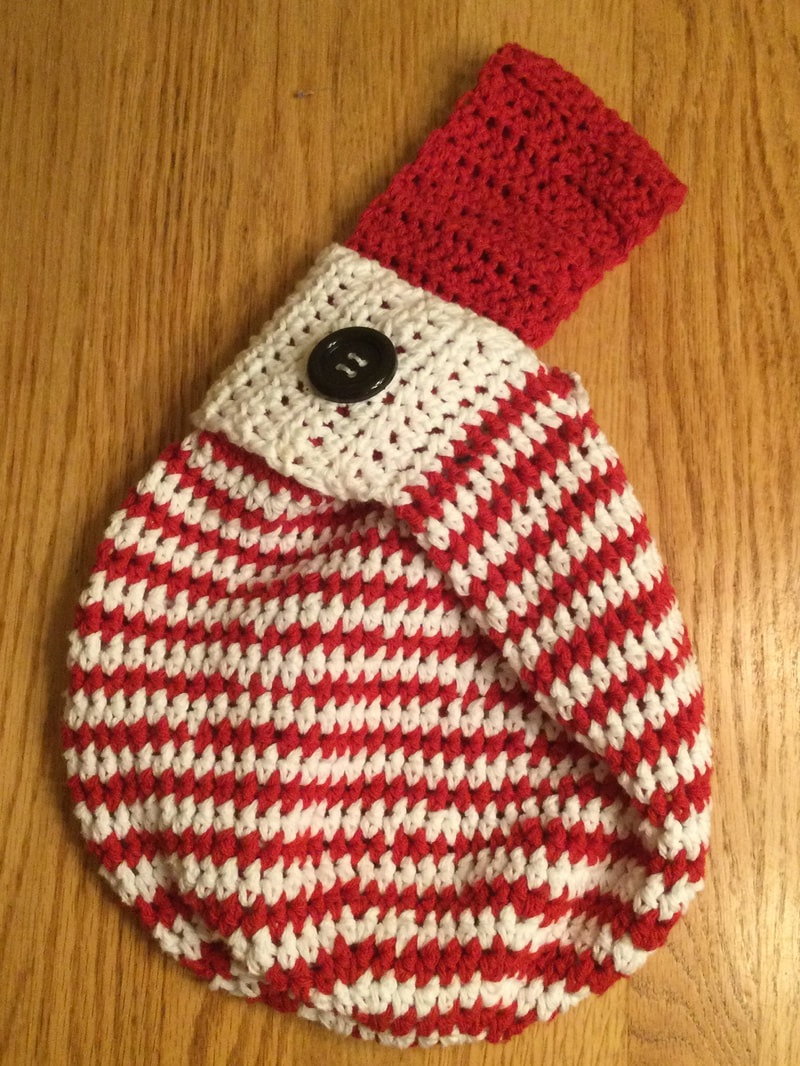
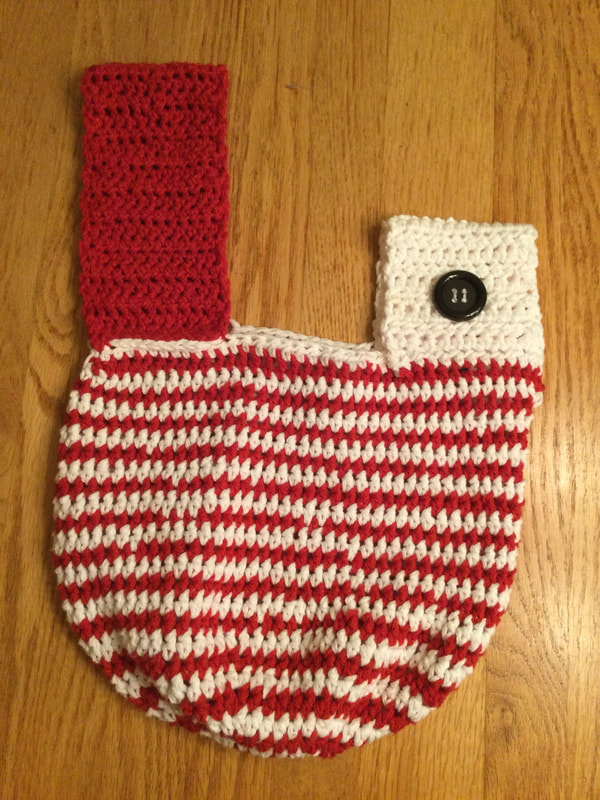
Leave the purse open to fill with your belongings. Then slip the long handle through the shorter loop. Fit your hand through the open loop, and you are ready to go. You have an intriguing, flirty purse, ready for spring. You do not need a separate closure since the purse is completely closed when you slip the longer handle through the smaller loop. I just aded buttons for accent. A striped version starts with the darker color and alternates each row with a contrast yarn until you get to the handles. As noted above. you will need 140 yards off the darker yarn and 120 yarns of the lighter yarn to complete the pattern. This purse came out a bit larger with a circumference of 20 inches and a height of 9 inches. I used Sugar and Cream white cotton yarn for the light color and Premier red for the darker red. If you crochet the striped version you will need 140 yarns of darker yarn to include the longer handle and 120 yards for the contrast yarn for the loop close.
Cotton yarn is a excellent choice these bags. Usually, I select Sugar and Cream, Lydia, or Premier yarns when I work with cotton. However, Christmas Tree Shops had a surprise seasonal section this year. When I visited the store I found a different selection. The Summer Kiss Yarn by Lion Brand came in neon bright and white variigated colors. Although the labels stated that the yarn was a #4 worsted or medium weight, I found that the yarn was more like a light #3. Therefore I doubled my strands to get the desired thickness and stiffness for my bags. Here I used a I (5.5mm) hook with the two strands. Each skein weighed 3.5 ox. or 100 grams and contained 262 yards. The Low Tide cotton yarn also by Lion Brand, came in softer shades. I chose a dull rose for this bag and a sage green for a purse for a future article. Again, I doubled the yarn to get a stiffer body for the Knotted Japanese Purse using this yarn. 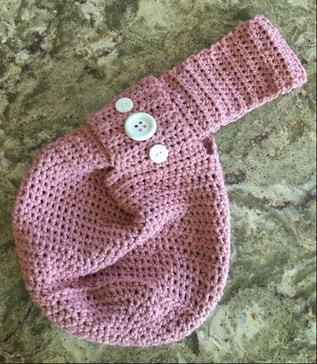 As spring continues, I have two types of purses planned for future articles: A Crocheted Bento Bag and Crocheted Bags with Varying Closures. As always, I welcome your feedback and reflections. Please join me on my stitching journey. 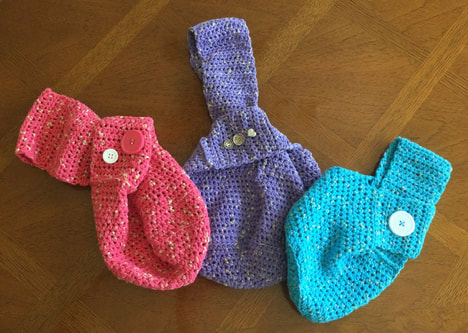
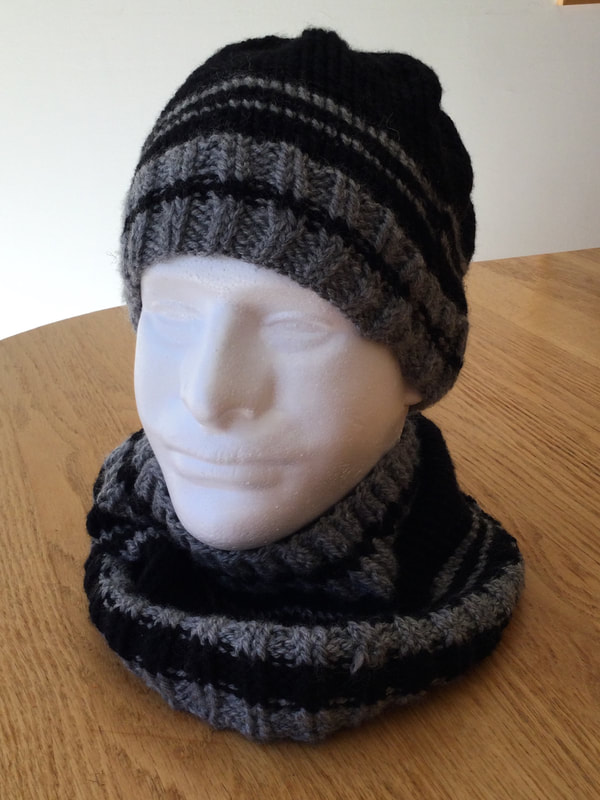
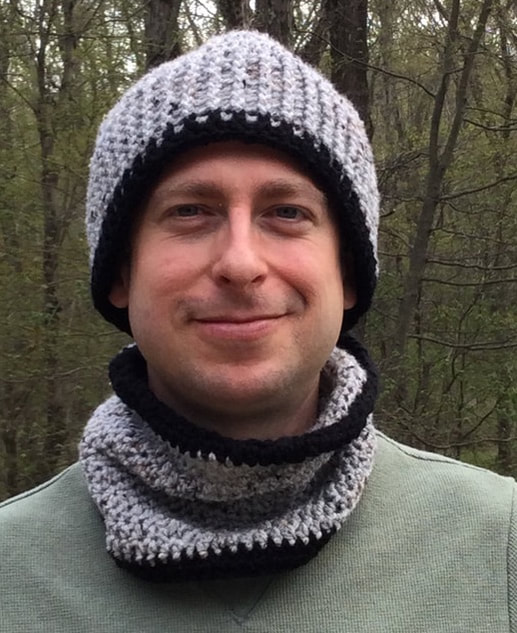
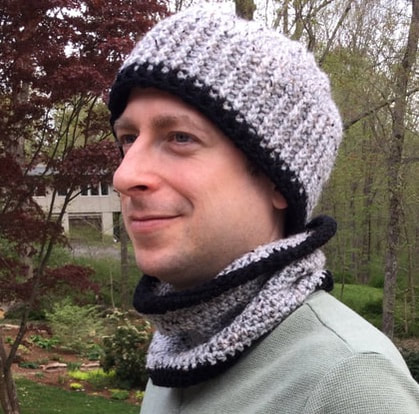
 Again, I did not find a complete free pattern for my men's cowl. Since the stitch count for the hat was 96 stitches cast on, I figured that about 120 stitches would do the trick for the cowl. I wanted a piece that would drape and be comfortable while still keeping the wearer warm. The stripe design came from a photo on Pinterest titled Snood Pfit Gar. My son-in-law, Gabe wears a black coat, and so the set would be styliish as he protected himself in chilly weather. 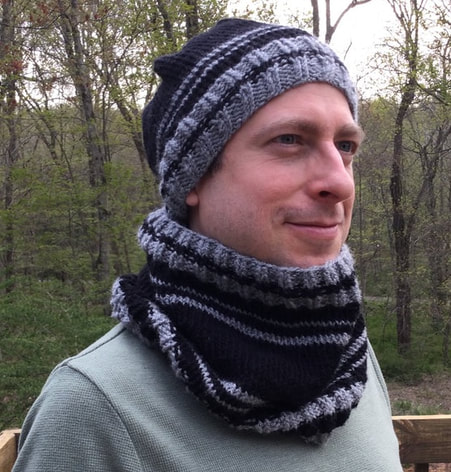 As I mentioned in my crochet article, I found a styrofoam head mannikin for posing my pieces. When Gabe saw his "understudy" he volunteered to pose in person. He is looking forward to taking possession of the pieces once I am through with my writing, photographing, and posting this article. (http://www.lilcreates.com/lillians-blog/crocheted-gifts-for-men) I focused my efforts to complete these pieces in a timely fashion so that my readers would've the option of making them for the men in their lives before Father's Day. Enjoy your knitting. I would love to see how you interpreted the directions to make a hat and cowl sets for yourself. while i created my pieces with grey and black, there are many color combinations that would be attractive. How would the hat and cowl look in: bone and coffee, blue and brown, black and red, sage and beige. The possibilities are endless. I hope that the knitting tool from Bellish works for you now and in the future. I was so happy to find the size and stitch chart (All Free Knitting), and I will keep it in my Knitting binder for future use. 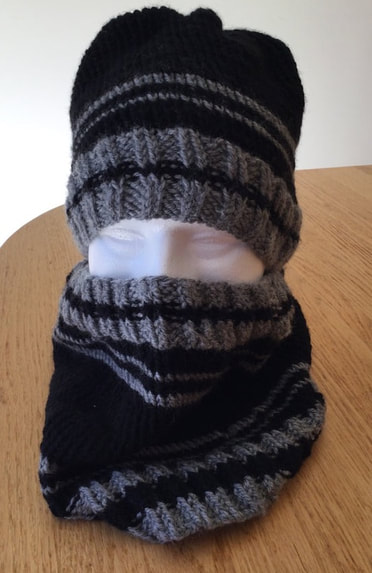 As always, I welcome your feedback and reflections. {lease join me on my stitching journey.
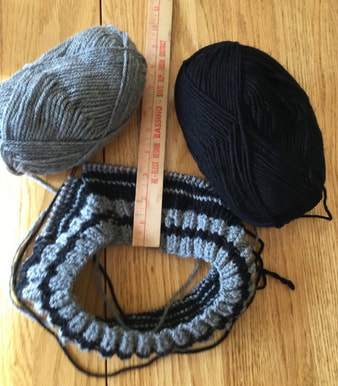
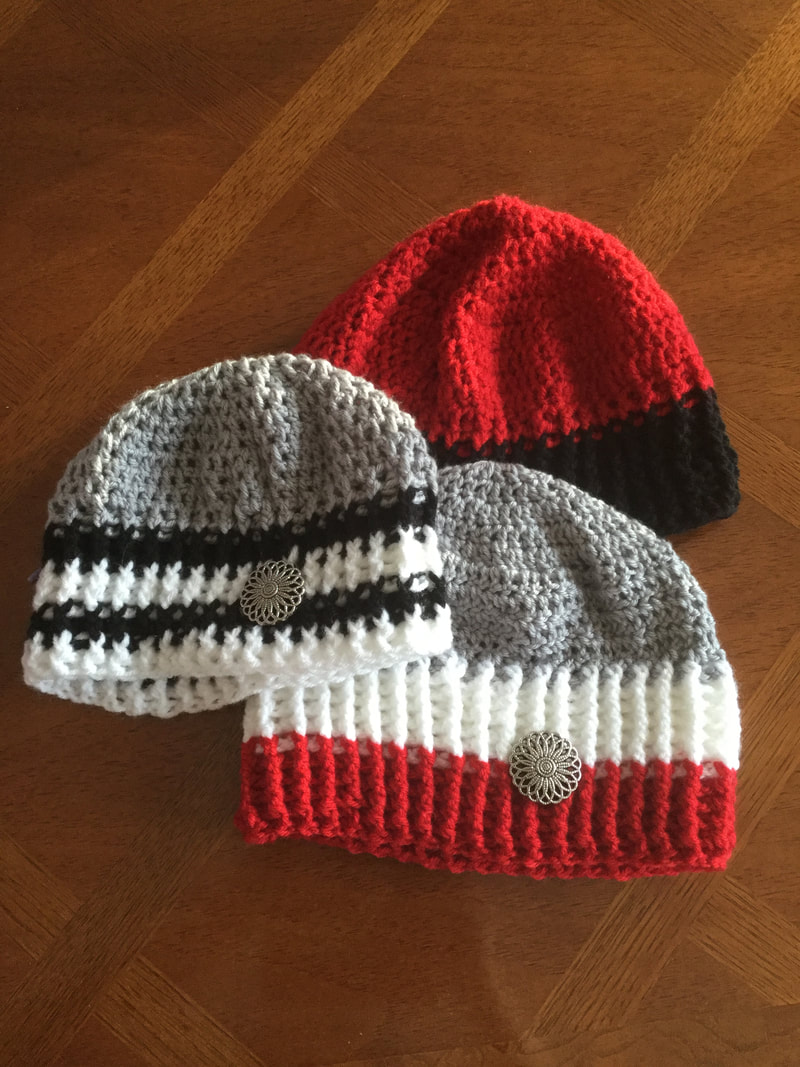
However, this time my son-in-law first requested a men's cowl or gaitor to go with the new beanie. He wanted to keep his neck warm in winter weather without bothering with the ends of a dangling scarf. Also, if the cowl fitted well, he could bring the top edge over his mouth and neck if confronted with frigid blasts. I had some difficulty finding a pattern with the exact dimensions, style, texture and stitches. Therefore, the resulting piece became a combination of photos, basic knowledge, and trial and error. I started with a 3 pack of Lion Brand Vana's Choice worsted yarn in Grey Marble that I had ordered via the internet. I really liked the black flecks that ran randomly through the yarn and decided to add comparable black yarn that I had in my stash for accents. Most of the patterns that I found called for bulky yarn or were too big to be comfortable or to fit his style. I did find a couple of patterns with complicated stitches. I tried them out, but I determined that I could not easily do the project and watch my nighttime programs with my husband. Therefore, I resorted to my tried and true Half Double Crochet. Since I began my the cowl with a Half DoubleCrochet Foundation Stitch, I was off to a good start. The initial Foundation Chain of 67 stitches was just right for Gabe. For a larger man, you might want to go up to 70-75 stitches. Actually, several times I chained and crocheted a few rows as I tried the piece on and looked in the mirror to get the right size. When I was pleased I continued on to complete the work. After the foundation chain, I crocheted an additional row of black before switching to the Grey Marble for 19 rows. I ended the cowl with two rows of black. The dimensions for this rather fitted cowl were: circumference = 22 inches and height = 7 1/2 inches). For a man who wears large or extra large, I would extend the circumference to 24 inches and add another inch to the height for 8 1/2 inches. 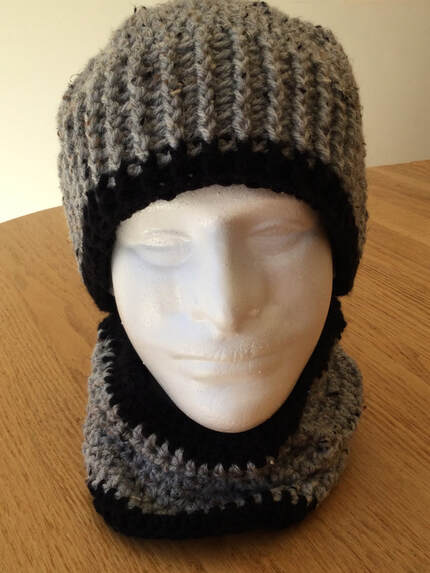 The accompanying beanie was also crocheted in Grey Marble with Black accents. Here I used my favorite Lakeside Beanie designed by 5 Knots North. I adjusted the number of stitches in the crown from 70 to 66 to give a slightly tighter fit. As I had made this hat for Gabe before, I knew what to look for. The hat starts with an expanding circle of Double Crochet stitches at the crown and continues with the same final number for three rows as you start to form the sides. Then you transition to alternating Front Post Double Crochet and Back Post Double Crochet to achieve the ribbed feature. To get that cozy, warm feeling, continue to just below the ears. 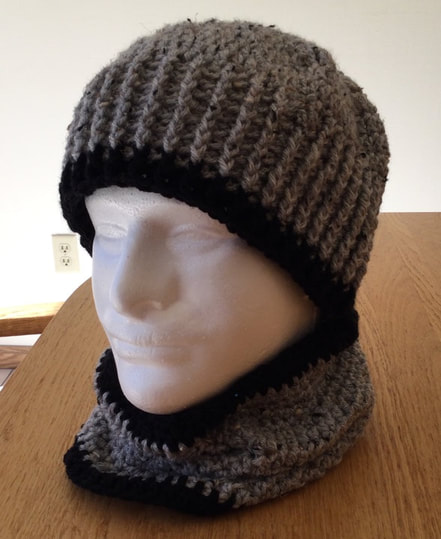 I still had enough Grey Marble for a set of Men's mittens, and I was determined to teach myself how to crochet a thumb with a gusset. Mastering this technique had been a goal of mine for several years, and now I had the perfect opportunity. Again, size became a challenge as the typical men's mitten was much to large (9+ inch circumference below the thumb) and I needed a circumference of about 8 inches. The pattern I chose was Basic Men's Mittens- Free Crohet Pattern from Love Life Yarns. I shortened the cuff as well as the length of finger portion. Then I continued to round out the top. Once more, I added a black accent to be consistent with the other pieces. I crocheted a row of Half Double Crochet to the bottom of the cuff after I had finished the mitten. 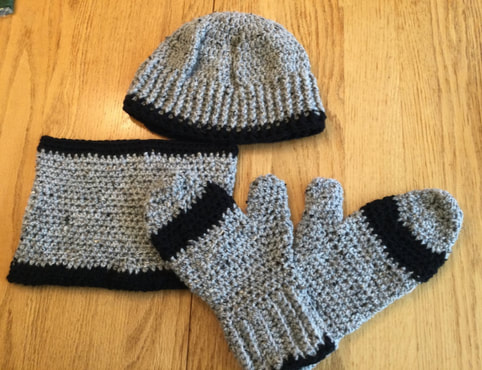
As always, I welcome your feedback and reflections. Please join me on my stitching journey.
|
Archives
November 2022
Categories
|


 RSS Feed