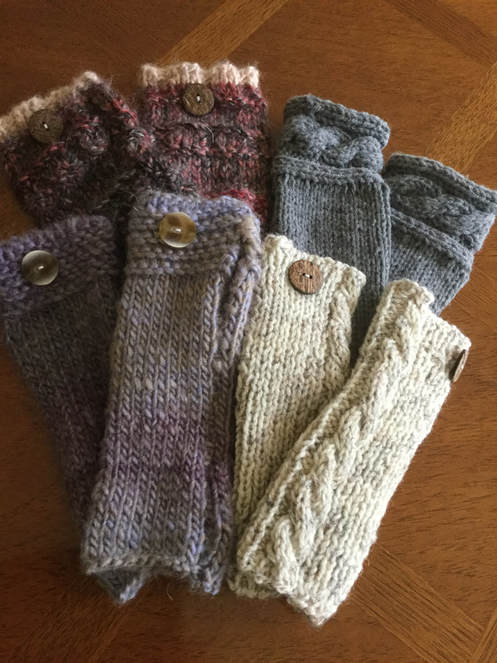
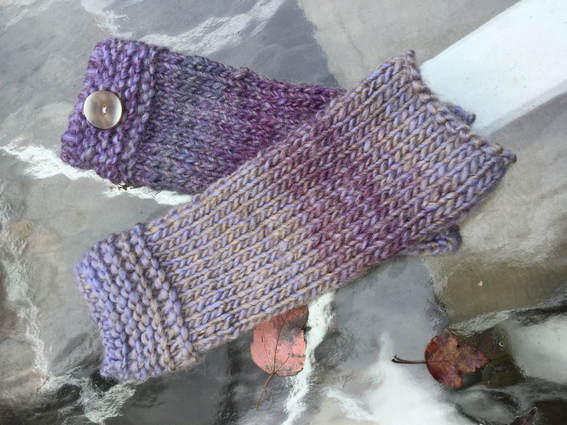
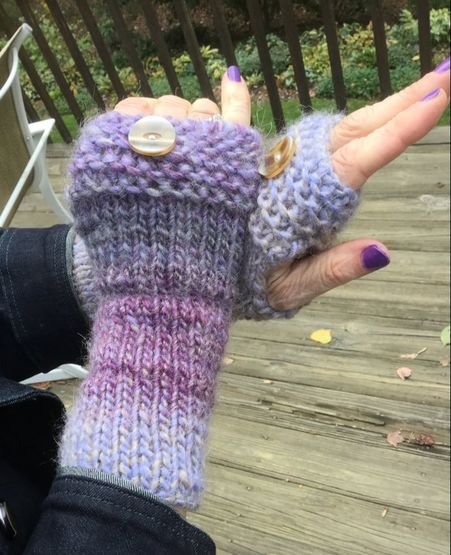
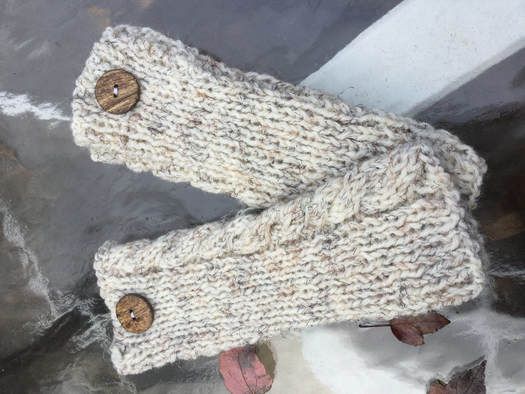
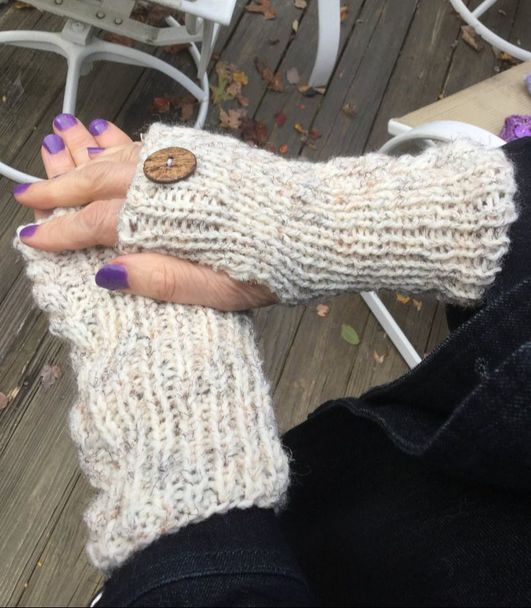
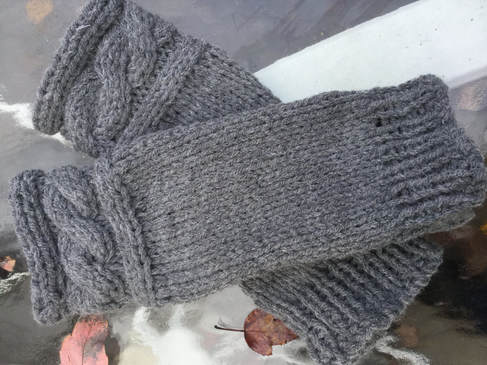
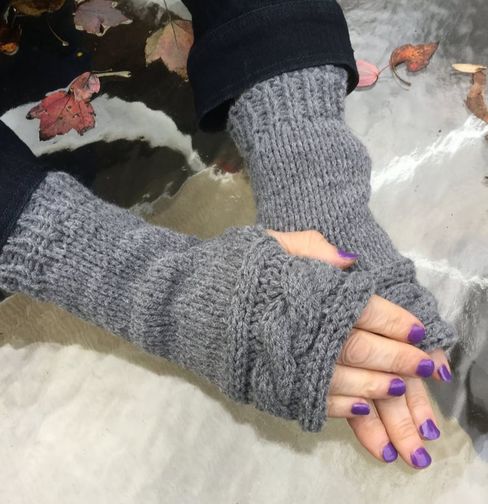
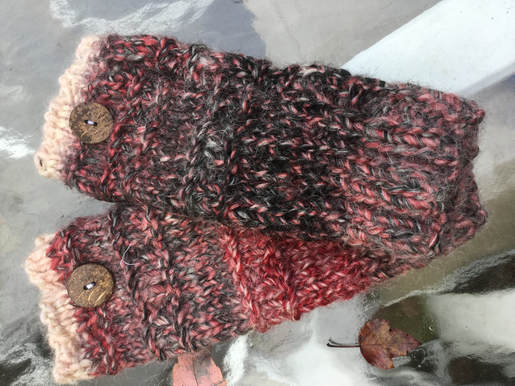
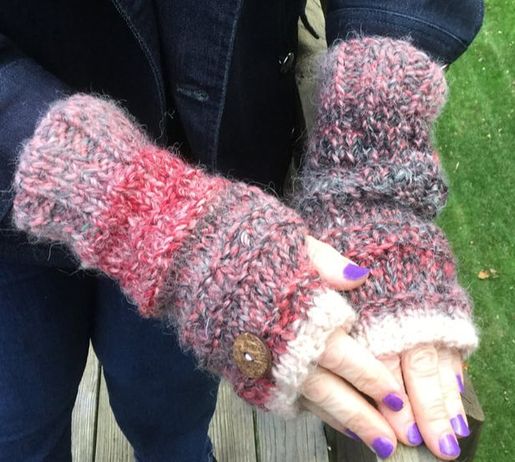
 Rustic fingerless gloves provide a wonderful medium for exploring creativity by combining heathery colors with textures. In my last posting I shared my interpretations of knitted pieces inspired by the Outlander saga. To accompany the lovely cowls, I knew I wanted to explore the many fingerless gloves and gauntlets that would keep the Highland folk's hands warm in the chilled Scottish weather. I have been knitting and crocheting fingerless gloves for several years. However this new slant provided me with a new slant to my creative projects. Fingerless gloves are useful as well as decorative in that they leave the fingers free to accomplish tasks which keeping the hand warm. I will be writing about these rustic fingerless gloves in two articles. This page is devoted to knitted styles. For my friends in the crochet community you can also refer keep posted for my next article on Rusted Crocheted Fingerless Gloves and Gauntlets. My first style, based on a glove warn by Mrs. Fitz, was knitted in a flat panel with bulky yarn (#5) on US 9 needles. It was adapted from a pattern by Polly Foo Foo (http://pollyfoofoo.blogspot.com/2014/09/mrs-fitz-mini-mitts.html?spref=pi). As I like to experiment with new yarns, Appalachia by Premier Yarns fit the bill. The yarn is 90% acrylic and 10% Alpaca. The Roanake colorway has heathery strands of grayish purple, and brown. The bottom half of the piece is knitted in stockinnette, and the upper cuff is knitted in garter stitch. When completed, the flat panel is seamed, leaving 1.5 inches for the thumb hole. I altered the pattern by casting on 24 stitches instead of the 22 called for. I also knit 8 inches for the stockinnette section instead of the 6 directed in the pattern. I love to add a coordinating or complementary button from my vast collection to add the perfect accent. This glove could easily accompany the gray cowl from my previous post. (http://www.lilcreates.com/lillians-blog/knittisg-outlandish-styles) To touch this piece is to love it. Sometimes you have a pattern in mind and look for the right yarn to knit the project. At other times, you hold the yarn in your hand and think about the perfect pattern. My skein of Wool-Ease by Lion Brand Yarns was oatmeal intertwined with the slender threads of dark brown that gave a truly rustic effect. This glove was also knitted in a flat panel with a cable that ran the length from arm to finger tips. My finished version was 8.5 inches long and used most of the single skein. I adapted a free knitting pattern from Lion Brand for my project (Free Knitting Pattern Lion Brand Cashmere Blend Knit Cabled Wristlets # 60157AD). I had expected the cable to run up the middle of the back of the hand, when I attempted to follow the construction directions, the cable ran up the side. I still like the finished project. The dark brown wooden button with the scatched surface brought out the brown in the slender threads. At 8.5 inches this glove reaches midway up my forearm, but it could easily be extended to be an arm warmer that comes closer to the elbow. The twisting of the cables could be symbolic of the intertwining relationships between Claire, Jaime, and Jack in the saga. I found two sources for the armwarmer gauntlet that featured a cabled panel at the top of the glove, but I ended up adapting the design and making my own pattern as I went along. The "Heal's Hands Gauntlets" designed by Kristen Brooks in Highland Knits provided a stitch guide and a chart for the cabled section. However, there was no option for a thumb hole. Also I must confess that at this point, I have not yet learned to follow a knitting chart. Another version showed up as "Claire's Fingerless Gloves" in Warm Up With Knits published by Leisure Arts. This pattern was attractive and complex, but I decided to leave this project for another time. Still, I liked the idea of the cabled pattern to adorn the top of a glove. After several run-throughs I finally executed a glove that was interesting and relatively easy to follow. I am still working on the specific details, but for those who want to tackle this glove with the premliminary directions, here you go: For this project I used a heavier worsted weight charcoal yarn from my stash that I knitted with #9 needles. This glove knitted from the top down in a flat panel and is executed in two main steps. Cabled section: Cast on 16 stitches. Pattern: Row 1: P3, K2, P6, K2, P3 Row 2: K3, P2, K6, P2, K3 Row 3: P3, K2, P6, K2, P3 Row 4, K3, P2, Place 3 stitches on cable and bring to front, Knit next 3 stitches, Knit 3 stitches from cable, P2, K3. Row 5: P3, K2, P6, K2, P3 Row 6: K3, P2, K6, P2, K3 Knit this pattern a total of 6 times and bind off, but leave a 2 foot tail. Hand and Arm: Place cabled section face up on table. On the side opposite the yarns from your bind off, start to pick up stitches from the k3 border. You should have 30 stitches in all. Continue in stockinnet for 6 inches. Rib k1P1 for 8 rows and bind off pattern. Construction: Fold rectangle in half lengthwise with wrong sides showing. Single crochet edges from top of cabled panel just up to top of last 3 knitted stitches in panel. Single crochet on one side only for 1.5 inches. This is your thumb hole. Join both sides together again and crochet to bottom before finishing off. Use the tail from the end of the cable section to single crochet on the other side of the thumb hole. Weave in ends and turn glove right side out. Moisten and lay flat on towel to block. My final rustic knitted fingerless glove is also from a design that I created. The Appalachia yarn (#5) by Premier Yarns is called Bramwell. This acrylic-alpaca mix is a self striping yarn with tone and strands ranging from darkest browns and navies to autumn rusts and wheats. When I first started this glove I decided to use the strategy of knitting from yarns on the outside and inside of the skein. In this way I could knit both gloves at the same time and have a better chance of making them both equal. However, the self striping was deceptive. The first glove was wonderful. Colors started from muted gray-rust combo to the darker browns, to a more brown and rust and finally to wheat. However, the second glove gave me a few surprises. The yarn from the center also started with the same muted gray-rust combo, but then the colors transitioned to a brighter rust, wheat combo. That was okay, but the color band was so long that my second glove looked completely different from the first. I pulled out all of the yarn remaining, hoping that I would find some of the darker shades. When I found what I was looking for, I frogged glove #2 half-way back and then attacked some of the darker yarn and knitted in pattern until the last few rows. I attached the wheat color again. The clothes were not look alike, but harmonious. A dark brown wooden button finished off the piece. I am currently knitting the same glove in a solid charcoal bulky and will publish the directions in the near future. These rustic fingerless gloves are a new line for me. I hope to present them at a couple of upcoming Holiday Craft shows. I hope that you enjoyed the gloves featured. I would appreciate your feedback.
Please share your photos and experiences in comments or on Facebook.
3 Comments
Kathy
10/26/2017 04:49:18 pm
I liked your mitts,would like to see what else you do.
Reply
Brenda
10/26/2017 05:20:45 pm
Hello Lillian
Reply
Dianne
10/27/2017 05:35:34 am
I’m going to make a pair for myself. Thanks for the pattern.
Reply
Leave a Reply. |
Archives
November 2022
Categories
|


 RSS Feed