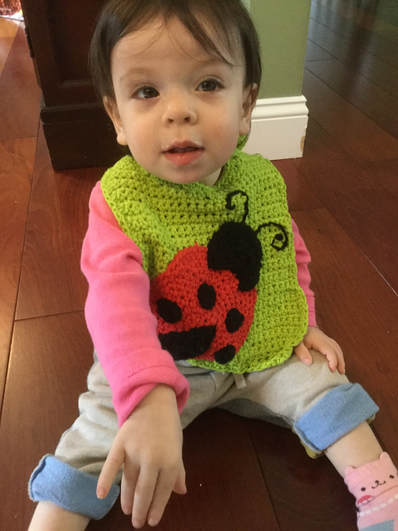
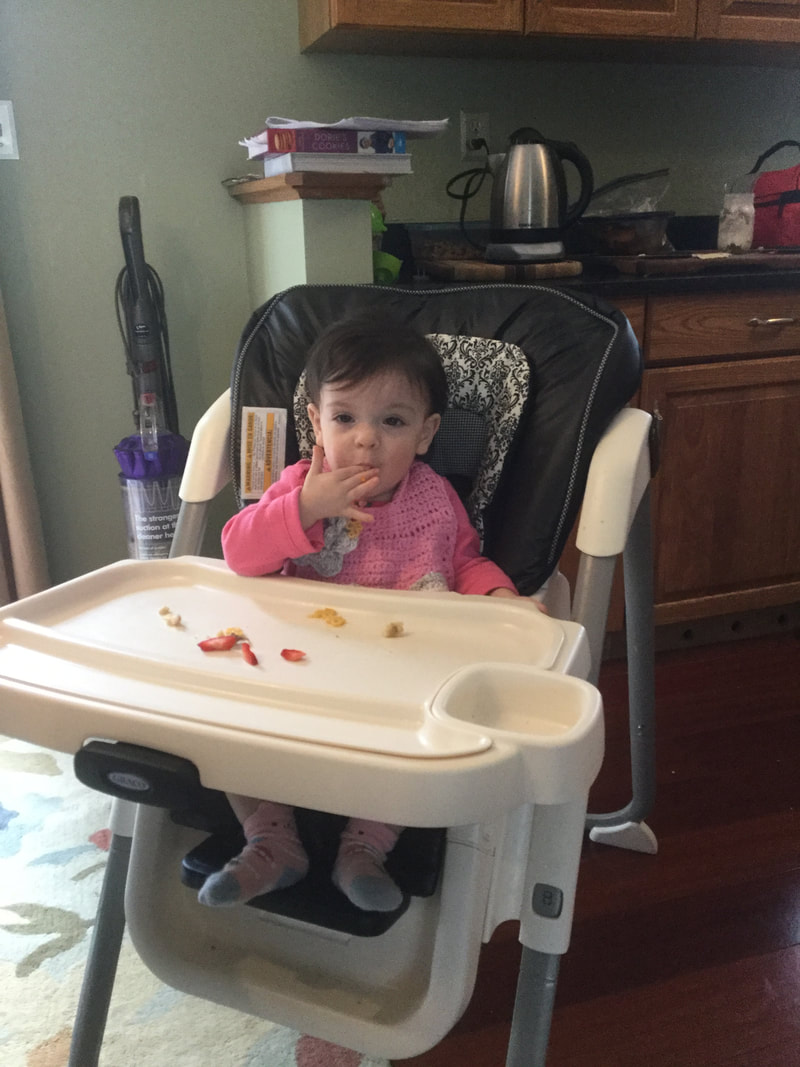
 When I was in the middle of my engagement with stuffed animals, dolls and other amigurumi, my daughter requested that I crochet some bibs like the one I made several months ago for an article on crochet trims. It appears that most of the bibs that are available are shorter and reach only halfway down her toddler daughter's chest. As our little one has become an adventurous and therefore a messier eater, the infant bibs are not doing the job. Also, the material is not nearly as absorbent as she would like it to be. Lucky for me, I had a considerable supply of #4 weight cotton yarn that I had bought on sale. This would be a wonderful way to decrease my stash that seems to have a life of its own. My new challenge would be to produce larger bibs that would protect her clothing from water, spills and dribbles. They had to pass the comfort test or she would pull at the bibs and refuse to wear them. To satisfy me, they had to be cheerful, colorful, and creative. Hopefully, they would wash and dry well so that they could be used more than one time.
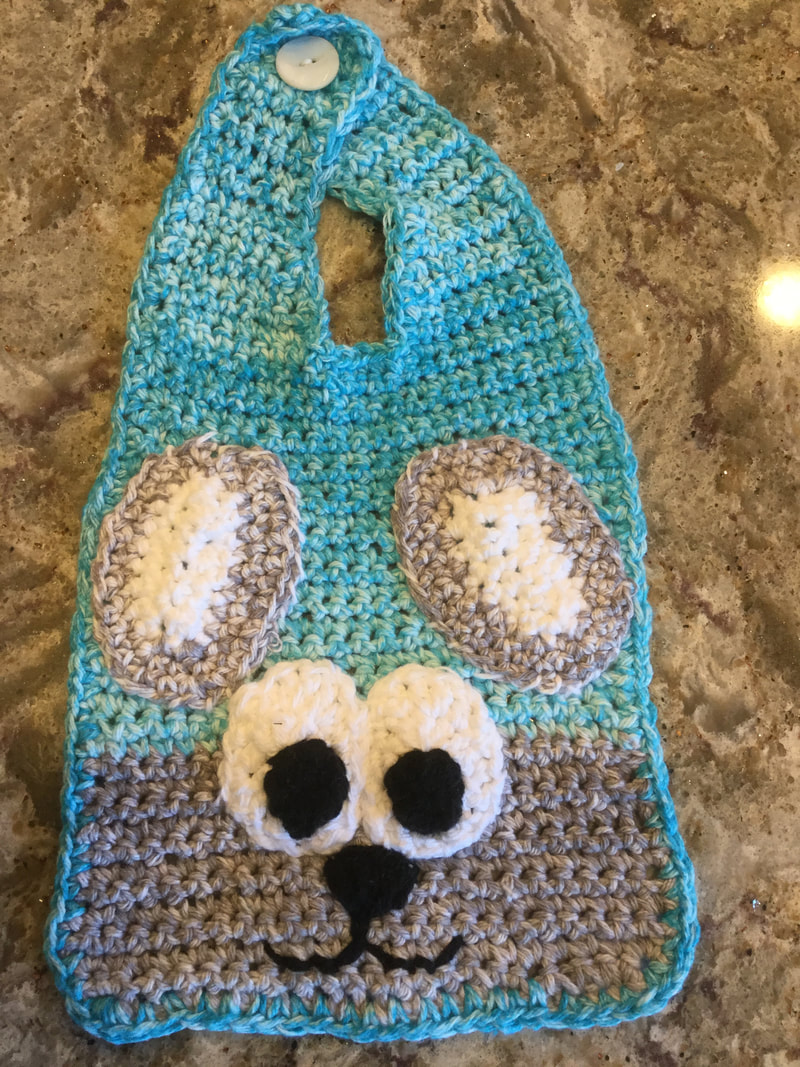
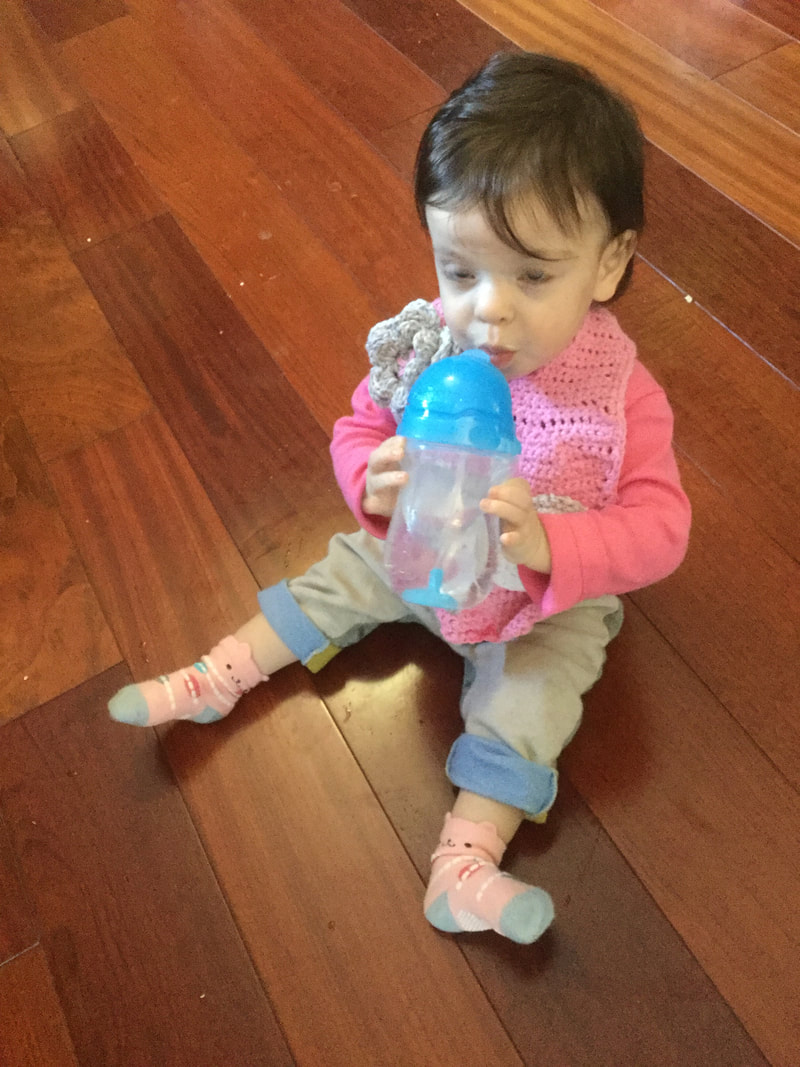
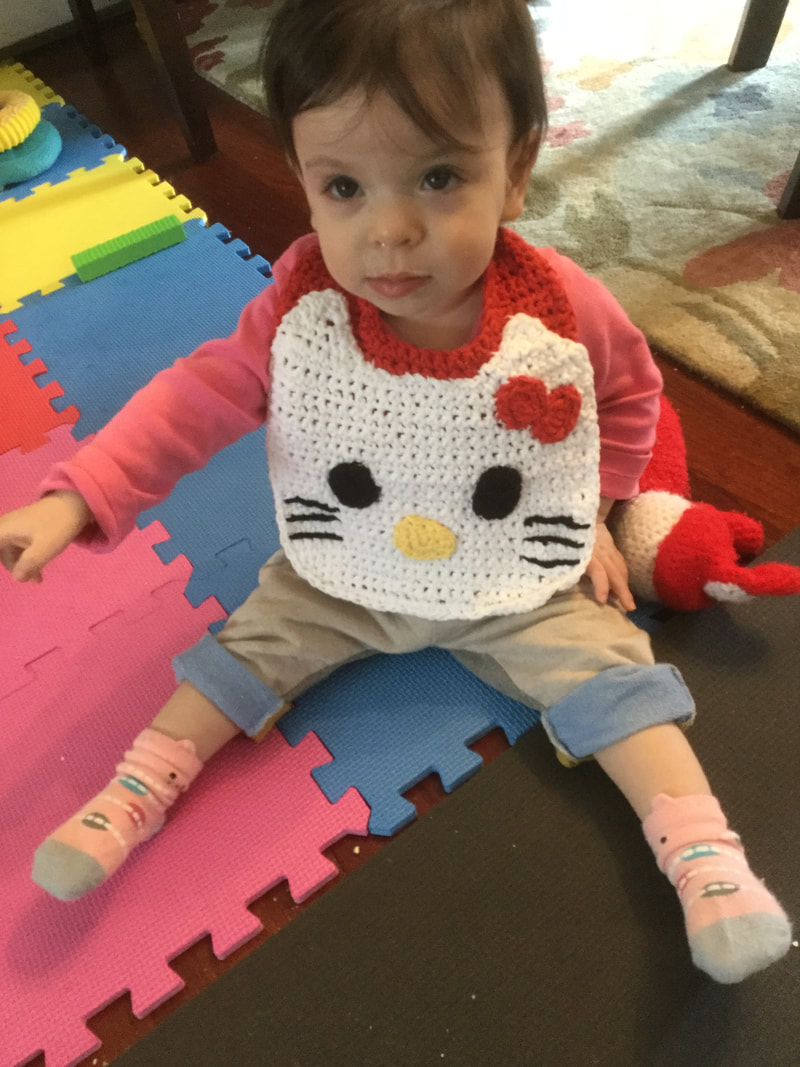
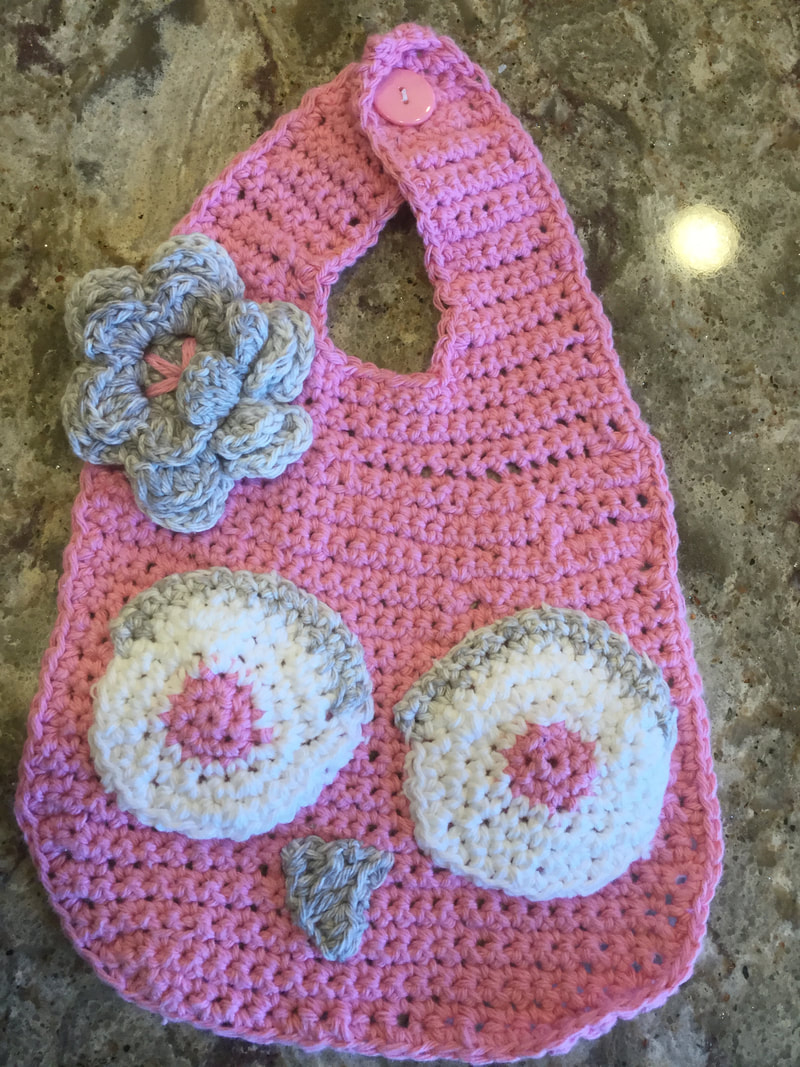
After a week of intense crocheting activity, I arrived at my daughter's home with about 8 new bibs in hand. Before my granddaughter would become fussy, I managed to button up several and and pose her for my IPad camera. She did not complain, and so the comfort test was passed. As she was wearing a peach colored shirt and beige pants, we kept her in the white owl bib with peach and grey features and matching flower. My grandddaughter has been playing games with her water from her sippy cup lately. By mid-day, her shirt usually needs to be changed. Her new owl bib absorbed the water and kept her dry. We took the bib off before nap time and let it dry out on the table. 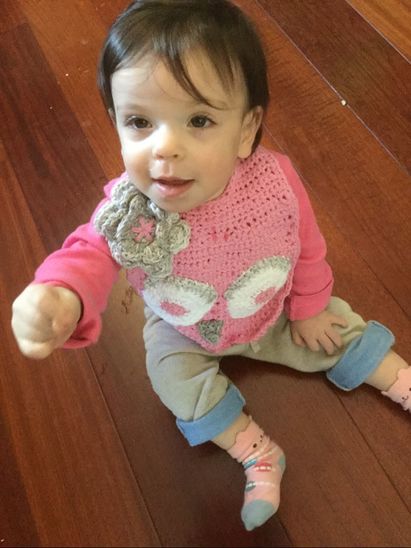
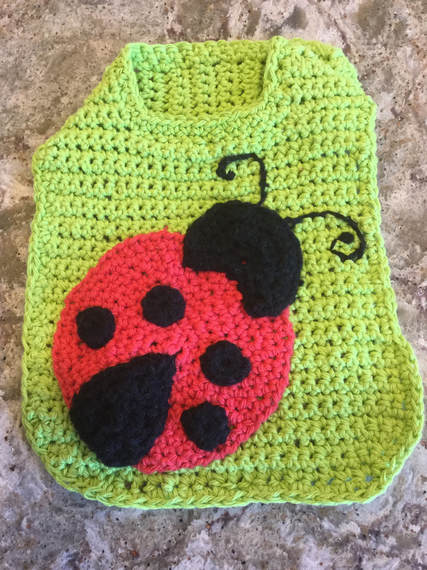
These crocheted bibs are 8 to 9 inches wide and extend to 9 inches below the chin. A Picot or Scalloped trim would add to these dimensions. I used two different closures for the bib. In the first I crocheted a six inch arm to each side of the bib. On the left I crocheted a button hole, and on the right, I sewed a 3/4 inch button. This step would put the closing in back of her head at the neck. For the second, I extended the left hand arm to about 8-9 inches and crocheted a tab of about1-2 inches on the right. I crocheted a button hole at the end of the arm and sewed the button to the tab. In this style the button closure was at the front. If I were to leave out the tab on the right side, I would make the arm 9 plus inches so that it would button easily. For a bigger child, I might add an inch to the arms for both bibs. I did not make a version with tie strings as I felt it would take longer to make the bow. In mean time, the toddler could become fussy and squirmy.
I experimented with my stitches and rows as I went along, but I finally decided to start with a chain of 20 stitches, using a 4.5mm G hook. (G comes in 4.0 and 4.5 sizes). In the first row I crocheted 2 Single Crochet (SC) stitches into the second stitch from the hook and crocheted across until the last stitch. I crocheted 2 SC stitches in the last stitch and chained 1 before turning my work. In row 2, I made 2 SC stitches in the first stitch, crocheted across and made 2 SC stitches in the last stitch and chained 1 just as I had done for the first row. I continued in the same manner for a total of 5 rows until my piece was 29 stitches wide. At this point I did not made any more increases. However I did make a chain one at the end of each row until the piece was about 9 inches long. Then I had to decide whether to make the bib with a back or a side closure.
Back closure: Crochet a strip 8 SC stitches wide for 6 inches. To make the button hole, crochet 2 SC, chain 3, skip 4 stitches, and SC the last 2 stitches, chain 1. I realize that this makes only 6 stitches, but it works out. In the next row, Sc in first 2 stitches, SC 3stitchers in button hole space, SC in last 2 stitches, chain 1. In last row,make a SC decrease in first 3 stitches, s SC, and make a SC decrease in the last 3 stitches and fasten off. On the right hand side, crochet a strip of 8 SC stifches for 6 inches to match the right side. Add the next two rows without the button hole. End with the decrease row as you did on the left. Sew a 3/4 inch button at the end. Side Closure: Crochet a strip 8 SC stitches wide for 9 inches. for the last row make a SC decrease, Sc to the last 2 stitches and make a final SC decrease before fastening off. On the right side make atab1-2 inches tall before finishing row and fasten off. Sew a button at the end of the tab.
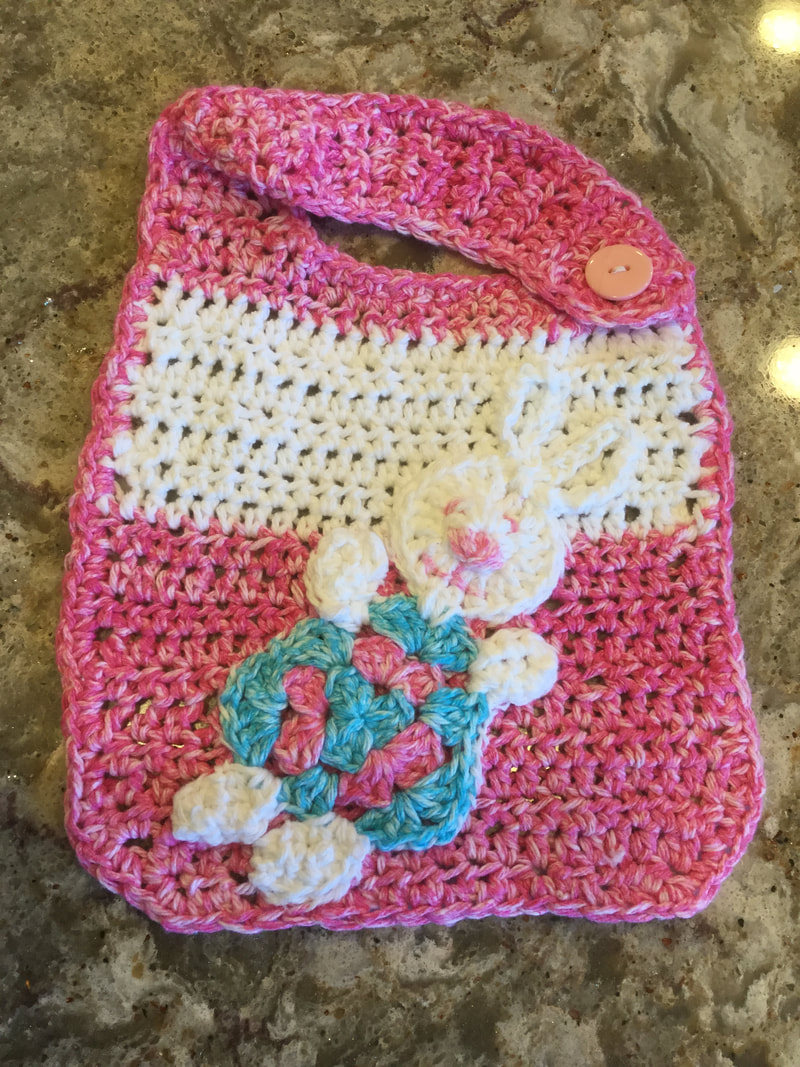
Trim: For all bibs, single crochet (SC) around the entire bib. Make sure to SC 3 stitches in each corner stitch so that the bib lies flat. Picot: Start at the top at the right side and make 2 SC.In the next stitch SC and chain 4. SC in base of the same stitch. Continue around the outside of the bib in the same manner. I chose not to put the trim in the area that would lie on the neck as it may be irritating for the child. Continue around with the Picot, ending with 2 SC. Scallop: I crocheted a 5 stitch scallop and made the trim around the outside of the bib. While the trim was attractive, I would consider experimenting with a 3 stitch scallop so that the trim would be a less obvious feature. 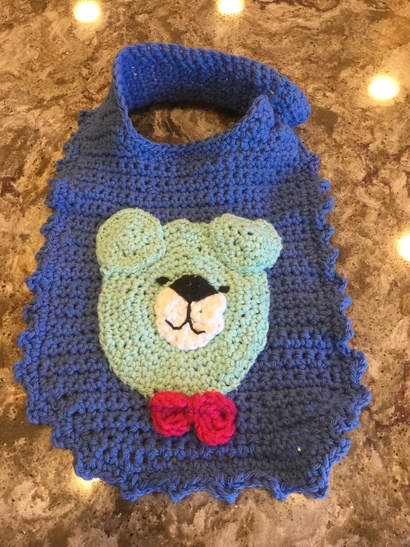 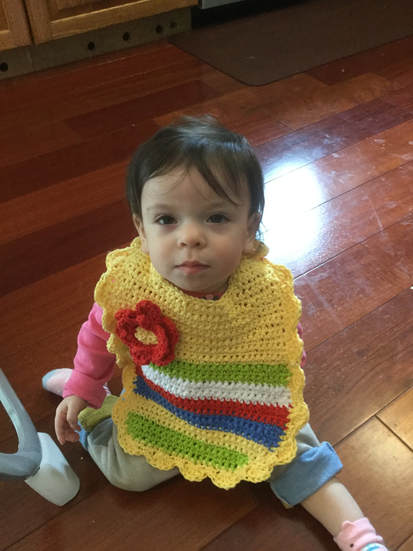 My son-in-law-will be bringing his daughter for dinner while my daughter attends evening classes. We will have another opportunity to observe and to see which bib designs work best. He selected the ladybug, frog, owl, and Hello Kitty bibs to keep at home. These bibs are truly made with love.

1 Comment
Audrey R
4/23/2018 05:48:54 pm
These bibs are so cute!!!! Thanks for sharing. Leave a Reply. |
Archives
November 2022
Categories
|


 RSS Feed