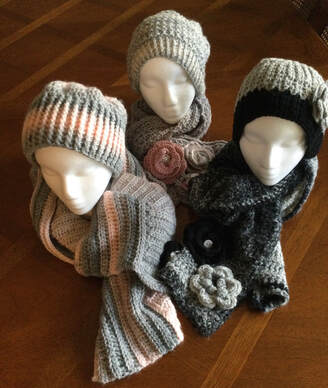
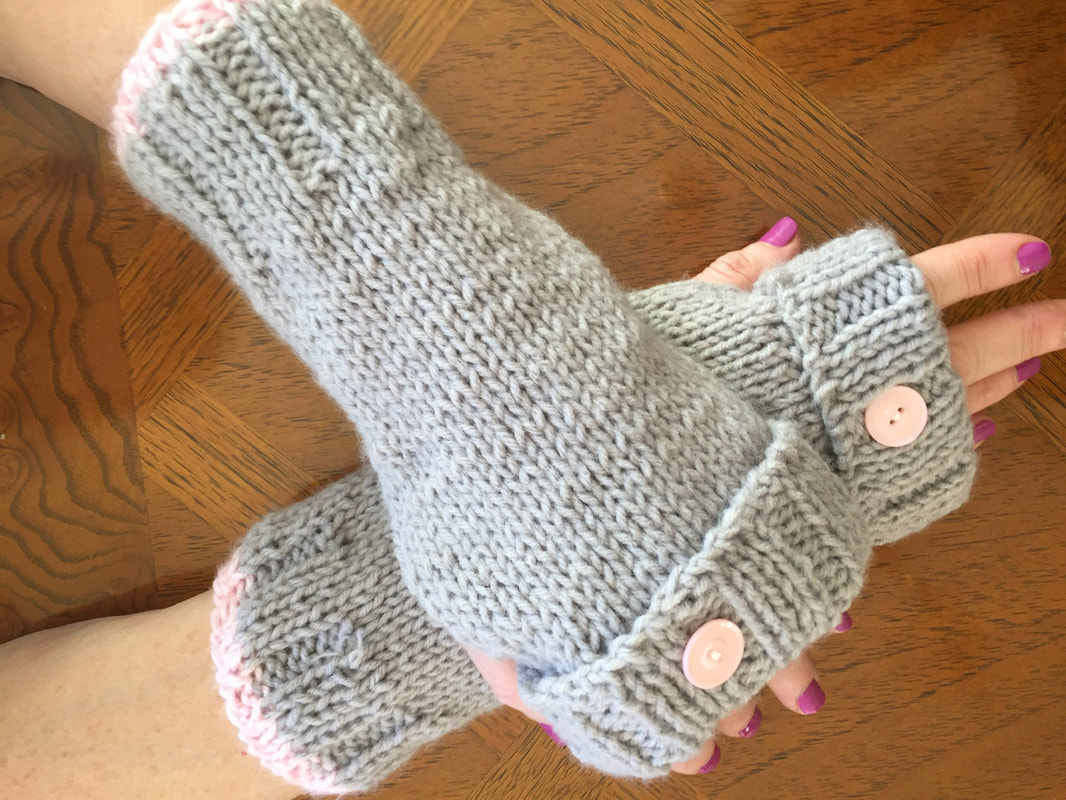
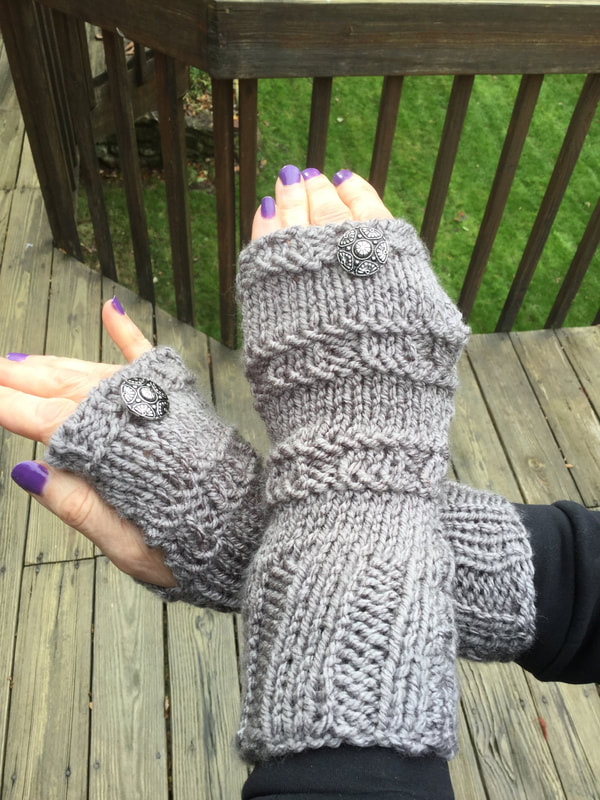
 Gray has come a long way from earlier associations as a dull and dreary color to a chic and serene hue that is a mainstay of home decor and fashion. This autumn I have enjoyed creating a variety of accessories that coordinate well with outdoor garments and provide cozy additions to cold weather indoor fashion. I also found pieces that I created during the past few seasons that go so well with the theme of this article. Where possible, I will share the patterns and yarns used. As you view the pieces and descriptions, I hope that you come to share my enthusiasm for grey fiber projects. Perhaps you will attempt one of your own  Although I donate or gift most of my knitted and crocheted pieces, I decided to keep my favorite gray set for myself. The pieces were knit with Natural Marl from Loops and Thread with the color way Pearl. Information about the mittens was previously published in the Facebook Group "Just Mittens," The mittens were constructed from "The World's Somplest Mittens" from Tin Can Knits.This pattern introduced me to knitting mittens with 4 double pointed needles. Once I overcame my initial hesitation of working with the 4 dp's, I found the directions straightforward, I was thrilled with the cozy mitten that fitted my hand beautifully. The pattern includes directions from toddler through adult large in yarns from DK, Worsted, and Chunky. For the hat I adapted a chunky yarn pattern to my worsted weight yarn. I casted on 90 stitches as the pattern for the body required a multiple of 6. I worked in the round and used a 1x1 ribbing for 8 rows before beginning the main part of the hat. The stitch pattern was: Row 1: Knit. Row 2: Purl Row 3: Knit 1, Purl 1 Row 4: Knit 1, Purl 1 (You want to achieve 2 rows of ribbing.) Repat the pattern stitch until the hat measures 7 inches to begin decrease rows. Row 1: Knit 2 together, knit 4 until end of round (75 stitches) Row 2: Purl 2 together, knit 3 until end of round (60 stitches) Row 3: Knit1, Purl1 ribbing ( no decreases) Row 4: Knit 1, Purl 1, ribbing (nodecreases) Row 5: Knit 2 together, Knit 2 until end of round (45 stretches) Row 6: Knit 2 together,Knit 1 until end of round (30 stitches) Row 7: Knit 1 Purl 1 Row 8: Knit 1, Purl1 Row 9: Knit 2 together until end of round (15 stitches). Row 10: Purl 2 together , Pul1 Use a tapestry needle to draw yarn through all stitches and go again to secure. 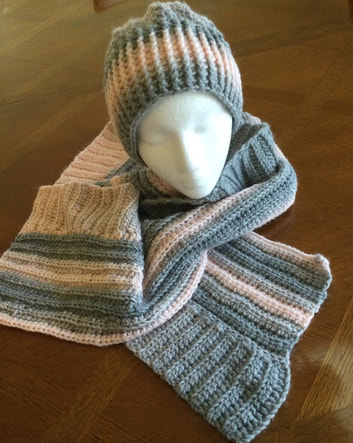 Another set was created a few seasons ago from Scarify yarn by Lion brand. The hat was crocheted from my favorite Lakeside pattern. To this day, it remains my best fitting hat. The scarf was crocheted in two directions. This scarf was adapted from a knitted version that came from a purchased pattern. I chained for about 65 inches for a foundation row. The pattern stitch for the first section is a repeat of one row. Make a HDC into the back loop of the third stitch from the hook Continue across the row. Chain 2 and turn. . HDC in fhe back loop of first stitch and continue across. My scarf had 14 rows for about 5 inches. but you can easily adapt for a narrower scarf by decreasing the number rows along the length of the scarf. For the second part of the scarf, I wanted to create a horizontal ribbing that was at right angles to the vertical piece. The second part is crocheted separately and then attached to the main part of the scarf. Chain 16 stitches. HDC into the third stitch from the hook. HDC to the end of row for 14 stitches.. Chain 2 and turn. HDC into the back loop only and continue across. You will be crocheting a strip that is as long as the first part of the scarf. Pin pieces to space out sections and so that the ends meet and crochet with a slip stitch along the length. Weave in the ends. Soak in cool water and squeeze out water gently. Dono wring. Shape interlace and lay along fluffy towel. Rowll towel nd let dry for a couple of hours. Unroll and continue to dry. This blocking process makes the stitches pop. 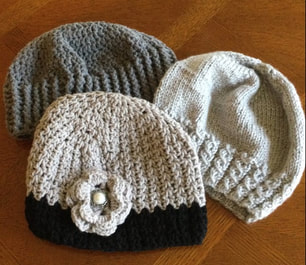 The three hats in the above photo can accessorize many winter coats. The pale gray hat on the right features a bamboo pattern instead of the typical ribbing. The hat was knit flatl and then seamed up the side. My adaptation is done in multiples of 5. Row 1: purl 2, knit 3 across to end. Row 2: knit 2, purl 3 across Row 3: purl 2, Place first knit stitch over the next 2 stitches. Repeat to end. Row 4: knit 2. purl 1, purl over for an extra stitch, purl 1. This increase enables you to replace the stitch that you lost when you placed the stitch over the next 2 stitches in Row 3. I repeated the sequence 4 times to create a 2 inch border. End in row 4. Knit body of hat in stock and knit until the piece measures 6 1/2 inches. To make decreases, knit 2 together, knit 8. On purl side, there are no decreases. Continue in decreases on alternate rows. Each time there will be one less stitch between the knit 2 together.. When between 8-10 stitches remain on the needle, use a tapestry needle to gather the stitches and secure. Leave a long tail to sew up the side of the beanie. The grey and black hat was crocheted from the crown down .Begin with magic circler a ring made from asmallchain. Row 1. Crochet 8 DC into the ring. Row2: Crochet 2 DC into each stitch. Row 3: Crochet 2 DC into the first stitch, followed by one stitch into the next and continue around. Row 4: Crochet 2 DC into the first stitch and one stitch into the next 2 stiitches. and continue around. Row 5: Crochet 2DC into first stitch followed by one stitch in next 3 stitches and continue around. Continue pattern until there are 7 stitches between each 2 DC in same stitch. Crown will be about 7 inches in diameter. Now you will set up the V stitch for the body of the hat. Crochet 2DC in the same stitch, skip one stitch. Continue around. For the rest of the hat crochet a V stitch between the two stitches that you made together in the previous row. Skip a stitch. As you continue down body of the hat, create v's For contrast, I changed to black and continued for the last 4 rows. I finished the hat with a crocheted flower. 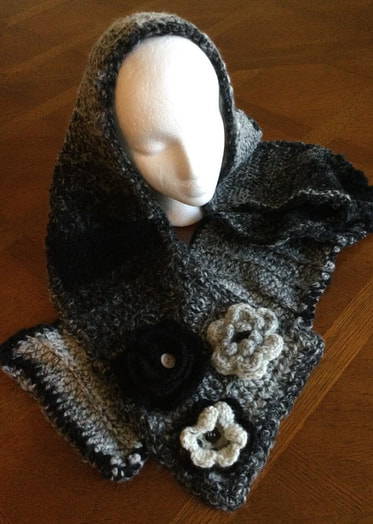 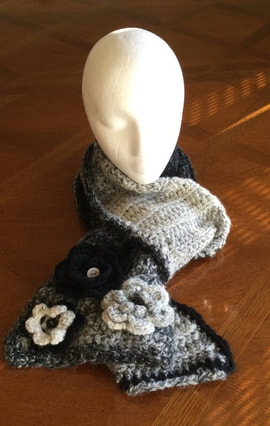 The grey and black scarf was crocheted from Scarfy yarn . It is 7 inches wide by 68 inches long. The piece was crocheted in double crochet. A row of single crochet was made along the edges to even out the stitches. Flowers in grey and black finished off the look. The scarf is long enough to be doubled to pull the ends through. This enables the wearer to keep the flowers on top. 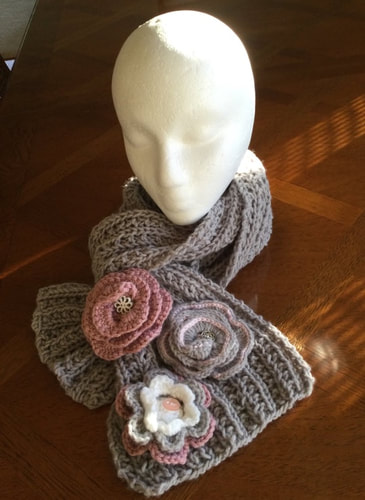 A second long knitted scarf was made with a broken rib stitch. The stitch also measured about 7 stitches wide and 68 stitches long. Pink and gray crocheted flowers gave it a flair. 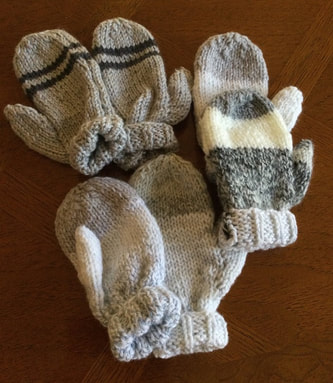 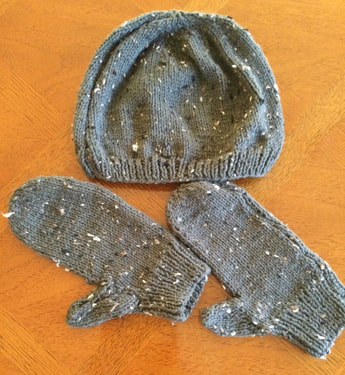 Several mittens knitted with the two needle flat method were donated to variety of charities. See patterns from Knitting4Piece for easy-to follow instructions. 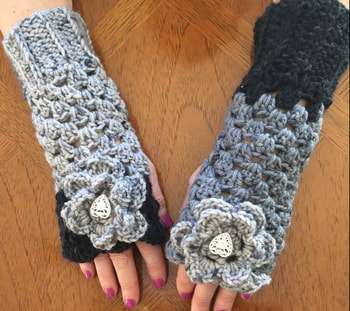 In years past I created variety of fingerless mittens. The grey ones were especially popular at winter fairs and made great gifts. This mismatched version was created from self-striping yarn.  Bamboo stitch mittens can be created from a flat panel. Begin with a 2 purl , 3knit rib for the cuff and change to the bamboo pattern noted earlier in the article. Fold the glove in half , right sides together. Sew or crochet the ribbing portion. leave about 2- 21/2 half stitches . Sew or crochet the remainder to the bottom. Weave in ends. Turn right side out. Silver hearts lighten up the pieced.
There are countless versions of knitted and crocheted gloves that can be created 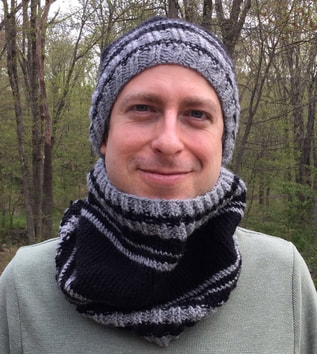 Let's not leave out the men. My son=in-law has enjoyed his hat and cowl set as weather comes in. They are especially welcome when he shovels snow from the drive. I really like the patterns and would be tempted to make one for myself in the future.
I could really continue for a very long time as I showcase my grey winter pieces. I welcome your feedback and reflections. I welcome you to join me on my stitching journey. 
0 Comments
Leave a Reply. |
Archives
November 2022
Categories
|

 RSS Feed