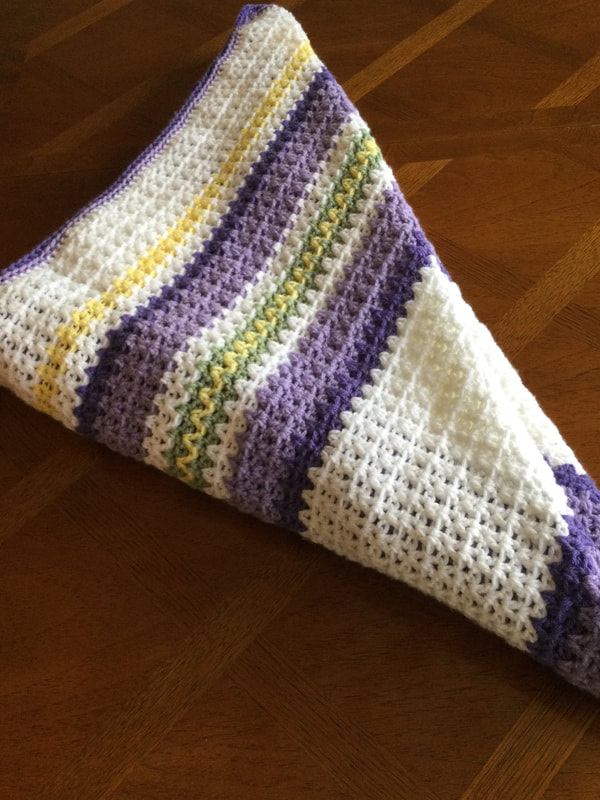
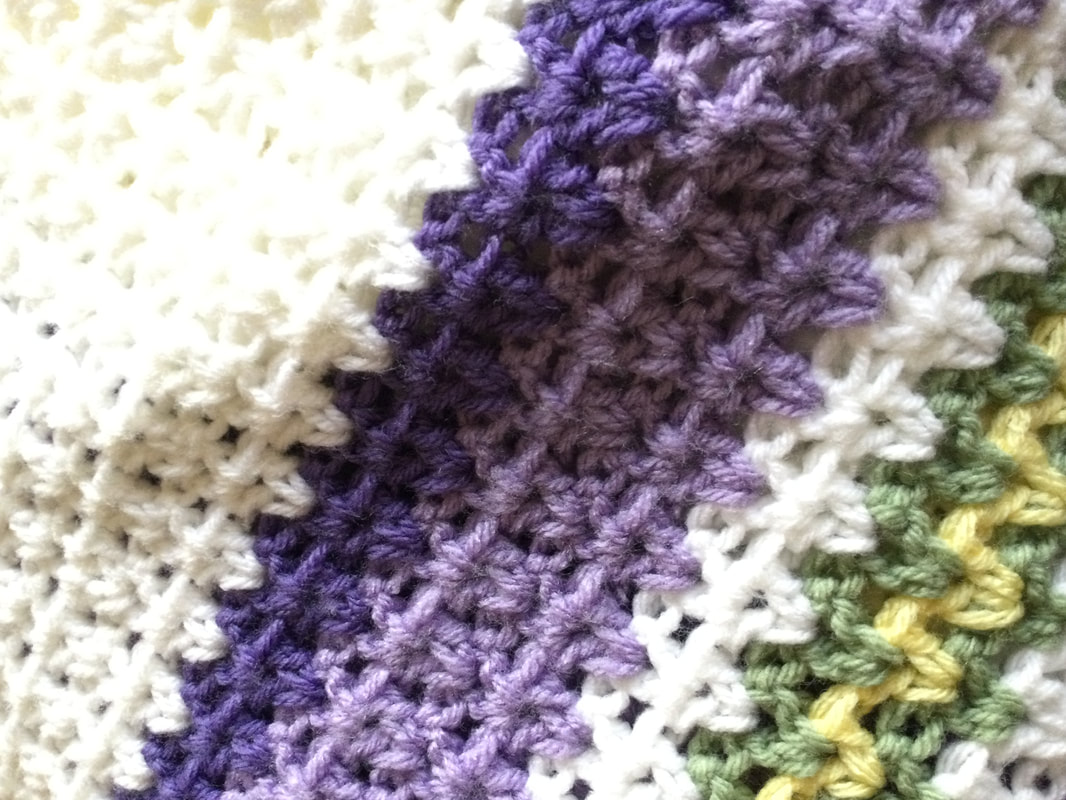
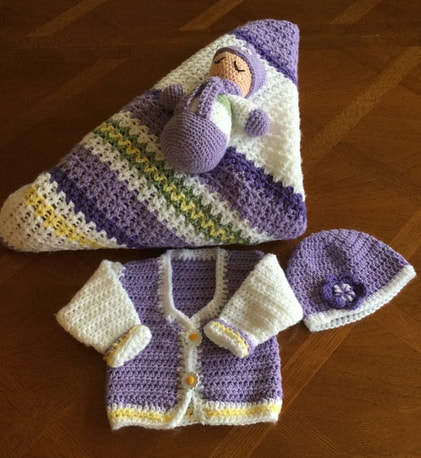
 It has been several years since I have had the opportunity to knit or crochet for infants, and so I was overjoyed to learn that a couple from our extended family were expecting a girl n January. After consultation with the mother to be, we determined that the blanket would be done in purple and white. We decided to use a lighter and darker shade of purple and add bits of yellow and sage green for accent. I had several months to crochet the blanket. Still, I startedrightaway. While many of my blankets have been done in extended Granny stitch or Diagonal Granny stitch, I decided to work with the Stitch for a denser, plushier feel. Many V stitch projects work with a multiple of 3, but I find it easier to work with an even number of stitches. 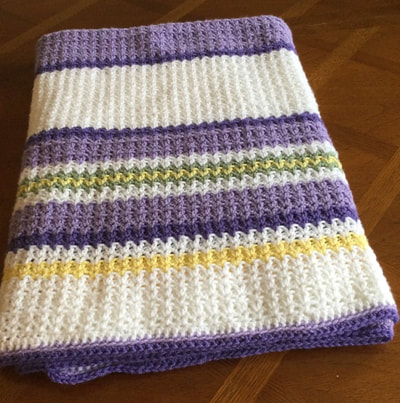 Row 1: After the base chain, make a double crochet into the 4th chain from the hook. This forms the initial DC and skip 1. Chain1 and make another DC in the same space. Skip 1 space. In the next space crochet a DC, ch1, DC and skip the next space. Repeat until the last 2 chains. Skip 1 chain and DC in the 3rd chain of the last stitch. Row 2: Chain 3. Dc in the ch1 space from the previous row. Chain1. DC in he same space. You wil be building a v on top of the v in row 1. Continue to form V's in the chain 1 space as you crochet across the row. DC in the 3rd chain of the last stitch. You will repeat this row until you reach the end of your piece. To change colors, make the first part of your final DC, leaving 2 loops on the hook. Pull loop of new color through 2 loops, leaving a tail of several inches. Knot tail to old color. Snip old color. Chain 3 in new color and continue until you need make a new change.
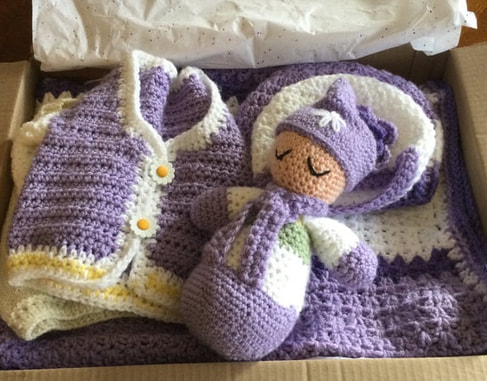
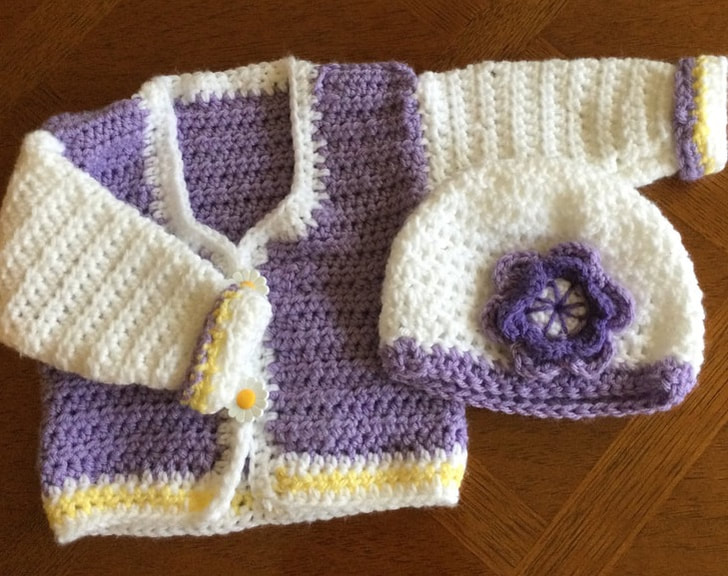
My blanket ended being a crib blanket, rather than a initial blanket for a newborn. My base chain was 150 stitches, and the blanket ended up being 57' by 57'. In the future, I would only chain 120 stitches or130 stitches. This little miss will have this blanket even through toddlerhood. My color sequence went as follows: 6 white, 2 yellow, 2 white, 2 dark purple,4 light purple, 2 white, 2 green, 2 yellow, 2 green, 2 white, 4 light purple, 2 dark purple,16 white, 2 dark purple, 18 light purple, 2 dark purple, 16 white, 2 dark purple, 4 light purple, 2 white, 2 green, 2yellow, 2 green, 2 white, 4 light purple, 2 dark purple, 2 white, 2 yellow, 6 white. for a total of 118 rows. Once completed, I made HDC in white around the entire blanket. Be sure to make 3 HDC stitches in each corner. This was followed by row of light purple and final row of dark purple. 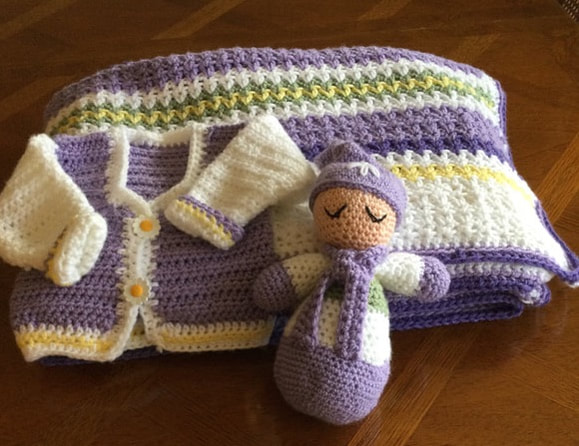 The blanket was followed by a trio of crocheted beanies that followed directions for hats for 6 and 12 months. Flower motifs were added for color and style. I just followed charts to get the correct number inches in the crown and height from crown to below the ear. 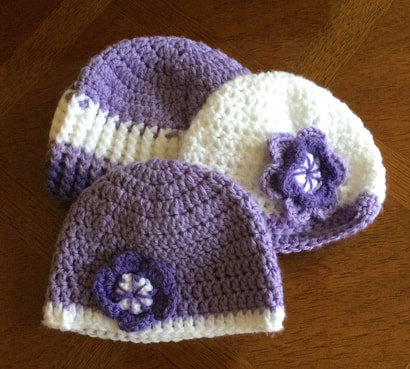 The third piece in the collection was "Baby Girl Sweater" designed by Edie Eckman for www/redheart.com/ The body of the sweater in crocheted in HDC in one piece from the bottom up. After the body is crocheted directions are given to separate for the right front, back, and left front to form the armholes. The sleeves are crocheted separately from the bottom up. Sew up the sleeve to form a tube. Crochet or stitch the sweater at the shoulders and fit the sleeve into the armhole. Stitch or crochet together. I added 2 rows to the bottom of the sweater before I crocheted all around the bottom, front, neck and front for two more rows. The 2 button hole loops were formed in the second row of crocheting. The two daisy buttons picked up the hint of yellow in the sweater.
The first stuffy that my 6 year old granddaughter attached to was a sleepydoll. It was crocheted in pink, and she called the doll. "Baby." Even when she received other crocheted creatures, "Baby"was still her favorite. The sleepy doll has a round bottom, two arms, a head, and a sleep hat. The eyes are embroiled closed in black. I just had to crochet a sleepy doll for the new baby. I used the colors in the blanket and followed the directions from Sleepy Doll Amigurumi Free Crochet Pattern from Coolcreativity.com. A free video accompanies the pattern. 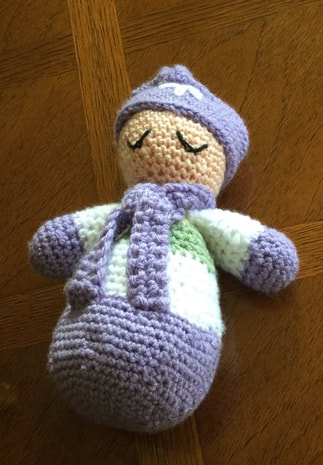 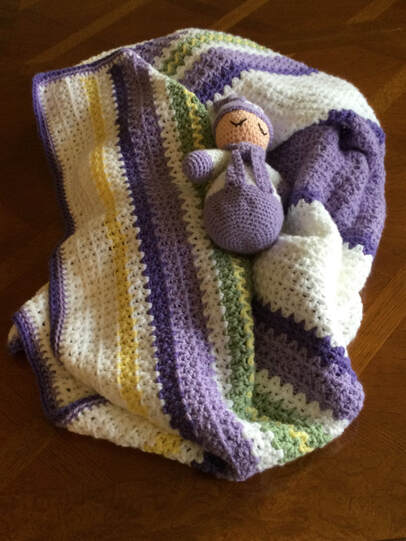 I will be mailing the package off to the parents tomorrow with cleaning directions and many wishes for a bright future for their new daughter. I have one more baby set to crochet for a boy baby expected in March. I am glad that I got a chance to revisit crocheting baby pieces again. Also, now I might go back to crocheting arigurumi. I have not made animals or dolls for a while, but I look forward to exploring the creative possibilities again.
As always, I appreciate your feedback and reflections. I welcome you to join me on my stitching journey. 
0 Comments
Leave a Reply. |
Archives
November 2022
Categories
|

 RSS Feed