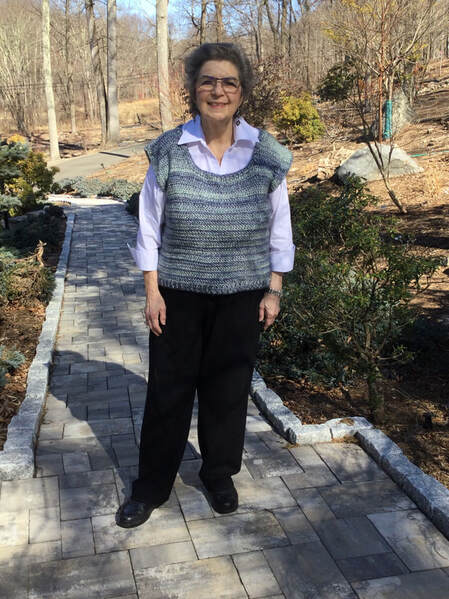
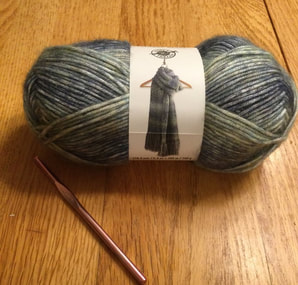
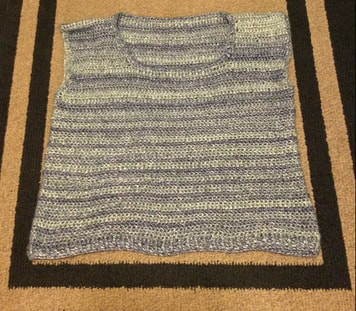
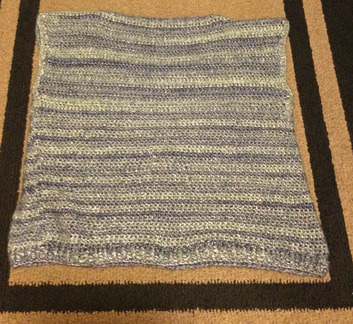
 When I purchased the second set of marled yarn in Blue Frost colorway, I knew that I wanted to crochet a pullover vest. The Natural Marl Yarn by Loops and Threads through Michaels is 69% polyester, 22% acrylic, and 9% wool. There are 278 yards in each 5.3 oz skein. With 3 skeins, I had total of 834 yards to produce my vest. I knew that I would be calling it close, but I felt I could manage to complete the vest. Alas, it became challenging to find a free crocheted pattern that provided for a 45 inch bust with a 48 hips for a amply built lady. All of my pattern books for crocheted items were for hats, scarves, shawls, baby items, and mittens. Therefore, I decided to use my measurements to develop my own pattern. Although I had a general picture in mind, I did not write done a specific pattern before I started to crochet. Rather, I started with a 140 stitch chain that fit my hips and wrote down my process as I went along. The piece I produced is generally in the extra-large range. To make this pattern for smaller sizes, I will have to do some research to get the correct stitch count. The back was easy. After I joined the chain being careful not to twist it, I chained 3 and made a Double Crochet (DC) in the same stitch. There were 140 stitches. Then I continued around with DC and joined the round. I put in a place marker to show the start of the round. Each round began with a chain 3 that did not count as a stitch and DC for 13 inches. Then I would split for the armholes. From the place marker I slipstitched 2 stitches, chained 3 and began DC working in the first stitch for 66 stitches. I continued on the back for 9 inches. Then I finished off. The front panel was much trickier. I Starting working in the same way I did the back for 7 rows or about 3 inches.Then I had to figure out how many stitches to leave for the neckline and how to accomplish the decreases as each side as I transitioned to the shoulder, I decided to leave 20 stitches for the neckline. Since the front was 66 stitches wide, that would leave 23 stitches on each side as I began the neckline on the left side. I gradually worked in the decreases the neckline edge (DC2tog) as i crocheted up to the shoulder of 16 stitches. I was able to DC evenly for couple of rows when the front side matched the back. I finished off and cut the yarn.Then I turned the piece to the wrong side, and beginning at the armhole, I retraced the same steps I used for the front left side to work on the right. When both front and back were done I joined the shoulders. Now, I had use the remaining yarn to create a ribbing for the neckline, armholes, and bottom of the vest. I started with the neckline as I thought that it was most important to develop a finished edge here. I picked up stitches in a double crochet. When I finished the round, I chained 3 and made alternating front and back post double crochet stitches around the neckline (FPDC and BPDC). I repeated this process for 2 more rows. The next most important area was the armhole. However, I did not think that I had enough yarn to make a full ribbed section to the armhole and to the bottom of the vest. Therefore, I just made single row of double crochet around each armhole. Finally, I was able to take care fo the bottom of the vest. I followed the same steps I used for the neckline and was able to eke out 3 rows of ribbing with a successful ending to my contest of yarn chicken. As I managed to lose about 14 pounds from the beginning of crocheting the vest to writing this article, I found that I had about 2 inch of ease at the hip and 1.5 inches of ease at the bust. I was generally pleased with the construction and fit of the pullover vest, but I would make a few changes to improve the appearance and fit. First. I would probably use a narrower scoop neck or a V neckline. As is, I need to keep pulling the shoulders up closer to my neck so that the vest stays perky and does not droop. Also, I would leave more stitches at the bottom of the armhole and then make a few additional decreases as I crocheted up to the shoulder. I might even make the vest a an inch or two longer for a better resting place on the hip.
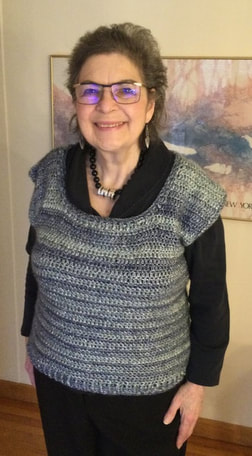
I received compliments when I wore my vest over black pants and a cotton shawl collar long sleeve t-shirt when I came to my knitting and crocheting group. My fellow members did not know thatI had been working on the project, and it was aa fresh look to them. For the picture at the beginning of thisarticleItried on theist with a white buttoned blouse to see a different outfit. I would repeat this project with more carefully written notes and with the corrections noted above. Also, I would make sure that I had enough yarn before I started. I do not like playing yarn chicken. With ample yarn, I could mak e a deeper ribbing on the hip, and I could use ribbing on the armhole, too. As always, I appreciate your reflections and feedback. I welcome you to join me on my stitching journey.
0 Comments
Leave a Reply. |
Archives
November 2022
Categories
|


 RSS Feed