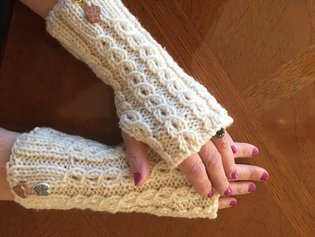
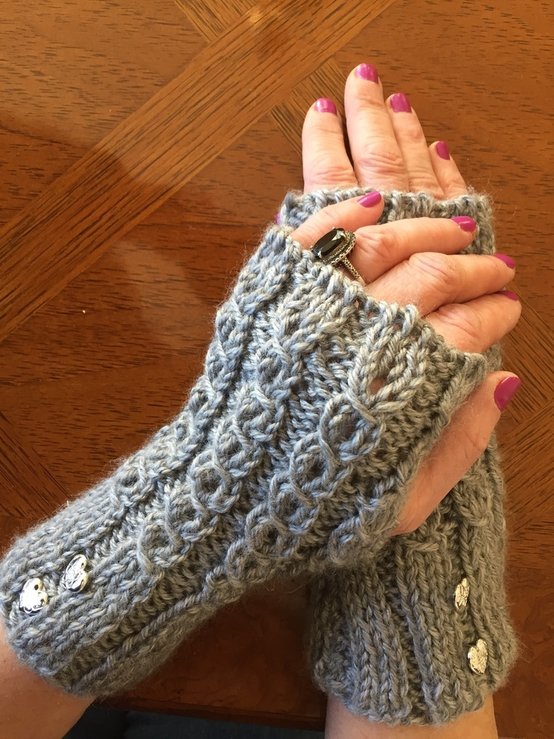
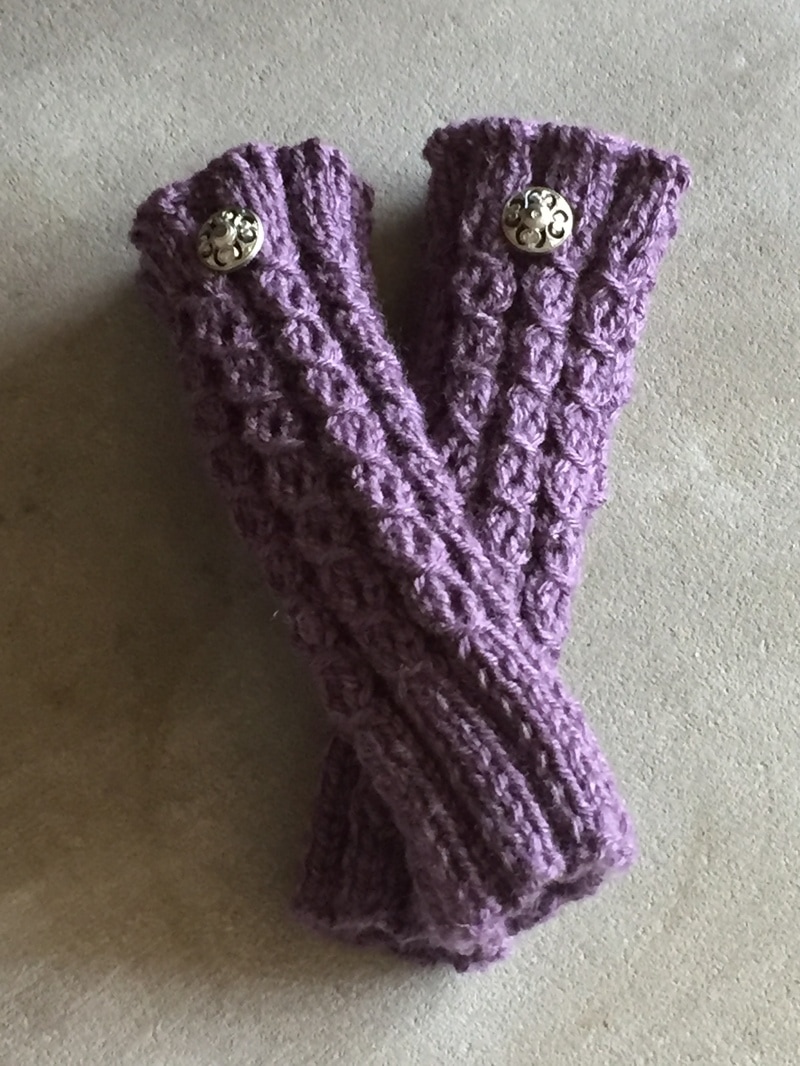
 My aqua manicured nails peeked out from my crocheted fingerless gloves as I adjusted a coordinated multi-hued scarf. My husband and I were about to venture into New York City for a day of theater and city walking when I realized that I needed a pair of gloves and a scarf to keep warm. With a stash full of gloves and scarves for gifts or for selling at the seasonal holiday fairs, I had not yet thought gift myself a pair. The knitted mini-cabled gloves were cheerful and “cool.” Not only would I be warm and toasty, but I had the perfect fashion accessory. In addition I could keep them on while using my phone or dealing with other detailed tasks. Over the fall and winter I have warn these gloves many times. While these gloves were made of a thicker worsted yarn, a thinner yarn would make them the perfect accessory for spring. Therefore, when I started this blog, I knew that I would have to share my pattern with my readers. During the past year I have experimented with many patterns for these fingerless gloves or hand warmers. This pattern will be the first of many I plan to publish. Knitting or crocheting are both ideal mediums for fingerless gloves. The gloves are one skein projects that can be completed in a weekend. They have been popular items for sale at craft fairs and make for inexpensive yet creative gifts. The following free knitted pattern is relatively easy to complete. On a 1-5 scale, I would rate it as a 2-3 in difficulty. You will be creating 2 flat rectangles that you will sew together to make the gloves. Materials: #6 and #8 knitting needles. Yarn: #4 Worsted yarn of your choice Directions: Cuff: Cast on 37 stitches. Rib in the following pattern for 14 rows. Row 1: Purl 2, Knit 3. Ending in Purl 2. Row 2: Knit 2, Purl 3 . Ending in Purl 2. Body: Knit 8 repetitions of this 4 row pattern. Row 1: Purl 2. (Slip stitch as if to knit. Knit next 2 stitches. Cross slipped stitch over 2 knitted stitches, Purl 2). Continue to last 2 stitches. End in Purl 2. Row 2: Knit 2. (Purl 1, YO, Purl 1, knit 2). Continue to last to stitches. End in Knit 2. Row 3: Purl 2, Knit 3, Purl 2 across. End in Knit 2. Row 4: Knit 2, Purl 3, Knit 2 across. End in Knit 2. Finger Cuff: Stitch to #6 needles so that you will get a tighter stitch that will close more naturally on your fingers. Follow the same pattern as you did for the wrist cuff for 6 rows. Bind off in pattern. Leave a long enough tail to sew the glove together. Construction: Fold the knitted rectangle in half with the wrong side of cable showing as you sew. Starting at the upper cuff, whip stich both sides together for the 6 rows of the upper cuff plus one row of the body. For the next 1..5 inches, loosely stich only one side. Then begin joining both sides together again until you reach the bottom. Weave in all ends. Turn the glove so that the cable faces out. Add decorative buttons to the cuff or to the middle of the top cuff. For spring weather, use a lighter worsted. Happy knitting. I would appreciate any feedback. Enjoy your knew fashion accessory.

0 Comments
Leave a Reply. |
Archives
November 2022
Categories
|

 RSS Feed