• Home
  • About
  • Gallery
  • Lillian\\\'s Blog

Crocheted Girls' Purse:  Free Pattern

9/26/2017

0 Comments

 
Picture
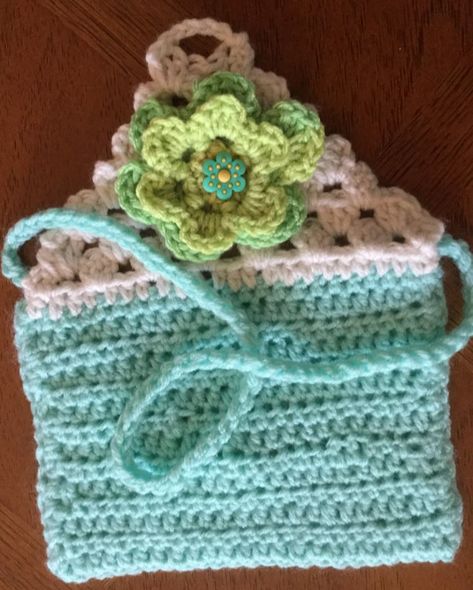
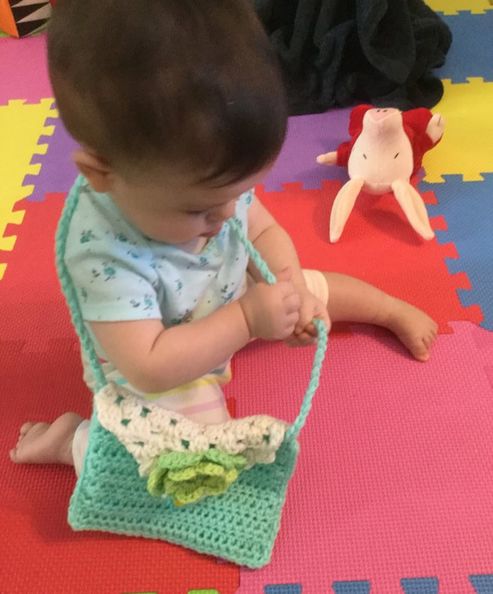
Our blond, curly headed, two year old guest wanted to shop like mommy,.  With a big smile, she selected a bright pink crocheted purse decorated with a pink and white crocheted flower from my stash of hats, headbands, loveys, and purses.
I was "tickled pink" that she was so easy to please.  A  month later, her mom showed me pictures of her daughter in her grown-up, dress-up play clothes.   As I was preparing for the autumn holiday fair season, I decided to make several other purses as a draw for my youngest potential customers.  A few weeks ago, I started working in a focused way to transform my yarn scrap pile into attractive, useful pieces.  I could make one or two purses out of the larger balls of yarn, contrasting flaps, out of medium balls,  and varigated yarn flowers or contrasting two layered flowers from smaller amounts of yardage. As a gift to my to fellow crocheters, I decided to share my original pattern.  As you can see my granddaughter already has her eye on one of my special editions.

CROCHETED GIRLS' PURSE FREE PATTERN

Materials: 
Main Color:  Worsted Weight Yarn (#4) If you don't have enough yarn of one color to make an entire purse, crochet the front and other color for the back.  You can also use smaller amounts to crochet striped bands.  I also like to make the strap from the same color as the main color of the purse.
Granny Stitch Flap:    Smaller amount of contrasting worsted. 
Two-Layered Flower:  Varigated worsted or two complementary or contrasting colored yarns
Crochet Hook:  Size H
Tapestry Needle
Sewing needle and cotton thread
Small button for center of flower
1" size button for flap closure
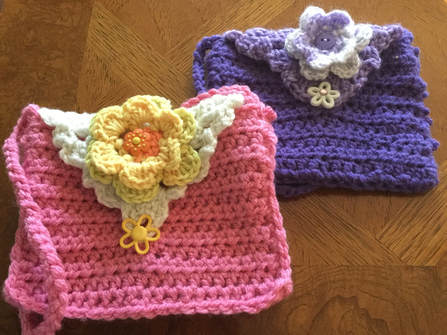
Picture
Directions:

Pouch:
  • Crochet a chain of 24 stitches.
  • Crochet a HDC into second stitch from hook.  Crochet across to make 23 stitches..  Chain 1 and turn.
  • Your edge will be tighter than if you had chained two, but the edge will be smoother and neater.  I like the way this looks in the finished purse.
  • Crochet 28 rows of HDC.
  • Fold the crocheted piece in half so that the two shorter edges match.
  • Crochet SC along the first side until you reach the bottom corner.  Make 3 SC in the same space. 
  • Crochet SC along the bottom of the purse.  this will make a nice sharp edge. 
  • Again at the corner, 3 stitches in the same space. 
  • SC up the last side until you reach the top. Do not cut off the yarn. 
Flap

  • Row 1:Flip the purse over.  Starting at the right, SC across the purse to the end. Ch 2 and turn.
  • Row 2:  DC in the same space. Skip two chains.  Crochet 3 DC in the same space.
  • When there are 3 spaces remaining, skip 2 chains and make 2 DC in the last stitch.Turn. (2 DC, 6 clusters, 2 DC)
  • Row3:  Slip stitch into second DC.  Make a 3 DC cluster into the space between the clusters in previous row.  Continue to make clusters in the spaces across the row. There will be a 2 DC remaining.  Turn. Your edge will start to look like a staircase. (7 clusters)
  • Row 4:  Make 2 slip stitches into the top of the first cluster. Make clusters into the spaces across the row until the last space. Turn. (6 clusters)
  • Row 5:  Make 2 slip stitches into the top of the first cluster. Make clusters into the spaces across the row until the last space.  Turn. (5 clusters)
  • Row 6:  Make 2 slip stitches into the top of the first cluster.  Make clusters into the spaces across the row until the last space.  Turn.  (4 clusters)
  • Row 7: Make 2 slip stitches into the top of the first cluster.  Make clusters into the spaces across the row until the last space.  Turn  (3 clusters)
  • Row 8: Make 2 slip stitches into the top of the first cluster.  Turn (2 clusters)
  • Buttonhole: Crochet SC into second stitch of cluster.  Chain 4.  SC into  into second stitch of cluster.   Slip stitch into to last stitch fasten off and weave in cut end.
Picture
Strap

  • When you finished the pouch part of the purse, the yarn will still be attached to the purse.  You will need to crochet the chain with 2 strands to make it thick enough.  If possible,  pull the center part our of the skein so that you can crochet with both strands at once. If your yarn is already wound into a ball,you will have to unwind enough yarn to crochet strap.  I used a 19 inch strap measurement for a toddler. Two to three  yards for the yarn attached to the purse will provide you with an ample length.  Cut the yarn.   Then take the new end and anchor the end into the inside of the purse.  I sewed down 2 inches and whip stitched back to the top edge. 
  • Begin chaining with the double strand until you reach the desired length.  Finish off and chain and leave 10 inches of both yarns.   Cut yarn and thread through tapestry needle to anchor to the other end inside the purse in a similar fashion.
Picture
Flower and Finish:

  • Crochet a 2 layered flower with 6 petals.  You may use varigated yarn, self-striping yarn, or two different colors.  Choose your favorite flower pattern. One site with flowers that would do well with this pattern was developed by Cindy at Skip to My Lou.  https://www.skiptomylou.org/10-beautiful-ways-to-crochet-a-flower/
  • Sew a 1/2 to5/8 inch button to the center of the flower.
  • Make sure that the flap closes over the purse opening.  Using the tails from flower, sew the flower on the center of the flap.
  • Place the 1" button through the button hole and hold in place.  Sew the button onto the front of the purse.  Make sure that you only sew through one layer.
  • Moisten and block if needed.
Picture
I hope that you enjoy this pattern and that  you make many girls happy with your efforts.  You are welcome to crochet this purse for your own personal use or for sale.  Please do not copy or reprint or sell this pattern.  If you make items for sale or post your purses, please reference my site to give me designer credit.

http://www.lilcreates.com/lillians-blog/crocheted-girls-purse-free-pattern. 

In the near future, I plan to post this pattern on Ravelry.
0 Comments


Leave a Reply.

    Archives

    November 2022
    October 2022
    September 2022
    August 2022
    July 2022
    June 2022
    May 2022
    April 2022
    March 2022
    February 2022
    January 2022
    December 2021
    November 2021
    October 2021
    September 2021
    August 2021
    July 2021
    June 2021
    May 2021
    April 2021
    March 2021
    April 2019
    March 2019
    December 2018
    October 2018
    September 2018
    August 2018
    July 2018
    June 2018
    May 2018
    April 2018
    March 2018
    February 2018
    January 2018
    December 2017
    November 2017
    October 2017
    September 2017
    August 2017
    July 2017
    June 2017
    May 2017
    April 2017
    March 2017
    February 2017

    Categories

    All

    RSS Feed

Proudly powered by Weebly
  • Home
  • About
  • Gallery
  • Lillian\\\'s Blog