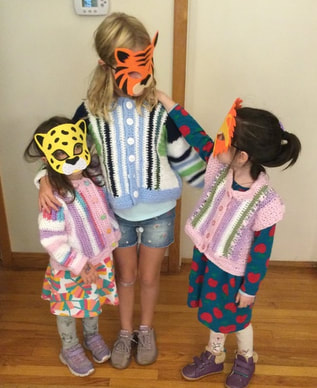
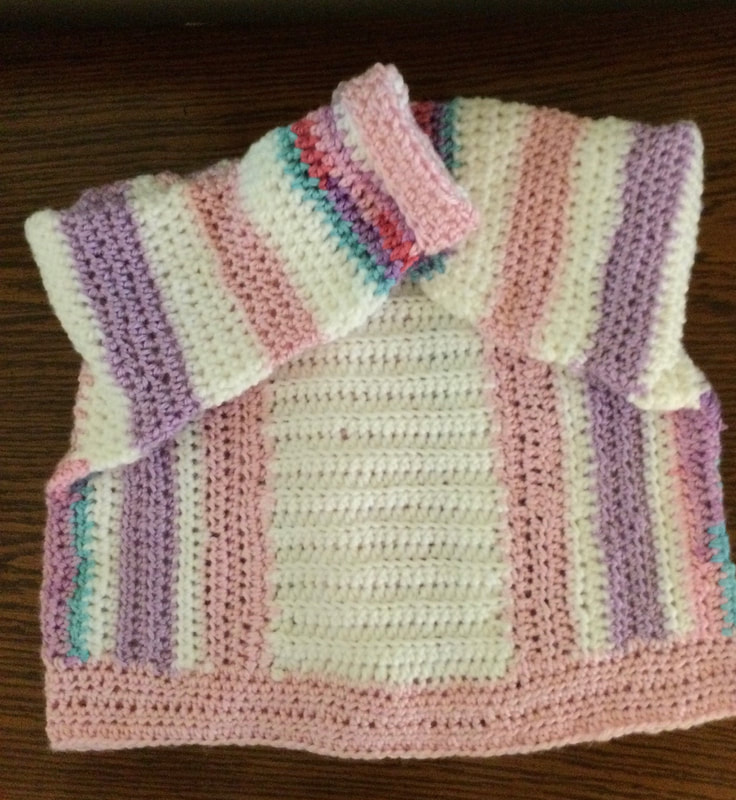
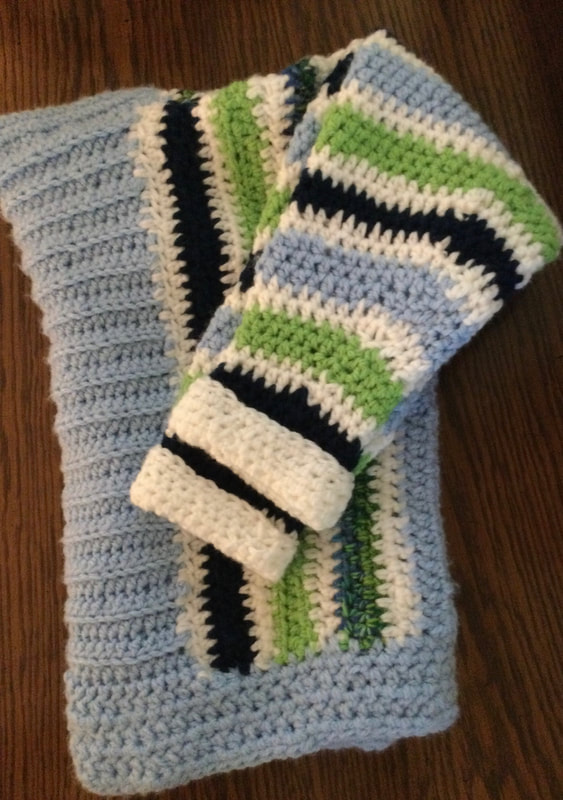
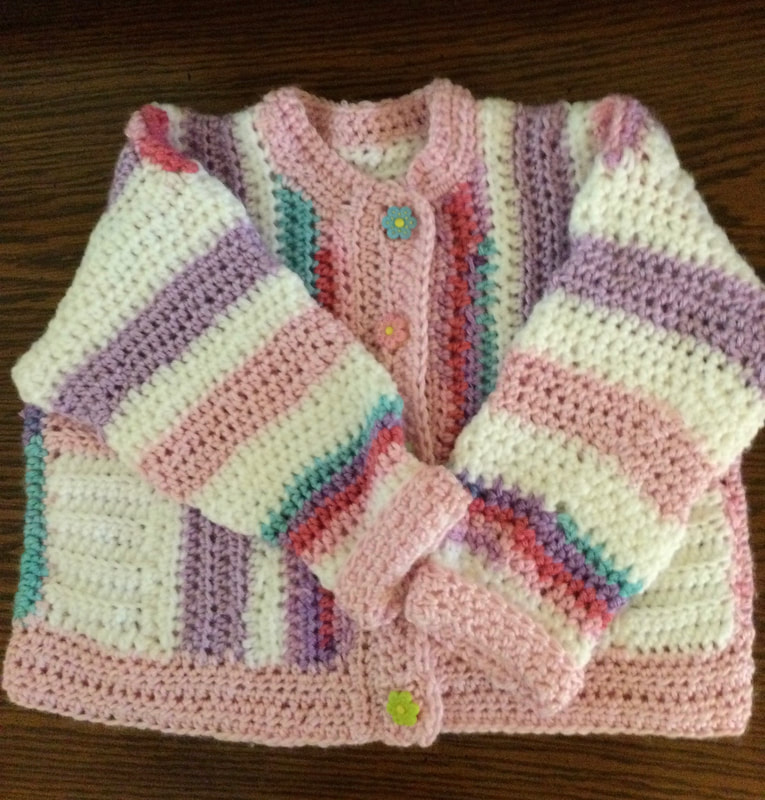
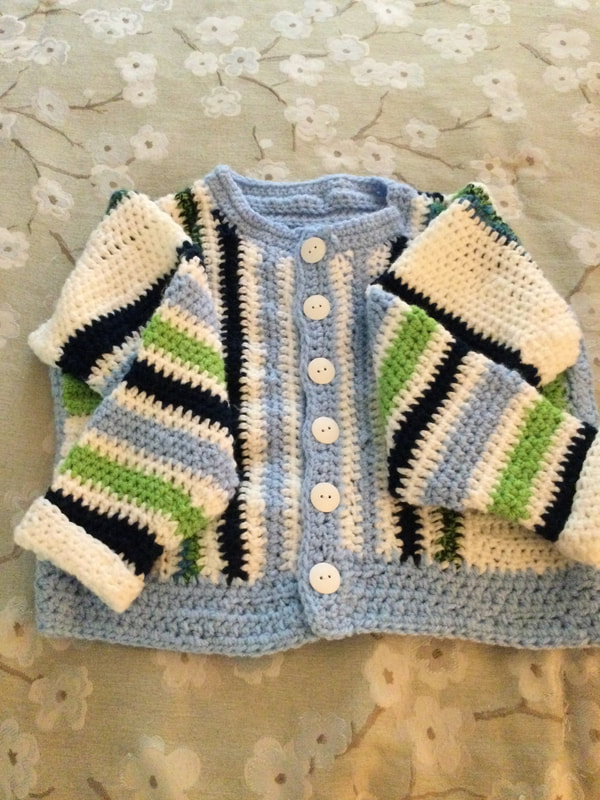
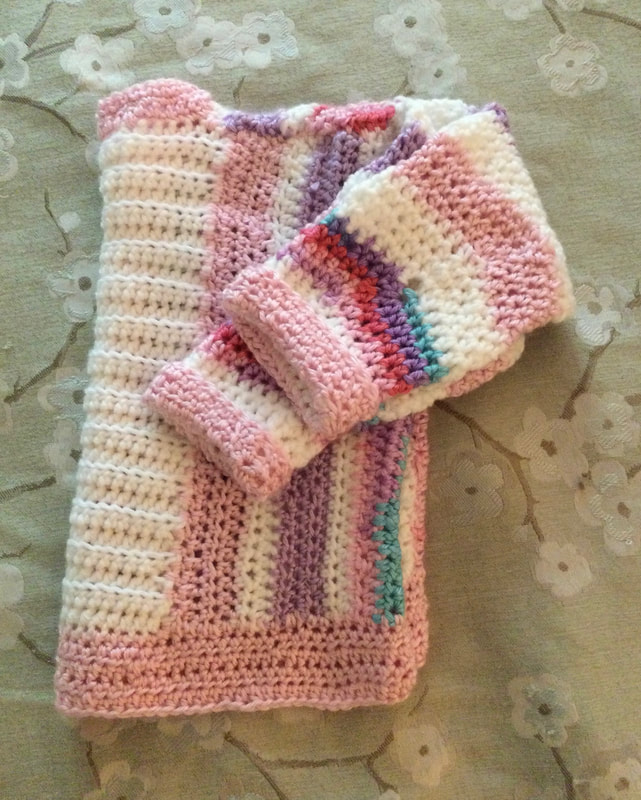
 The highlight of our holiday family gathering was my granddaughters' fashion parade. Donned in their animal masks and individually tailored crocheted, freeform. striped and patchwork cardigans, they posed for photos and gleefully marched the length of the hallway and returned through the living room. Their parents and grandparents cheered and encouraged them as they paraded through the house in their new sweaters. 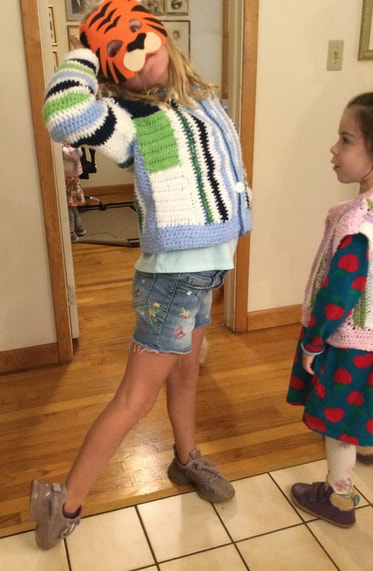 Having mastered the knitted form of these freeform cardigans, I switched my focus to explore crocheted versions. (http://www.lilcreates.com/lillians-blog/embracing-colors-and-stripes-to-design-a-girls-knitted-cardigan).Still compiling colors and stripes, I wanted to crochet to create my designs. Each girl chose her own colors. I worked worked without a pattern, using their measurements as my guide while adding several inches of positive ease for a roomy fit. 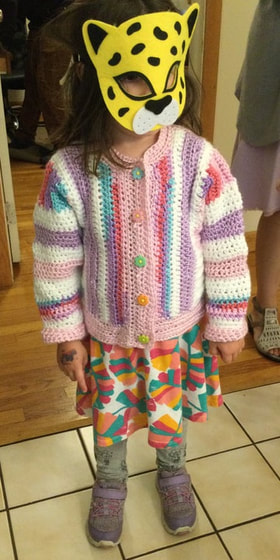 This post started as three separate articles. However, since the process was similar in designing each piece, I decided to combine my efforts to explain the process. Then I could add details that were specific for each piece. I would be crocheting cardigans in sizes 4 and 8. The vest was crocheted in size 6. 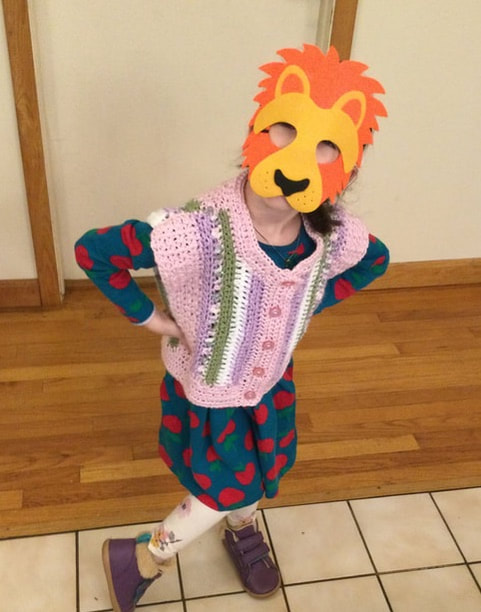 Each piece begins with a rectangular panel that stretches from thence to the bottom ofd the garment. The size 4 was crocheted in white in HDC on the back loop only. The size 8 was crocheted in light blue, using the same stitch. The size 6 was crocheted in a V stitch in pink yarn.
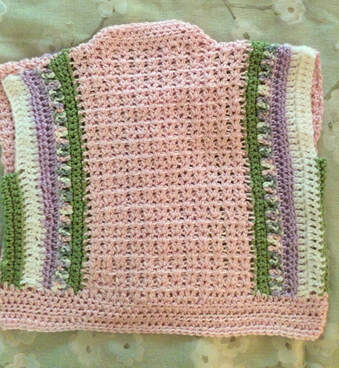 Nest, I turned the back panel 90 degrees and picked up stitches along the length.of the panel. Stripes in the child's chosen colors were crocheted on each side on each side of the panel. Size 4 were done in pick, white, purple, and a pink-purple variegated yarn. Size 6 was done in pink, sage green, white, purple, and a multi-colored yarn. Size 8 was done in light blue, navy, white, multi-colored, and neon green. Once I reached almost 1/2 of the circumference, I added a shorter section that reached from the bottom of the back to just below the armhole. This section was the transition to the front.
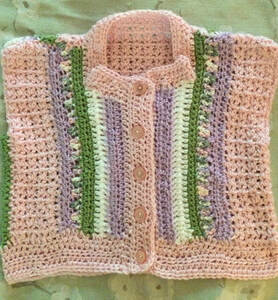 To make the front, I had to start with a piece that was separate from the rest of the garment. For sizes 4 and 8 I crocheted a 2 inch strip that used 3 colors in blocks. The size 6 was done in pink. Then I crocheted the strips to the side piece from the bottom up. This process enabled me to form the armhole. I turned the work again to crochet about 3 more stripes before working on the neckline. decreasing a stitch in the next 4 rows, I repeated the steps on the other side of the sweater. At this point I crocheted the shoulders with right sides together so that I could pick up stitches around the armhole that would be crocheted in the round. These directions relate only to sizes 4and 8. sweaters. Since I made the size 6 with yarns left over from the size 4 sweater, I was running out of the pink yarn, My friends in my craft group suggested that I leave the piece as a vest since the armholes had a neat edge. The 5 1/2year old granddaughter already had several knitted sweaters, and the vest idea really appealed me. For the size 4 cardigan,I picked up 50 stitches, and for the size 8 cardigan,I picked up 60. I placed a stitch marker at the starting point so that I identify rounds. For each sweater I decreased one stitch before and one stitch after the marker at regular intervals until I reached the desired sleeve length. The sleeves were crocheted in striped in HDC. I alternated white with colors for contrast.
Before I could crochet the button bands I crocheted the neck/ collar in single crochet (sc) for 3 rows. The borrombandswas crocheted in HDC for 5 4ows. To form the left button band,I picked up stitches along the length of the sweater each crochet 4 rows in sc. Buttonhole placement went on the right side and was determined by the number of stithes. Row 1: Pick up and sc crochet stitches along the length of the front. (sc) Row 2: Crochet 2 stitches, *skip 2. Crochet number of stitches needed for sweater. For size 4 sweater repeat from * 3 more times . For size 8 sweater repeat from * 4 more times. Skip 2 more stitches for last button hole. Size 4 had 5 buttons, and size 8 had buttons. Row 3: Crochet in sc across. Make 2 stitches in the skipped space. Row 4: Crochet in sc across. To strengthen the buttonholes, I used a tapestry needle to sew buttonhole stitches around each buttonhole. 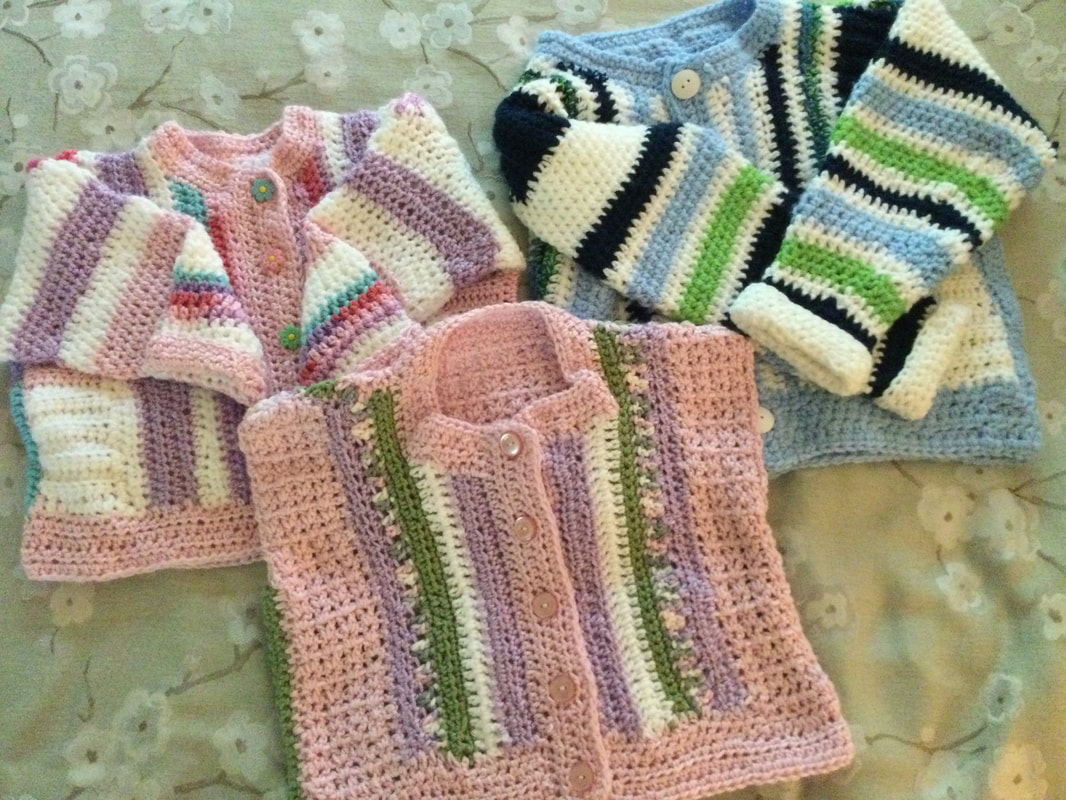 The girls were delighted with their sweaters. The youngest who is sometimes resistant to wearing and being photographed in the sweaters I make for her, wore her sweater for the entire evening. The oldest struck dynamic poses and asked me to make a vest similar to the one I made for the 5 1/2 year old. This gal was eager to wear her sweater to kindergarten. As I had been working without a pattern, each time I designed a sweater, I became more accurate. The lessons I learned from ny knitted versions served me well.
I called these designs freeform, but they were still done with stripes and rectangles. While scrolling through the freeform designs on Pinterest, I found panels that were done with swirls, curves, and oddly shaped pieces that were joined together to form panels and sections of sweaters. Since I have several other projects that need my attention, these designs will have to wait until Itime when I do not have so many other crafting commitments. However, these freeform designs will remain on my future todo list. As always, I appreciate your reflections and feedback. I welcome you to join me on my stitching journey. 
0 Comments
Leave a Reply. |
Archives
November 2022
Categories
|

 RSS Feed